| Centos7安装mysql8.0以上版本 | 您所在的位置:网站首页 › pixel2rom › Centos7安装mysql8.0以上版本 |
Centos7安装mysql8.0以上版本
|
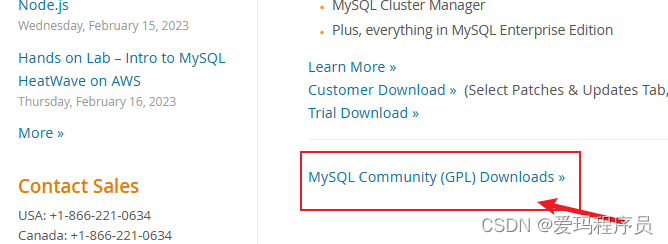
Centos7安装mysql8.0以上版本 **在centos7中使用yum安装mysql8.0以上版本的话会出现很多依赖上面的问题,后面解决的话会很麻烦。所以可以用下面的方法,这应该大家基本都在用的方法。**步骤一:为了以后方便找到mysql,可以再自己熟悉的目录下新建一个文件夹,我选的是/usr/local/下 [root@VM-24-4-centos local]# mkdir mysql步骤二:去官网下载MySQL8.0以上版本
步骤五:rpm安装各种依赖包,一定要按顺序安装 [root@VM-24-4-centos mysql]# rpm -ivh mysql-community-common-8.0.32-1.el7.x86_64.rpm 警告:mysql-community-common-8.0.32-1.el7.x86_64.rpm: 头V4 RSA/SHA256 Signature, 密钥 ID 3a79bd29: NOKEY 准备中... ################################# [100%] 软件包 mysql-community-common-8.0.32-1.el7.x86_64 已经安装 [root@VM-24-4-centos mysql]# rpm -ivh mysql-community-client-plugins-8.0.32-1.el7.x86_64.rpm 警告:mysql-community-client-plugins-8.0.32-1.el7.x86_64.rpm: 头V4 RSA/SHA256 Signature, 密钥 ID 3a79bd29: NOKEY 准备中... ################################# [100%] 正在升级/安装... 1:mysql-community-client-plugins-8.################################# [100%] [root@VM-24-4-centos mysql]# rpm -ivh mysql-community-libs-8.0.32-1.el7.x86_64.rpm 警告:mysql-community-libs-8.0.32-1.el7.x86_64.rpm: 头V4 RSA/SHA256 Signature, 密钥 ID 3a79bd29: NOKEY 准备中... ################################# [100%] 正在升级/安装... 1:mysql-community-libs-8.0.32-1.el7################################# [100%] [root@VM-24-4-centos mysql]# rpm -ivh mysql-community-client-8.0.32-1.el7.x86_64.rpm 警告:mysql-community-client-8.0.32-1.el7.x86_64.rpm: 头V4 RSA/SHA256 Signature, 密钥 ID 3a79bd29: NOKEY 准备中... ################################# [100%] 正在升级/安装... 1:mysql-community-client-8.0.32-1.e################################# [100%] [root@VM-24-4-centos mysql]# rpm -ivh mysql-community-icu-data-files-8.0.32-1.el7.x86_64.rpm 警告:mysql-community-icu-data-files-8.0.32-1.el7.x86_64.rpm: 头V4 RSA/SHA256 Signature, 密钥 ID 3a79bd29: NOKEY 准备中... ################################# [100%] 正在升级/安装... 1:mysql-community-icu-data-files-8.################################# [100%] [root@VM-24-4-centos mysql]# rpm -ivh mysql-community-server-8.0.32-1.el7.x86_64.rpm 警告:mysql-community-server-8.0.32-1.el7.x86_64.rpm: 头V4 RSA/SHA256 Signature, 密钥 ID 3a79bd29: NOKEY 准备中... ################################# [100%] 正在升级/安装... 1:mysql-community-server-8.0.32-1.e################################# [100%]步骤六:初始化MySQL [root@VM-24-4-centos local]# mysqld --initialize --console步骤七:权限设置 [root@VM-24-4-centos local]# chown -R mysql:mysql /var/lib/mysql/步骤七:启动MySQL [root@VM-24-4-centos local]# systemctl start mysqld步骤七:修改密码 MySQL安装刚开始有默认密码,可以查询到临时密码 [root@VM-24-4-centos local]# cat /var/log/mysqld.log|grep localhost 2023-02-09T05:50:53.149464Z 6 [Note] [MY-010454] [Server] A temporary password is generated for root@localhost: K=?ku?2aDk>k ****用临时密码登录MySQL**** [root@VM-24-4-centos local]# mysql -uroot -p Enter password: Welcome to the MySQL monitor. Commands end with ; or \g. Your MySQL connection id is 8 Server version: 8.0.32 Copyright (c) 2000, 2023, Oracle and/or its affiliates. Oracle is a registered trademark of Oracle Corporation and/or its affiliates. Other names may be trademarks of their respective owners. Type 'help;' or '\h' for help. Type '\c' to clear the current input statement. mysql>修改密码: mysql> alter user 'root'@'localhost' identified by '123456'; Query OK, 0 rows affected (0.02 sec)ok,这样MySQL就安装好了,可以使用了 |

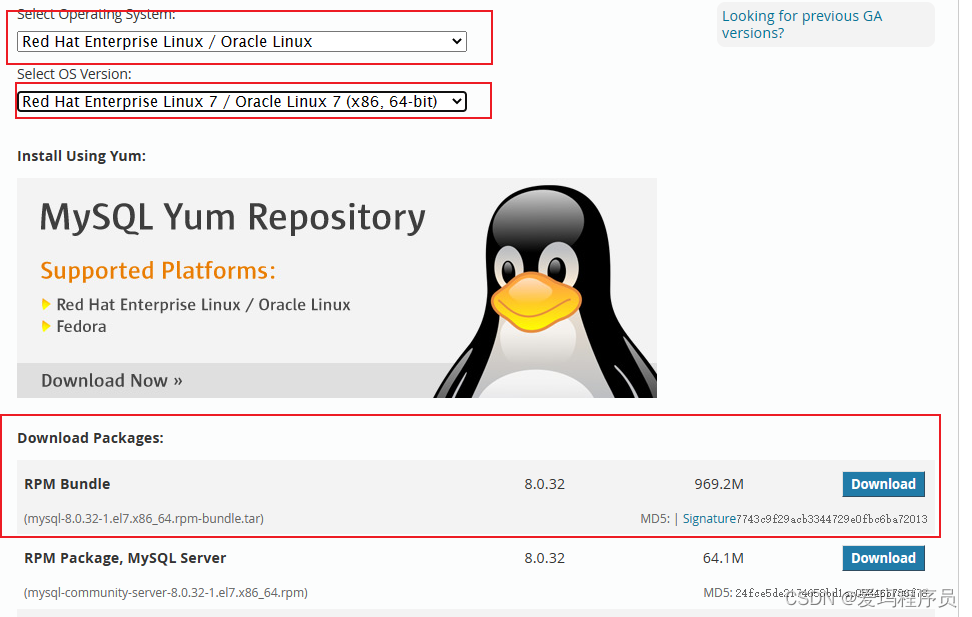 Linux的版本自己选择自己应的版本型号 步骤三:将下载好的文件拖入到Linux指定目录中,这里使用的ssh工具可以使用xshell,Finalshell都不错,这个方法可以直接cd进指定目录然后直接拖过去就可以了 步骤四:解压MySQL文件
【本文地址】
公司简介
联系我们