| 【Nacos】生产上需要不重启服务的情况下刷新配置,这个方法可以试试 | 您所在的位置:网站首页 › 删除服务器文件就会重启吗 › 【Nacos】生产上需要不重启服务的情况下刷新配置,这个方法可以试试 |
【Nacos】生产上需要不重启服务的情况下刷新配置,这个方法可以试试
|
【Nacos】生产上需要不重启服务的情况下刷新配置,这个方法可以试试
配置Demo搭建RefreshScope 原理
假设Nacos服务已经搭建完成 配置 新建service-config配置文件,9d0c9401-f575-4427-a982-eb8637a652b0为区别命名空间的ID,自动生成。 Demo搭建
引入依赖
com.alibaba.cloud
spring-cloud-starter-alibaba-nacos-config
2.1.3.RELEASE
resources下新建 bootstrap.properties 配置文件,配置信息如下:
spring.cloud.nacos.config.server-addr=127.0.0.1:8848
spring.cloud.nacos.config.file-extension=yml
spring.application.name=service-config
spring.cloud.nacos.config.namespace=9d0c9401-f575-4427-a982-eb8637a652b0
# 项目启动nacos配置信息打印级别,info会打印出配置信息
logging.level.com.alibaba.cloud.nacos.client.NacosPropertySourceBuilder=warn
关键注解RefreshScope
@RestController
@RefreshScope
public class TestNacosController {
@Value("${top.fsn.id}")
private String id;
@RequestMapping("test")
public String test() {
return id;
}
}
RefreshScope 原理
Demo搭建
引入依赖
com.alibaba.cloud
spring-cloud-starter-alibaba-nacos-config
2.1.3.RELEASE
resources下新建 bootstrap.properties 配置文件,配置信息如下:
spring.cloud.nacos.config.server-addr=127.0.0.1:8848
spring.cloud.nacos.config.file-extension=yml
spring.application.name=service-config
spring.cloud.nacos.config.namespace=9d0c9401-f575-4427-a982-eb8637a652b0
# 项目启动nacos配置信息打印级别,info会打印出配置信息
logging.level.com.alibaba.cloud.nacos.client.NacosPropertySourceBuilder=warn
关键注解RefreshScope
@RestController
@RefreshScope
public class TestNacosController {
@Value("${top.fsn.id}")
private String id;
@RequestMapping("test")
public String test() {
return id;
}
}
RefreshScope 原理
该注解支持动态更新配置文件中数据,无需重启服务。另外,该注解及实现方式也是SpringCloud下,通过拓展Spring下的Scope(作用域)接口进行实现。其注解代码如下: 注解的代码很简单,可以看到它返回的是ScopedProxyMode(就姑且叫代理模型吧)对象。关于代理模型有如下四种类型(实际就三种)。 @Target({ ElementType.TYPE, ElementType.METHOD }) @Retention(RetentionPolicy.RUNTIME) @Scope("refresh") @Documented public @interface RefreshScope { /** * @see Scope#proxyMode() * @return proxy mode */ ScopedProxyMode proxyMode() default ScopedProxyMode.TARGET_CLASS; } public enum ScopedProxyMode { /** * Default typically equals {@link #NO}, unless a different default * has been configured at the component-scan instruction level. */ // 与NO类型一样,表示不使用代理 DEFAULT, /** * Do not create a scoped proxy. *This proxy-mode is not typically useful when used with a
* non-singleton scoped instance, which should favor the use of the
* {@link #INTERFACES} or {@link #TARGET_CLASS} proxy-modes instead if it
* is to be used as a dependency.
*/
NO,
/**
* Create a JDK dynamic proxy implementing all interfaces exposed by
* the class of the target object.
*/
// 使用 jdk dynamic proxy(基于接口的代理)
INTERFACES,
/**
* Create a class-based proxy (uses CGLIB).
*/
// 使用 CGLIB 做代理(基于目标类)
TARGET_CLASS;
}
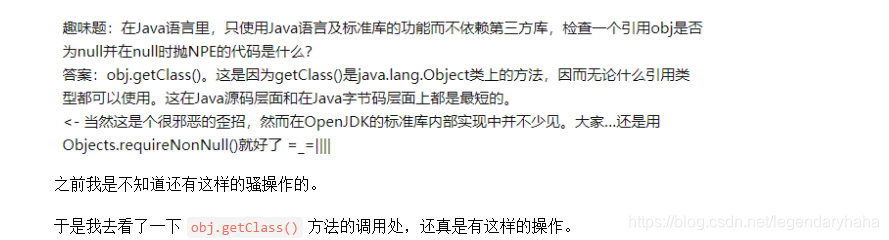
RefreshScope 的实现,几个类结构如下, 这个方法有一处不明白,讲道理,这个void方法,如果是我写,判断bean不为null,我直接return了,还getClass干嘛。。但是最近看过why大佬的一篇关于return null文章,顿时茅塞顿开。 if (bean != null) {bean.getClass();}  在AbstractBeanFactory#doGetBean中,又通过如下方法,调用GenericScope #get方法,兜兜转转,又回到RefreshScope 的父类来了:
# AbstractBeanFactory#doGetBean
Object scopedInstance = scope.get(beanName, () -> {
beforePrototypeCreation(beanName);
# GenericScope #get
@Override
public Object get(String name, ObjectFactory objectFactory) {
BeanLifecycleWrapper value = this.cache.put(name,
new BeanLifecycleWrapper(name, objectFactory));
this.locks.putIfAbsent(name, new ReentrantReadWriteLock());
try {
return value.getBean();
}
catch (RuntimeException e) {
this.errors.put(name, e);
throw e;
}
}
可以看到我们这里用 @RefreshScope注解的bean最终被放到一个locks中,它的定义如下:
private ConcurrentMap locks = new ConcurrentHashMap();
每个bean在初始后之后,还需要为其添加一个监听器,在继续debug之后,就来到了: 在AbstractBeanFactory#doGetBean中,又通过如下方法,调用GenericScope #get方法,兜兜转转,又回到RefreshScope 的父类来了:
# AbstractBeanFactory#doGetBean
Object scopedInstance = scope.get(beanName, () -> {
beforePrototypeCreation(beanName);
# GenericScope #get
@Override
public Object get(String name, ObjectFactory objectFactory) {
BeanLifecycleWrapper value = this.cache.put(name,
new BeanLifecycleWrapper(name, objectFactory));
this.locks.putIfAbsent(name, new ReentrantReadWriteLock());
try {
return value.getBean();
}
catch (RuntimeException e) {
this.errors.put(name, e);
throw e;
}
}
可以看到我们这里用 @RefreshScope注解的bean最终被放到一个locks中,它的定义如下:
private ConcurrentMap locks = new ConcurrentHashMap();
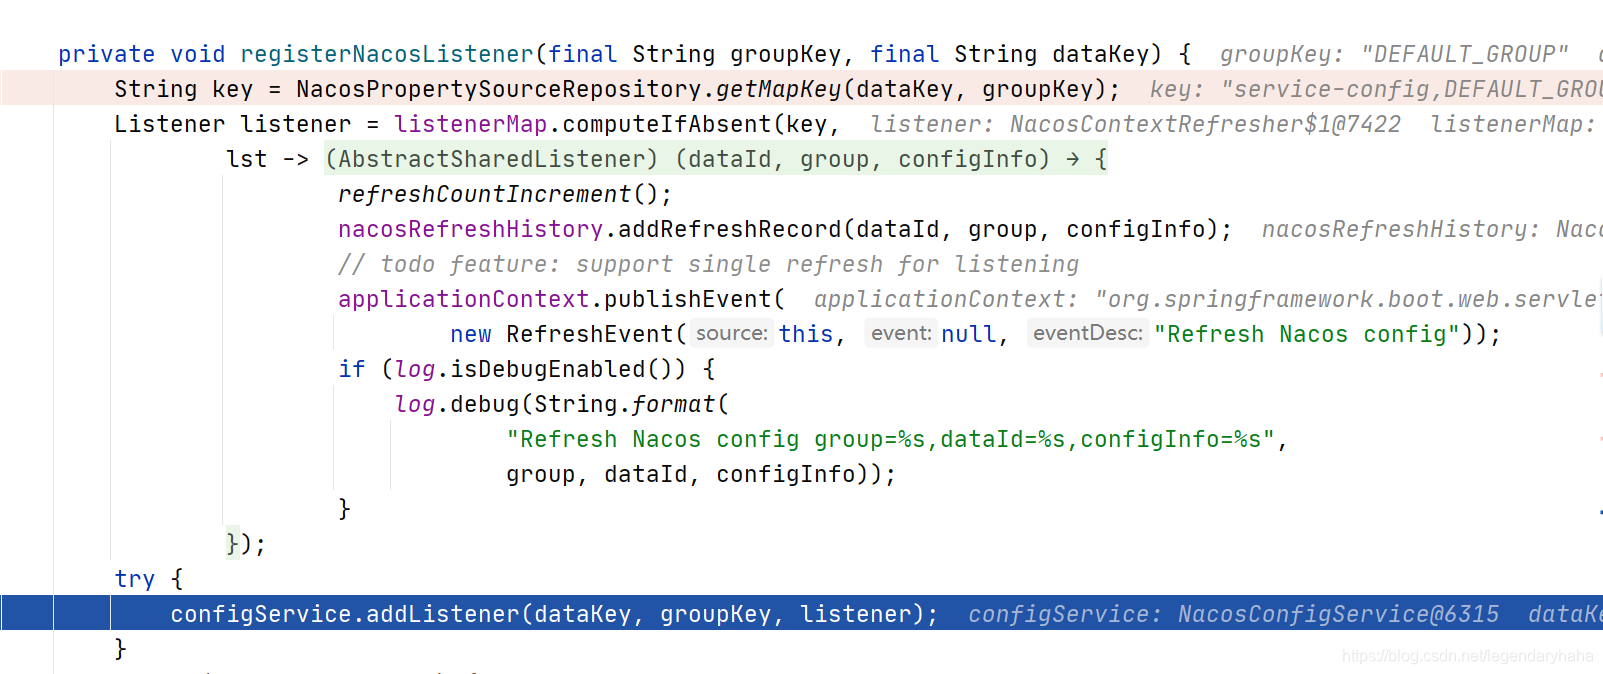
每个bean在初始后之后,还需要为其添加一个监听器,在继续debug之后,就来到了:
NacosContextRefresher#registerNacosListenersForApplications
其中 tenant=9d0c9401-f575-4427-a982-eb8637a652b0,即命名空间随出来的字符串标识 public void addListeners(String dataId, String group, List listeners) { group = null2defaultGroup(group); CacheData cache = addCacheDataIfAbsent(dataId, group); for (Listener listener : listeners) { cache.addListener(listener); } } ```cpp public CacheData addCacheDataIfAbsent(String dataId, String group, String tenant) throws NacosException { // ... synchronized (cacheMap) { CacheData cacheFromMap = getCache(dataId, group, tenant); if (null != cacheFromMap) { cache = cacheFromMap; // reset so that server not hang this check cache.setInitializing(true); } else { cache = new CacheData(configFilterChainManager, agent.getName(), dataId, group, tenant); // fix issue # 1317 if (enableRemoteSyncConfig) { String[] ct = getServerConfig(dataId, group, tenant, 3000L); cache.setContent(ct[0]); } } Map copy = new HashMap(this.cacheMap.get()); copy.put(key, cache); cacheMap.set(copy); } LOGGER.info("[{}] [subscribe] {}", agent.getName(), key); MetricsMonitor.getListenConfigCountMonitor().set(cacheMap.get().size()); return cache; } 在监听到服务端配置时,则得益于ClientWork#LongPollingRunnable内部类。 class LongPollingRunnable implements Runnable { // ... @Override public void run() { // ... try { // check failover config // ... // check server config // ... } } 在ClientWorker初始化后,会初始化executor 和 executorService ,executor 每隔 10毫秒(??有点奇怪 这么快的频率吗)启动 executorService 中的任务线程检查配置信息。话说这种设计方式有点绕。。。 public ClientWorker(final HttpAgent agent, final ConfigFilterChainManager configFilterChainManager, final Properties properties) { this.agent = agent; this.configFilterChainManager = configFilterChainManager; // Initialize the timeout parameter init(properties); this.executor = Executors.newScheduledThreadPool(1, new ThreadFactory() { @Override public Thread newThread(Runnable r) { Thread t = new Thread(r); t.setName("com.alibaba.nacos.client.Worker." + agent.getName()); t.setDaemon(true); return t; } }); this.executorService = Executors .newScheduledThreadPool(Runtime.getRuntime().availableProcessors(), new ThreadFactory() { @Override public Thread newThread(Runnable r) { Thread t = new Thread(r); t.setName("com.alibaba.nacos.client.Worker.longPolling." + agent.getName()); t.setDaemon(true); return t; } }); this.executor.scheduleWithFixedDelay(new Runnable() { @Override public void run() { try { checkConfigInfo(); } catch (Throwable e) { LOGGER.error("[" + agent.getName() + "] [sub-check] rotate check error", e); } } }, 1L, 10L, TimeUnit.MILLISECONDS); } |
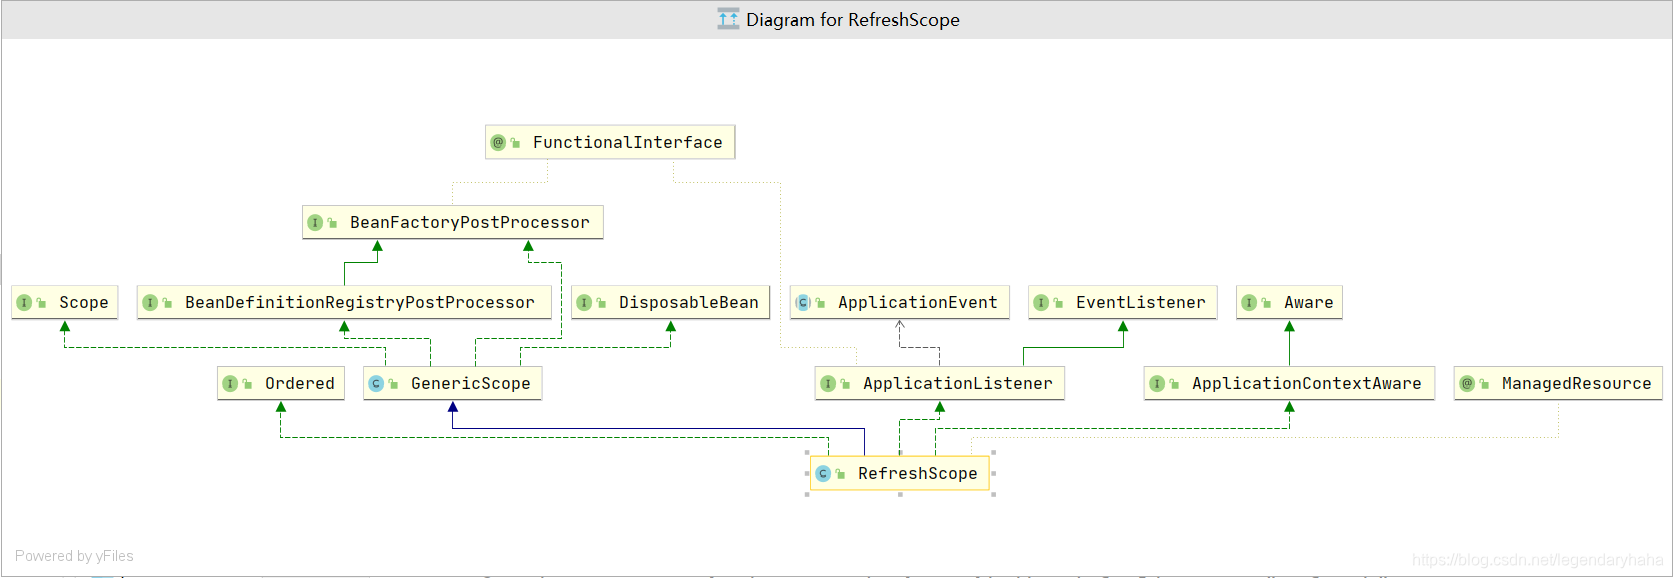 再看看RefreshScope 类继承了GenericScope
public class RefreshScope extends GenericScope implements ApplicationContextAware,
ApplicationListener, Ordered
通过Debug可以知道启动时,调用onApplicationEvent 方法。在start方法有进行eagerlyInitialize初始化。
再看看RefreshScope 类继承了GenericScope
public class RefreshScope extends GenericScope implements ApplicationContextAware,
ApplicationListener, Ordered
通过Debug可以知道启动时,调用onApplicationEvent 方法。在start方法有进行eagerlyInitialize初始化。  初始化的过程会获取一个name为scopedTarget.testNacosController
【本文地址】