|
包的引入
不引入当然用不了💦
# 在命令行输入pip install matplotlib
import matplotlib
# 查看版本号
print(matplotlib.__version__)
PyPlot
大多数Matplotlib实用程序都位于pyplot子模块下,通常以plt别名导入
绘图
绘制x和y点
xpoints代表各个点的横坐标ypoints代表各个点的纵坐标
import numpy as np
import matplotlib.pyplot as plt
# 在图中从位置(0,0)到位置(6,250)画一条线
xpoints = np.array([0, 6])
ypoints = np.array([0, 250])
plt.plot(xpoints, ypoints)
plt.show()
# 不指定x轴的点,默认为0到1平均分
ypoints = np.array([0, 250])
plt.plot(ypoints)
plt.show()
无线绘图
仅绘制标记点,可以使用快捷字符串符号参数 ‘o’ ,这意味着“环”
xpoints = np.array([0, 6])
ypoints = np.array([0, 250])
plt.plot(xpoints, ypoints,'o')
plt.show()
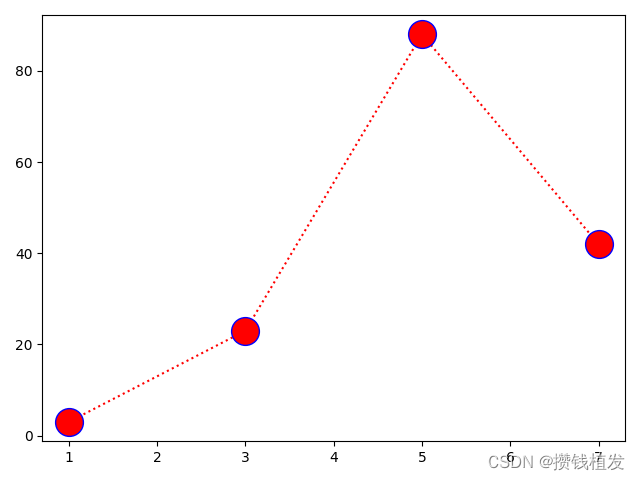
多点
可以根据需要绘制任意数量的点,只需确保两个轴上的点数相同即可连接线会按顺序连起来
xpoints = np.array([33, 7, 6, 13])
ypoints = np.array([3, 23, 88, 42])
plt.plot(xpoints, ypoints)
plt.show()

标记
关键字:marker,用指定的标记强调每个点
xpoints = np.array([1, 3, 5, 7])
ypoints = np.array([3, 23, 88, 42])
# plt.plot(xpoints, ypoints, marker='o')
plt.plot(xpoints, ypoints, marker='*')
plt.show()

标记参考

颜色参考
字符颜色‘b’蓝色‘g’绿色‘r’红色‘c’青色‘m’品红色‘y’黄色‘k’黑色‘w’白色
格式化字符串 fmt
格式:marker|line|color
xpoints = np.array([1, 3, 5, 7])
ypoints = np.array([3, 23, 88, 42])
plt.plot(xpoints, ypoints, 'o:r')
plt.show()

标记尺寸
可以使用关键字markersize或者ms来设置标记的大小
xpoints = np.array([1, 3, 5, 7])
ypoints = np.array([3, 23, 88, 42])
plt.plot(xpoints, ypoints, 'o:r',ms='20')
plt.show()

标记颜色
颜色允许使用十六进制颜色值(如:#4CAF50),或者颜色名称(如:hotpink)
边缘颜色
可以使用关键字markeredgecolor或者mec来设置标记的边缘颜色
xpoints = np.array([1, 3, 5, 7])
ypoints = np.array([3, 23, 88, 42])
plt.plot(xpoints, ypoints, 'o:r', ms='20', markeredgecolor='b')
plt.show()
边缘内颜色
可以使用关键字markerfacecolor或者mfc来设置标记的边缘颜色

线条
可以使用关键字linestyle或ls来更改线条样式
xpoints = np.array([1, 3, 5, 7])
ypoints = np.array([3, 23, 88, 42])
plt.plot(xpoints, ypoints, ls='dashed')
plt.show()

简短语法与线条参考
dotted写成: dashed写成–
xpoints = np.array([1, 3, 5, 7])
ypoints = np.array([3, 23, 88, 42])
plt.plot(xpoints, ypoints, ls='--')
plt.show()
字符描述‘-’实线样式‘–’短横线样式‘-.’点划线样式‘:’虚线样式‘.’点标记‘,’像素标记‘o’圆标记‘v’倒三角标记‘^’正三角标记‘’右三角标记‘1’下箭头标记‘2’上箭头标记‘3’左箭头标记‘4’右箭头标记‘s’正方形标记‘p’五边形标记’*’星形标记‘h’六边形标记 1‘H’六边形标记 2‘+’加号标记‘x’X 标记‘D’菱形标记‘d’窄菱形标记‘enter键上面那个键,与markdown表格冲突打不出来,理解万岁👍👀’竖直线标记‘_’水平线标记
线条颜色
使用关键字color或c来设置线条颜色,内容与标记颜色一样
线条宽度
使用关键字linewidth或lw来设置线条宽度该值是一个浮点数,以磅为单位
xpoints = np.array([1, 3, 5, 7])
ypoints = np.array([3, 23, 88, 42])
plt.plot(xpoints, ypoints, lw='20.5')
plt.show()

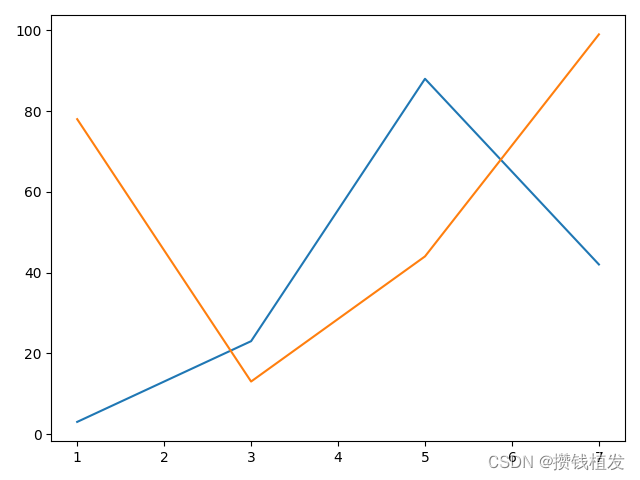
多条线
添加更多的plt.plot()函数来绘制任意数量的线
xpoints = np.array([1, 3, 5, 7])
ypoints1 = np.array([3, 23, 88, 42])
ypoints2 = np.array([78, 13, 44, 99])
plt.plot(xpoints, ypoints1)
plt.plot(xpoints, ypoints2)
plt.show()
标签与标题
设置标签
可以使用xlabel()和ylabel()函数为x轴y轴设置标签使用前需要设置字体为楷体,见如下代码
# 设置字体为楷体
matplotlib.rcParams['font.sans-serif'] = ['KaiTi']
xpoints = np.array([1, 3, 5, 7])
ypoints = np.array([78, 13, 44, 99])
plt.plot(xpoints, ypoints)
plt.xlabel('时间节点')
plt.ylabel('收入')
plt.show()

设置标题
使用title()函数设置标题
设置标题和标签的字体属性
使用xlabel(),ylabel(),title()中的fontdict参数来设置字体属性
# 参数对应字体、颜色、大小
font1 = {'family': 'KaiTi', 'color': 'blue', 'size': 20}
font2 = {'family': 'KaiTi', 'color': 'darkred', 'size': 15}
xpoints = np.array([1, 3, 5, 7])
ypoints = np.array([78, 13, 44, 99])
plt.title('我是标题', fontdict=font1)
plt.xlabel('时间节点', fontdict=font1)
plt.ylabel('收入', fontdict=font2)
plt.plot(xpoints, ypoints)
plt.show()

标题的位置设定
使用title()中的loc参数来设置标题位置合法值:“left”,“right”,“center”。默认为"center"
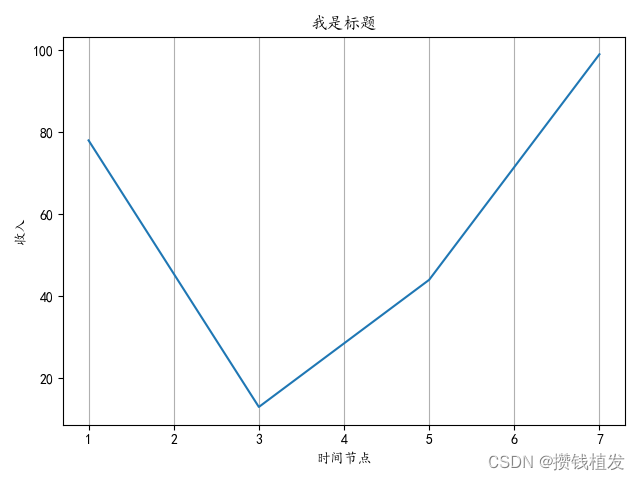
网格线
添加网格线
使用grid()函数添加网格线
xpoints = np.array([1, 3, 5, 7])
ypoints = np.array([78, 13, 44, 99])
plt.title('我是标题')
plt.xlabel('时间节点')
plt.ylabel('收入')
plt.grid()
plt.plot(xpoints, ypoints)
plt.show()

指定要显示的网格线
使用grid()函数中的axis轴参数来设置合法值:“x”,“y”,“both”。默认为"both"
xpoints = np.array([1, 3, 5, 7])
ypoints = np.array([78, 13, 44, 99])
plt.title('我是标题')
plt.xlabel('时间节点')
plt.ylabel('收入')
plt.grid(axis='x')
plt.plot(xpoints, ypoints)
plt.show()
设置网格线的线属性
设置网格的线条属性: plt.grid(color='color',linestyle='linestyle',linewidth='number')
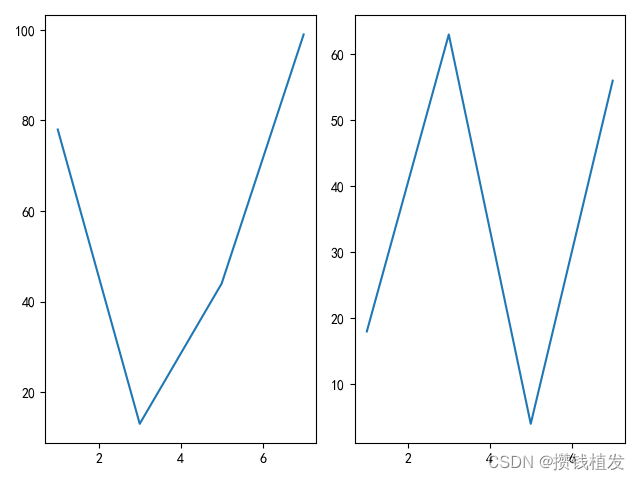
多图
显示多个图
使用subplots()函数来显示多张图
subplots(几行,几列,第几张子图)在绘制plot函数之前使用
# 图一
xpoints = np.array([1, 3, 5, 7])
ypoints = np.array([78, 13, 44, 99])
plt.subplot(1, 2, 1)
plt.plot(xpoints, ypoints)
# 图二
xpoints = np.array([1, 3, 5, 7])
ypoints = np.array([18, 63, 4, 56])
plt.subplot(1, 2, 2)
plt.plot(xpoints, ypoints)
plt.show()
为整个图添加标题
使用suptitle()函数
title()同样可以为每一张子图添加标题
散点图
创建散点图
使用scatter()函数绘制散点图
xpoints = np.array([1, 3, 5, 7])
ypoints = np.array([78, 13, 44, 99])
plt.scatter(xpoints, ypoints)
plt.show()

颜色
统一颜色:同样是使用color或者c参数来设置颜色为每一个点上色:只能使用c作参数,并且需要传入数量对应的颜色数组,如(colors = np.array(['red', 'green', 'gray', 'black']))
颜色图
Matplotlib模块有许多可用的颜色图颜色图就像一个颜色列表,里面每一种颜色都有一个范围从0到100的值"viridis"颜色图:  颜色图的使用
可以使用带有颜色图值的关键字参数cmap指定颜色图此外还要创建一个包含值从0到100的数组,数量与散点图的点对应即可
xpoints = np.array([1, 3, 5, 7, 9, 11])
ypoints = np.array([78, 13, 44, 99, 150, 8])
colors = np.array([0, 20, 40, 60, 80, 100])
plt.scatter(xpoints, ypoints, c=colors, cmap='viridis')
plt.colorbar() # 可以把颜色图展示在旁边
plt.show()
颜色图的使用
可以使用带有颜色图值的关键字参数cmap指定颜色图此外还要创建一个包含值从0到100的数组,数量与散点图的点对应即可
xpoints = np.array([1, 3, 5, 7, 9, 11])
ypoints = np.array([78, 13, 44, 99, 150, 8])
colors = np.array([0, 20, 40, 60, 80, 100])
plt.scatter(xpoints, ypoints, c=colors, cmap='viridis')
plt.colorbar() # 可以把颜色图展示在旁边
plt.show()

可用的颜色图

尺寸
使用s参数改变点的尺寸可以统一改,也可以为每个点设置单独尺寸(类似颜色那样即可)
透明度
使用alpha参数调整点的透明度(如alpha=0.5即半透明)可以统一改,也可以为每个点设置单独透明度(类似颜色那样即可)
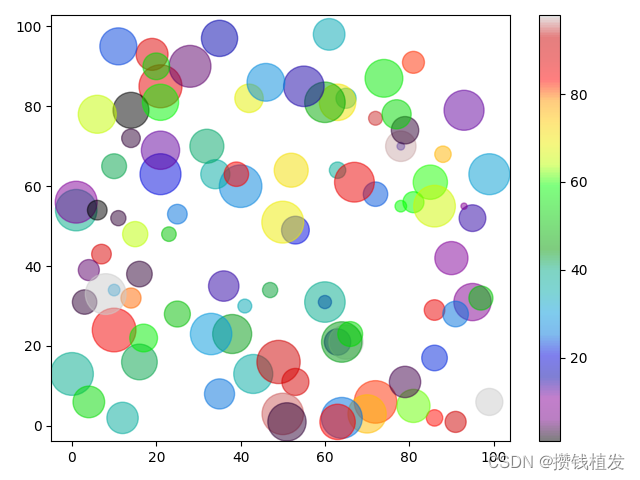
组合颜色、大小和透明度
在点上组合具有不同大小的颜色图
x = np.random.randint(100, size=(100))
y = np.random.randint(100, size=(100))
colors = np.random.randint(100, size=(100))
sizes = 10 * np.random.randint(100, size=(100))
plt.scatter(x, y, c=colors, s=sizes, alpha=0.5, cmap='nipy_spectral')
plt.colorbar()
plt.show()
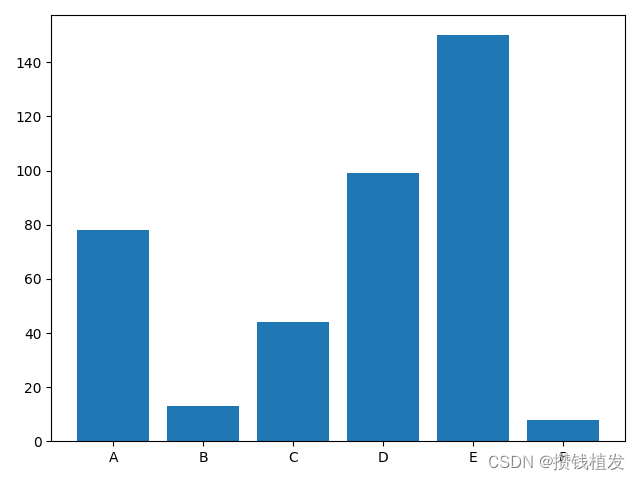
柱状图
创建柱状图
使用bar()函数绘制柱状图
x = np.array(["A", "B", "C", "D", "E", "F"])
y = np.array([78, 13, 44, 99, 150, 8])
plt.bar(x, y)
plt.show()
水平柱状图
使用barh()函数即可
颜色
与plot同理
条形宽度和高度
bar() 使用关键字width来设置宽度barh() 使用关键字height来设置高度
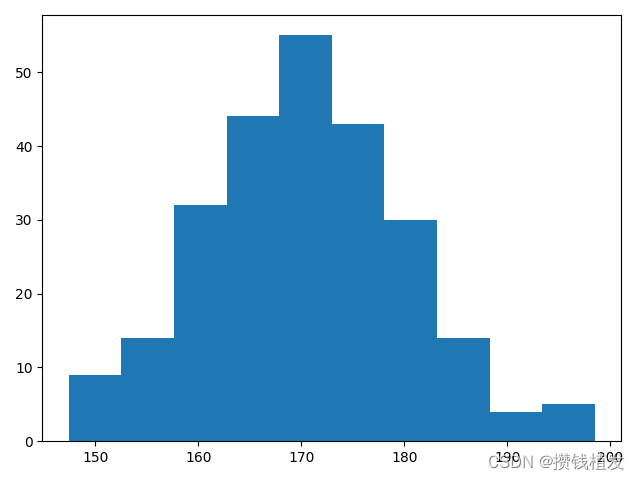
直方图
使用hist()函数创建直方图hist()使用一个数字数组作为参数
# 随机创建一个均值170,方差为10,数量为250的数组
x = np.random.normal(170, 10, 250)
plt.hist(x)
plt.show()
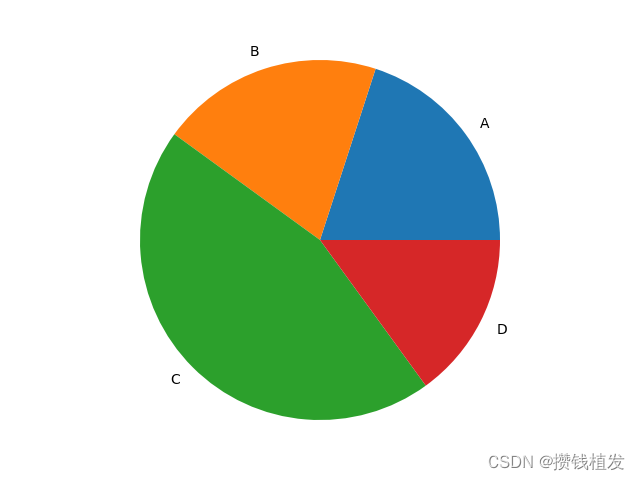
饼图
创建饼图
使用pie()函数绘制饼图
y = np.array([20, 20, 45, 15])
plt.pie(y)
plt.show()

标签
使用label参数为饼图添加标签
my_labels = ["A", "B", "C", "D"]
y = np.array([20, 20, 45, 15])
plt.pie(y, labels=my_labels)
plt.show()
起始角度
默认起始角度位于x轴,但可以通过关键字startangle来更改startangle默认角度为0,以度为单位
分离指定的块
使用关键字explode实现分离一个块必须是一个数组,每个块都要有值,值代表距离中心有多远
my_labels = ["A", "B", "C", "D"]
y = np.array([20, 20, 45, 15])
my_explode = [0, 0, 0, 0.5]
plt.pie(y, labels=my_labels, explode=my_explode)
plt.show()

阴影
将关键字shadows设置为true即可
颜色
与plot同理
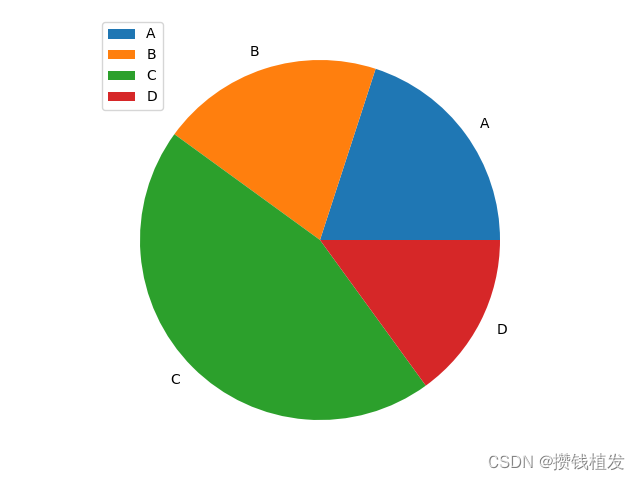
图例
使用legend()函数为每一块添加解释列表
my_labels = ["A", "B", "C", "D"]
y = np.array([20, 20, 45, 15])
plt.pie(y, labels=my_labels)
plt.legend()
plt.show()
带标题的图例
legend()函数里面可以传入带标题的图例,注意需要声明使用哪款字体
matplotlib.rcParams['font.sans-serif'] = ['KaiTi']
my_labels = ["A", "B", "C", "D"]
y = np.array([20, 20, 45, 15])
plt.pie(y, labels=my_labels)
plt.legend(title="我是图例标题")
plt.show()

感谢您的观看,撒花🎉🎉
|