| 关于微前端实现原理与 ngx | 您所在的位置:网站首页 › 沙雕搞笑短句子图片带字 › 关于微前端实现原理与 ngx |
关于微前端实现原理与 ngx
|
简单来说
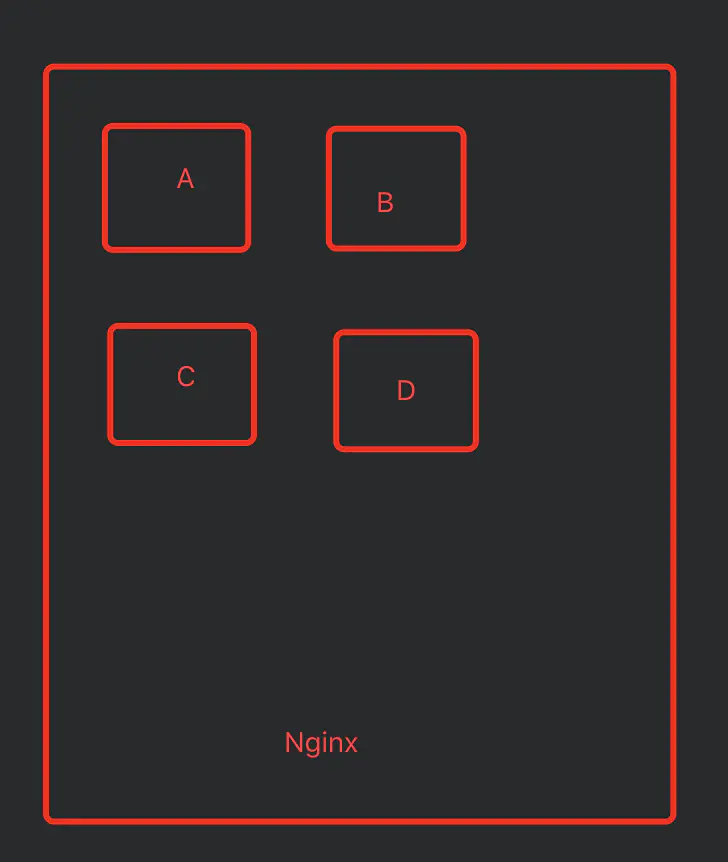
从部署角度考虑 A,B,C,D 为并行四个打包后的静态文件,当有 E 应用使用 A,B,C,D 应用中的组件或者事件时通过类 eureka 服务发现注册的方式去复用组件或应用。 当然,这只是众多思路中的一种 当然,这只是众多思路中的一种 当然,这只是众多思路中的一种 好处: 应用自治: 只需要遵循统一的接口规范或者框架,以便于系统集成到一起,相互之间是不存在依赖关系的。 单一职责: 每个前端应用可以只关注于自己所需要完成的功能。 技术栈无关: 你可以使用 Angular 的同时,又可以使用 React 和 Vue。 这就好像使用 k8s 集群和 grpc 调用一样 架构模式 基座模式: 通常有一个 main/portal 应用来充当基座,提供基础服务,剩下的应用可插拔在基座上。好像 dashboard 和 widget 的关系 自组织模式: 各个应用平级不存在相互管理 实现思路基于基座模式的微服务无非是 服务发现,服务注册,服务调用 等功能
单个浏览器多个应用还需做到 状态 |css 共享/隔离 技术方式从技术实践上,微前端架构可以采用以下的几种方式进行: 路由分发式。通过 HTTP 服务器的反向代理功能,来将请求路由到对应的应用上。 前端微服务化。在不同的框架之上设计通讯、加载机制,以在一个页面内加载对应的应用。 微应用。通过软件工程的方式,在部署构建环境中,组合多个独立应用成一个单体应用。 微件化。开发一个新的构建系统,将部分业务功能构建成一个独立的 chunk 代码,使用时只需要远程加载即可。 前端容器化。通过将 iFrame 作为容器,来容纳其它前端应用。 应用组件化。借助于 Web Components 技术,来构建跨框架的前端应用。 ngx-planet项目地址: https://github.com/worktile/ngx-planet Ngx-Planet 是国内少有用 Angular 的公司 worktile 徐海风设计出来的一款 基于 基座模式,粒度到 Component 共用,带有消息事件注册的 微前端项目结构实现。 原帖在知乎不多赘述# 使用 Angular 打造微前端架构的 ToB 企业级应用 ngx-planet-v8由于公司数十个项目都是 ng8 所以将 ngx-planet 降级为 v8 版本测试了一下,还可以 项目地址: https://github.com/ferried/ngx-planet-v8 降级过程 1.安装脚手架:npm install -g @angular/[email protected] 2.创建项目:ng new ngx-planet-parent --style=less 3.额外创建两个项目:ng new portal --style=less && ng new app1 --style=less --prefix=app1 4.将额外两个项目移入 ngx-planet-parent 中 mv portal app1 ngx-planet-parent/example 5.生成 v8 包:ng new library ngx-planet-v8 6.三个项目安装 cdk:npm install @angular/[email protected] 7.example 目录下两个项目安装其余依赖: npm install @angular-builders/[email protected] @worktile/[email protected] [email protected] 8.清空 library 生成的项目,将 ngx-planet项目中的 packages/ngx-planet的src 整体复制入 projects/ngx-planet-v8 最后将 mdule.ts 种的模块名称修改一下 NgxPlanetV8Module 9.复制tsconfig.lib.json 并打包 ng build ngx-planet-v8 10.example 下的两个项目加入依赖 npm install ../../dist/ngx-planet-v8 11.准备三个文件 proxy.config.js,extra-webpack.config.js,postcss.config.jsportal 下的 postcss module.exports = { plugins: [require("autoprefixer")], };app1 下的 postcss module.exports = {};portal 下的 extra-webpack.config.js,这个文件是混入 customWebpack 用的,原项目是.scss 这里改成了.less const WebpackAssetsManifest = require("webpack-assets-manifest"); const PrefixWrap = require("@worktile/planet-postcss-prefixwrap"); module.exports = { optimization: { runtimeChunk: false, }, plugins: [new WebpackAssetsManifest()], module: { rules: [ { test: /\.less$/, use: [ { loader: "postcss-loader", options: { plugins: [ PrefixWrap(".portal", { prefixRootTags: true, }), ], }, }, "less-loader", ], }, ], }, };app1 下的 extra-webpack.config.js, const WebpackAssetsManifest = require("webpack-assets-manifest"); const PrefixWrap = require("@worktile/planet-postcss-prefixwrap"); module.exports = { optimization: { runtimeChunk: false, }, plugins: [new WebpackAssetsManifest()], module: { rules: [ { test: /\.less$/, use: [ { loader: "postcss-loader", options: { plugins: [ PrefixWrap(".app1", { hasAttribute: "planet-inline", prefixRootTags: true, }), ], }, }, "less-loader", ], }, ], }, };portal 下的 proxy.config.js const PROXY_CONFIG = {}; PROXY_CONFIG["/static/app1"] = { target: "http://localhost:3001", secure: false, changeOrigin: false, }; PROXY_CONFIG["/static/app2"] = { target: "http://localhost:3002", secure: false, changeOrigin: true, }; module.exports = PROXY_CONFIG; 12.修改 angular.jsonportal 的 angular.json { ... "architect": { "build": { // build改成 custom-webpack "builder": "@angular-builders/custom-webpack:browser", "options": { "customWebpackConfig": { // extra-webpack.config.js "path": "extra-webpack.config.js", // 混入配置 "mergeStrategies": { "externals": "replace", "module.rules": "append" } }, // baseHref "baseHref": "/", "outputPath": "dist/portal", "index": "src/index.html", "main": "src/main.ts", "polyfills": "src/polyfills.ts", "tsConfig": "tsconfig.app.json", // 加入 extractCss "extractCss": true, "aot": true, "assets": [ "src/favicon.ico", "src/assets" ], "styles": [ "src/styles.less" ], "scripts": [] }, "configurations": { "production": { "fileReplacements": [ { "replace": "src/environments/environment.ts", "with": "src/environments/environment.prod.ts" } ], "optimization": true, "outputHashing": "all", "sourceMap": false, "extractCss": true, "namedChunks": false, "aot": true, "extractLicenses": true, // 加入 vendorChunk "vendorChunk": false, "buildOptimizer": true, "budgets": [ { "type": "initial", "maximumWarning": "2mb", "maximumError": "5mb" }, { "type": "anyComponentStyle", "maximumWarning": "6kb", "maximumError": "10kb" } ] } } }, "serve": { // serve改成 custom-webpack "builder": "@angular-builders/custom-webpack:dev-server", "options": { "browserTarget": "portal:build", // 混入代理文件 "proxyConfig": "proxy.conf.js", "port": 3000 }, "configurations": { "production": { "browserTarget": "portal:build:production" } } }, ... "defaultProject": "portal" }app1 的 angular.json { ... "architect": { "build": { // 同样改成custom-webpack:browser "builder": "@angular-builders/custom-webpack:browser", "options": { // 混入配置 "customWebpackConfig": { "path": "extra-webpack.config.js", "mergeStrategies": { "module.rules": "append" }, // replaceDuplicatePlugins "replaceDuplicatePlugins": true }, "outputPath": "dist/app1", "index": "src/index.html", "main": "src/main.ts", "polyfills": "src/polyfills.ts", "tsConfig": "tsconfig.app.json", // vendorChunk & extractCss "vendorChunk": false, "extractCss": true, "aot": true, "assets": [ "src/favicon.ico", "src/assets" ], "styles": [ "src/styles.less" ], "scripts": [] }, "configurations": { "production": { "fileReplacements": [ { "replace": "src/environments/environment.ts", "with": "src/environments/environment.prod.ts" } ], "optimization": true, "outputHashing": "all", "sourceMap": false, "namedChunks": false, "aot": true, "extractLicenses": true, // extractCss && vendorChunk "extractCss": true, "vendorChunk": false, "buildOptimizer": true, "budgets": [ { "type": "initial", "maximumWarning": "2mb", "maximumError": "5mb" }, { "type": "anyComponentStyle", "maximumWarning": "6kb", "maximumError": "10kb" } ] } } }, "serve": { // custom-webpack:dev-server,加入port3001和vendorChunk "builder": "@angular-builders/custom-webpack:dev-server", "options": { "port": 3001, "vendorChunk": false, "browserTarget": "app1:build" }, ... "defaultProject": "app1" } 13.构建 portal 应用修改 Approuting import { NgModule } from "@angular/core"; import { Routes, RouterModule } from "@angular/router"; import { EmptyComponent } from "ngx-planet-v8"; const routes: Routes = [ { path: "app1", component: EmptyComponent, children: [ { path: "**", component: EmptyComponent, }, ], }, { path: "app2", component: EmptyComponent, children: [ { path: "**", component: EmptyComponent, }, ], }, ]; @NgModule({ imports: [RouterModule.forRoot(routes)], exports: [RouterModule], }) export class AppRoutingModule {}app.module import { BrowserModule } from "@angular/platform-browser"; import { NgModule } from "@angular/core"; import { BrowserAnimationsModule } from "@angular/platform-browser/animations"; import { AppRoutingModule } from "./app-routing.module"; import { AppComponent } from "./app.component"; import { FormsModule } from "@angular/forms"; import { CommonModule } from "@angular/common"; import { NgxPlanetV8Module } from "ngx-planet-v8"; @NgModule({ declarations: [AppComponent], imports: [ BrowserModule, BrowserAnimationsModule, FormsModule, CommonModule, AppRoutingModule, // 引入模块 NgxPlanetV8Module, ], providers: [], bootstrap: [AppComponent], }) export class AppModule {}app.component.html // 通过路由从基座应用跳到app1 APP1 // 容器 // 加载状态 加载中app.module.ts import { Component, OnInit } from "@angular/core"; import { Planet, SwitchModes } from "ngx-planet-v8"; @Component({ selector: "app-root", templateUrl: "./app.component.html", styleUrls: ["./app.component.less"], }) export class AppComponent implements OnInit { title = "portal"; get loadingDone() { return this.planet.loadingDone; } constructor(private planet: Planet) {} ngOnInit(): void { // 向基座注册app1应用,当然可以变成json通过http远程配置 const appHostClass = "thy-layout"; this.planet.registerApps([ { name: "app1", hostParent: "#app-host-container", hostClass: appHostClass, routerPathPrefix: /\/app1|app4/, // '/app1', resourcePathPrefix: "/static/app1/", preload: false, switchMode: SwitchModes.coexist, loadSerial: true, stylePrefix: "app1", // prettier-ignore scripts: [ 'main.js', // 'polyfills.js' ], styles: ["styles.css"], manifest: "/static/app1/manifest.json", extra: { name: "应用1", color: "#ffa415", }, }, { name: "app2", hostParent: "#app-host-container", hostClass: appHostClass, routerPathPrefix: "/app2", resourcePathPrefix: "/static/app2/", preload: false, switchMode: SwitchModes.coexist, stylePrefix: "app2", // prettier-ignore scripts: [ 'main.js' ], styles: ["styles.css"], manifest: "/static/app2/manifest.json", extra: { name: "应用2", color: "#66c060", }, }, ]); this.planet.start(); } } 14.修改 app1main.ts import { enableProdMode, NgModuleRef, Type, NgZone } from "@angular/core"; import { platformBrowserDynamic } from "@angular/platform-browser-dynamic"; import { AppModule } from "./app/app.module"; import { environment } from "./environments/environment"; import { PlanetPortalApplication, defineApplication } from "ngx-planet-v8"; if (environment.production) { enableProdMode(); } defineApplication("app1", { template: ``, bootstrap: (portalApp: PlanetPortalApplication) => { return platformBrowserDynamic([ { provide: PlanetPortalApplication, useValue: portalApp, }, ]) .bootstrapModule(AppModule) .then((appModule) => { return appModule; }) .catch((error) => { console.error(error); return null; }); }, });routing.ts import { NgModule } from "@angular/core"; import { Routes, RouterModule } from "@angular/router"; import { EmptyComponent } from "ngx-planet-v8"; const routes: Routes = [{ path: "app1", component: EmptyComponent }]; @NgModule({ imports: [RouterModule.forRoot(routes)], exports: [RouterModule], }) export class AppRoutingModule {}module.ts import { BrowserModule } from "@angular/platform-browser"; import { NgModule } from "@angular/core"; import { BrowserAnimationsModule } from "@angular/platform-browser/animations"; import { AppRoutingModule } from "./app-routing.module"; import { AppComponent } from "./app.component"; import { CommonModule } from "@angular/common"; import { RouterModule } from "@angular/router"; import { FormsModule } from "@angular/forms"; import { NgxPlanetV8Module } from "ngx-planet-v8"; @NgModule({ declarations: [AppComponent], imports: [ BrowserModule, BrowserAnimationsModule, FormsModule, CommonModule, AppRoutingModule, RouterModule, NgxPlanetV8Module, ], providers: [], bootstrap: [AppComponent], }) export class AppModule {}最后向 app1 的 package.json 中 script 下加入 "start": "ng serve --deploy-url=/static/app1/", 这个 deploy-url 将来就是你 nginx 的文件夹路径 end: 分别启动 portal 和 app1 然后进行测试吧 参考资料# 微前端如何落地? # 使用 Angular 打造微前端架构的 ToB 企业级应用 |


【本文地址】