| cv2.fitEllipse函数详解:ellipse参数并根据参数计算出椭圆焦点坐标 | 您所在的位置:网站首页 › 椭圆的曲率圆心在哪里 › cv2.fitEllipse函数详解:ellipse参数并根据参数计算出椭圆焦点坐标 |
cv2.fitEllipse函数详解:ellipse参数并根据参数计算出椭圆焦点坐标
|
cv2.fitEllipse函数详解:ellipse参数并根据参数计算出椭圆焦点坐标
最近因为用到了这个函数,所以就趁着这个机会,好好顺顺,做下记录。 ellipse = cv2.fitEllipse(cnt) #(x, y), (a, b), angle = cv2.fitEllipse(cnt) #ellipse = [ (x, y) , (a, b), angle ]ellipse 为元组类型,其里面的参数为: (x, y)代表椭圆中心点的位置(a, b)代表长短轴长度,应注意a、b为长短轴的直径,而非半径 angle 代表了中心旋转的角度 椭圆参数角度效果旋转30°
旋转90° 旋转120° 旋转150°
旋转180° 旋转210° 对于一个旋转60°椭圆,如下:
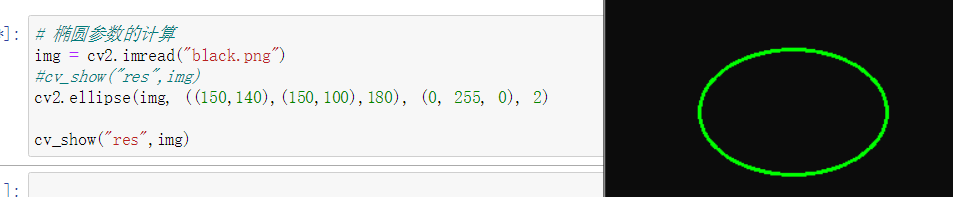
最终效果图: 可以看出来没有影响。 完整代码如下:其中"black.png“ 就是我随便截取的一个黑色背景。 import os import numpy as np from matplotlib import pyplot as plt from PIL import Image import cv2 from PIL import ImageEnhance import math def cv_show(name,file): cv2.imshow(name, file) cv2.waitKey(0) cv2.destroyAllWindows() # 椭圆参数的计算 img = cv2.imread("black.png") #cv_show("res",img) cv2.ellipse(img, ((150,140),(150,100),60), (0, 255, 0), 2) cv_show("res",img) #画长宽 res_ellipse = ((150,140),(150,100),60) ell_center_x = int(res_ellipse[0][0]) ell_center_y = int(res_ellipse[0][1]) ell_h_point1_x = int(ell_center_x - 0.5 * res_ellipse[1][0] * math.cos(res_ellipse[2]/ 180 * math.pi)) ell_h_point1_y = int(ell_center_y - 0.5 * res_ellipse[1][0]* math.sin(res_ellipse[2]/ 180 * math.pi)) ell_h_point2_x = int(ell_center_x + 0.5 * res_ellipse[1][0] * math.cos(res_ellipse[2]/ 180 * math.pi)) ell_h_point2_y = int(ell_center_y + 0.5 * res_ellipse[1][0]* math.sin(res_ellipse[2]/ 180 * math.pi)) ell_w_point1_x = int(ell_center_x - 0.5 * res_ellipse[1][1] * math.sin(res_ellipse[2]/ 180 * math.pi)) ell_w_point1_y = int(ell_center_y + 0.5 * res_ellipse[1][1]* math.cos(res_ellipse[2]/ 180 * math.pi)) ell_w_point2_x = int(ell_center_x + 0.5 * res_ellipse[1][1] * math.sin(res_ellipse[2]/ 180 * math.pi)) ell_w_point2_y = int(ell_center_y - 0.5 * res_ellipse[1][1]* math.cos(res_ellipse[2]/ 180 * math.pi)) cv2.line(img,(ell_h_point1_x,ell_h_point1_y),(ell_h_point2_x,ell_h_point2_y),(0,255,255),thickness=2) cv2.line(img,(ell_w_point1_x,ell_w_point1_y),(ell_w_point2_x,ell_w_point2_y),(0,255,255),thickness=2) cv_show("res_img",img) |
 旋转60°
旋转60°


 从上图看应该是旋转180°以内和180°到360°是一样的。
 则根据高中数学知识易得:
  根据上图和其他参数,可以很简单的用下面的代码计算出来点的坐标:
 计算代码如下:
 对于角度为240°(180+60)的椭圆,计算效果如下:
【本文地址】
公司简介
联系我们