| js前端获取扫码枪扫描的数据,打印条形码,批量打印 | 您所在的位置:网站首页 › 扫码枪二维码扫出来是错的 › js前端获取扫码枪扫描的数据,打印条形码,批量打印 |
js前端获取扫码枪扫描的数据,打印条形码,批量打印
|
扫码枪相当于键盘输入设备,输入一连串数字后加一个enter键。 但在实际开发中需要区分是扫描枪输入还是键盘用户输入,区别在于扫码枪输入很快 1.获取扫码枪扫码的数据 // 监听扫码 window.document.onkeypress = (e) => { if (window.event) { // IE this.nextCode = e.keyCode; } else if (e.which) { // Netscape/Firefox/Opera this.nextCode = e.which; } if (e.which === 13) { // 键盘回车事件 if (this.code.length < 3) return; // 扫码枪的速度很快,手动输入的时间不会让code的长度大于2,所以这里不会对扫码枪有效 this.parseQRCode(this.code); // 获取到扫码枪输入的内容,做别的操作 this.lastCode = ""; this.lastTime = ""; return; } this.nextTime = new Date().getTime(); if ( this.lastCode && this.lastTime && this.nextTime - this.lastTime > 500 ) { // 当扫码前有keypress事件时,防止首字缺失 this.code = e.key; } else if (this.lastCode && this.lastTime) { this.code += e.key; } this.lastCode = this.nextCode; this.lastTime = this.nextTime; };this.parseQRCode这个函数是获取到扫码的数据进行处理,我这边的逻辑是要拿到他请求后台数据拿到条形码 parseQRCode(code) { this.addCodeInfo.DoType = "1"; if (code) { this.addCodeInfo.VehicleCode = code; this.code = ""; } if (!this.addCodeInfo.VehicleCode) { this.$message({ message: "请输入车架编号", type: "warning", }); return; getCodeApi(this.addCodeInfo) .then((res) => { if (res.Code == "0") { this.QrCode = res.QrCode; if (this.isPrint) { this.$nextTick(() => { this.printFn();//这是打印的方法 }); } this.$message({ message: res.Message, type: "success", }); } }) .catch((e) => { console.log("e", e); }); },UI部分 请勿撕毁 以便保修2.实现扫码之后立即打印 printFn() { //给要打印的内容加样式 const styleSheet = ` body{margin: 0 0} .contents {display: flex; flex-direction: column; display: block; width: 250px; height: 100px; background-color: #fff; text-align: center; margin: 0 auto; page-break-after:always} .printTitle{font-size: 17px; font-weight: bold; color: black;} .QrCode-img { width: 250px; margin: 3px 0; } `; var newWin = window.open(""); // 新打开一个空窗口 var imageToPrint = document.getElementById("printAreass"); // 获取需要打印的内容 newWin.document.write(imageToPrint.outerHTML); // 将需要打印的内容添加进新的窗口 newWin.document.head.innerHTML = styleSheet; // 给打印的内容加上样式 newWin.document.close(); // 在IE浏览器中使用必须添加这一句 newWin.focus(); // 在IE浏览器中使用必须添加这一句 setTimeout(function () { newWin.print(); // 打开打印窗口 newWin.close(); // 关闭打印窗口 }, 100); },效果展示:
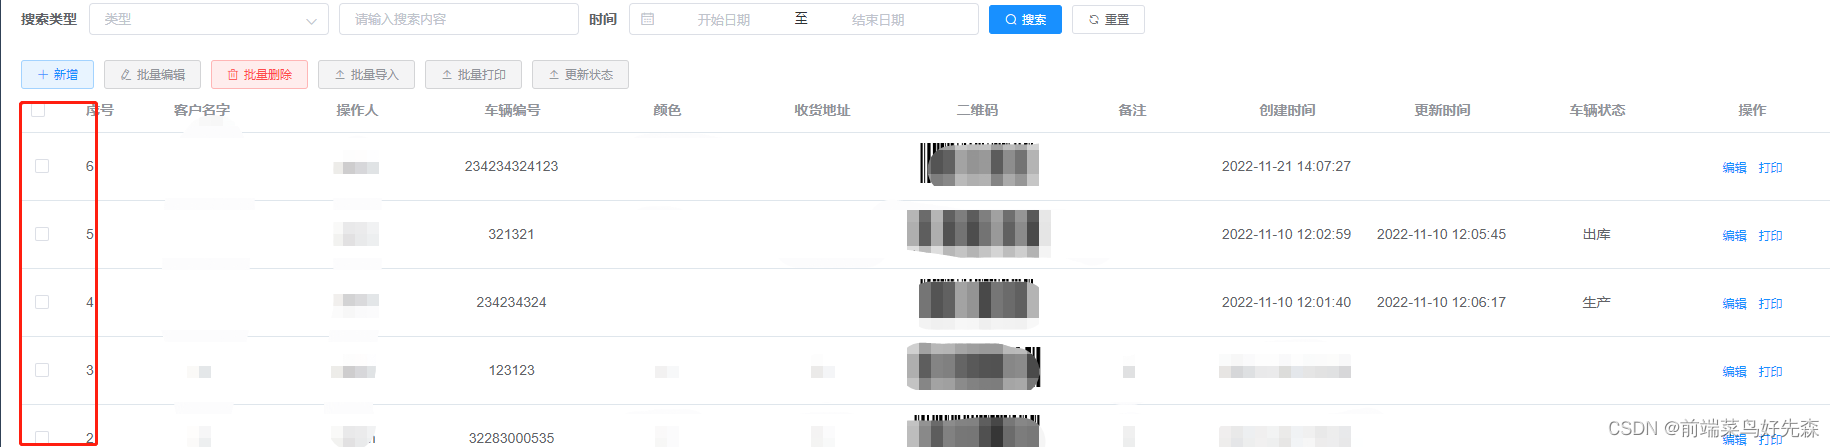
3.批量打印 我这用的是element-ui的表单,多选,全选
UI部分 请勿撕毁 以便保修逻辑部分 batchPrint() { if (this.multipleSelection.length == 0) { this.$message({ message: "请选择要打印的数据", type: "warning", }); return; } const styleSheet = ` body{margin: 0 0} .content {display: flex; flex-direction: column; display: block; width: 250px; height: 100px; background-color: #fff; text-align: center; margin: 0 auto; page-break-after:always} .printTitle{font-size: 17px; font-weight: bold; color: black;} .QrCode-img { width: 250px; margin: 3px 0; } `; const data = this.multipleSelection; // 打印 var newWin = window.open(""); // 新打开一个空窗口 data.forEach((item, i) => { var imageToPrint = document.getElementById("content" + i); // 获取需要打印的内容 newWin.document.write(imageToPrint.outerHTML); // 将需要打印的内容添加进新的窗口 }); newWin.document.head.innerHTML = styleSheet; // 给打印的内容加上样式 newWin.document.close(); // 在IE浏览器中使用必须添加这一句 newWin.focus(); // 在IE浏览器中使用必须添加这一句 setTimeout(function () { newWin.print(); // 打开打印窗口 newWin.close(); // 关闭打印窗口 if (newWin.closed) { this.$refs.multipleTable.clearSelection(); } }, 100); },效果展示:
单个打印和多个打印其实都一样,多个打印只是循环了一下而已 这个功能是做工厂出货之后扫码溯源的功能, |


【本文地址】
公司简介
联系我们