| LaTeX使用tikz实现每一页全覆盖的水印,且图片不会把水印覆盖 | 您所在的位置:网站首页 › 怎么做ppt水印图片 › LaTeX使用tikz实现每一页全覆盖的水印,且图片不会把水印覆盖 |
LaTeX使用tikz实现每一页全覆盖的水印,且图片不会把水印覆盖
|
使用draftwatermark的时候,图片会把水映覆盖。
使用background实现水印文字重复且多行全覆盖的效果,可参考如下链接
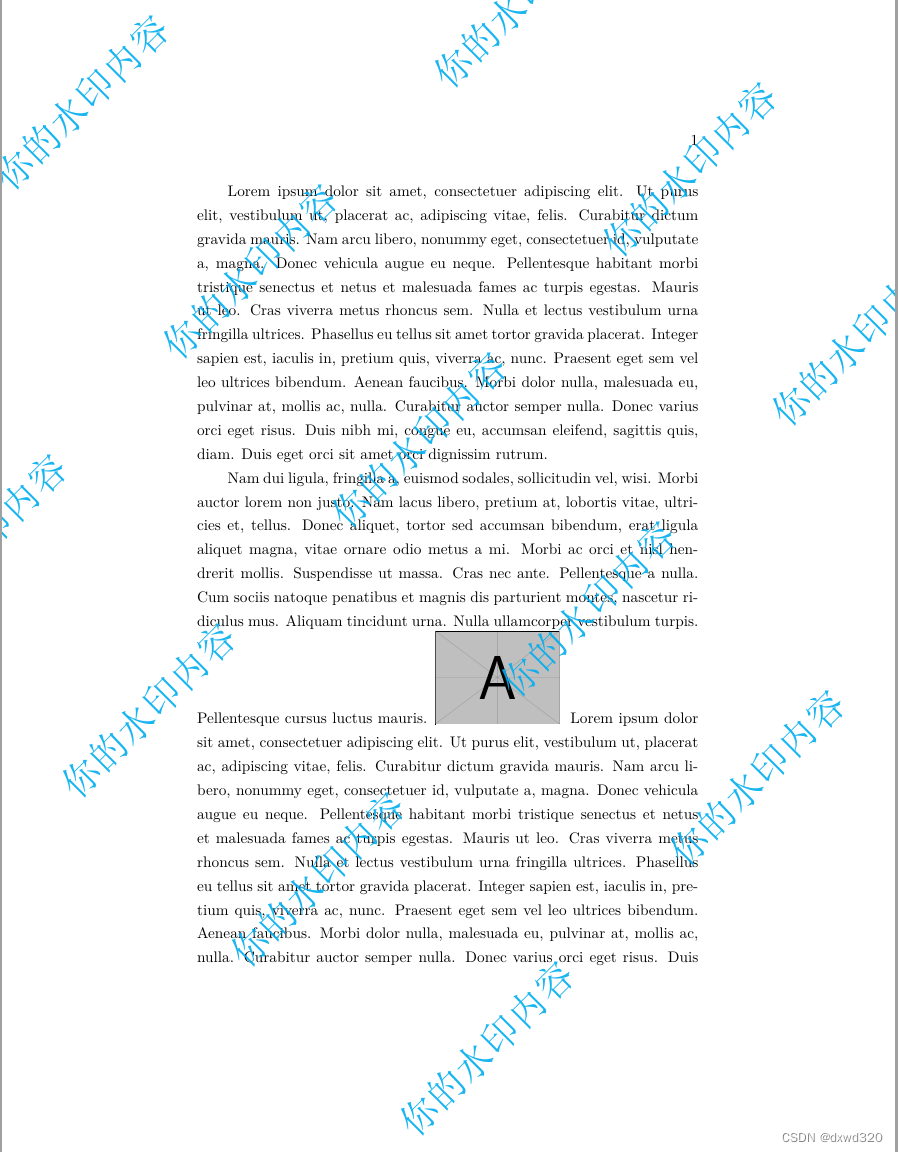
《LaTeX中如何给每一页加全覆盖的水印?效果如下图。?》 来自 \usepackage{background} \backgroundsetup{contents=Confidential,color=blue}使用background存在同样的问题,就是:图片会把水映覆盖。 所以参考如下链接,改用tikz 《Latex添加水印,在图片上面》 原文链接:https://blog.csdn.net/weixin_51394621/article/details/129628023 上面的链接实现的只是一行文字的效果,我们想实现的效果要像上面使用background实现的一样,每一行文字重复,且可以按需生成多行,同时水印要在图片上面。 tikz node 中的文字换行 选项中加align=center,并用\\换行,例如 \node at (-0.5,1)[draw, align=center]{example \\ example example}; 使用tikz实现每一页全覆盖的水印,且图片不会把水印覆盖: \documentclass{ctexart} \usepackage{lipsum} \usepackage[dvipsnames, svgnames, x11names]{xcolor}% 颜色支持 % begin watermark \usepackage{tikz} \makeatletter % prepare \bg@text \def\bg@text{} \foreach \i in {1, ..., 5} { \g@addto@macro\bg@text{\hspace{4em}你的水印内容\hspace{4em}你的水印内容\hspace{4em}你的水印内容\\ \\ \\ \\} } % allow multiline contents \AddToHook{shipout/foreground}{ \begin{tikzpicture}[remember picture,overlay] \node(a)[cyan,rotate=45,scale=2.5,opacity=0.9,,xshift=-1.1cm,yshift=0cm] at (current page.center) {\bg@text}; \end{tikzpicture} } \makeatother % end watermark \begin{document} \lipsum[1-2] \begin{frame} \centering \includegraphics[width=3cm]{example-image-a} \end{frame} \lipsum[1] \end{document}水印的文字内容,文字大小,文字颜色和文字字体可以根据需要去调整。
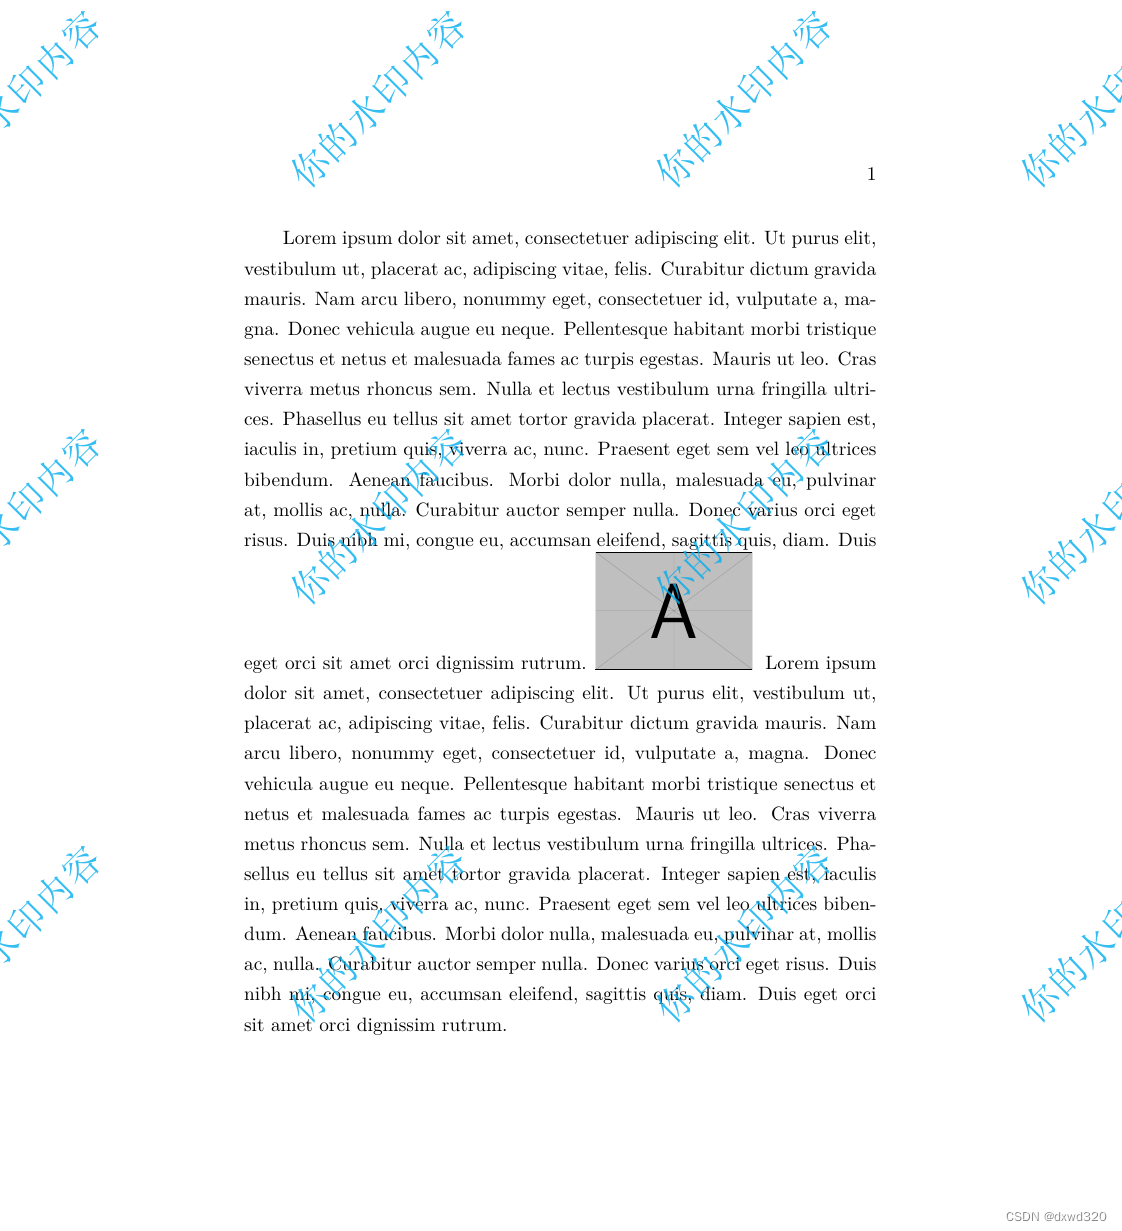
另一种实现方式: 采用偏移的方式,按设定的坐标,循环生成16个水印,可支持文字或图片水印。 \documentclass{ctexart} \usepackage{lipsum} %测试用,随机生成拉丁字母 % begin watermark \usepackage{tikz} % allow multiline contents \AddToHook{shipout/foreground}{ \begin{tikzpicture}[remember picture,overlay] \foreach \y in {-12, -4, 4, 12} { \foreach \x in {-10.5, -3.5, 3.5, 10.5} { \node[rotate=45,scale=2.0, opacity=0.8] at ([xshift=\x cm, yshift=\y cm] current page.center) %{\includegraphics[width=6cm]{inspur.png}}; %使用图片水印 {\color{cyan}你的水印内容}; %使用文字水印 } } \end{tikzpicture} } % end watermark \begin{document} \lipsum[1-1] \begin{frame} %插入测试图片 \centering \includegraphics[width=3cm]{example-image-a} \end{frame} \lipsum[1] \end{document}效果如下:
参考: LaTeX:使用tikz绘制简单带文字、阴影的矩形图形 来自 更进一步,在多页文档,想要实现首页不加水印,尾页不加水印,只有中间内容页加水印怎么办? 可参考如下代码: \documentclass{ctexart} \usepackage{lipsum} %测试用,随机生成拉丁字母 % begin watermark \usepackage{tikz} % allow multiline contents \newcommand\BackgroundPicture{ \begin{tikzpicture}[remember picture,overlay] \foreach \y in {-12, -4, 4, 12} { \foreach \x in {-10.5, -3.5, 3.5, 10.5} { \node[rotate=45,scale=1.0, opacity=0.8] at ([xshift=\x cm, yshift=\y cm] current page.center) %{\includegraphics[width=6cm]{inspur.png}}; %使用图片水印 {\color{cyan}你的水印内容}; %使用文字水印 } } \end{tikzpicture} } % end watermark \begin{document} \lipsum[1-2] \newpage \AddToHook{shipout/foreground}{\BackgroundPicture} \begin{frame} %插入测试图片 \centering \includegraphics[width=12cm]{example-image-a} \end{frame} \lipsum[1-1] \newpage \RemoveFromHook{shipout/foreground} \lipsum[1-2] \end{document}效果如下:
参考链接: LaTeX如何为页面添加水印? 来自 |

【本文地址】
公司简介
联系我们