| How to Transfer Photos from iPhone to PC | 您所在的位置:网站首页 › 康熙时期的货币值多少钱 › How to Transfer Photos from iPhone to PC |
How to Transfer Photos from iPhone to PC
|
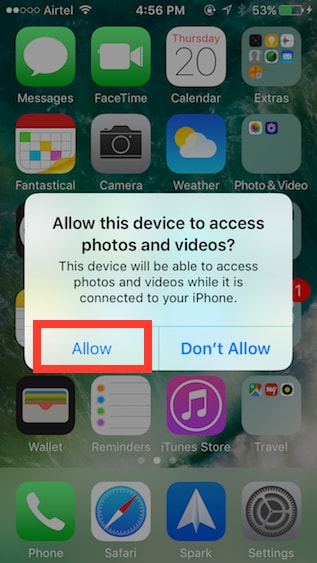
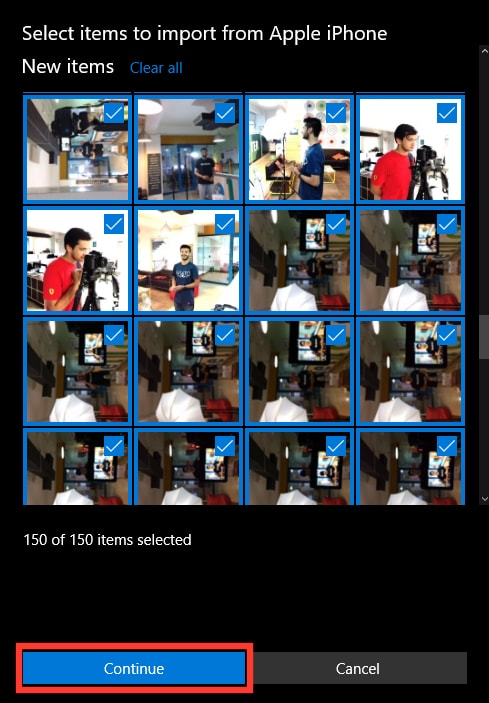
It is no secret that iPhones play extremely well with Macs. But not so much with PCs. So much so, that even the Windows version of iTunes pretty much blows. Also, by default, Apple doesn’t even allow users to transfer data from their iPhone over to their PC or Mac. So, what if you wanted to export iPhone pictures to your PC running Windows 10? Well, read this article and learn exactly how you can transfer iPhone photos to PC: Note: There are a number of ways to do this, and I will be telling you about the 5 best ones. I’m doing this using an iPhone running iOS 10, and Windows 10 without iTunes installed. 1. Windows’ Photos AppThe easiest method to do this, is to use the built-in Photos app on Windows. This app allows users to easily import photos from their iPhone onto their Windows PC. To do this, simply follow the steps below: Connect your iPhone to your Windows PC. On your iPhone, you will see a prompt asking whether your iPhone should allow the PC to access photos and videos, tap on “Allow”.
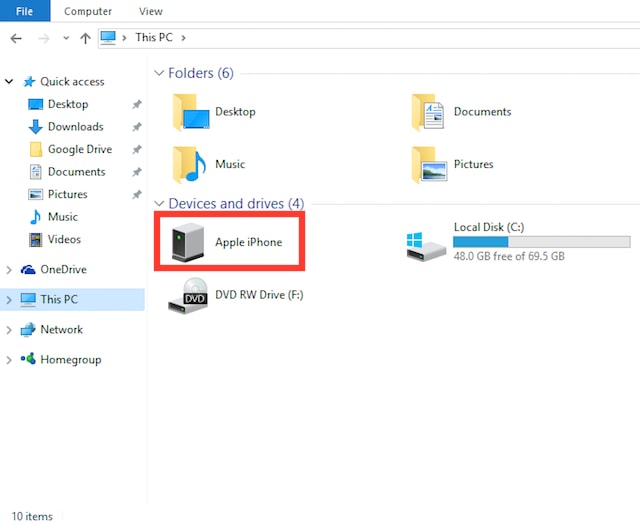
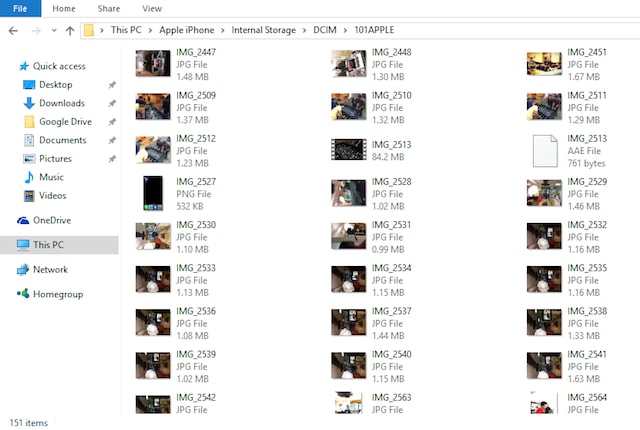
Your selected photos will now be imported on your Windows PC, thanks to the Photos app. If you don’t use the Photos app, or don’t have it on your PC, you can use one of the other four methods. 2. Windows ExplorerNo matter what version of Windows you’re using (seriously, stop using XP now), you obviously have the Windows Explorer. To use the Windows Explorer to import photos from your iPhone, you can simply follow the steps given below: Connect your iPhone to your Windows PC. On your iPhone, tap on “Allow”, when it prompts you to.
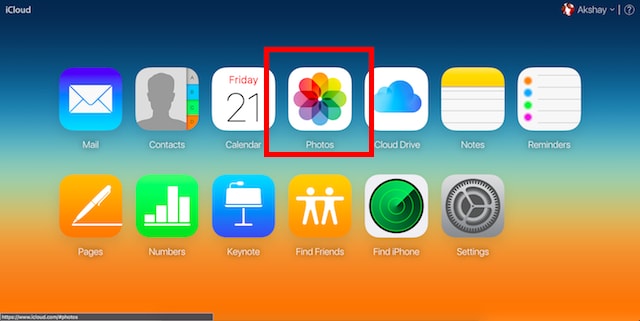
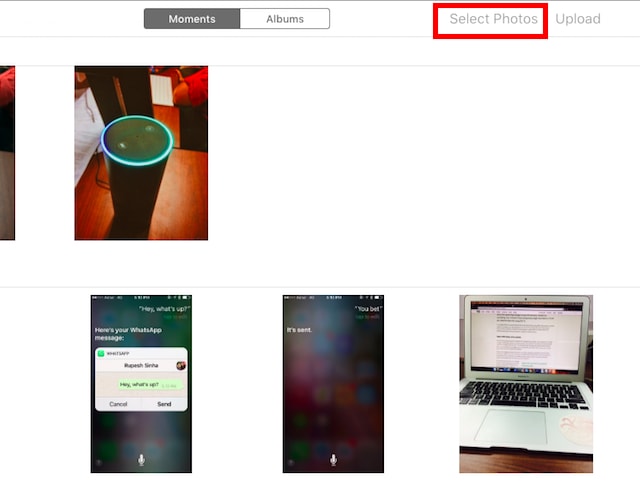
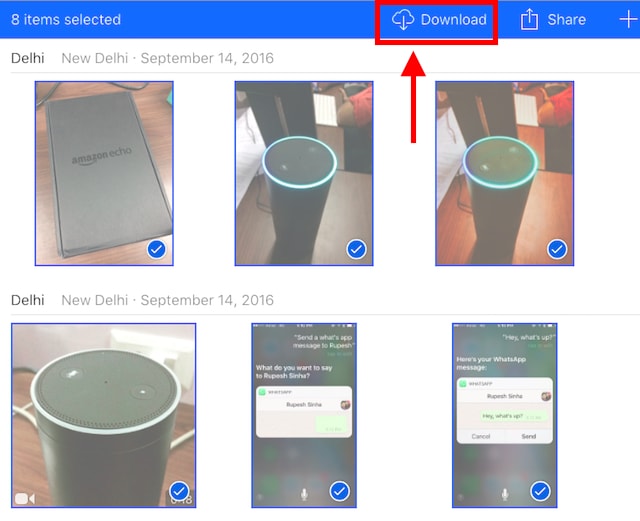
That’s basically all you need to do, to export photos from your iPhone into your Windows PC. 3. iCloud PhotosiPhones have this great feature called “iCloud Photo Library“, which automatically syncs all the images you take on your iPhone with your iCloud account. So, they are available on every device you have. If you haven’t enabled iCloud Photo Library, simply go to Settings -> Photos and Camera. Here, turn on “iCloud Photo Library”. Your photos will be uploaded to your iCloud account. Now that you’ve done that, and your photos have synced to iCloud, the rest is very easy. On your Windows PC, open up a browser window, and go to iCloud. Sign in with your Apple ID, and go to Photos.
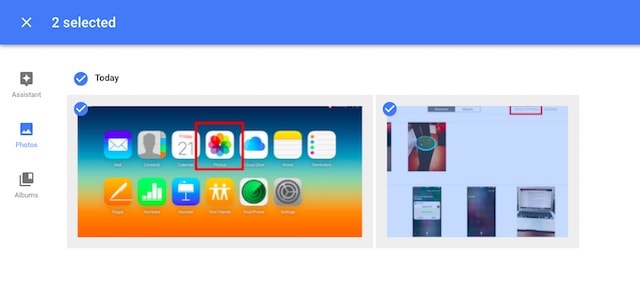
That’s it. All the photos you want to export will now be available on your PC. You can delete them from your iPhone if you wish. 4. Google PhotosIf you use Google Photos on your iPhone, you can easily use it to transfer photos to your Windows PC. If you want to use Google Photos to transfer photos to your Windows PC, simply follow the steps below: On your PC, go to the Google Photos web app. Here, select the photos that you want to download.
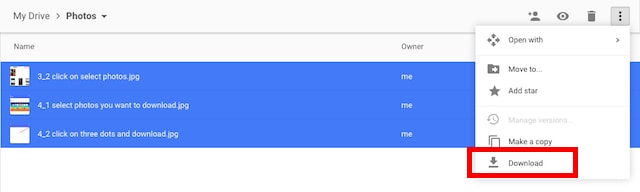
Your selected photos will then be downloaded onto your Windows PC. This is another fast way of transferring photos. 5. Google Drive or DropboxYou can also choose to use a cloud storage service in order to transfer your photos from your iPhone to your Windows PC. The best part about this is that you don’t need to have a PC running Windows 10, unlike the first method. To use Google Drive, or Dropbox to transfer photos, you can do the following: First, download the Google Drive, or Dropbox app on your iPhone. Then, upload your photos on to the cloud. Next, on your PC, open Google Drive, or Dropbox, and login with your account. You will see all your uploaded photos. Simply select the ones that you want to download, click on the three dots, and select “Download”.
The photos will then be downloaded to your Windows PC, and you can simply delete them off your iPhone, and free up some space, as well. Bonus: Use IFTTT Recipes to Automatically Upload PhotosIf you take a lot of pictures from your iPhone, and you like to back them all up on your Windows PC, or on Google Drive, or Dropbox, you can automate the task of uploading the photos to IFTTT. You can create a simple recipe to upload photos from your Camera Roll to Google Drive, or Dropbox. You can simply create a recipe that goes “If new photo is added to Camera Roll, then upload it to Dropbox“. To read about this recipe in detail, check out our article on IFTTT Recipes. SEE ALSO: 10 Best iTunes Alternatives Easily Transfer iPhone Photos to Windows PCAll of these methods should work just fine for transferring photos from an iPhone to your Windows PC. These methods will also work on a Mac, by the way, except for the Windows Photos, and Windows Explorer method (for obvious reasons). You can use any of these methods and as always, we would like to know if you faced any issues while using these. Also, if you know of any other, easier way to do this, you can let us know about it in the comments section below. TAGS DropboxfeaturedGoogle PhotosiCloudtransfer photos 4 Comments |

【本文地址】