| Cocos Creator | 您所在的位置:网站首页 › 割绳子里的人物怎么画 › Cocos Creator |
Cocos Creator
|
本文转载自微信公众号【 Cocos Creator 笔记】 ,作者:请容我安眠。Cocos 忠实爱好者一枚,日常会在个人公众号中分享一些引擎使用技巧和开发经验,旨在交流学习。
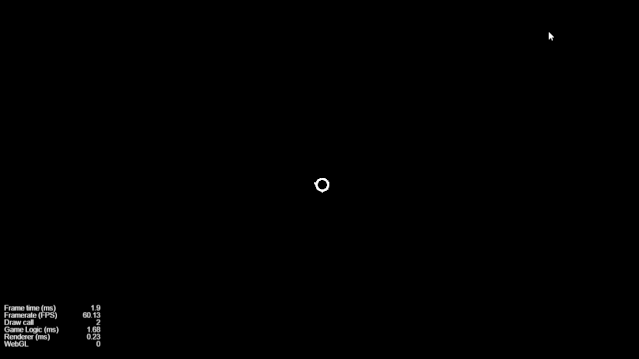
今天带来的分享是 如何在 Cocos Creator 中 制作自由/约束的绳索效果 我使用的是 Cocos Creator v2.2.1 以下是绳索效果的演示预览: 演示 自由:
约束:
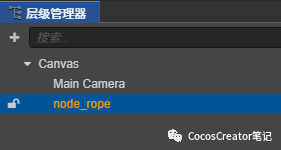
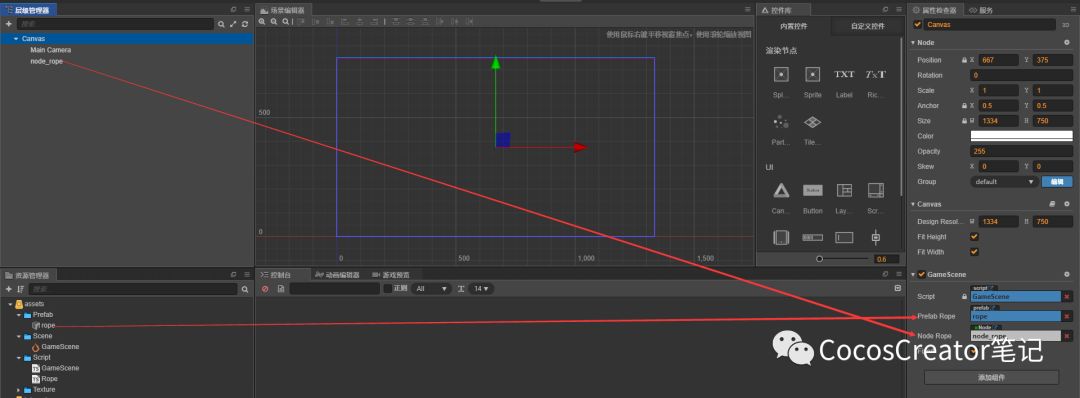
源码地址:https://gitee.com/Valiancer/Rope 实现 首先了解下什么是正向动力学/反向动力学: 角色动画中的骨骼运动遵循动力学原理,定位和动画骨骼包括两种类型的动力学:正向动力学( FK )和反向动力学( IK ) 正向动力学:是指完全遵循父子关系的层级,用父层级带动子层级的运动 反向动力学:一种通过先确定子骨骼的位置,然后反求 推导出其所在骨骼链上n级父骨骼位置,从而确定整条骨骼链的方法 01 在层级管理器中 Canvas 下新建节点,用来做绘制的容器:
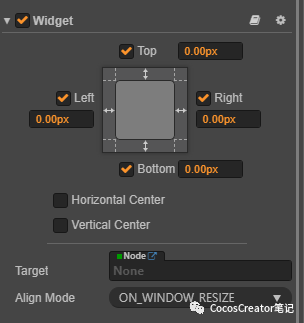
tips : Widget (对齐挂件) 是一个很常用的 UI 布局组件。它能使当前节点自动对齐到父物体的任意位置,或者约束尺寸,让你的游戏可以方便地适配不同的分辨率: https://docs.cocos.com/creator/manual/zh/components/widget.html 我们要在整个屏幕上绘制绳索,所以在刚创建的节点添加 Widget 组件,这样无论在什么分辨率的设备上,该节点都会铺满整个屏幕:
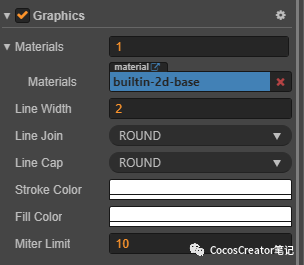
tips : Graphics 组件提供了一系列绘画接口,这些接口参考了 canvas 的绘画接口来进行实现: https://docs.cocos.com/creator/manual/zh/components/graphics.html 接下来添加绘画必不可少的 Graphics 组件,可以根据喜好自定义样式:
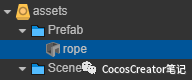
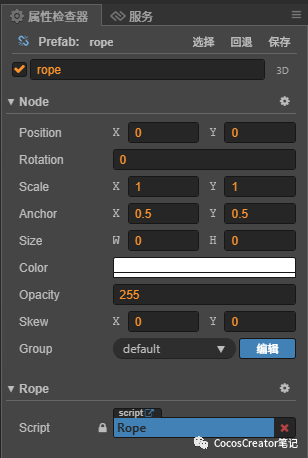
tips : 预制资源( Prefab ):https://docs.cocos.com/creator/manual/zh/asset-workflow/prefab.html 绳索是由很多节点构成的,所以把节点做成预制件可以更方便的使用和管理:
这里的绳索节点非常简单,只需挂载一个 Rope 脚本:
Rope 脚本中主要计算自身节点和目标节点的坐标 根据目标节点坐标算出自身节点坐标: calcSelf(ptTarget: cc.Vec2) { let dir = ptTarget.sub(this._ptSelf).normalizeSelf(); this._angle = Math.atan2(dir.y, dir.x); dir = dir.mul(-1 * this._length); this._ptSelf = ptTarget.add(dir); this.node.position = this._ptSelf; }根据自身节点坐标算出目标节点坐标: calcTarget() { let dx = this._length * Math.cos(this._angle); let dy = this._length * Math.sin(this._angle); this._ptTarget = cc.v2(this._ptSelf.x + dx, this._ptSelf.y + dy); }02 在游戏脚本中声明变量,并将对应的节点拖拽到相应位置: @property(cc.Prefab) prefabRope: cc.Prefab = null; @property(cc.Node) nodeRope: cc.Node = null; @property() fixed: boolean = false;
注册监听事件: this.node.on("touchstart", this.onTouchMove, this); this.node.on("touchmove", this.onTouchMove, this); this.node.on("touchend", this.onTouchEnd, this);关闭监听事件: onDestroy() { this.node.off("touchstart", this.onTouchMove, this); this.node.off("touchmove", this.onTouchMove, this); this.node.off("touchend", this.onTouchEnd, this); }初始化绳索节点,可以自定义节点的长度和角度,也可以声明变量,由编辑器控制,将所有的节点放到 _arrayRope 数组中: let length = 12; let angle = 0; for (let index = 0; index = 0; index--) { let script = this._arrayRope[index].getComponent(Rope); if (index == this._arrayRope.length - 1) { script.calcSelf(this._touchLocation); } else { let last = this._arrayRope[index + 1].getComponent(Rope); script.calcSelf(last.getSelfPoint()); } script.calcTarget(); }想要约束根节点的话,只需要设定根节点的坐标后,再根据之前算出的各节点坐标,依次求出子节点坐标(正向动力学): this._arrayRope[0].getComponent(Rope).setSelfPoint(cc.Vec2.ZERO); this._arrayRope[0].getComponent(Rope).calcTarget(); for (let index = 1; index |

【本文地址】