| 前端手册 | 您所在的位置:网站首页 › vnw前端u › 前端手册 |
前端手册
|
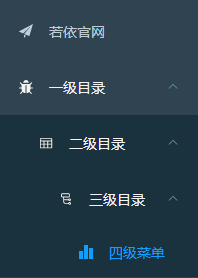
# 前端手册 # 通用方法 # $tab对象 $tab对象用于做页签操作、刷新页签、关闭页签、打开页签、修改页签等,它定义在plugins/tab.js文件中,它有如下方法 打开页签 this.$tab.openPage("用户管理", "/system/user"); this.$tab.openPage("用户管理", "/system/user").then(() => { // 执行结束的逻辑 }) 12345修改页签 const obj = Object.assign({}, this.$route, { title: "自定义标题" }) this.$tab.updatePage(obj); this.$tab.updatePage(obj).then(() => { // 执行结束的逻辑 }) 123456关闭页签 // 关闭当前tab页签,打开新页签 const obj = { path: "/system/user" }; this.$tab.closeOpenPage(obj); // 关闭当前页签,回到首页 this.$tab.closePage(); // 关闭指定页签 const obj = { path: "/system/user", name: "User" }; this.$tab.closePage(obj); this.$tab.closePage(obj).then(() => { // 执行结束的逻辑 }) 1234567891011121314刷新页签 // 刷新当前页签 this.$tab.refreshPage(); // 刷新指定页签 const obj = { path: "/system/user", name: "User" }; this.$tab.refreshPage(obj); this.$tab.refreshPage(obj).then(() => { // 执行结束的逻辑 }) 12345678910关闭所有页签 this.$tab.closeAllPage(); this.$tab.closeAllPage().then(() => { // 执行结束的逻辑 }) 12345关闭左侧页签 this.$tab.closeLeftPage(); const obj = { path: "/system/user", name: "User" }; this.$tab.closeLeftPage(obj); this.$tab.closeLeftPage(obj).then(() => { // 执行结束的逻辑 }) 12345678关闭右侧页签 this.$tab.closeRightPage(); const obj = { path: "/system/user", name: "User" }; this.$tab.closeRightPage(obj); this.$tab.closeRightPage(obj).then(() => { // 执行结束的逻辑 }) 12345678关闭其他tab页签 this.$tab.closeOtherPage(); const obj = { path: "/system/user", name: "User" }; this.$tab.closeOtherPage(obj); this.$tab.closeOtherPage(obj).then(() => { // 执行结束的逻辑 }) 12345678# $modal对象$modal对象用于做消息提示、通知提示、对话框提醒、二次确认、遮罩等,它定义在plugins/modal.js文件中,它有如下方法 提供成功、警告和错误等反馈信息 this.$modal.msg("默认反馈"); this.$modal.msgError("错误反馈"); this.$modal.msgSuccess("成功反馈"); this.$modal.msgWarning("警告反馈"); 1234提供成功、警告和错误等提示信息 this.$modal.alert("默认提示"); this.$modal.alertError("错误提示"); this.$modal.alertSuccess("成功提示"); this.$modal.alertWarning("警告提示"); 1234提供成功、警告和错误等通知信息 this.$modal.notify("默认通知"); this.$modal.notifyError("错误通知"); this.$modal.notifySuccess("成功通知"); this.$modal.notifyWarning("警告通知"); 1234提供确认窗体信息 this.$modal.confirm('确认信息').then(function() { ... }).then(() => { ... }).catch(() => {}); 12345提供遮罩层信息 // 打开遮罩层 this.$modal.loading("正在导出数据,请稍后..."); // 关闭遮罩层 this.$modal.closeLoading(); 12345# $auth对象$auth对象用于验证用户是否拥有某(些)权限或角色,它定义在plugins/auth.js文件中,它有如下方法 验证用户权限 // 验证用户是否具备某权限 this.$auth.hasPermi("system:user:add"); // 验证用户是否含有指定权限,只需包含其中一个 this.$auth.hasPermiOr(["system:user:add", "system:user:update"]); // 验证用户是否含有指定权限,必须全部拥有 this.$auth.hasPermiAnd(["system:user:add", "system:user:update"]); 123456验证用户角色 // 验证用户是否具备某角色 this.$auth.hasRole("admin"); // 验证用户是否含有指定角色,只需包含其中一个 this.$auth.hasRoleOr(["admin", "common"]); // 验证用户是否含有指定角色,必须全部拥有 this.$auth.hasRoleAnd(["admin", "common"]); 123456# $cache对象$cache对象用于处理缓存。我们并不建议您直接使用sessionStorage或localStorage,因为项目的缓存策略可能发生变化,通过$cache对象做一层调用代理则是一个不错的选择。$cache提供session和local两种级别的缓存,如下: 对象名称 缓存类型 session 会话级缓存,通过sessionStorage实现 local 本地级缓存,通过localStorage实现示例 // local 普通值 this.$cache.local.set('key', 'local value') console.log(this.$cache.local.get('key')) // 输出'local value' // session 普通值 this.$cache.session.set('key', 'session value') console.log(this.$cache.session.get('key')) // 输出'session value' // local JSON值 this.$cache.local.setJSON('jsonKey', { localProp: 1 }) console.log(this.$cache.local.getJSON('jsonKey')) // 输出'{localProp: 1}' // session JSON值 this.$cache.session.setJSON('jsonKey', { sessionProp: 1 }) console.log(this.$cache.session.getJSON('jsonKey')) // 输出'{sessionProp: 1}' // 删除值 this.$cache.local.remove('key') this.$cache.session.remove('key') 12345678910111213141516171819# $download对象$download对象用于文件下载,它定义在plugins/download.js文件中,它有如下方法 根据名称下载download路径下的文件 const name = "be756b96-c8b5-46c4-ab67-02e988973090.xlsx"; const isDelete = true; // 默认下载方法 this.$download.name(name); // 下载完成后是否删除文件 this.$download.name(name, isDelete); 12345678根据名称下载upload路径下的文件 const resource = "/profile/upload/2021/09/27/be756b96-c8b5-46c4-ab67-02e988973090.png"; // 默认方法 this.$download.resource(resource); 1234根据请求地址下载zip包 const url = "/tool/gen/batchGenCode?tables=" + tableNames; const name = "ruoyi"; // 默认方法 this.$download.zip(url, name); 12345更多文件下载操作 // 自定义文本保存 var blob = new Blob(["Hello, world!"], {type: "text/plain;"}); this.$download.saveAs(blob, "hello world.txt"); // 自定义文件保存 var file = new File(["Hello, world!"], "hello world.txt", {type: "text/plain;charset=utf-8"}); this.$download.saveAs(file); // 自定义data数据保存 const blob = new Blob([data], { type: 'text/plain;charset=utf-8' }) this.$download.saveAs(blob, name) // 根据地址保存文件 this.$download.saveAs("https://ruoyi.vip/images/logo.png", "logo.jpg"); 1234567891011121314# 开发规范 # 新增 view在 @/views (opens new window) 文件下 创建对应的文件夹,一般性一个路由对应一个文件, 该模块下的功能就建议在本文件夹下创建一个新文件夹,各个功能模块维护自己的utils或components组件。 # 新增 api在 @/api (opens new window) 文件夹下创建本模块对应的 api 服务。 # 新增组件在全局的 @/components (opens new window) 写一些全局的组件,如富文本,各种搜索组件,封装的分页组件等等能被公用的组件。 每个页面或者模块特定的业务组件则会写在当前 @/views (opens new window) 下面。 如:@/views/system/user/components/xxx.vue。这样拆分大大减轻了维护成本。 # 新增样式页面的样式和组件是一个道理,全局的 @/style (opens new window) 放置一下全局公用的样式,每一个页面的样式就写在当前 views下面,请记住加上scoped 就只会作用在当前组件内了,避免造成全局的样式污染。 /* 编译前 */ .example { color: red; } /* 编译后 */ .example[_v-f3f3eg9] { color: red; } 123456789# 请求流程 # 交互流程一个完整的前端 UI 交互到服务端处理流程是这样的: UI 组件交互操作; 调用统一管理的 api service 请求函数; 使用封装的 request.js 发送请求; 获取服务端返回; 更新 data;为了方便管理维护,统一的请求处理都放在 @/src/api (opens new window) 文件夹中,并且一般按照 model 维度进行拆分文件,如: api/ system/ user.js role.js monitor/ operlog.js logininfor.js ... 12345678提示 其中,@/src/utils/request.js (opens new window) 是基于 axios 的封装,便于统一处理 POST,GET 等请求参数,请求头,以及错误提示信息等。 它封装了全局request拦截器、response拦截器、统一的错误处理、统一做了超时处理、baseURL设置等。 # 请求示例 // api/system/user.js import request from '@/utils/request' // 查询用户列表 export function listUser(query) { return request({ url: '/system/user/list', method: 'get', params: query }) } // views/system/user/index.vue import { listUser } from "@/api/system/user"; export default { data() { userList: null, loading: true }, methods: { getList() { this.loading = true listUser().then(response => { this.userList = response.rows this.loading = false }) } } } 123456789101112131415161718192021222324252627282930提示 如果有不同的baseURL,直接通过覆盖的方式,让它具有不同的baseURL。 export function listUser(query) { return request({ url: '/system/user/list', method: 'get', params: query, baseURL: process.env.BASE_API }) } 12345678 # 引入依赖除了 element-ui 组件以及脚手架内置的业务组件,有时我们还需要引入其他外部组件,这里以引入 vue-count-to (opens new window) 为例进行介绍。 在终端输入下面的命令完成安装: $ npm install vue-count-to --save 1加上 --save 参数会自动添加依赖到 package.json 中去。 # 路由使用框架的核心是通过路由自动生成对应导航,所以除了路由的基本配置,还需要了解框架提供了哪些配置项。 # 路由配置 // 当设置 true 的时候该路由不会在侧边栏出现 如401,login等页面,或者如一些编辑页面/edit/1 hidden: true // (默认 false) //当设置 noRedirect 的时候该路由在面包屑导航中不可被点击 redirect: 'noRedirect' // 当你一个路由下面的 children 声明的路由大于1个时,自动会变成嵌套的模式--如组件页面 // 只有一个时,会将那个子路由当做根路由显示在侧边栏--如引导页面 // 若你想不管路由下面的 children 声明的个数都显示你的根路由 // 你可以设置 alwaysShow: true,这样它就会忽略之前定义的规则,一直显示根路由 alwaysShow: true name: 'router-name' // 设定路由的名字,一定要填写不然使用时会出现各种问题 query: '{"id": 1, "name": "ry"}' // 访问路由的默认传递参数 roles: ['admin', 'common'] // 访问路由的角色权限 permissions: ['a:a:a', 'b:b:b'] // 访问路由的菜单权限 meta: { title: 'title' // 设置该路由在侧边栏和面包屑中展示的名字 icon: 'svg-name' // 设置该路由的图标,支持 svg-class,也支持 el-icon-x element-ui 的 icon noCache: true // 如果设置为true,则不会被 缓存(默认 false) breadcrumb: false // 如果设置为false,则不会在breadcrumb面包屑中显示(默认 true) affix: true // 如果设置为true,它则会固定在tags-view中(默认 false) // 当路由设置了该属性,则会高亮相对应的侧边栏。 // 这在某些场景非常有用,比如:一个文章的列表页路由为:/article/list // 点击文章进入文章详情页,这时候路由为/article/1,但你想在侧边栏高亮文章列表的路由,就可以进行如下设置 activeMenu: '/article/list' } 1234567891011121314151617181920212223242526272829普通示例 { path: '/system/test', component: Layout, redirect: 'noRedirect', hidden: false, alwaysShow: true, meta: { title: '系统管理', icon : "system" }, children: [{ path: 'index', component: (resolve) => require(['@/views/index'], resolve), name: 'Test', meta: { title: '测试管理', icon: 'user' } }] } 1234567891011121314151617外链示例 { path: 'http://ruoyi.vip', meta: { title: '若依官网', icon : "guide" } } 1234# 静态路由代表那些不需要动态判断权限的路由,如登录页、404、等通用页面,在@/router/index.js (opens new window)配置对应的公共路由。 # 动态路由代表那些需要根据用户动态判断权限并通过addRoutes动态添加的页面,在@/store/modules/permission.js (opens new window)加载后端接口路由配置。 提示 动态路由可以在系统管理-菜单管理进行新增和修改操作,前端加载会自动请求接口获取菜单信息并转换成前端对应的路由。 动态路由在生产环境下会默认使用路由懒加载,实现方式参考loadView方法的判断。 # 常用方法想要跳转到不同的页面,使用router.push方法 this.$router.push({ path: "/system/user" }); 1跳转页面并设置请求参数,使用query属性 this.$router.push({ path: "/system/user", query: {id: "1", name: "若依"} }); 1更多使用可以参考vue-router (opens new window)官方文档。 # 组件使用vue 注册组件的两种方式 # 局部注册在对应页使用components注册组件。 import countTo from 'vue-count-to'; export default { components: { countTo }, data () { return { startVal: 0, endVal: 2020 } } } 12345678910111213141516# 全局注册在 @/main.js (opens new window) 文件下注册组件。 import countTo from 'vue-count-to' Vue.component('countTo', countTo) 12 123# 创建使用可以通过创建一个后缀名为vue的文件,在通过components进行注册即可。 例如定义一个a.vue文件 这是a组件 1234在其他组件中导入并注册 测试页面 import a from "./a"; export default { components: { testa: a } }; 1234567891011121314# 组件通信通过props来接收外界传递到组件内部的值 测试页面 import a from "./a"; export default { components: { testa: a }, data() { return { name: "若依" }; }, }; 这是a组件 name:{{ name }} export default { props: { name: { type: String, default: "" }, } }; 1234567891011121314151617181920212223242526272829303132333435使用$emit监听子组件触发的事件 测试页面 子组件传来的值 : {{ message }} import a from "./a"; export default { components: { testa: a }, data() { return { name: "若依", message: "" }; }, methods: { ok(message) { this.message = message; }, }, }; 这是a组件 name:{{ name }} 发送 export default { props: { name: { type: String, default: "" }, }, data() { return { message: "我是来自子组件的消息" }; }, methods: { click() { this.$emit("ok", this.message); }, }, }; 12345678910111213141516171819202122232425262728293031323334353637383940414243444546474849505152535455 # 权限使用封装了一个指令权限,能简单快速的实现按钮级别的权限判断。v-permission (opens new window) 使用权限字符串 v-hasPermi // 单个 存在权限字符串才能看到 // 多个 包含权限字符串才能看到 1234使用角色字符串 v-hasRole // 单个 管理员才能看到 // 多个 包含角色才能看到 1234提示 在某些情况下,它是不适合使用v-hasPermi,如元素标签组件,只能通过手动设置v-if。 可以使用全局权限判断函数,用法和指令 v-hasPermi 类似。 用户管理 参数管理 角色管理 定时任务 import { checkPermi, checkRole } from "@/utils/permission"; // 权限判断函数 export default{ methods: { checkPermi, checkRole } } 12345678910111213141516171819前端有了鉴权后端还需要鉴权吗? 前端的鉴权只是一个辅助功能,对于专业人员这些限制都是可以轻松绕过的,为保证服务器安全,无论前端是否进行了权限校验,后端接口都需要对会话请求再次进行权限校验! # 多级目录如果你的路由是多级目录,有三级路由嵌套的情况下,还需要手动在二级目录的根文件下添加一个 。 如:@/views/system/log/index.vue (opens new window),原则上有多少级路由嵌套就需要多少个。
提示 最新版本多级目录已经支持自动配置组件,无需添加。 # 页签缓存由于目前 keep-alive 和 router-view 是强耦合的,而且查看文档和源码不难发现 keep-alive 的 include (opens new window) 默认是优先匹配组件的 name ,所以在编写路由 router 和路由对应的 view component 的时候一定要确保 两者的 name 是完全一致的。(切记 name 命名时候尽量保证唯一性 切记不要和某些组件的命名重复了,不然会递归引用最后内存溢出等问题) DEMO: //router 路由声明 { path: 'config', component: ()=>import('@/views/system/config/index'), name: 'Config', meta: { title: '参数设置', icon: 'edit' } } 1234567//路由对应的view system/config/index export default { name: 'Config' } 1234一定要保证两者的名字相同,切记写重或者写错。默认如果不写 name 就不会被缓存,详情见issue (opens new window)。 提示 在系统管理-菜单管理-可以配置菜单页签是否缓存,默认为缓存 # 使用图标全局 Svg Icon 图标组件。 默认在 @/icons/index.js (opens new window) 中注册到全局中,可以在项目中任意地方使用。所以图标均可在 @/icons/svg (opens new window)。可自行添加或者删除图标,所以图标都会被自动导入,无需手动操作。 # 使用方式 12# 改变颜色svg-icon 默认会读取其父级的 color fill: currentColor; 你可以改变父级的color或者直接改变fill的颜色即可。 提示 如果你是从 iconfont (opens new window)下载的图标,记得使用如 Sketch 等工具规范一下图标的大小问题,不然可能会造成项目中的图标大小尺寸不统一的问题。 本项目中使用的图标都是 128*128 大小规格的。 # 使用字典字典管理是用来维护数据类型的数据,如下拉框、单选按钮、复选框、树选择的数据,方便系统管理员维护。主要功能包括:字典分类管理、字典数据管理 大于3.7.0版本使用如下方法 1、main.js中引入全局变量和方法(已有) import DictData from '@/components/DictData' DictData.install() 122、加载数据字典,可以是多个。 export default { dicts: ['字典类型'], ... ... 12343、读取数据字典 1234564、翻译数据字典 // 字典标签组件翻译 // 自定义方法翻译 {{ xxxxFormat(form) }} xxxxFormat(row, column) { return this.selectDictLabel(this.dict.type.字典类型, row.name); }, 12345678910111213小于3.7.0版本使用如下方法 1、main.js中引入全局变量和方法(已有) import { getDicts } from "@/api/system/dict/data"; Vue.prototype.getDicts = getDicts 122、加载数据字典 export default { data() { return { xxxxxOptions: [], ..... ... created() { this.getDicts("字典类型").then(response => { this.xxxxxOptions = response.data; }); }, 1234567891011123、读取数据字典 1234564、翻译数据字典 // 字典标签组件翻译 // 自定义方法翻译 {{ xxxxFormat(form) }} xxxxFormat(row, column) { return this.selectDictLabel(this.xxxxxOptions, row.name); }, 12345678910111213# 使用参数参数设置是提供开发人员、实施人员的动态系统配置参数,不需要去频繁修改后台配置文件,也无需重启服务器即可生效。 1、main.js中引入全局变量和方法(已有) import { getConfigKey } from "@/api/system/config"; Vue.prototype.getConfigKey = getConfigKey 122、页面使用参数 this.getConfigKey("参数键名").then(response => { this.xxxxx = response.msg; }); 123# 异常处理@/utils/request.js 是基于 axios 的封装,便于统一处理 POST,GET 等请求参数,请求头,以及错误提示信息等。它封装了全局 request拦截器、response拦截器、统一的错误处理、统一做了超时处理、baseURL设置等。 如果有自定义错误码可以在errorCode.js中设置对应key value值。 import axios from 'axios' import { Notification, MessageBox, Message } from 'element-ui' import store from '@/store' import { getToken } from '@/utils/auth' import errorCode from '@/utils/errorCode' import { tansParams } from "@/utils/ruoyi"; axios.defaults.headers['Content-Type'] = 'application/json;charset=utf-8' // 创建axios实例 const service = axios.create({ // axios中请求配置有baseURL选项,表示请求URL公共部分 baseURL: process.env.VUE_APP_BASE_API, // 超时 timeout: 10000 }) // request拦截器 service.interceptors.request.use(config => { // 是否需要设置 token const isToken = (config.headers || {}).isToken === false if (getToken() && !isToken) { config.headers['Authorization'] = 'Bearer ' + getToken() // 让每个请求携带自定义token 请根据实际情况自行修改 } return config }, error => { console.log(error) Promise.reject(error) }) // 响应拦截器 service.interceptors.response.use(res => { // 未设置状态码则默认成功状态 const code = res.data.code || 200; // 获取错误信息 const msg = errorCode[code] || res.data.msg || errorCode['default'] if (code === 401) { MessageBox.confirm('登录状态已过期,您可以继续留在该页面,或者重新登录', '系统提示', { confirmButtonText: '重新登录', cancelButtonText: '取消', type: 'warning' } ).then(() => { store.dispatch('LogOut').then(() => { location.href = '/index'; }) }) } else if (code === 500) { Message({ message: msg, type: 'error' }) return Promise.reject(new Error(msg)) } else if (code !== 200) { Notification.error({ title: msg }) return Promise.reject('error') } else { return res.data } }, error => { console.log('err' + error) let { message } = error; if (message == "Network Error") { message = "后端接口连接异常"; } else if (message.includes("timeout")) { message = "系统接口请求超时"; } else if (message.includes("Request failed with status code")) { message = "系统接口" + message.substr(message.length - 3) + "异常"; } Message({ message: message, type: 'error', duration: 5 * 1000 }) return Promise.reject(error) } ) // 通用下载方法 export function download(url, params, filename) { return service.post(url, params, { transformRequest: [(params) => { return tansParams(params) }], responseType: 'blob' }).then((data) => { const content = data const blob = new Blob([content]) if ('download' in document.createElement('a')) { const elink = document.createElement('a') elink.download = filename elink.style.display = 'none' elink.href = URL.createObjectURL(blob) document.body.appendChild(elink) elink.click() URL.revokeObjectURL(elink.href) document.body.removeChild(elink) } else { navigator.msSaveBlob(blob, filename) } }).catch((r) => { console.error(r) }) } export default service 123456789101112131415161718192021222324252627282930313233343536373839404142434445464748495051525354555657585960616263646566676869707172737475767778798081828384858687888990919293949596979899100101102103104105106107108109提示 如果有些不需要传递token的请求,可以设置headers中的属性isToken为false export function login(username, password, code, uuid) { return request({ url: 'xxxx', headers: { isToken: false, // 可以自定义 Authorization // 'Authorization': 'Basic d2ViOg==' }, method: 'get' }) } 1234567891011 # 应用路径有些特殊情况需要部署到子路径下,例如:https://www.ruoyi.vip/admin,可以按照下面流程修改。 1、修改vue.config.js中的publicPath属性 publicPath: process.env.NODE_ENV === "production" ? "/admin/" : "/admin/", 12、修改router/index.js,添加一行base属性 export default new Router({ base: "/admin", mode: 'history', // 去掉url中的# scrollBehavior: () => ({ y: 0 }), routes: constantRoutes }) 1234563、/index路由添加获取子路径/admin 修改layout/components/Navbar.vue中的location.href location.href = '/admin/index'; 1修改utils/request.js中的location.href location.href = '/admin/index'; 14、修改nginx配置 location /admin { alias /home/ruoyi/projects/ruoyi-ui; try_files $uri $uri/ /admin/index.html; index index.html index.htm; } 12345打开浏览器,输入:https://www.ruoyi.vip/admin 能正常访问和刷新表示成功。 # 内容复制如果要使用复制功能可以使用指令v-clipboard,示例代码。 复制 12345参数 说明 v-clipboard:copy 需要复制的内容 v-clipboard:cat 需要剪贴的内容 v-clipboard:success 复制成功处理函数 clipboard:error 复制失败处理函数← 后台手册 组件文档 → |
【本文地址】