| A UIPageViewController Tutorial for Swift | 您所在的位置:网站首页 › uipageviewcontroller循环 › A UIPageViewController Tutorial for Swift |
A UIPageViewController Tutorial for Swift
|
UIPageViewController is a powerful class used by nine out of ten of the mobile apps you will ever come across. Many apps use it for feature lists and/or tips on getting started. In this post, I will show you how incredibly easy it is to make a UIPageViewController tutorial.
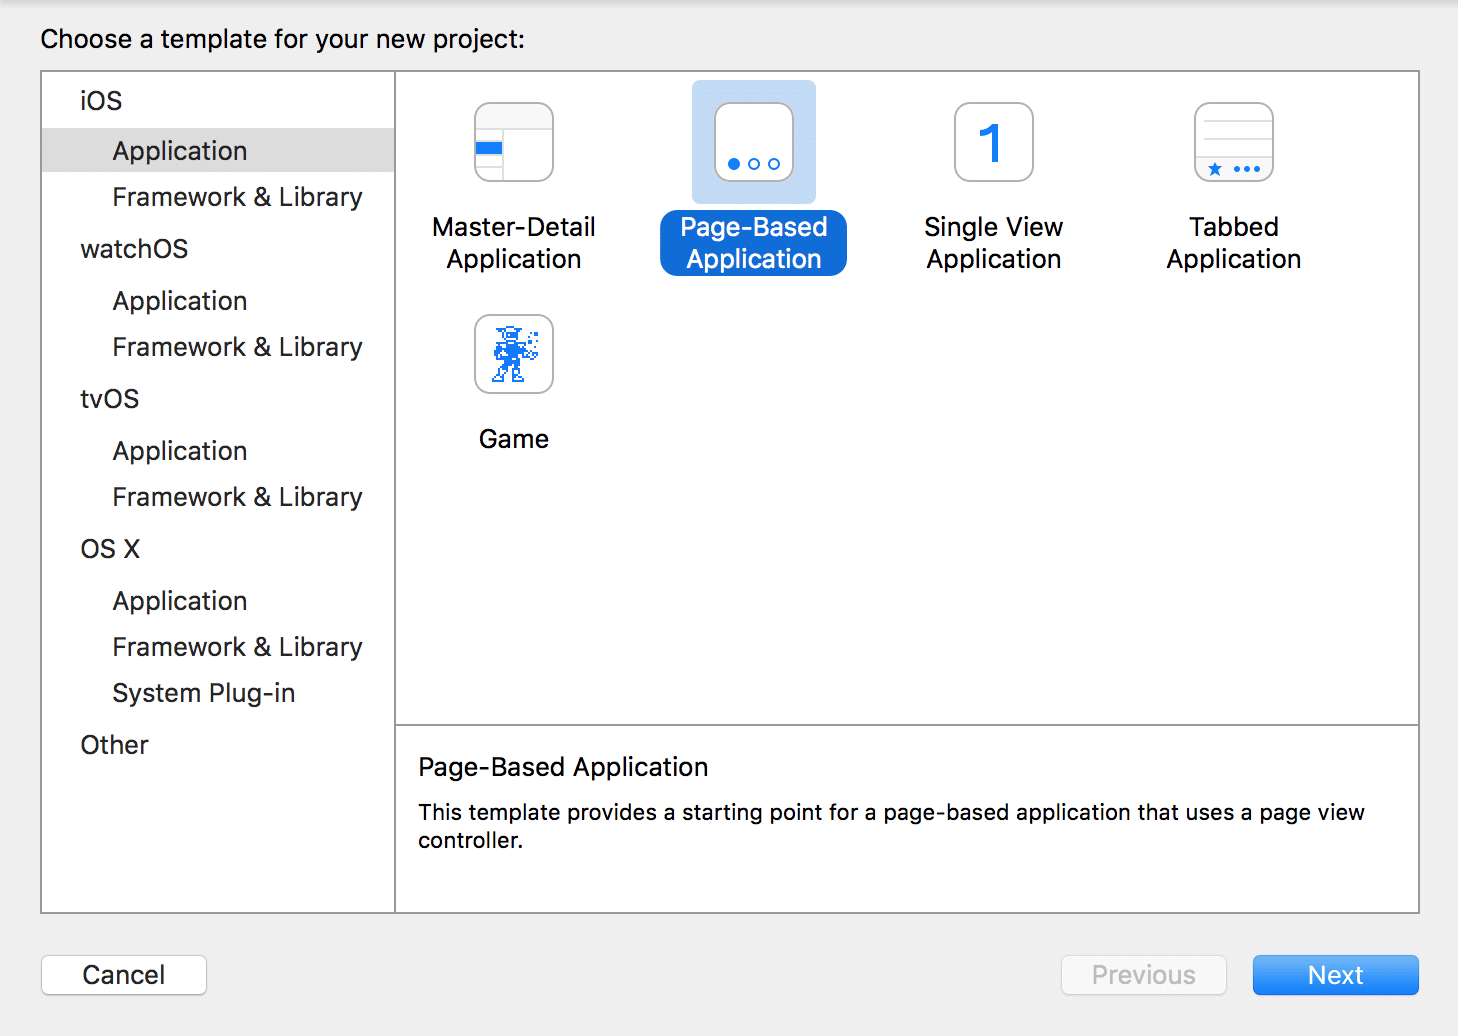
To start, let’s create a new application. It doesn’t matter which type you select, since we’re going to start with a clean slate anyway. Select a product name and be sure to select Swift for the language.
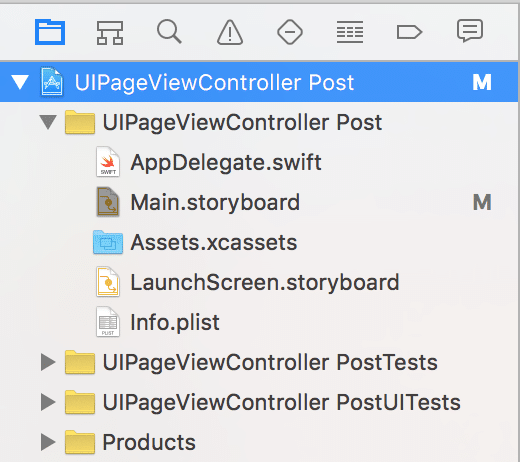
Remove all of the auto-generated files besides the ones listed.
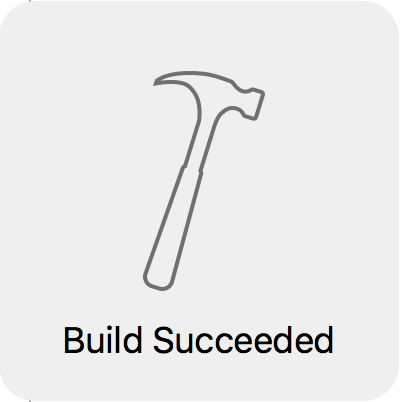
Now remove all of the objects in Main.storyboard. If you did everything right, building the project (Cmd + b) should succeed.
Next, inside Main.storyboard, add a new Page View Controller object to the canvas.
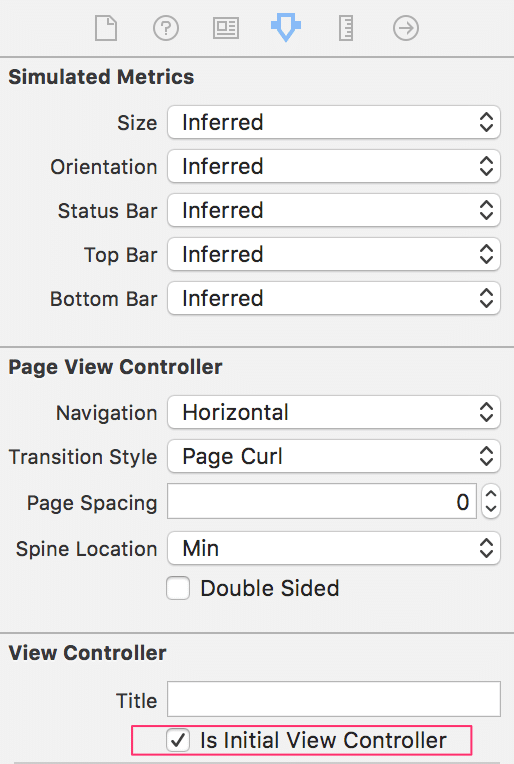
Make sure to set the new UIPageViewController object as the initial view controller in the attributes inspector. That way, it will be initialized when the app launches.
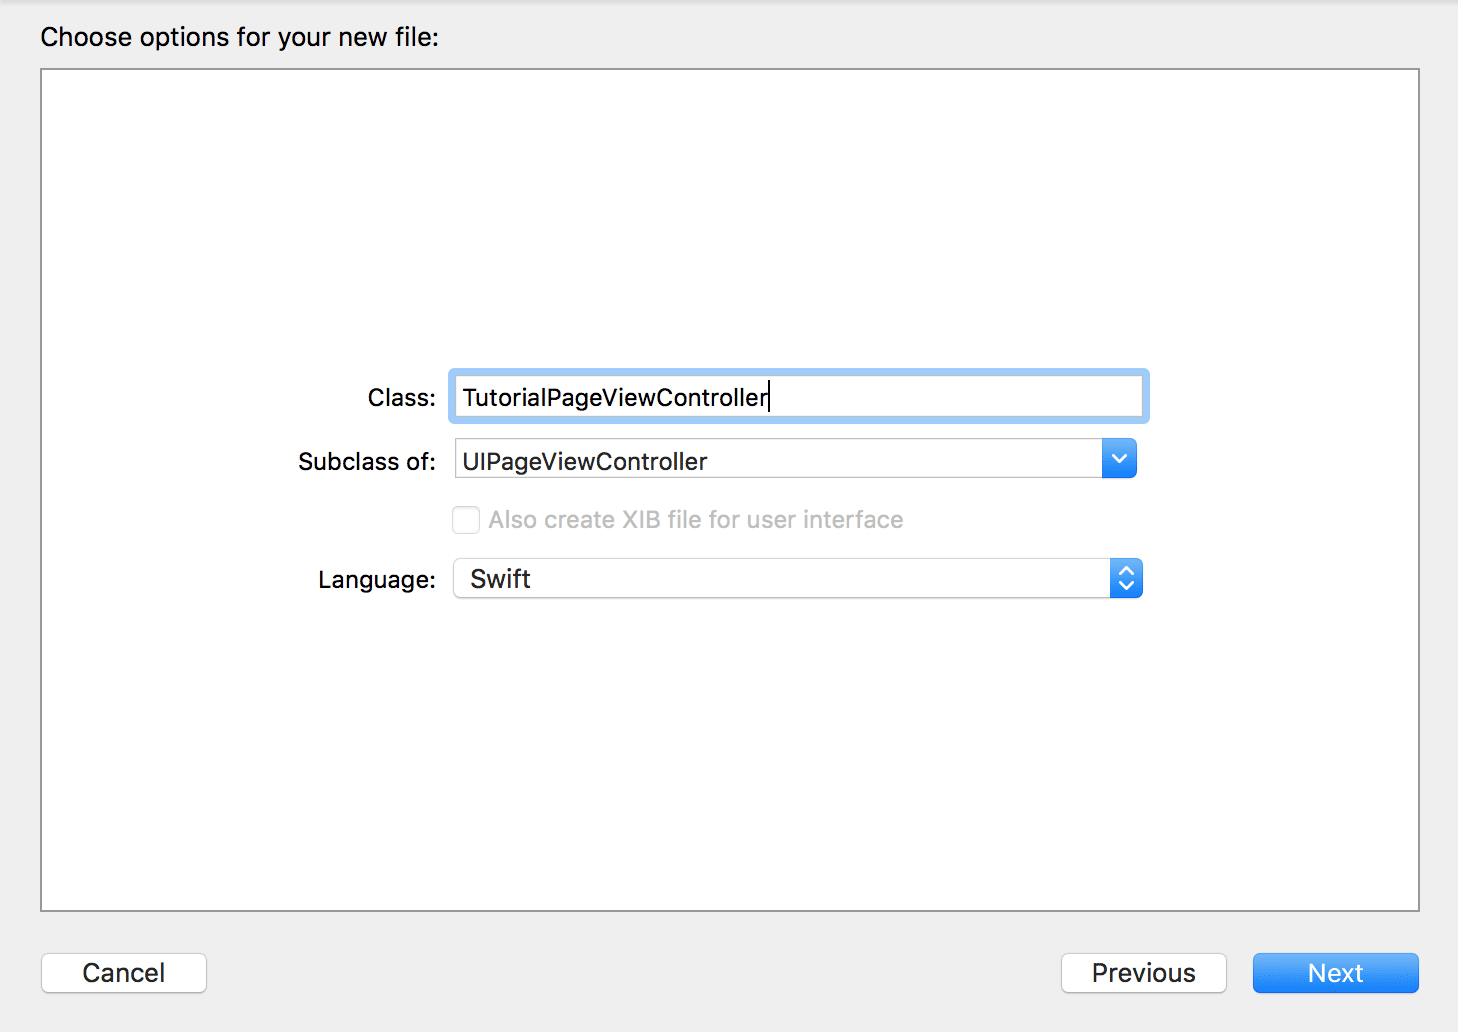
Next, let’s create a custom UIPageViewController subclass…
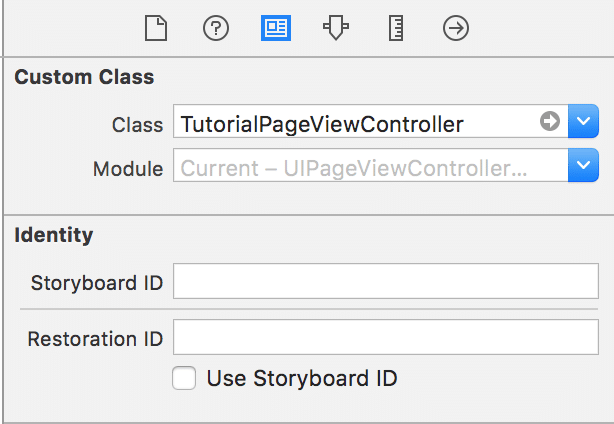
…and assign it to the UIPageViewController object (which we created inside Main.storyboard earlier) in the identity inspector.
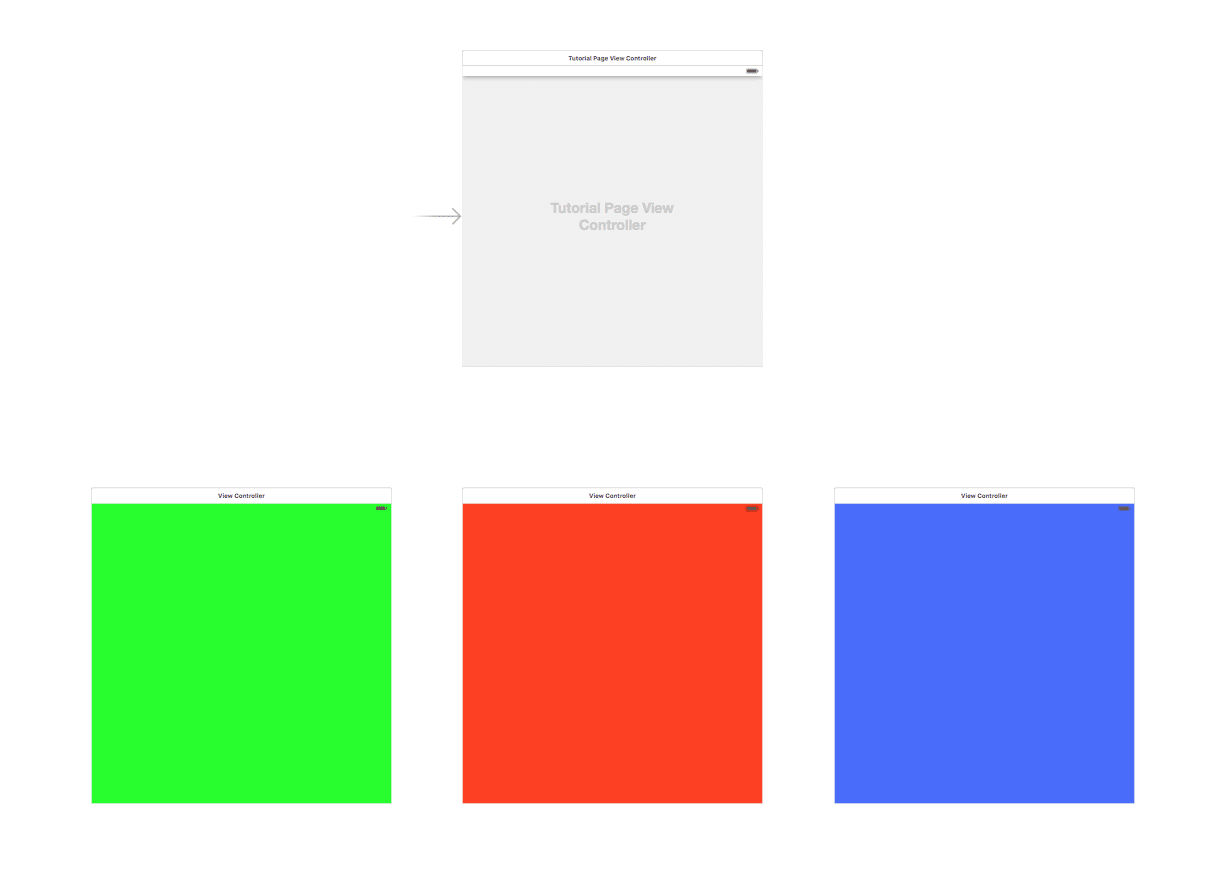
Now for the fun part–let’s create three view controller objects in Main.storyboard. These will eventually be scrolled through in the page view controller.
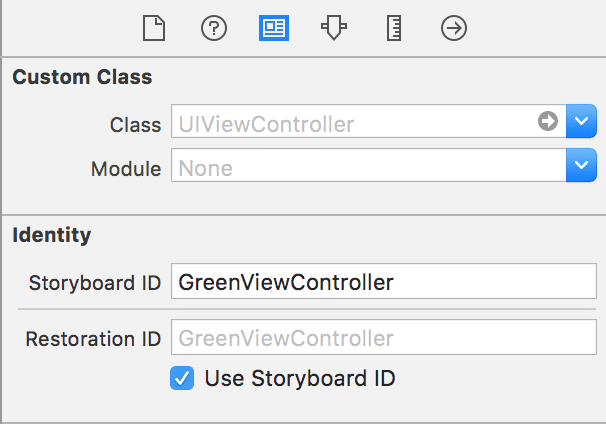
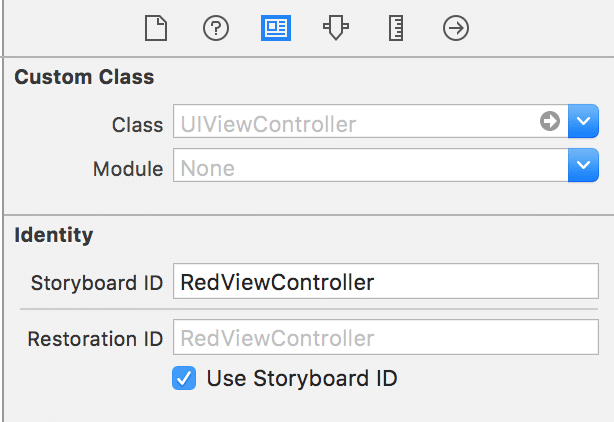
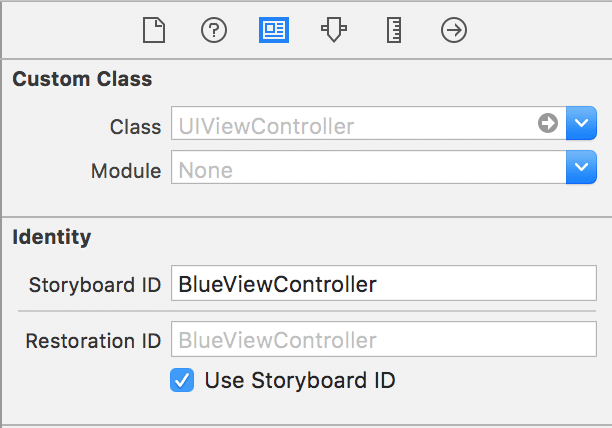
Planning ahead a bit, let’s set Storyboard IDs in the identity inspector for each of the view controllers above. These will be used in code to instantiate the view controllers. Alternatively, you could create three separate UIViewController subclass files and assign them to the objects in the storyboard.
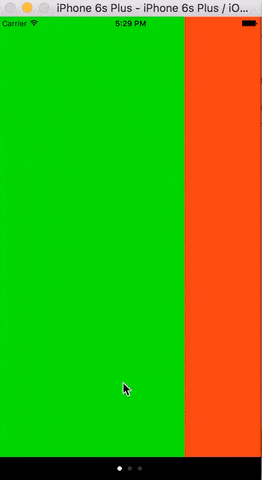
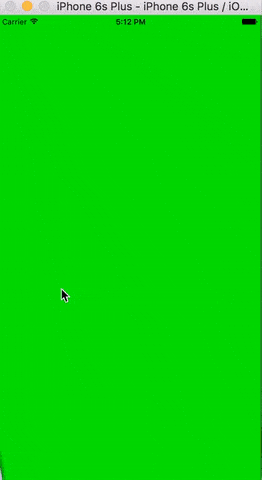
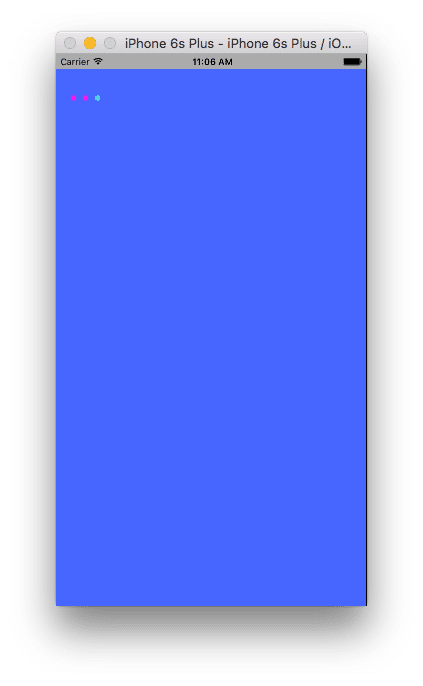
All right, now that our storyboard is all set up, let’s write some code! To start, let’s set ourselves as the datasource and define the required methods. // // TutorialPageViewController.swift // UIPageViewController Post // // Created by Jeffrey Burt on 12/11/15. // Copyright © 2015 Atomic Object. All rights reserved. // import UIKit class TutorialPageViewController: UIPageViewController { override func viewDidLoad() { super.viewDidLoad() dataSource = self } } // MARK: UIPageViewControllerDataSource extension TutorialPageViewController: UIPageViewControllerDataSource { func pageViewController(pageViewController: UIPageViewController, viewControllerBeforeViewController viewController: UIViewController) -> UIViewController? { return nil } func pageViewController(pageViewController: UIPageViewController, viewControllerAfterViewController viewController: UIViewController) -> UIViewController? { return nil } }Next, let’s add an array to reference the view controllers we want to page through. The view controllers will be shown in this order. private(set) lazy var orderedViewControllers: [UIViewController] = { return [self.newColoredViewController("Green"), self.newColoredViewController("Red"), self.newColoredViewController("Blue")] }() private func newColoredViewController(color: String) -> UIViewController { return UIStoryboard(name: "Main", bundle: nil) . instantiateViewControllerWithIdentifier("\(color)ViewController") }Now, it’s time to load up the first view controller (green). override func viewDidLoad() { super.viewDidLoad() dataSource = self if let firstViewController = orderedViewControllers.first { setViewControllers([firstViewController], direction: .Forward, animated: true, completion: nil) } }Sweet, green is shown, but what about red and blue? Let’s go ahead and actually implement the UIPageViewControllerDataSource methods to get swiping up and running. func pageViewController(pageViewController: UIPageViewController, viewControllerBeforeViewController viewController: UIViewController) -> UIViewController? { guard let viewControllerIndex = orderedViewControllers.indexOf(viewController) else { return nil } let previousIndex = viewControllerIndex - 1 guard previousIndex >= 0 else { return nil } guard orderedViewControllers.count > previousIndex else { return nil } return orderedViewControllers[previousIndex] } func pageViewController(pageViewController: UIPageViewController, viewControllerAfterViewController viewController: UIViewController) -> UIViewController? { guard let viewControllerIndex = orderedViewControllers.indexOf(viewController) else { return nil } let nextIndex = viewControllerIndex + 1 let orderedViewControllersCount = orderedViewControllers.count guard orderedViewControllersCount != nextIndex else { return nil } guard orderedViewControllersCount > nextIndex else { return nil } return orderedViewControllers[nextIndex] }This gives us the following output:
This is great and all, but what if we wanted to loop the view controllers? Easy! Just convert the UIPageViewControllerDataSource methods to the following: func pageViewController(pageViewController: UIPageViewController, viewControllerBeforeViewController viewController: UIViewController) -> UIViewController? { guard let viewControllerIndex = orderedViewControllers.indexOf(viewController) else { return nil } let previousIndex = viewControllerIndex - 1 // User is on the first view controller and swiped left to loop to // the last view controller. guard previousIndex >= 0 else { return orderedViewControllers.last } guard orderedViewControllers.count > previousIndex else { return nil } return orderedViewControllers[previousIndex] } func pageViewController(pageViewController: UIPageViewController, viewControllerAfterViewController viewController: UIViewController) -> UIViewController? { guard let viewControllerIndex = orderedViewControllers.indexOf(viewController) else { return nil } let nextIndex = viewControllerIndex + 1 let orderedViewControllersCount = orderedViewControllers.count // User is on the last view controller and swiped right to loop to // the first view controller. guard orderedViewControllersCount != nextIndex else { return orderedViewControllers.first } guard orderedViewControllersCount > nextIndex else { return nil } return orderedViewControllers[nextIndex] }Sweet, an infinite loop that we actually want!
But we’re making a tutorial. Let’s trash the page curl and replace it with a horizontal scroll. This can be done in the attributes inspector inside Main.storyboard. Be sure to click on the Tutorial Page View Controller object since that’s what we’re editing.
There’s only one thing missing: the dots! Simply implement the following two UIPageViewControllerDataSource methods inside our TutorialPageViewController: UIPageViewControllerDataSource extension. func presentationCountForPageViewController(pageViewController: UIPageViewController) -> Int { return orderedViewControllers.count } func presentationIndexForPageViewController(pageViewController: UIPageViewController) -> Int { guard let firstViewController = viewControllers?.first, firstViewControllerIndex = orderedViewControllers.indexOf(firstViewController) else { return 0 } return firstViewControllerIndex }Build and run and you should be all set! And for the best part…the GitHub Download link! Update: Be sure to check out my next post, where I explain How to Move Page Dots in a UIPageViewController.
 Jeff Burt
All Posts →
Jeff Burt
All Posts →
|


【本文地址】