| springBoot打war包 并指定配置文件的两种方式 | 您所在的位置:网站首页 › springboot的tomcat配置文件 › springBoot打war包 并指定配置文件的两种方式 |
springBoot打war包 并指定配置文件的两种方式
|
1: 使用pom文件配置 springBoot启动类要改动一下 package com.example.demo; import org.springframework.boot.SpringApplication; import org.springframework.boot.autoconfigure.SpringBootApplication; import org.springframework.boot.builder.SpringApplicationBuilder; import org.springframework.boot.web.servlet.support.SpringBootServletInitializer; @SpringBootApplication public class Demo1Application extends SpringBootServletInitializer{ @Override protected SpringApplicationBuilder configure(SpringApplicationBuilder builder) { return builder.sources(Demo1Application.class); } public static void main(String[] args) { SpringApplication.run(Demo1Application.class, args); } }改动pom文件 com.example demo-1 0.0.1-SNAPSHOT war //记得是war org.springframework.boot spring-boot-starter-tomcat provided //自己添加tomcat依赖 记得provided demo//打成war包的名字 org.springframework.boot spring-boot-maven-plugin org.apache.maven.plugins maven-war-plugin WEB-INF/classes/user-application.properties //你要打成war包要排除的配置文件名
在你的包下建一个类,那个包都行,只要启动是指定对路径即可(下面说),名字随意。代码如下 package com.example.demo; import org.springframework.boot.SpringApplication; import org.springframework.boot.env.EnvironmentPostProcessor; import org.springframework.core.env.ConfigurableEnvironment; import org.springframework.core.env.MutablePropertySources; import org.springframework.core.env.PropertiesPropertySource; import org.springframework.core.io.FileSystemResource; import org.springframework.core.io.support.PropertiesLoaderUtils; import java.io.File; import java.io.IOException; import java.util.Properties; public class aa implements EnvironmentPostProcessor{ //指定配置文件的路径 private static final String LOCATION = "C:\\application.properties"; @Override public void postProcessEnvironment(ConfigurableEnvironment configurableEnvironment, SpringApplication springApplication) { File file = new File(LOCATION); // File file = new File(System.getProperty("user.home"), LOCATION); // System.out.println("user.home" + System.getProperty("user.home")); if (file.exists()) { MutablePropertySources propertySources = configurableEnvironment.getPropertySources(); // System.out.println("Loading local settings from " + file.getAbsolutePath()); Properties properties = loadProperties(file); // System.out.println(properties.toString()); propertySources.addFirst(new PropertiesPropertySource("Config", properties)); } } private Properties loadProperties(File f) { FileSystemResource resource = new FileSystemResource(f); try { return PropertiesLoaderUtils.loadProperties(resource); } catch (IOException ex) { throw new IllegalStateException("Failed to load local settings from " + f.getAbsolutePath(), ex); } } }
此时启动项目读取的是我C盘下的properties文件配置 |
 打成war包后 打成的war包中不包含pom文件中排除在外的指定的配置文件
 如果不指定的话,打成war包后包含所有配置文件
  2:通过代码指定配置文件 首先还是修改一下启动类
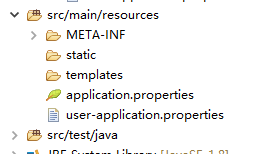
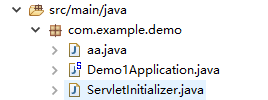 然后在resourse下建立一个META-INF文件夹,建立一个file,名字为spring.factories 内容是指定上一个class文件的路径
【本文地址】
公司简介
联系我们