|
本文章详细介绍使用Springboot如何实现上传文件和下载文件接口
1. 新建一个Springboot项目
File -> New Project 根据下图指引做: 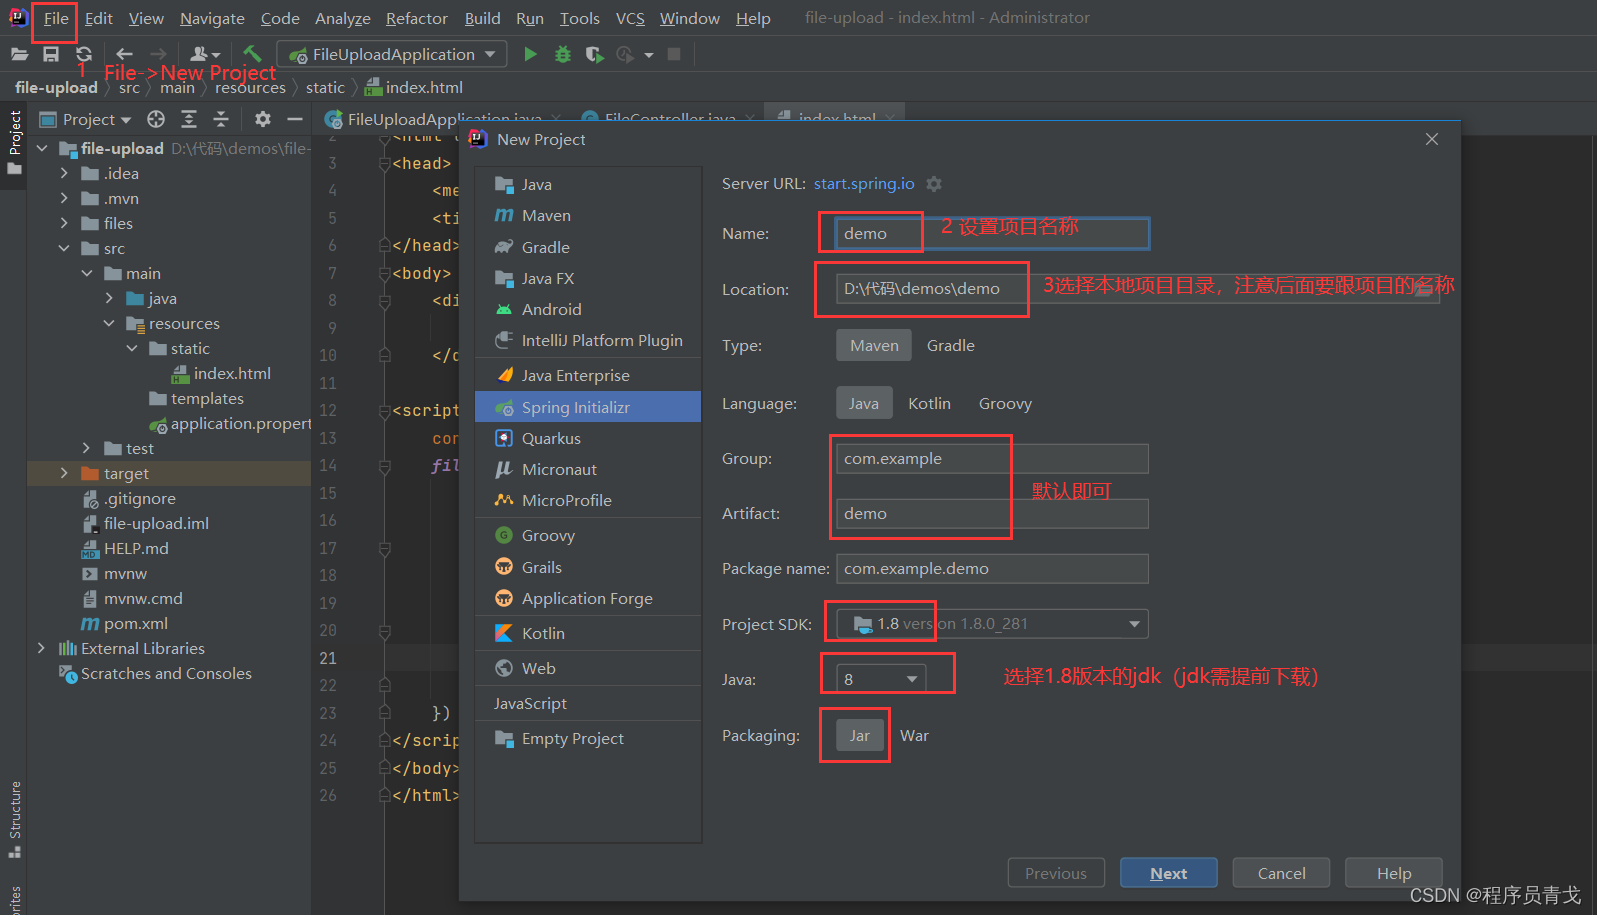
2. 点击next,选择Springboot版本和组件,版本可以跟我不同。
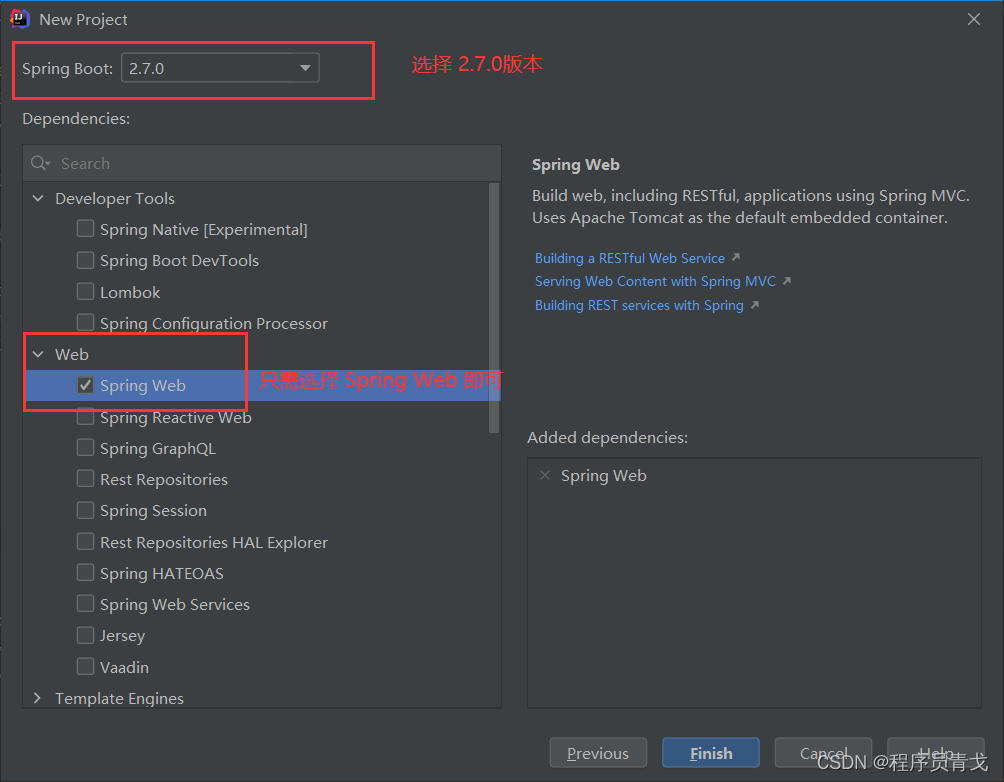
3. 点击 Finish完成项目创建,然后开始导入Pom依赖:
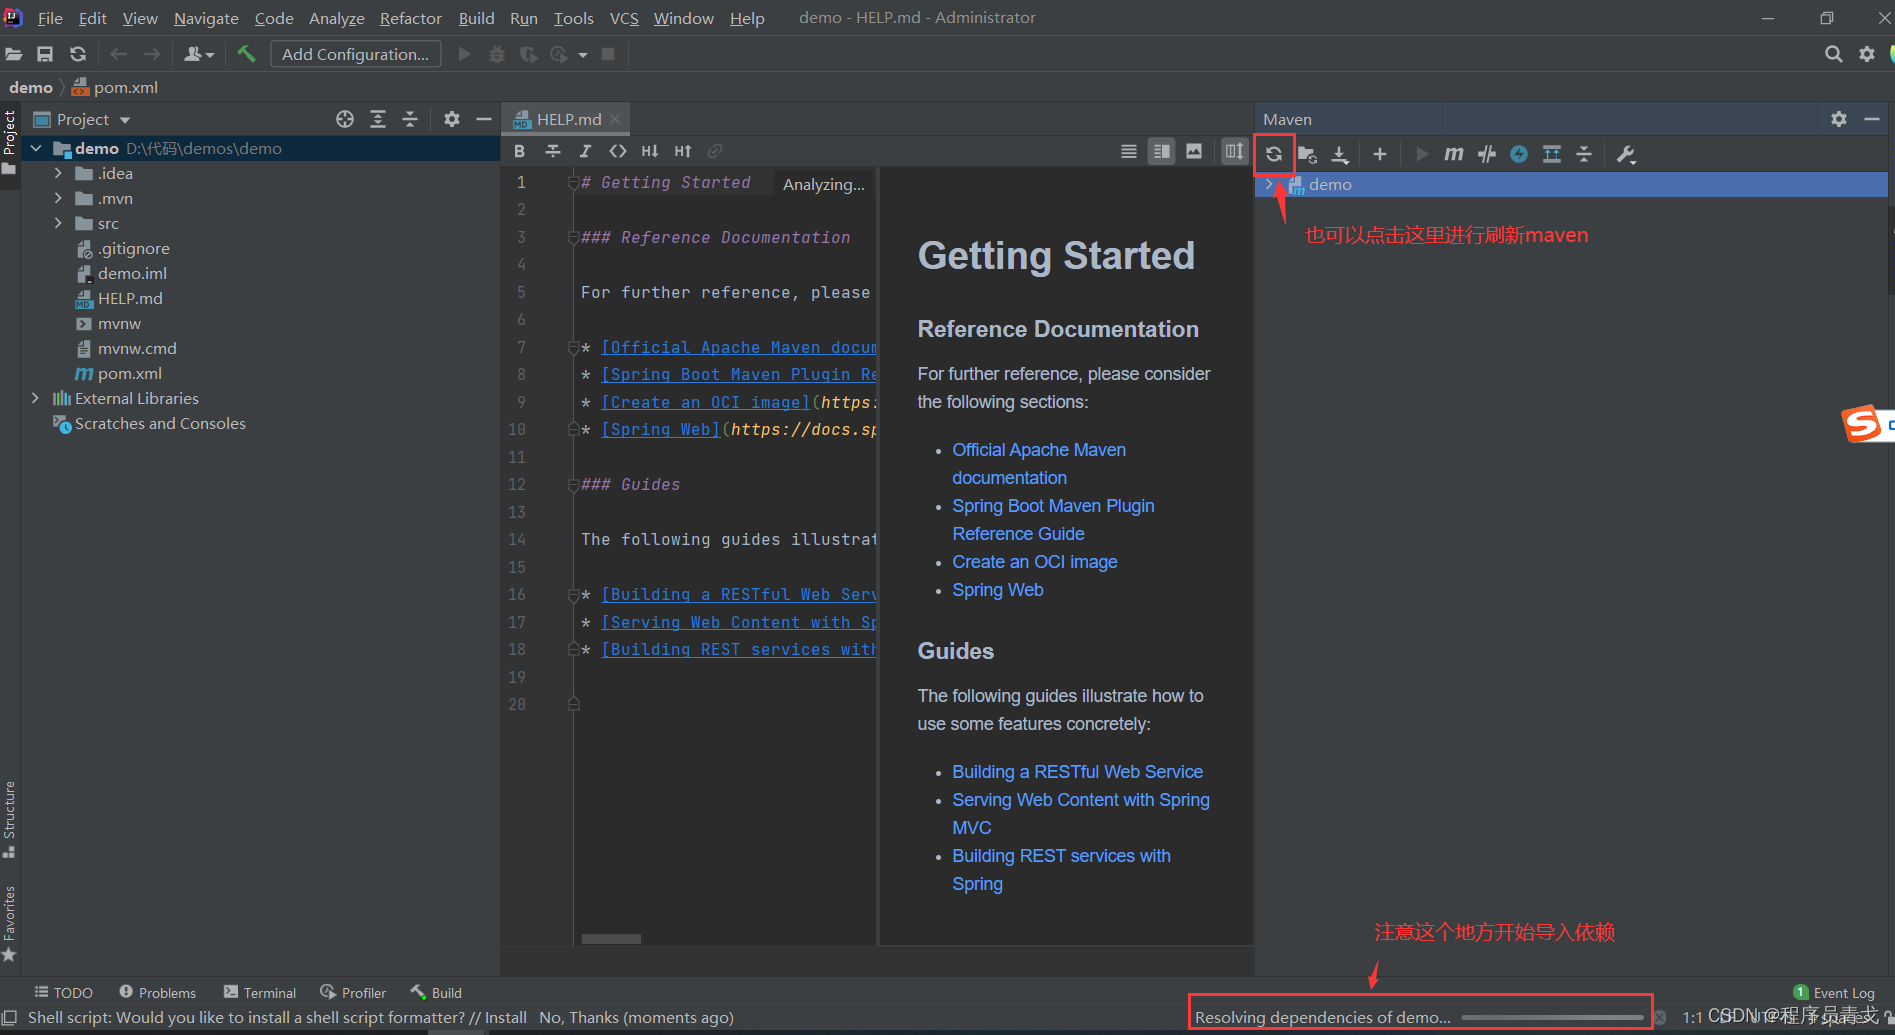
如果依赖下载的太慢的话,可以使用aliyun,方法是在你的 pom.xml里加入下面的代码:
nexus-aliyun
nexus-aliyun
http://maven.aliyun.com/nexus/content/groups/public/
true
false
public
aliyun nexus
http://maven.aliyun.com/nexus/content/groups/public/
true
false
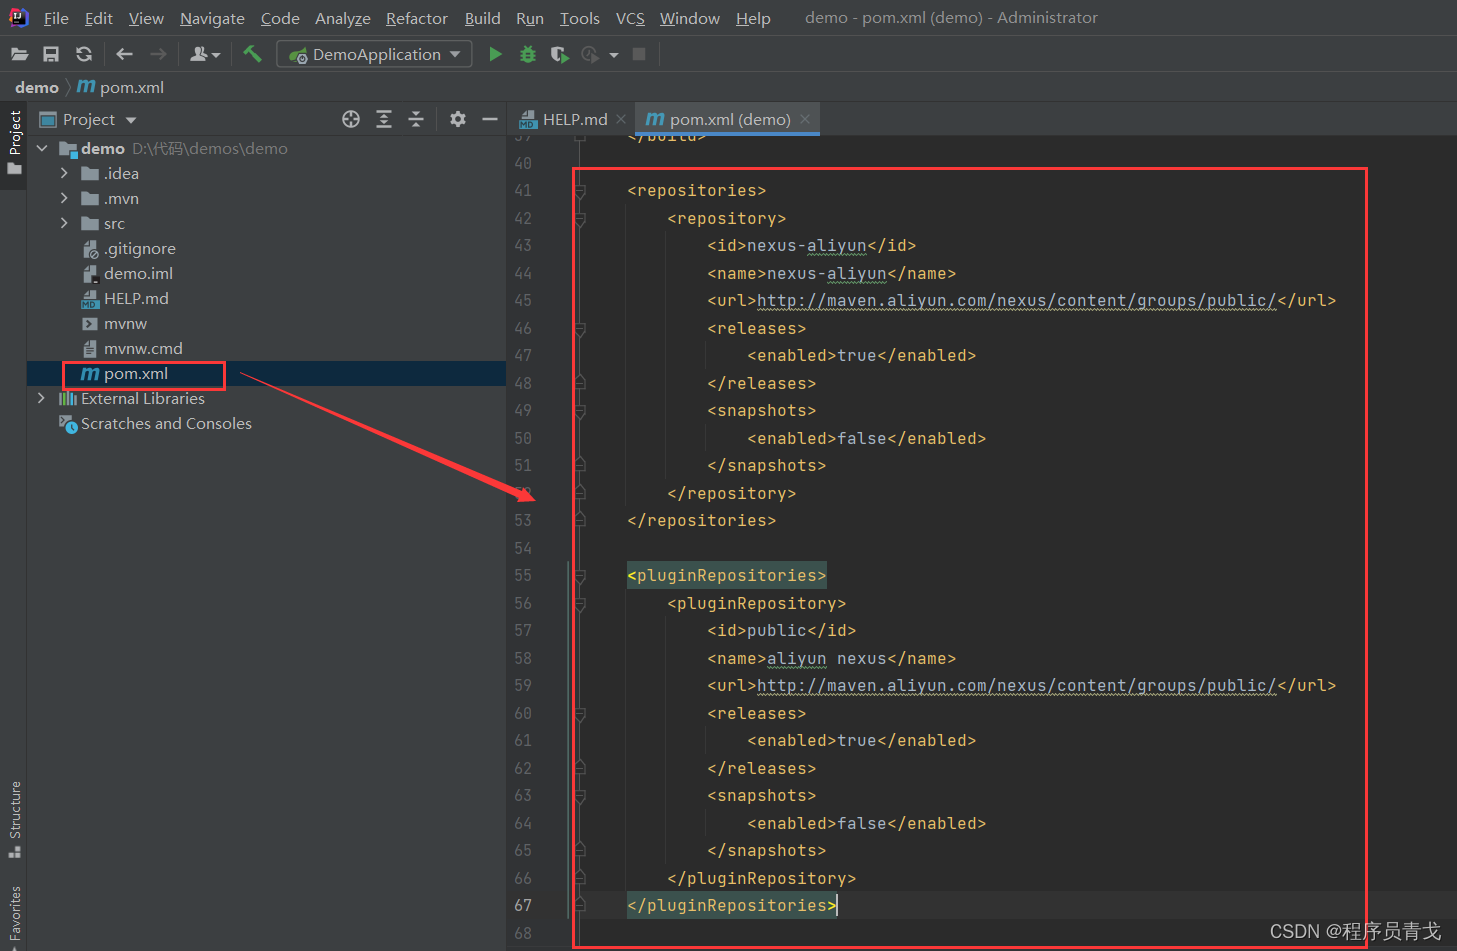 加完之后再刷新一下: 加完之后再刷新一下: 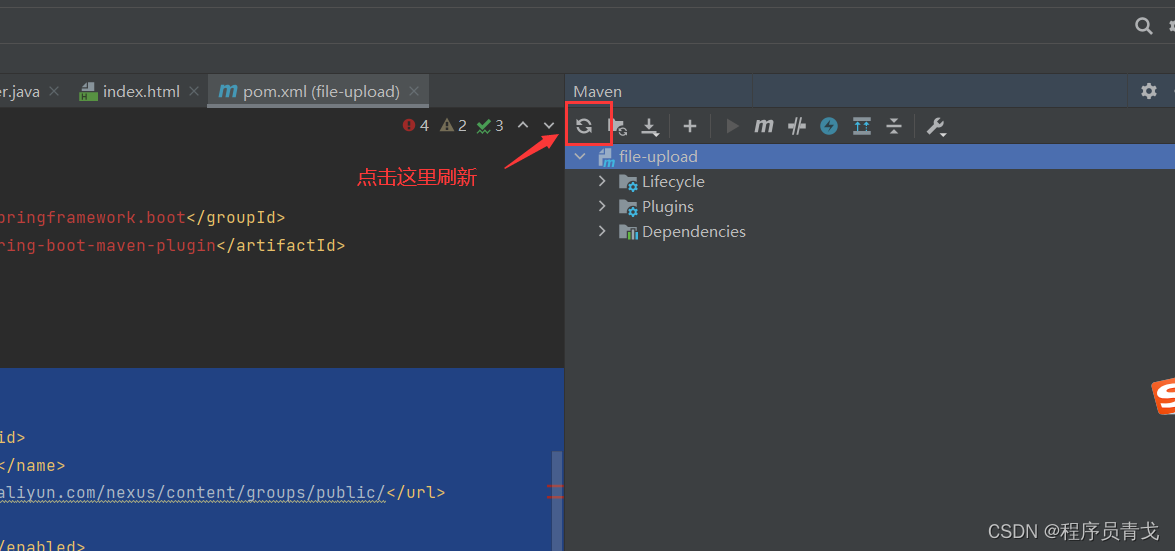
4. 导入依赖之后会出现Springboot的启动按钮:
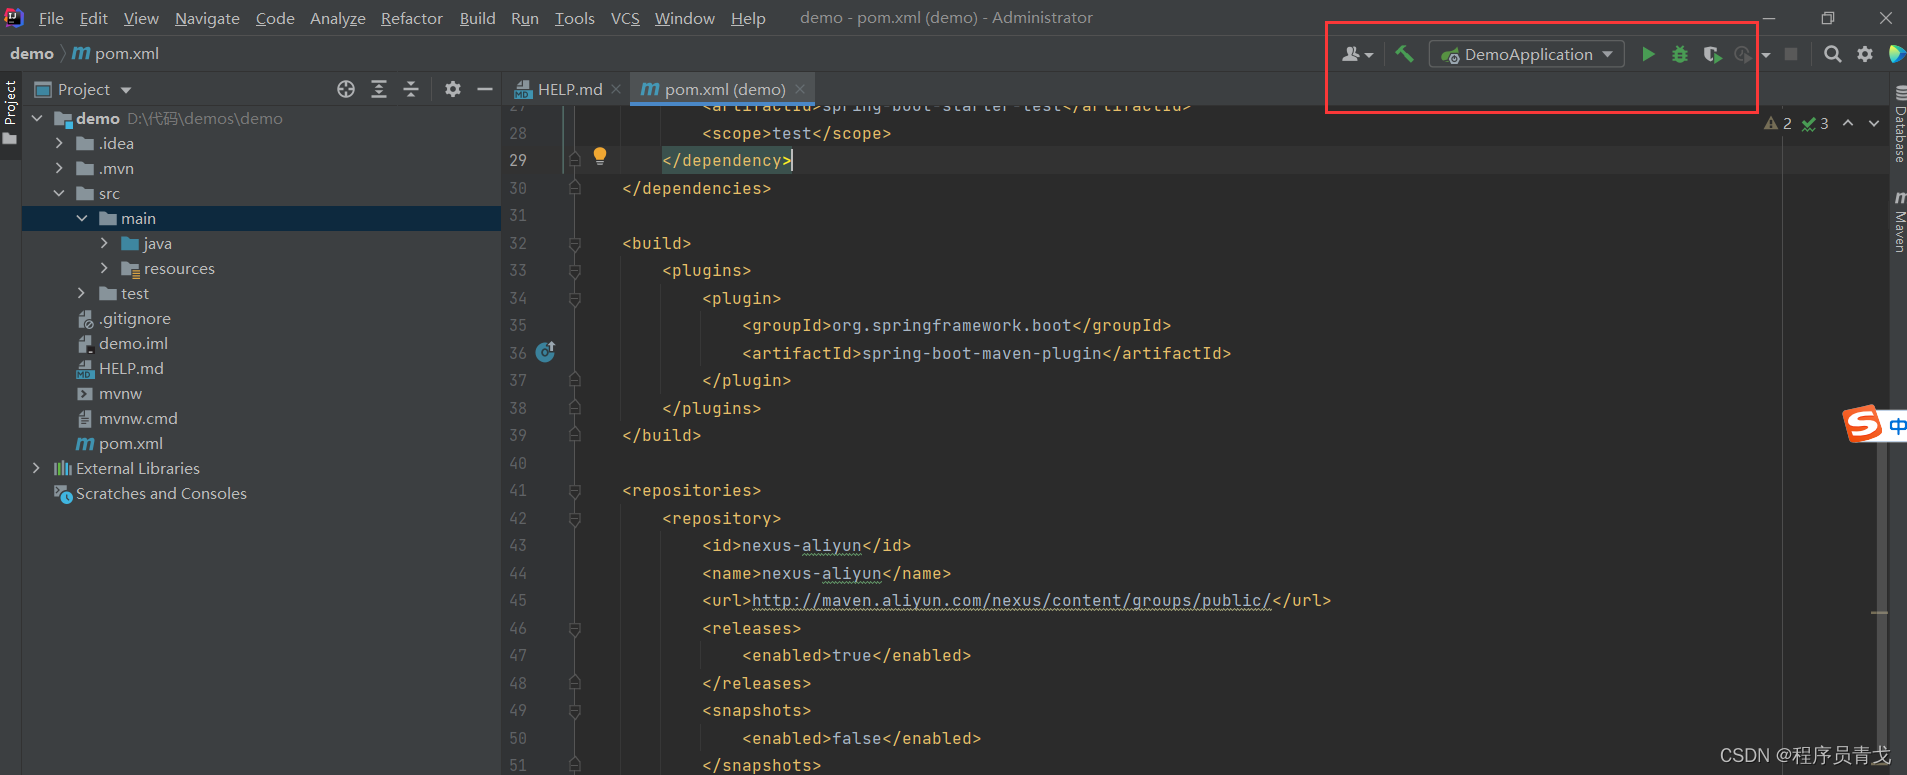 直接点击绿色的三角启动运行项目。 运行效果: 直接点击绿色的三角启动运行项目。 运行效果: 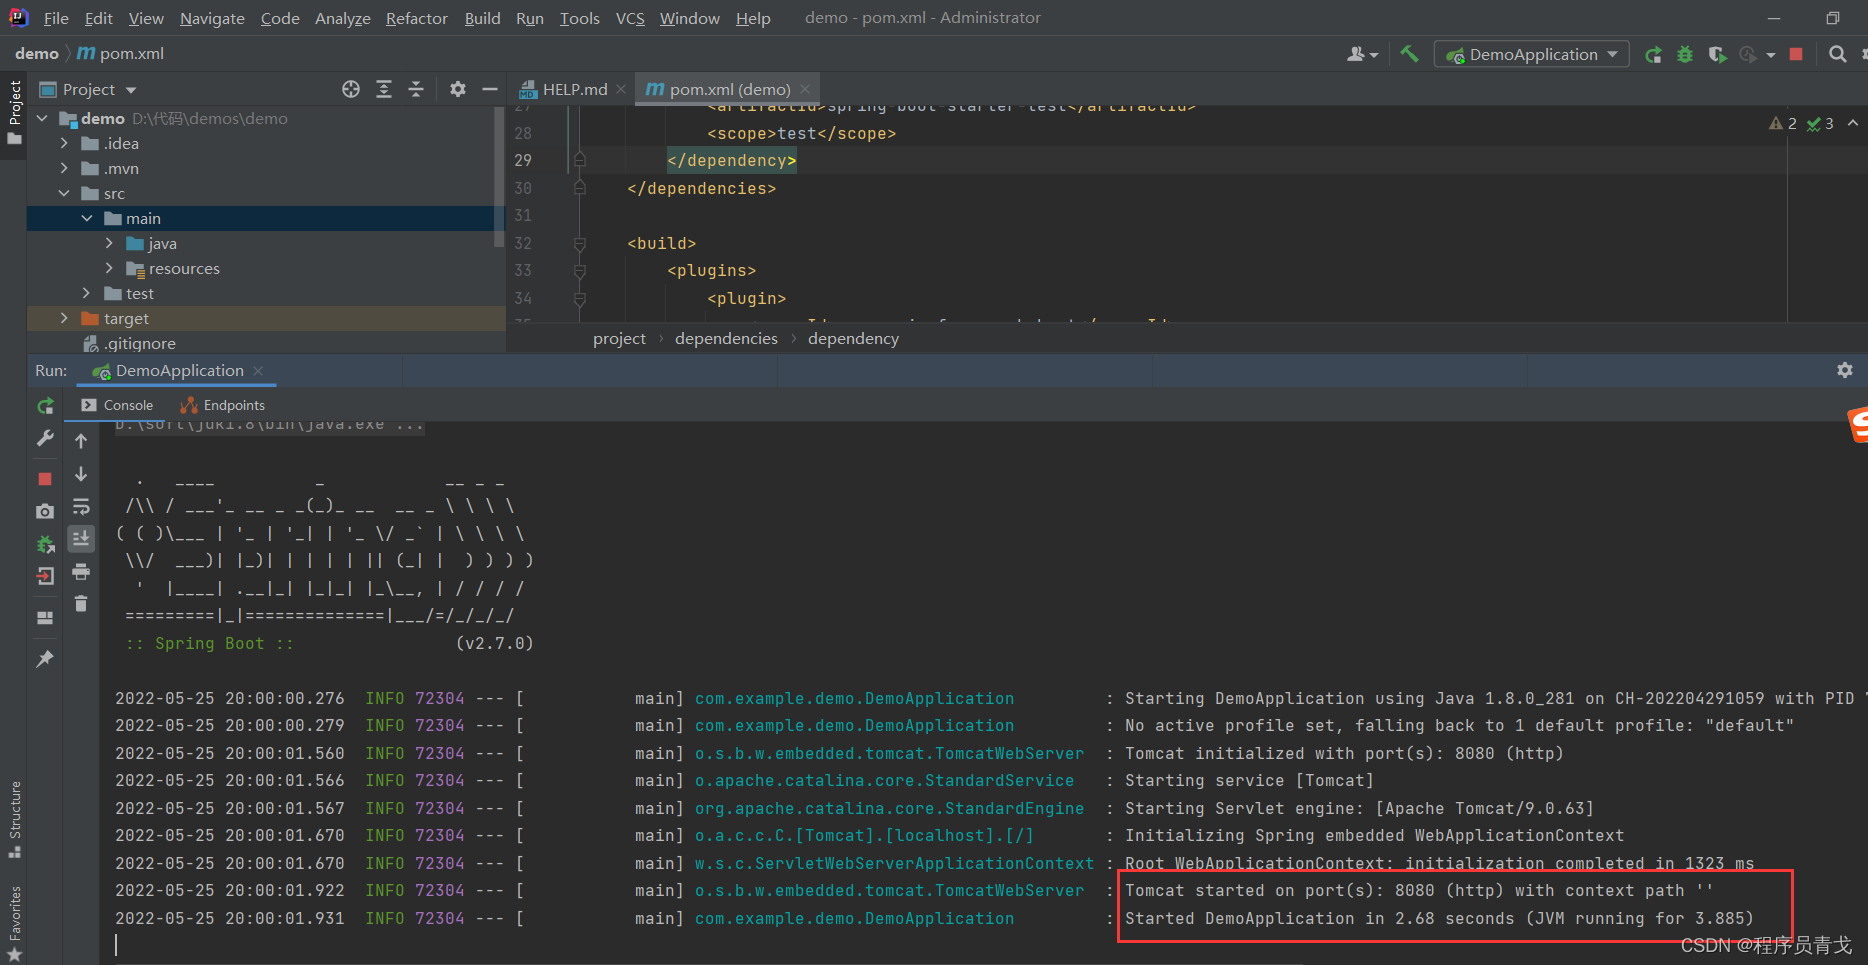 看到这个 8080 表示你的项目启动好了。 看到这个 8080 表示你的项目启动好了。
5. 开始写文件上传接口
package com.example.demo;
import org.springframework.web.bind.annotation.PostMapping;
import org.springframework.web.bind.annotation.RequestMapping;
import org.springframework.web.bind.annotation.RequestParam;
import org.springframework.web.bind.annotation.RestController;
import org.springframework.web.multipart.MultipartFile;
import java.io.File;
import java.io.IOException;
// 定义接口路径
@RestController
@RequestMapping("/file")
public class FileController {
// 找一个计算机的磁盘位置,比如 D:\\, 我这里使用的是本项目的路径
private static final String BASE_DIR = "D:\\代码\\demos\\demo\\files\\";
// 定义接口类型和二级路径,完整的接口url是:/file/upload
@PostMapping("/upload")
public void upload(@RequestParam MultipartFile file) {
// 获取文件的名称
String fileName = file.getOriginalFilename();
try {
// 新建一个文件路径
File uploadFile = new File(BASE_DIR + fileName);
// 当父级目录不存在时,自动创建
if (!uploadFile.getParentFile().exists()) {
uploadFile.getParentFile().mkdirs();
}
// 存储文件到电脑磁盘
file.transferTo(uploadFile);
} catch (IOException e) {
e.printStackTrace();
}
}
}
6. 测试下文件上传接口,使用postman测试:
重启下项目,然后测试。  点击这里重启。 点击这里重启。
请注意下面的5个步骤,缺一不可 
然后我们选择本地的一张图片做测试,注意key必须是 file,跟你接口的参数名字保持一致!  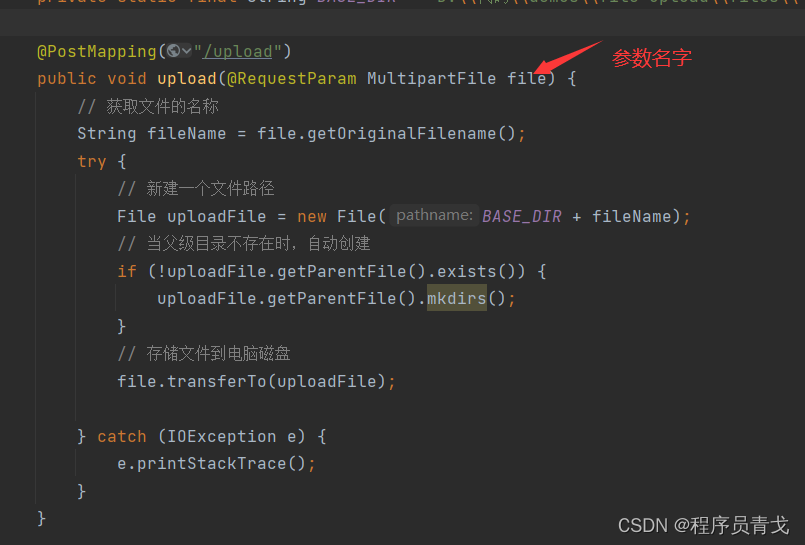 开始测试: 开始测试: 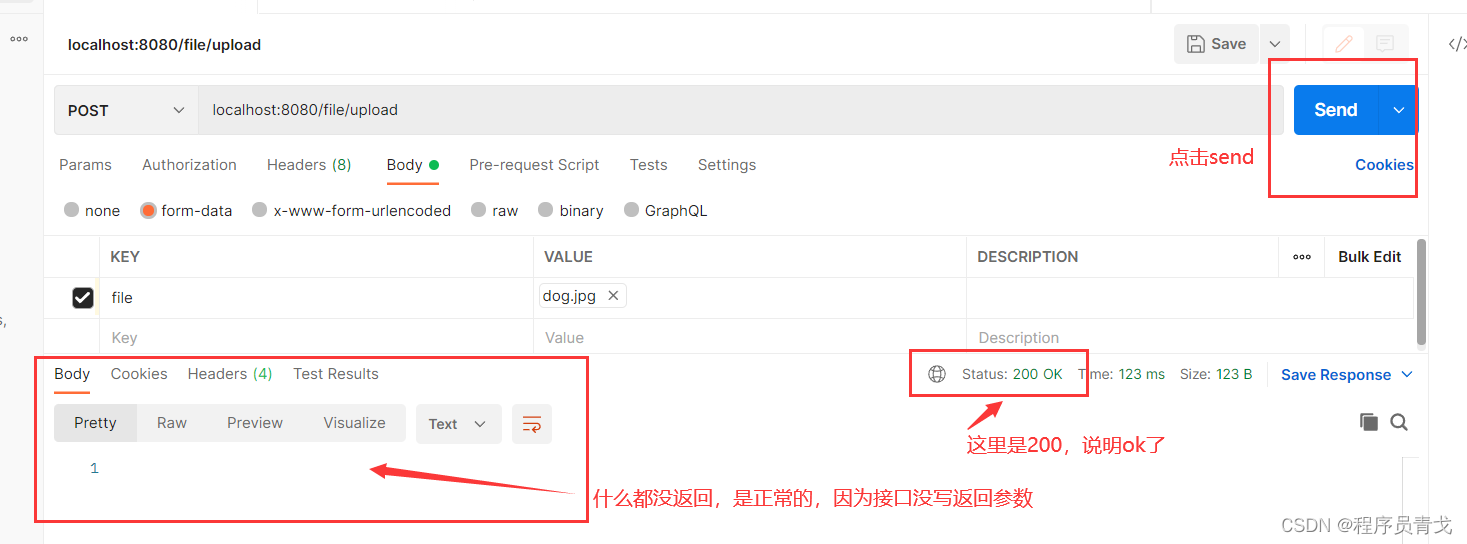
7. 文件下载接口
// 注意导包
import javax.servlet.http.HttpServletResponse;
import java.net.URLEncoder;
// 下载接口,url: /file/download?fileName=xxx
@GetMapping("/download")
public void download(@RequestParam String fileName, HttpServletResponse response) {
// 新建文件流,从磁盘读取文件流
try (FileInputStream fis = new FileInputStream(BASE_DIR + fileName);
BufferedInputStream bis = new BufferedInputStream(fis);
OutputStream os = response.getOutputStream()) { // OutputStream 是文件写出流,讲文件下载到浏览器客户端
// 新建字节数组,长度是文件的大小,比如文件 6kb, bis.available() = 1024 * 6
byte[] bytes = new byte[bis.available()];
// 从文件流读取字节到字节数组中
bis.read(bytes);
// 重置 response
response.reset();
// 设置 response 的下载响应头
response.setContentType("application/octet-stream");
response.setHeader("Content-disposition", "attachment;filename=" + URLEncoder.encode(fileName, "UTF-8")); // 注意,这里要设置文件名的编码,否则中文的文件名下载后不显示
// 写出字节数组到输出流
os.write(bytes);
// 刷新输出流
os.flush();
} catch (Exception e) {
e.printStackTrace();
}
}
8. 测试下载接口
重启下项目,然后测试。  点击这里重启。 点击这里重启。
可以使用刚才上传的文件进行测试,路径为 http://localhost:8080/file/download?fileName=dog.png  回车后即可完成下载! 回车后即可完成下载! 
9. 文件上传接口返回下载地址
我们可以把刚才的文件上传接口进行稍微的改造: 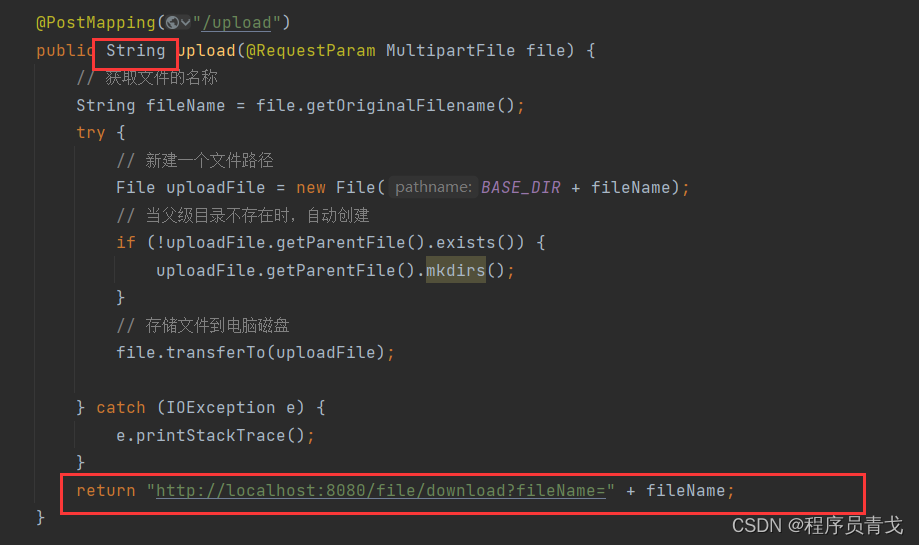
@PostMapping("/upload")
public String upload(@RequestParam MultipartFile file) {
String fileName = file.getOriginalFilename();
try {
File uploadFile = new File(BASE_DIR + fileName);
if (!uploadFile.getParentFile().exists()) {
uploadFile.getParentFile().mkdirs();
}
file.transferTo(uploadFile);
} catch (IOException e) {
e.printStackTrace();
}
// 自己拼接一下下载的接口url,参数就是上传的文件名称
return "http://localhost:8080/file/download?fileName=" + fileName;
}
这样就咋上传完成后直接返回了下载的地址。
再来测试下: 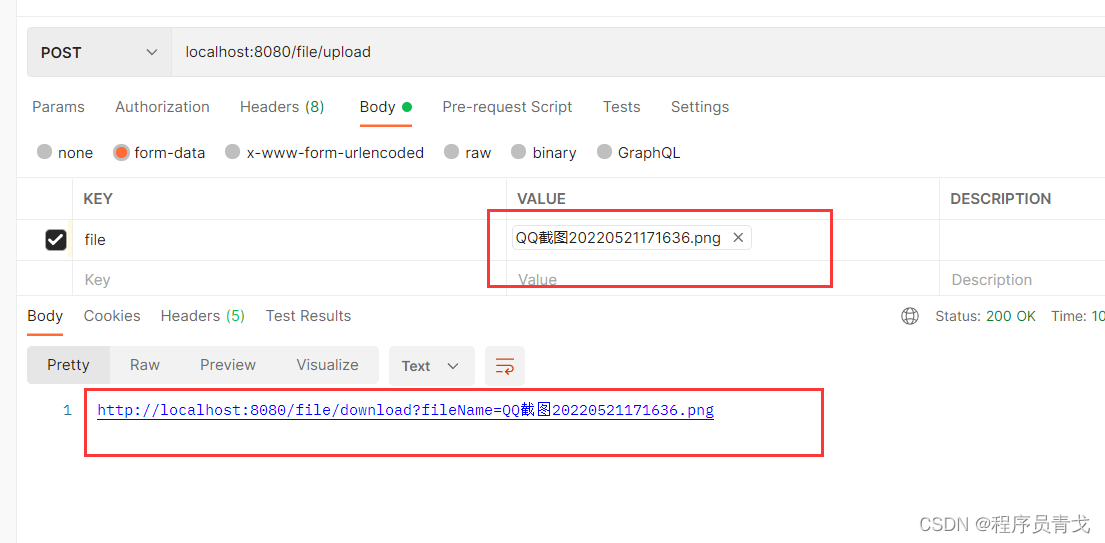 换了一个文件,在文件上传完成后直接返回了文件的下载链接,非常nice。 换了一个文件,在文件上传完成后直接返回了文件的下载链接,非常nice。
10. 前端网页上传文件
在static文件夹新建 index.html 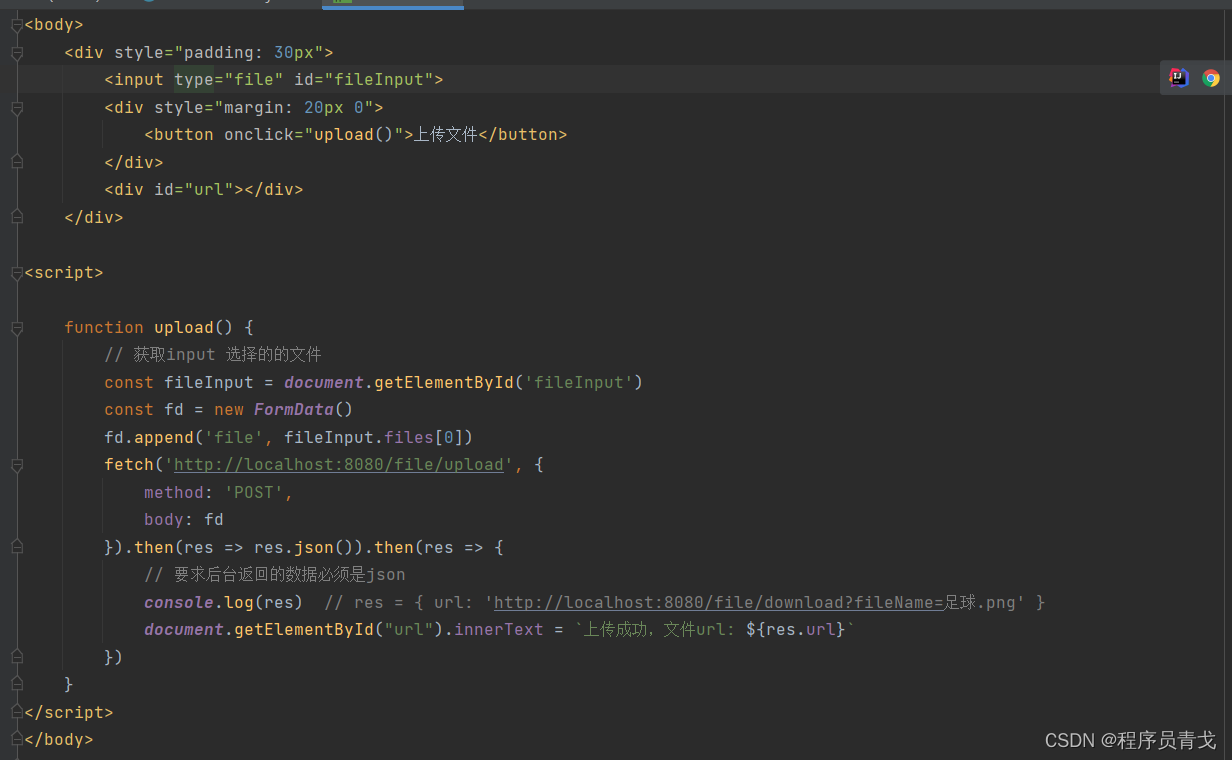
DOCTYPE html>
文件
上传文件
function upload() {
// 获取input 选择的的文件
const fileInput = document.getElementById('fileInput')
const fd = new FormData()
fd.append('file', fileInput.files[0])
fetch('http://localhost:8080/file/upload', {
method: 'POST',
body: fd
}).then(res => res.json()).then(res => {
// 要求后台返回的数据必须是json
console.log(res) // res = { url: 'http://localhost:8080/file/download?fileName=足球.png' }
document.getElementById("url").innerText = `上传成功,文件url: ${res.url}`
})
}
前端使用 fetch 上传文件,请求后台接口,但是要求后台返回的数据是json格式,怎么设置后台返回格式为json呢?
我们可以对上传接口改造,使用 Map返回数据,map中有个属性 url,就是我们返回的数据。 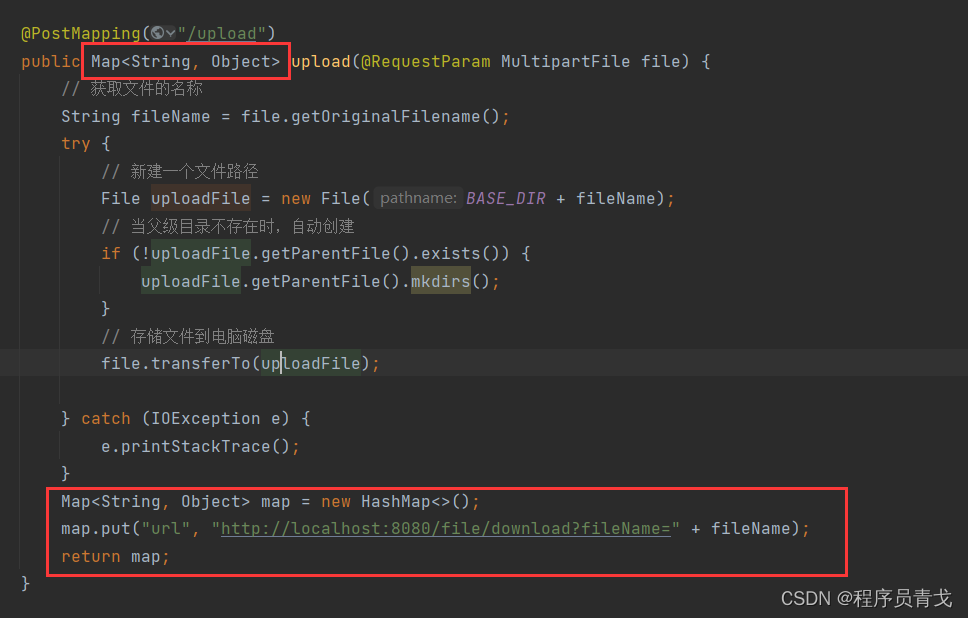
@PostMapping("/upload")
public Map upload(@RequestParam MultipartFile file) {
// 获取文件的名称
String fileName = file.getOriginalFilename();
try {
// 新建一个文件路径
File uploadFile = new File(BASE_DIR + fileName);
// 当父级目录不存在时,自动创建
if (!uploadFile.getParentFile().exists()) {
uploadFile.getParentFile().mkdirs();
}
// 存储文件到电脑磁盘
file.transferTo(uploadFile);
} catch (IOException e) {
e.printStackTrace();
}
Map map = new HashMap();
map.put("url", "http://localhost:8080/file/download?fileName=" + fileName);
return map;
}
这样,我们就完成了后台 upload接口的改造了。
来看看效果: 
OK,至此,我们完成了后台接口和前端的请求,怎么样?很简单吧?快去试试吧!
我是程序员青戈, Java程序员一枚~
关注我的B站:程序员青戈 ,学习更多干货教程!
| 


 加完之后再刷新一下:
 直接点击绿色的三角启动运行项目。 运行效果:
  看到这个 8080 表示你的项目启动好了。
 点击这里重启。

 开始测试:
开始测试: 
 回车后即可完成下载!

 换了一个文件,在文件上传完成后直接返回了文件的下载链接,非常nice。

