| Python中Matplotlib绘制误差棒详细介绍 如何制作好看的误差棒如 | 您所在的位置:网站首页 › sigmaplot图例怎么设置 › Python中Matplotlib绘制误差棒详细介绍 如何制作好看的误差棒如 |
Python中Matplotlib绘制误差棒详细介绍 如何制作好看的误差棒如
|
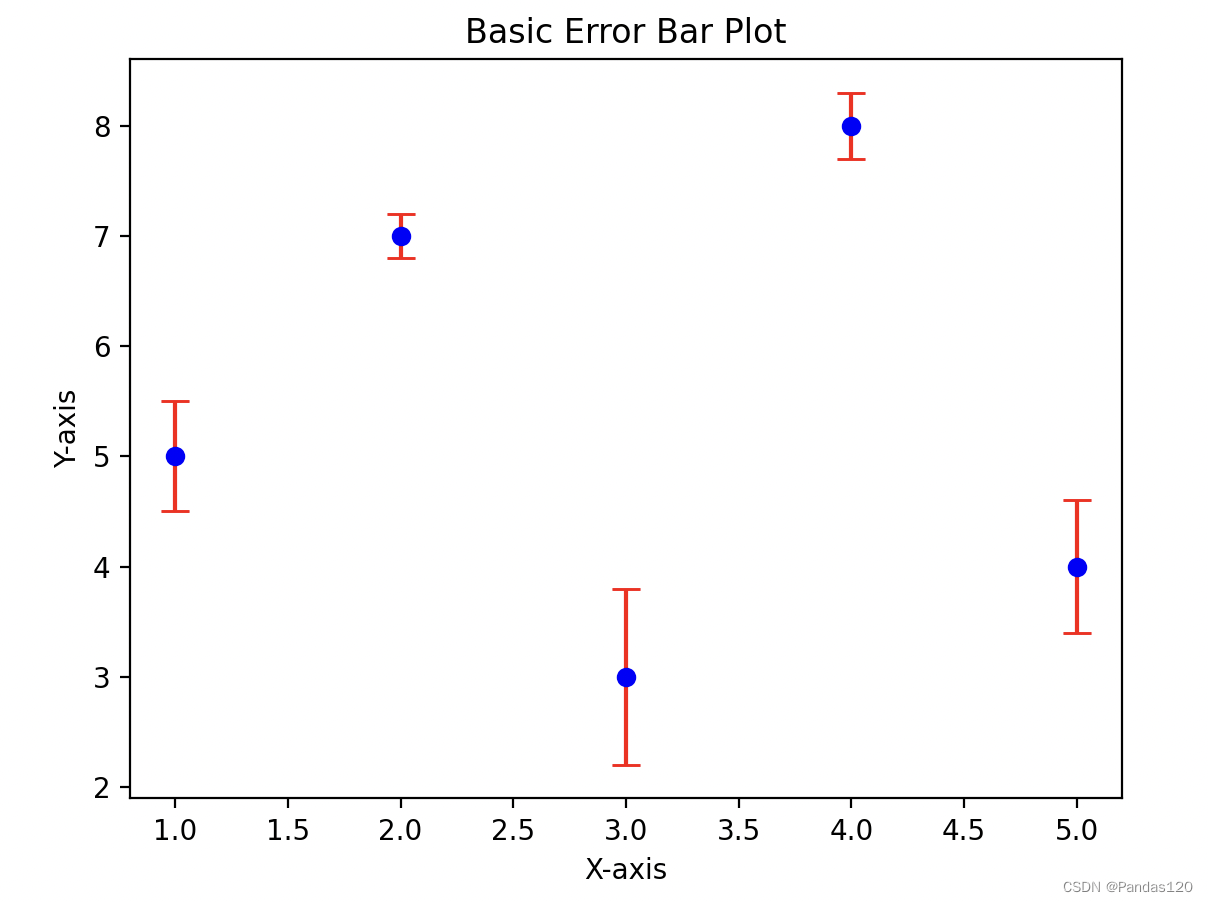
误差棒(Error Bars)是在数据可视化中用于表示数据不确定性的重要工具。Matplotlib 提供了绘制误差棒的功能,能够在图形中清晰地展示数据的变化范围。 1. 数据准备首先,需要准备包含主要数据以及误差范围的数据。误差棒通常用于表示一组数据的变化范围或测量值的不确定性。考虑以下示例数据: import matplotlib.pyplot as plt import numpy as np # 示例数据 x_values = np.array([1, 2, 3, 4, 5]) y_values = np.array([5, 7, 3, 8, 4]) y_error = np.array([0.5, 0.2, 0.8, 0.3, 0.6])这里,使用 NumPy 生成了包含 x 轴、y 轴和误差范围的示例数据。x_values 表示 x 轴上的数据点,y_values 表示对应的 y 轴上的数据点,y_error 表示每个数据点的误差范围。 2. 绘制基础误差棒有了数据之后,可以使用 Matplotlib 绘制基础的误差棒。以下是一个简单的示例: # 绘制基础误差棒 plt.errorbar(x_values, y_values, yerr=y_error, fmt='o', color='blue', ecolor='red', capsize=5) # 添加标题和标签 plt.title('Basic Error Bar Plot') plt.xlabel('X-axis') plt.ylabel('Y-axis') # 显示图像 plt.show()
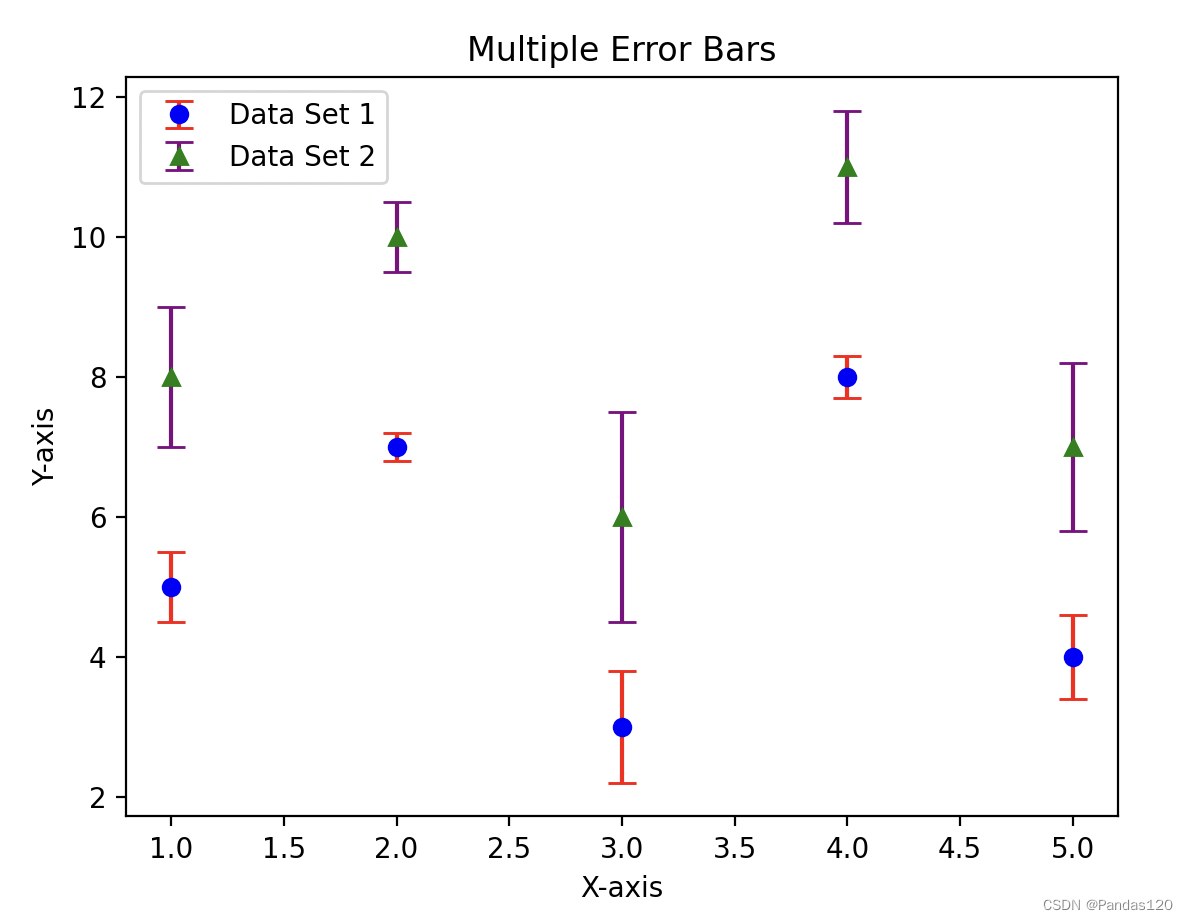
在这个示例中,使用 errorbar 函数来绘制误差棒。x_values 和 y_values 分别表示 x 轴和 y 轴上的数据点,yerr 参数表示误差范围,fmt 参数设置数据点的标记形状,color 参数设置数据点和误差棒的颜色,ecolor 参数设置误差棒的颜色,capsize 参数设置误差棒顶端和底端的线段长度。 3. 误差棒的进阶配置Matplotlib 提供了多种选项来配置误差棒,以满足不同的需求。以下是一些进阶配置的示例: 3.1. 多组误差棒可以绘制多组误差棒以比较不同数据集的误差范围。例如,可以添加一组更大的误差棒: # 多组误差棒 y_error_large = np.array([1.0, 0.5, 1.5, 0.8, 1.2]) plt.errorbar(x_values, y_values, yerr=y_error, fmt='o', color='blue', ecolor='red', capsize=5, label='Data Set 1') plt.errorbar(x_values, y_values + 3, yerr=y_error_large, fmt='^', color='green', ecolor='purple', capsize=5, label='Data Set 2') # 添加标题和标签 plt.title('Multiple Error Bars') plt.xlabel('X-axis') plt.ylabel('Y-axis') # 添加图例 plt.legend() # 显示图像 plt.show()
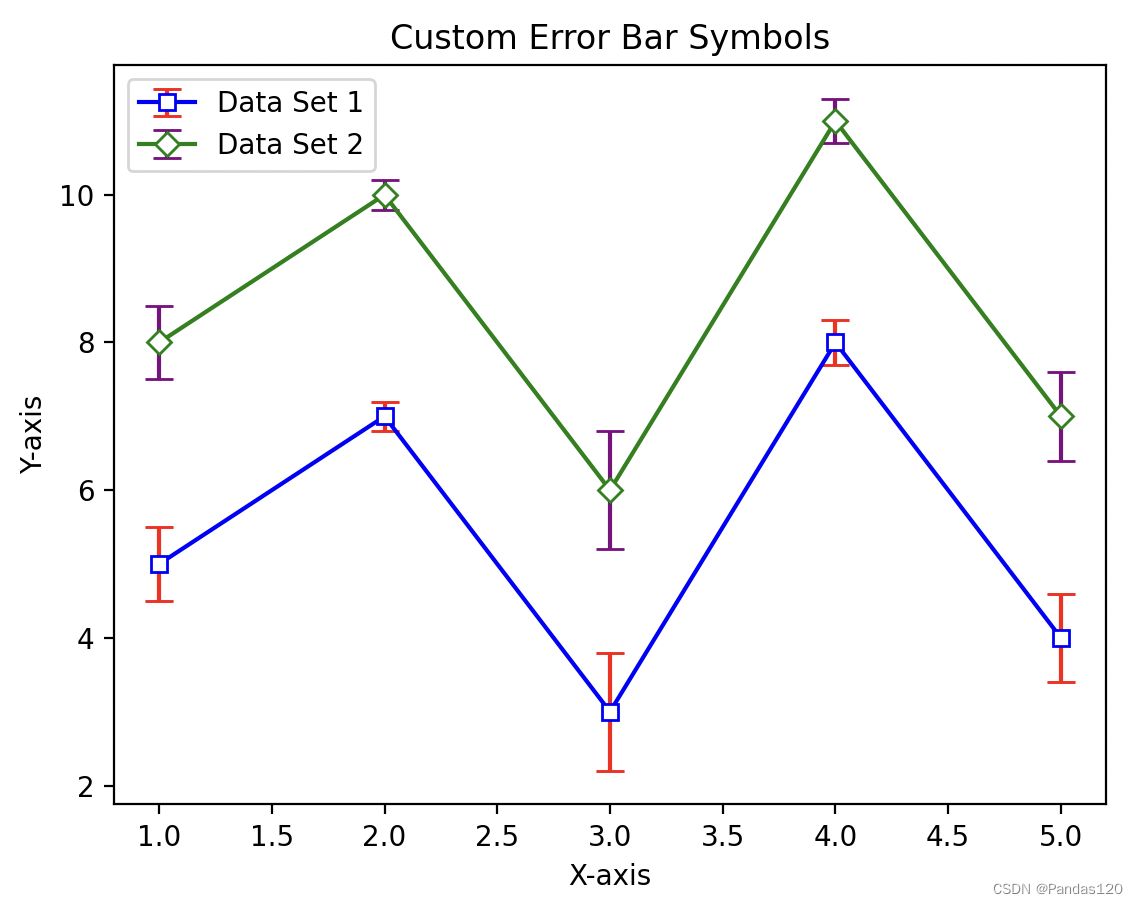
在这个例子中,添加第二组数据集和相应的大误差范围,比较了两组数据集的误差棒。使用 label 参数和 legend 函数添加图例,以便更好地识别每组数据集。 3.2. 自定义误差符号使用 marker 参数自定义误差符号的形状。例如,使用方形和三角形表示误差棒的起点和终点: # 自定义误差符号 plt.errorbar(x_values, y_values, yerr=y_error, fmt='o-', color='blue ', ecolor='red', capsize=5, marker='s', mfc='white', mec='blue', label='Data Set 1') plt.errorbar(x_values, y_values + 3, yerr=y_error, fmt='^-', color='green', ecolor='purple', capsize=5, marker='D', mfc='white', mec='green', label='Data Set 2') # 添加标题和标签 plt.title('Custom Error Bar Symbols') plt.xlabel('X-axis') plt.ylabel('Y-axis') # 添加图例 plt.legend() # 显示图像 plt.show()
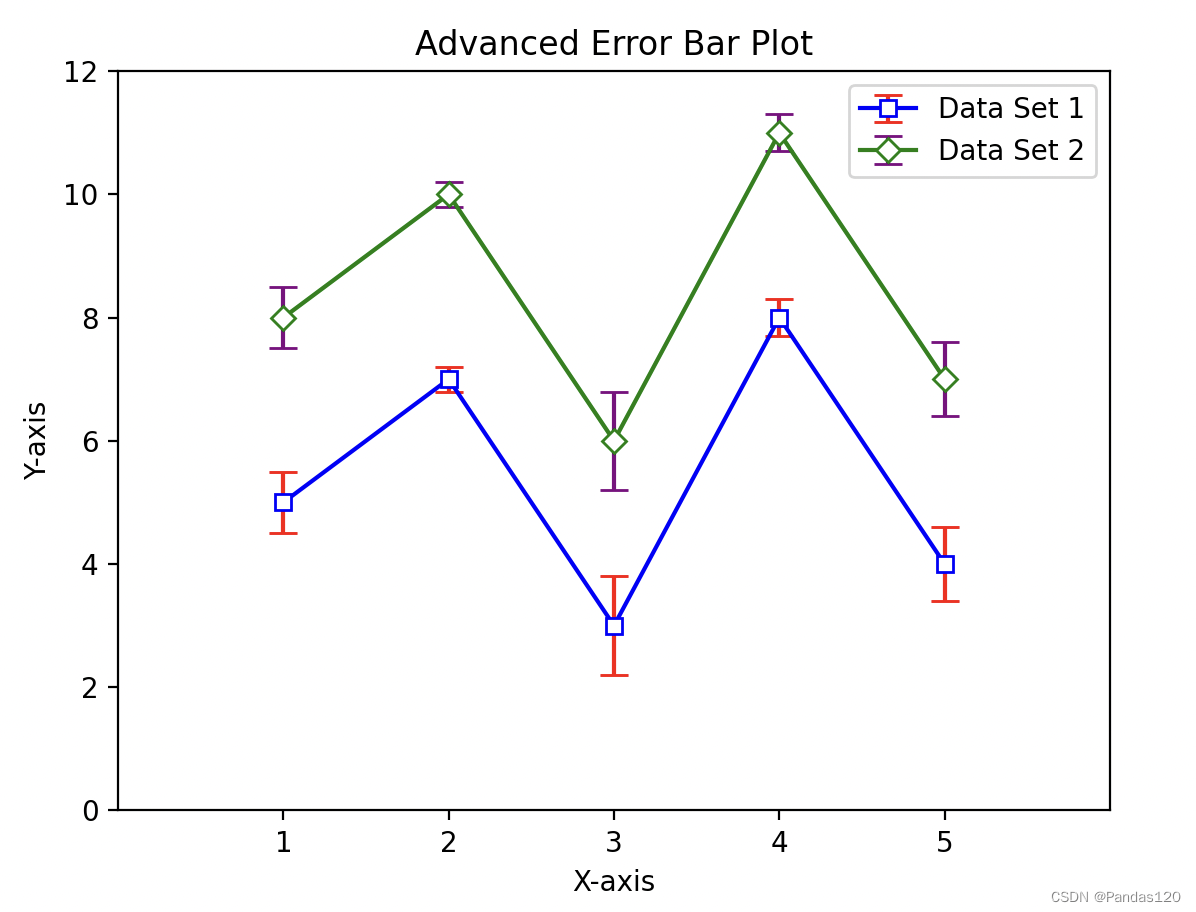
在这个例子中,设置 marker 参数来自定义误差符号的形状,使用 mfc 和 mec 参数设置 marker 的填充颜色和边框颜色。 4. 高级配置与优化除了上述介绍的基本和进阶配置之外,Matplotlib 还提供了许多高级配置选项,例如子图、图例、颜色映射等。 # 高级配置与优化 fig, ax = plt.subplots() # 绘制误差棒 ax.errorbar(x_values, y_values, yerr=y_error, fmt='o-', color='blue', ecolor='red', capsize=5, marker='s', mfc='white', mec='blue', label='Data Set 1') ax.errorbar(x_values, y_values + 3, yerr=y_error_large, fmt='^-', color='green', ecolor='purple', capsize=5, marker='D', mfc='white', mec='green', label='Data Set 2') # 设置坐标轴 ax.set_title('Advanced Error Bar Plot') ax.set_xlabel('X-axis') ax.set_ylabel('Y-axis') # 添加图例 ax.legend() # 设置坐标轴范围 ax.set_xlim(0, 6) ax.set_ylim(0, 12) # 设置坐标轴刻度 ax.set_xticks(np.arange(1, 6)) ax.set_yticks(np.arange(0, 13, 2)) # 显示图像 plt.show()
在这个例子中,使用 subplots 函数创建了一个图形对象,并通过 ax 对象更灵活地配置。这里包括了坐标轴设置、图例、坐标轴范围、坐标轴刻度等高级配置选项。 |
【本文地址】