| Python之tkinter 功能按钮Button的基本应用 | 您所在的位置:网站首页 › python下一步 › Python之tkinter 功能按钮Button的基本应用 |
Python之tkinter 功能按钮Button的基本应用
|
文章目录
Button简介Button的基本应用使用Lambda 表达式建立含图像的功能按钮图像与文字并存的功能按钮简易计算器按钮布局的应用设计鼠标光标在功能按钮上的形状
Button简介
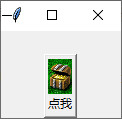
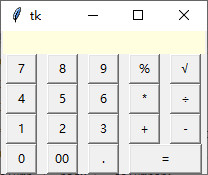
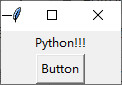
功能按钮也可称作按钮,在窗口组件中可以设计,在单击功能按钮时执行某一个特定的动作,这个动作也称为callback方法,也就是说我们可以将功能按钮当做用户与程序间沟通的桥梁。 按钮上面也可以有文字,或是和标签一样可以有图像,如果是文字样式的功能按钮,可以设定此文字的字形 它的语法格式: Botton(父对象, options,...)参数: 第一个参数:父对象,表示这个功能按钮将建立在哪一个窗口内第二个参数:options,参数如下 参数含义borderwidth边界宽度默认是两个像素bd边界宽度默认是两个像素background背景色彩bg背景色彩command单机功能按钮时,执行此方法cursor当鼠标光标移至按钮上时的形状foreground前景色彩fg前景色彩font字形height高,单位是字符高highlightbackground当功能按钮获取焦点时的背景颜色highlightcolor当功能按钮取得焦点时的颜色image功能按钮上的图像justify当有多行文字时,最后一行文字的对齐方式padx可设置功能按钮与文字的间隔默认是1pady可设置功能按钮的上下间距默认是1relief可由此控制文字外框默认是relief=FLATstate若设置为DISABLED,则以灰阶显示功能按钮,表示暂时无法使用默认是state=NORMALtext功能按钮名称underline可以设置第几个文字有下划线从0开始计算,默认是-1,表示无下划线width宽,单位是字符宽wraplength限制每行的文字数默认是0,表示只有"\n"才会换行 Button的基本应用例子:单击按钮显示字符串 import tkinter """这里我们相当于后续添加了label的属性""" def show(): label["text"] = "students" label["bg"] = "lightblue" label["fg"] = "red" root = tkinter.Tk() """这里我们先创建一个空的laber标签""" label = tkinter.Label(root) """command调用函数时只需要写函数的名字,不需要加括号""" button = tkinter.Button(root, text="打印", command=show) label.pack() button.pack() root.mainloop()运行结果: 当然,我们也可以使用config的方式来后续添加属性 例子:改用config的方式来添加 import tkinter def show(): label.config(text="python!!!", bg="lightblue", fg="red") root = tkinter.Tk() label = tkinter.Label(root) button = tkinter.Button(root, text="打印", command=show) label.pack() button.pack() root.mainloop()运行结果: 这里我们可以进一步优化,我们可以使用root.destroy来退出程序 例子: import tkinter def show(): label.config(text="python!!!", bg="lightblue", fg="red") root = tkinter.Tk() label = tkinter.Label(root) button = tkinter.Button(root, text="打印", width=15, command=show) """同理,这里的destroy也不需要加括号""" buttonBye = tkinter.Button(root, text="退出", width=15, command=root.destroy) label.pack() """这里的side=tkinter.LEFT相当于css里面的浮动,意思就是从左边开始排序""" button.pack(side=tkinter.LEFT) buttonBye.pack(side=tkinter.LEFT) root.mainloop()运行结果: 这里解释一下,root.destroy可以关闭root窗口对象,同时程序结束 另一个常用的方法是quit,可以让Python Shell执行的程序结束,但是root窗口则继续执行 例子:使用定时器功能,添加结束按钮 import tkinter count = 1 def show(aa): def counting(): global count count += 1 aa.config(text=str(count)) aa.after(1000, counting) counting() root = tkinter.Tk() label = tkinter.Label(root, bg="yellow", fg="red", height=3, width=15) buttonBye = tkinter.Button(root, text="退出", width=15, command=root.destroy) label.pack() show(label) buttonBye.pack(side=tkinter.LEFT) root.mainloop()运行结果: 例子:按按钮变颜色 import tkinter def yellow(): root.config(bg="lightyellow") def blue(): root.config(bg="lightblue") root = tkinter.Tk() root.geometry("300x200") exitbutton = tkinter.Button(root, text="Exit", command=root.destroy) bluebutton = tkinter.Button(root, text="Blue", command=blue) yellowbutton = tkinter.Button(root, text="Yellow", command=yellow) exitbutton.pack(anchor=tkinter.S, side=tkinter.RIGHT, padx=5, pady=5) bluebutton.pack(anchor=tkinter.S, side=tkinter.RIGHT, padx=5, pady=5) yellowbutton.pack(anchor=tkinter.S, side=tkinter.RIGHT, padx=5, pady=5) root.mainloop()运行结果: 我们可以用Lambda表达式来添加参数 例子:改良计时器,触发开启计时功能 import tkinter count = 1 def show(aa): def counting(): global count count += 1 aa.config(text=str(count)) aa.after(1000, counting) counting() root = tkinter.Tk() label = tkinter.Label(root, bg="yellow", fg="red", height=3, width=15) button = tkinter.Button(root, text="开始", width=15, command=lambda: show(label)) buttonBye = tkinter.Button(root, text="退出", width=15, command=root.destroy) label.pack() button.pack(side=tkinter.LEFT) buttonBye.pack(side=tkinter.LEFT) root.mainloop()运行结果: 例子:改良变颜色按钮,简化代码 import tkinter def color(bgcolor): root.config(bg=bgcolor) root = tkinter.Tk() root.geometry("300x200") exitbutton = tkinter.Button(root, text="Exit", command=root.destroy) bluebutton = tkinter.Button(root, text="Blue", command=lambda: color("lightblue")) yellowbutton = tkinter.Button(root, text="Yellow", command=lambda: color("lightyellow")) exitbutton.pack(anchor=tkinter.S, side=tkinter.RIGHT, padx=5, pady=5) bluebutton.pack(anchor=tkinter.S, side=tkinter.RIGHT, padx=5, pady=5) yellowbutton.pack(anchor=tkinter.S, side=tkinter.RIGHT, padx=5, pady=5) root.mainloop()运行结果: 一般功能按钮是用文字当按钮名称,其实也可以用图像当做按钮名称,若是使用图像当按钮名称,在Button()内可以省略text参数设置按钮名称,但是要在Button()内要增加image参数设置图像对象 例子:使用图像按钮 import tkinter def show(): label.config(text="Python!!!", bg="lightyellow", fg="red") root = tkinter.Tk() img = tkinter.PhotoImage(file="1.gif") label = tkinter.Label(root) button = tkinter.Button(root, image=img, command=show) label.pack() button.pack() root.mainloop()运行结果: 在设计功能按钮时,若是想要让图像和文字并存于功能按钮内,需要在Button()内增加参数"compound=参数",参数如下 参数含义LEFT左TOP上RIGHT右BOTTOM下CENTER中央例子:将图像放在文字上方 import tkinter def show(): label.config(text="Python!!!", bg="lightyellow", fg="red") root = tkinter.Tk() img = tkinter.PhotoImage(file="1.gif") label = tkinter.Label(root) button = tkinter.Button(root, image=img, text="点我", compound=tkinter.TOP, command=show) label.pack() button.pack() root.mainloop()运行结果: 运行结果: 运行结果:
运行结果: 谢谢观看,笔者会持续更新,如有错误或者建议,请私信我 |

 例子:将图像与文字重叠
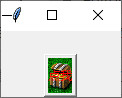
【本文地址】
公司简介
联系我们
| 今日新闻 |
| 推荐新闻 |
| 专题文章 |