| 【python学习】 | 您所在的位置:网站首页 › oppofindx怎么设置图标大小 › 【python学习】 |
【python学习】
|
写完毕业论文啦,终于可以有时间把学到的东西整理一下,今天总结一下关于图形绘制及让图好看的操作。 python 图形绘制 一、图形绘制1.1简单图形1.2 改线粗、颜色、添加图例、点形状1.3 颜色设置模块1.4图例设置1.4.1 图例背景\位置\大小1.4.1.1 图例位置1.4.1.2 图例大小1.4.1.2 图例字体类型 1.5 线类型1.6 点形状(marker)1.5 在图中添加文字(text)1.6 改刻度范围、刻度字体大小及坐标轴字体1.7 改图框粗细及图像大小像素1.7.1 图框粗细1.7.2 去除任意坐标轴1.7.3 图像大小像素设置 二、完整的图形实例 一、图形绘制 1.1简单图形先从绘制一幅简单的图开始,假设已知要画的点,那么: import matplotlib #引入画图数据库 import matplotlib.pyplot as plt import numpy as np # Data for plotting x=[1,2,3,4,5] y=[1,4,9,16,25] plt.plot(x,y) #画图,自变量x放前面 plt.show()
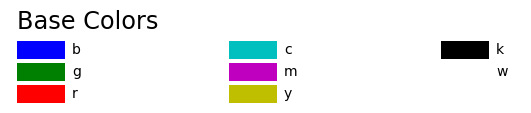
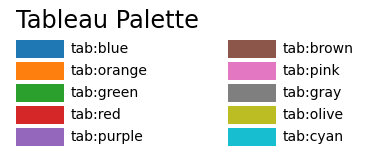
是不是感觉图不好看?接下来改线粗、颜色、线类型、添加标签 plt.plot(x,y,,linewidth =2.0, label = r"$\mathregular{\xi_a}$=0",color='b', linestyle='-',marker='*') #功能依次为线粗、标签(图例)、颜色、线类型、点形状 plt.legend() #标签显示(一般称为图例)这里所涉及的相关参数在后面都会给出选择 即将color='b’中的b改成颜色模块后的字母,如r,tab:pink,black等 图例的代码与latex的是相通的 参考链接:https://blog.csdn.net/Ying_Xu/article/details/51240291 需要展示希腊字母时: label=r"$希腊字母代码$"展示普通字母: label="$普通字母$" 1.4.1 图例背景\位置\大小官方关于plt.legend()各个参数的设置:https://matplotlib.org/api/legend_api.html?highlight=legend#module-matplotlib.legend plt.legend(frameon=False,loc="upper right",fontsize='small') #分别为图例无边框、图例放在右上角、图例大小 1.4.1.1 图例位置图例位置一般系统会默认最好的位置(best),不过有些情况需要自己调。将一块平面分为九个方向,分别为: 右上“upper right”,右下“lower right”,正右“right”,左上“upper left”,左下“lower left”,中央偏左“center left”,中央偏上“upper center”,中央偏下“lower center”,正中央“center”  1.4.1.2 图例大小
图例大小有几种,如果不设置系统默认偏小,自调可以用:‘xx-small’, ‘x-small’, ‘small’, ‘medium’, ‘large’, ‘x-large’, ‘xx-large’ 1.4.1.2 图例字体类型 font3 = {'family' : 'Arial', 'weight' : 'normal'} plt.legend(frameon=False,loc="upper right",fontsize='small',prop=font3) #分别为图例无边框、图例放在右上角、图例大小使用形参prop=font3,设置图例的字体类型,也可以通过在font3中添加size=10,实现设置图例大小 1.5 线类型官方参考链接:https://matplotlib.org/gallery/lines_bars_and_markers/linestyles.html#sphx-glr-gallery-lines-bars-and-markers-linestyles-py linestyle=‘此处放左边名字的下方小字’,如:linestyle=‘solid’,linestyle=(0, (1, 10)); 官方参考:https://matplotlib.org/gallery/lines_bars_and_markers/marker_reference.html#sphx-glr-gallery-lines-bars-and-markers-marker-reference-py https://matplotlib.org/gallery/lines_bars_and_markers/marker_fillstyle_reference.html#sphx-glr-gallery-lines-bars-and-markers-marker-fillstyle-reference-py marker=‘形状代码’,形状大小可以用代码:markersize=4
关于font:https://matplotlib.org/_modules/matplotlib/font_manager.html#FontEntry https://www.w3.org/TR/CSS2/ https://matplotlib.org/gallery/text_labels_and_annotations/fonts_demo.html#sphx-glr-gallery-text-labels-and-annotations-fonts-demo-py 这里相当于再画一个图框覆盖在原来的图上面,去掉任意一条边并不能在图上去掉,这里去掉一条边只是让那条边不变粗而已 #设置图框线粗细 bwith = 1.5 #边框宽度设置为2 TK = plt.gca()#获取边框 TK.spines['bottom'].set_linewidth(bwith)#图框下边 TK.spines['left'].set_linewidth(bwith)#图框左边 TK.spines['top'].set_linewidth(bwith)#图框上边 TK.spines['right'].set_linewidth(bwith)#图框右边 1.7.2 去除任意坐标轴官方参考:https://matplotlib.org/gallery/axisartist/simple_axisline3.html#sphx-glr-gallery-axisartist-simple-axisline3-py import matplotlib.pyplot as plt from mpl_toolkits.axisartist.axislines import Subplot fig = plt.figure(figsize=(3, 3)) ax = Subplot(fig, 111) fig.add_subplot(ax) ax.axis["right"].set_visible(False) ax.axis["top"].set_visible(False) plt.show()
官方指导:https://matplotlib.org/api/_as_gen/matplotlib.figure.Figure.html?highlight=dpi#matplotlib.figure.Figure.dpi plt.rcParams['figure.figsize']=(6.0,4.0) plt.rcParams['savefig.dpi'] = 200 #图片像素 plt.rcParams['figure.dpi'] = 200 #分辨率 # 默认的像素:[6.0,4.0],分辨率为100,图片尺寸为 600&400 # 指定dpi=200,图片尺寸为 1200*800 # 指定dpi=300,图片尺寸为 1800*1200 # 设置figsize可以在不改变分辨率情况下改变比例 二、完整的图形实例 import matplotlib #引入画图数据库 import matplotlib.pyplot as plt # Data for plotting x=[1,2,3,4,5] y=[1,4,9,16,25] plt.plot(x,y,linewidth =2.0, label = r"$\mathregular{\xi_a}$=0",color='tab:pink', linestyle='solid',marker='D') #画图,自变量x放前面 #以下为图形设置参数 plt.legend(frameon=False,loc="upper left",fontsize='large') #设置图例无边框,将图例放在左上角 plt.rcParams['figure.figsize']=(6.0,4.0) #图形大小 plt.rcParams['savefig.dpi'] = 200 #图片像素 plt.rcParams['figure.dpi'] = 200 #分辨率 # 默认的像素:[6.0,4.0],分辨率为100,图片尺寸为 600&400 # 指定dpi=200,图片尺寸为 1200*800 # 指定dpi=300,图片尺寸为 1800*1200 # 设置figsize可以在不改变分辨率情况下改变比例 font1 = {'family' : 'Arial', 'weight' : 'normal', 'size' : 18, } plt.xlabel('x',font1) #x轴坐标名称及字体样式 plt.ylabel('y',font1) #y轴坐标名称及字体样式 #插入文本框 plt.text(-1, 30,'(a)',fontsize=18) #在图中添加文本 plt.xticks(fontsize=13) #x轴刻度字体大小 plt.yticks(fontsize=13) #y轴刻度字体大小 plt.xlim(0,6)#X轴范围 plt.ylim(0,30)#显示y轴范围 #设置图框线粗细 bwith = 1.5 #边框宽度设置为2 TK = plt.gca()#获取边框 TK.spines['bottom'].set_linewidth(bwith) TK.spines['left'].set_linewidth(bwith) TK.spines['top'].set_linewidth(bwith) TK.spines['right'].set_linewidth(bwith) #plt.grid() #显示网格线 plt.show()
|


【本文地址】