| [ kvm ] 学习笔记 9:WebVirtMgr 基础及安装使用 | 您所在的位置:网站首页 › openwrt安装kvm虚拟机 › [ kvm ] 学习笔记 9:WebVirtMgr 基础及安装使用 |
[ kvm ] 学习笔记 9:WebVirtMgr 基础及安装使用
|
目录- 1. 前言- 2. webvirtmgr 简介- 3. webvirtmgr 部署实践 - 3.1 配置 webvirtmgr 主机 - 3.2 kvm node节点配置 - 3.3 控制台和kvm节点交互配置 1. 前言 上一篇:[kvm] Ovirt基础及安装使用 介绍了 ovirt 的安装和基础使用,本篇则介绍更加轻量级的 webvirtmgr,相比较 ovirt,webvirtmgr则显得更加轻量化和简单易用。 ovirt 比较适合较大的集群规模,比如虚拟机上千的集群,而对于虚拟机10-200 之间来说,采用 webvirtmgr 将更加便捷。 2. webvirtmgr 简介 webvirtmgr 特点 操作简单,易于使用通过libvirt的API接口对kvm进行管理提供对虚拟机生命周期管理
WebVirtMgr 功能 宿主机管理支持以下功能: CPU利用率内存利用率网络资源池管理存储资源池管理虚拟机镜像虚拟机克隆快照管理日志管理虚机迁移
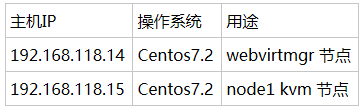
虚拟机管理支持以下功能: CPU利用率内存利用率光盘管理关/开/暂停虚拟机安装虚拟机VNC console连接创建快照 3. webvirtmgr 部署实践 我们线上有也有在用 webvirtmgr,这里在测试环境搭建做下记录,环境如下:
首先,selinux 和 防火墙都是关闭状态。 修改主机名: [[email protected] ~]#hostnamectl set-hostname webvirtmgr.super.com [[email protected] ~]#echo -e "192.168.118.14 webvirtmgr.super.com\n192.168.118.15 node1.super.com" >> /etc/hosts [[email protected] ~]#hostnamectl set-hostname node1.super.com [[email protected] ~]#echo -e "192.168.118.14 webvirtmgr.super.com\n192.168.118.15 node1.super.com" >> /etc/hosts关闭 NetworkManager 服务,否则后面通过 virsh 创建网桥设备时,会创建失败。 #systemctl stop NetworkManager ; systemctl disable NetworkManager3.1 配置 webvirtmgr 主机 启用epel的源,我一般是使用阿里云的centos源及epel源,见`http://mirrors.aliyun.com/help/centos`, `http://mirrors.aliyun.com/help/epel` #wget -O /etc/yum.repos.d/CentOS-Base.repo http://mirrors.aliyun.com/repo/Centos-7.repo #wget -O /etc/yum.repos.d/epel.repo http://mirrors.aliyun.com/repo/epel-7.repo首先安装必备的一些包 [[email protected] ~]#yum install gcc python-devel openssl-devel -y [[email protected] ~]#yum -y install git python-pip libvirt-python libxml2-python python-websockify supervisor nginx
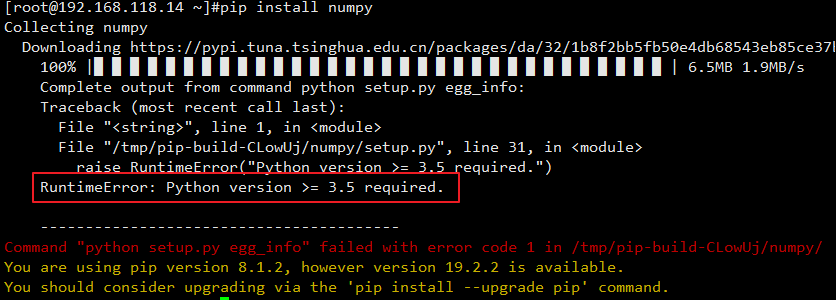
配置国内 pip 源,默认国外 pip 太慢了。 [[email protected] ~]#mkdir -pv ~/.pip/ mkdir: created directory ‘/root/.pip/’ [[email protected] ~]#cat ~/.pip/pip.conf [global] timeout = 6000 index-url = https://pypi.tuna.tsinghua.edu.cn/simple trusted-host = pypi.tuna.tsinghua.edu.cn安装 numpy 模块 [[email protected] ~]#pip install numpy
本地是 python 2.7 最新版本的 numpy 不支持,这就需要手动下载安装。 下载链接:https://pypi.tuna.tsinghua.edu.cn/packages/c4/33/8ec8dcdb4ede5d453047bbdbd01916dbaccdb63e98bba60989718f5f0876/numpy-1.16.2-cp27-cp27mu-manylinux1_x86_64.whl#sha256=fb3c83554f39f48f3fa3123b9c24aecf681b1c289f9334f8215c1d3c8e2f6e5b [[email protected] ~]#wget https://pypi.tuna.tsinghua.edu.cn/packages/c4/33/8ec8dcdb4ede5d453047bbdbd01916dbaccdb63e98bba60989718f5f0876/numpy-1.16.2-cp27-cp27mu-manylinux1_x86_64.whl#sha256=fb3c83554f39f48f3fa3123b9c24aecf681b1c289f9334f8215c1d3c8e2f6e5b [[email protected] ~]#pip install numpy-1.16.2-cp27-cp27mu-manylinux1_x86_64.whl 测试是否安装成功: [[email protected] ~]#python Python 2.7.5 (default, Jun 20 2019, 20:27:34) [GCC 4.8.5 20150623 (Red Hat 4.8.5-36)] on linux2 Type "help", "copyright", "credits" or "license" for more information. >>> import numpy没有报错,说明安装成功。
下载 webvirtmgr 程序包 [[email protected] ~]#git clone git://github.com/retspen/webvirtmgr.git
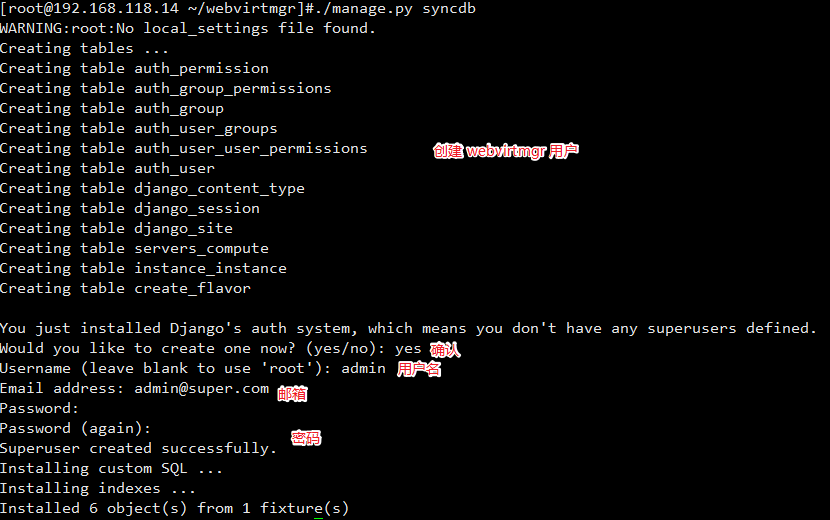
安装python程序依赖的库文件 [[email protected] ~/webvirtmgr]# pip install -r requirements.txt [[email protected] ~/webvirtmgr]#./manage.py syncdb
生成配置文件
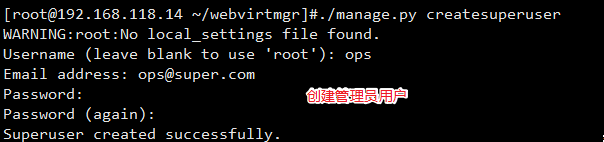
创建管理员用户
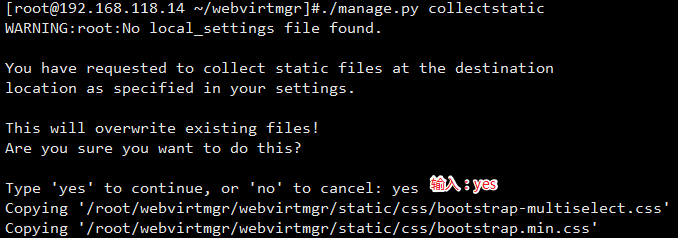
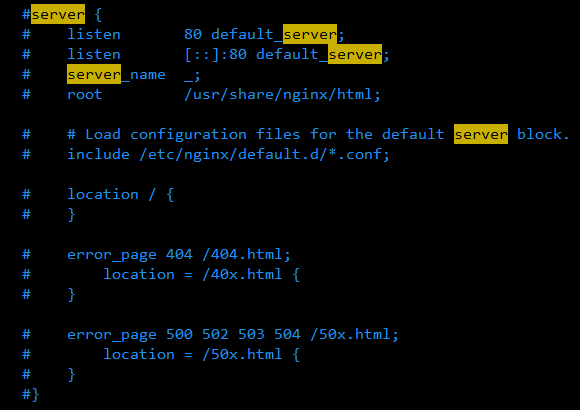
接下来,将 webvirtmgr 项目整个做成web可以访问的站点 [[email protected] ~]#mkdir -pv /var/www [[email protected] ~]#cp -a webvirtmgr/ /var/www/ [[email protected] ~]#chown -R nginx:nginx /var/www/修改nginx 主配置文件:将默认的 server 段注释掉 [[email protected] ~]#vim /etc/nginx/nginx.conf
新增配置文件 webvirtmgr.conf [[email protected] ~]#cat /etc/nginx/conf.d/webvirtmgr.conf server { listen 80 default_server; server_name $hostname; #access_log /var/log/nginx/webvirtmgr_access_log; location /static/ { root /var/www/webvirtmgr/webvirtmgr; # or /srv instead of /var expires max; } location / { proxy_pass http://127.0.0.1:8000; proxy_set_header X-Real-IP $remote_addr; proxy_set_header X-Forwarded-for $proxy_add_x_forwarded_for; proxy_set_header Host $host:$server_port; proxy_set_header X-Forwarded-Proto $scheme; proxy_connect_timeout 600; proxy_read_timeout 600; proxy_send_timeout 600; client_max_body_size 1024M; # Set higher depending on your needs } }
检查语法: [[email protected] ~]#nginx -t nginx: the configuration file /etc/nginx/nginx.conf syntax is ok nginx: configuration file /etc/nginx/nginx.conf test is successful [[email protected] ~]#nginx [[email protected] ~]#netstat -ntplu | egrep nginx tcp 0 0 0.0.0.0:80 0.0.0.0:* LISTEN 17710/nginx: master启动成功,通过 web 尝试访问。
修改配置 supervisor 服务 [[email protected] ~]#vim /etc/supervisord.conf 添加如下内容: [program:webvirtmgr] command=/usr/bin/python /var/www/webvirtmgr/manage.py run_gunicorn -c /var/www/webvirtmgr/conf/gunicorn.conf.py directory=/var/www/webvirtmgr autostart=true autorestart=true logfile=/var/log/supervisor/webvirtmgr.log log_stderr=true user=nginx [program:webvirtmgr-console] command=/usr/bin/python /var/www/webvirtmgr/console/webvirtmgr-console directory=/var/www/webvirtmgr autostart=true autorestart=true stdout_logfile=/var/log/supervisor/webvirtmgr-console.log redirect_stderr=true user=nginx 启动服务 [[email protected] ~]#systemctl start supervisord [[email protected] ~]#systemctl status supervisord ● supervisord.service - Process Monitoring and Control Daemon Loaded: loaded (/usr/lib/systemd/system/supervisord.service; disabled; vendor preset: disabled) Active: active (running) since Tue 2019-08-13 09:51:25 CST; 1s ago Process: 17741 ExecStart=/usr/bin/supervisord -c /etc/supervisord.conf (code=exited, status=0/SUCCESS) Main PID: 17744 (supervisord) CGroup: /system.slice/supervisord.service ├─17744 /usr/bin/python /usr/bin/supervisord -c /etc/supervisord.conf ├─17745 /usr/bin/python /var/www/webvirtmgr/console/webvirtmgr-console ├─17746 /usr/bin/python /var/www/webvirtmgr/manage.py run_gunicorn -c /var/www/webvirtmgr/conf/gunicorn.conf.py ├─17755 /usr/bin/python /var/www/webvirtmgr/manage.py run_gunicorn -c /var/www/webvirtmgr/conf/gunicorn.conf.py ├─17756 /usr/bin/python /var/www/webvirtmgr/manage.py run_gunicorn -c /var/www/webvirtmgr/conf/gunicorn.conf.py ├─17757 /usr/bin/python /var/www/webvirtmgr/manage.py run_gunicorn -c /var/www/webvirtmgr/conf/gunicorn.conf.py ├─17758 /usr/bin/python /var/www/webvirtmgr/manage.py run_gunicorn -c /var/www/webvirtmgr/conf/gunicorn.conf.py ├─17759 /usr/bin/python /var/www/webvirtmgr/manage.py run_gunicorn -c /var/www/webvirtmgr/conf/gunicorn.conf.py └─17760 /usr/bin/python /var/www/webvirtmgr/manage.py run_gunicorn -c /var/www/webvirtmgr/conf/gunicorn.conf.py Aug 13 09:51:25 webvirtmgr.super.com systemd[1]: Starting Process Monitoring and Control Daemon... Aug 13 09:51:25 webvirtmgr.super.com systemd[1]: Started Process Monitoring and Control Daemon.
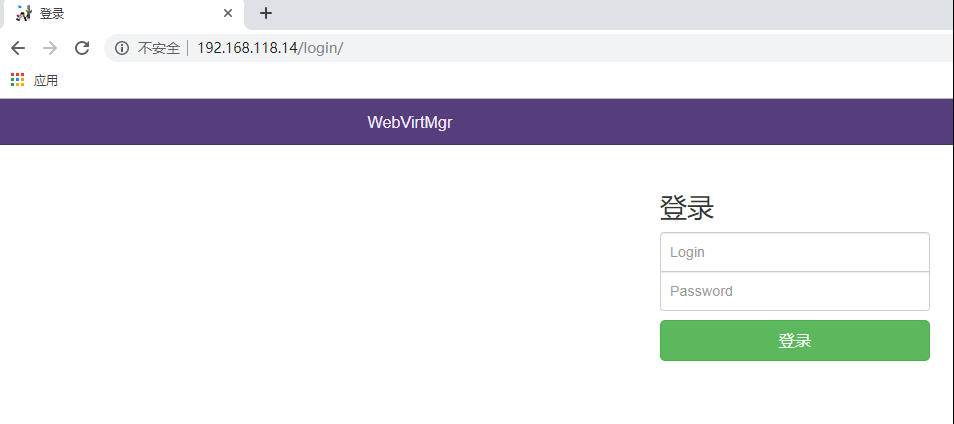
浏览器尝试访问webvirtmgr 地址:http://192.168.118.14/login/
上面创建的两个用户都可以登录。
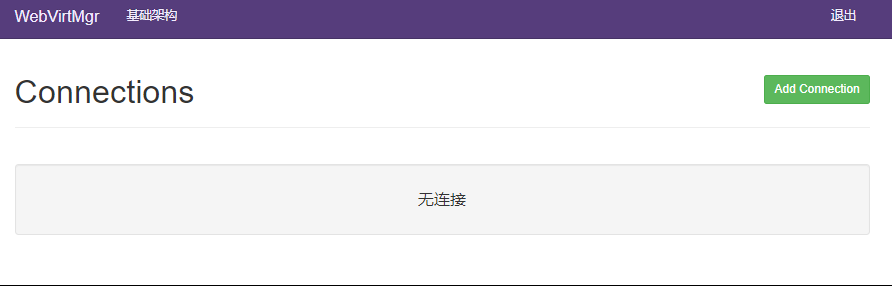
登录成功。到此,webvirtmgr控制台安装完毕。 3.2 kvm node节点配置 切换到 node1 节点(192.168.118.15)安装部署 [[email protected] ~]#yum install libvirt qemu-kvm virt-viewer -y这里有一步容易忽视,会造成后面虚拟机无法创建成功,需要注意下。 [[email protected] ~]#ln -vs /usr/libexec/qemu-kvm /usr/bin/ ‘/usr/bin/qemu-kvm’ -> ‘/usr/libexec/qemu-kvm’不需要默认nat网络模式,移除 [[email protected] ~]#mv /etc/libvirt/qemu/networks/default.xml /tmp/ [[email protected] ~]#systemctl start libvirtd [[email protected] ~]#systemctl status libvirtd ● libvirtd.service - Virtualization daemon Loaded: loaded (/usr/lib/systemd/system/libvirtd.service; enabled; vendor preset: enabled) Active: active (running) since Tue 2019-08-13 09:59:25 CST; 1s ago Docs: man:libvirtd(8) http://libvirt.org Main PID: 20741 (libvirtd) CGroup: /system.slice/libvirtd.service └─20741 /usr/sbin/libvirtd Aug 13 09:59:25 node1.super.com systemd[1]: Starting Virtualization daemon... Aug 13 09:59:25 node1.super.com systemd[1]: Started Virtualization daemon.3.3 控制台和kvm节点交互配置 到此,kvm 主机算配置完成,接下来需要配置控制台到kvm主机交互的环节 webvirtmgr 主机 切换到 nginx 用户,生成密钥对,然后将公钥拷贝到 kvm主机节点,实现免密码登录,因为命令是通过nginx用户发送到kvm主机执行的。 [[email protected] ~]#su - nginx -s /bin/bash -bash-4.2$ ssh-keygen -t rsa -P '' Generating public/private rsa key pair. Enter file in which to save the key (/var/lib/nginx/.ssh/id_rsa): Created directory '/var/lib/nginx/.ssh'. Your identification has been saved in /var/lib/nginx/.ssh/id_rsa. Your public key has been saved in /var/lib/nginx/.ssh/id_rsa.pub. The key fingerprint is: b4:0d:f6:0e:2d:5e:94:2b:56:97:b4:e0:7b:e3:26:f9 [email protected] The key's randomart image is: +--[ RSA 2048]----+ | . . | | . + o | | + = + | | o O + | | S B o | | o * + . | | . + o | | + | | E | +-----------------+# 将密钥拷贝到 KVM主机 ssh-copy-id [email protected]注意:如果这里是非22端口则采用如下命令:ssh-copy-id '-p [ssh端口] [email protected]'
可以在 webvirtmgr 安装 libvirt-client 进行测试: [[email protected] ~]#yum install libvirt-client -y -bash-4.2$ virsh --connect qemu+ssh://[email protected]/system list --all Id Name State ----------------------------------------------------
访问成功,接下来就可以在 web 页面进行操作了。
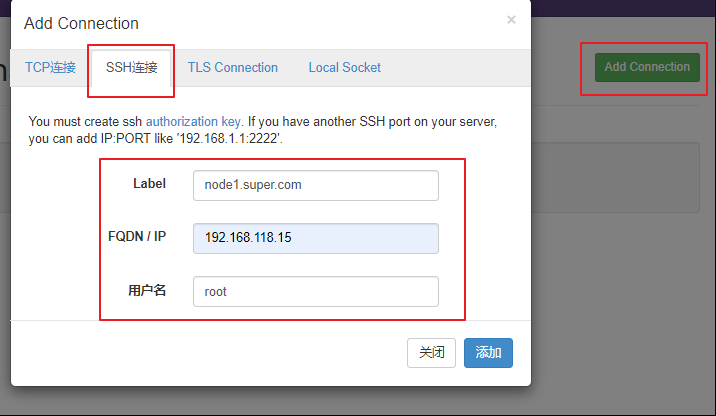
这里是直接使用 root用户,建议使用普通用户,但是要注意权限,点击添加
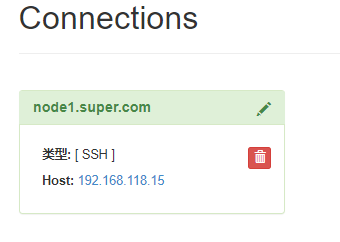
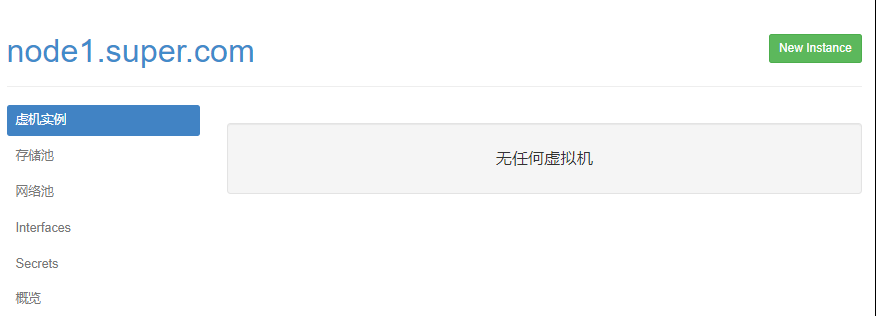
点进来如果没有任何报错,那么基本上已经添加主机成功了。
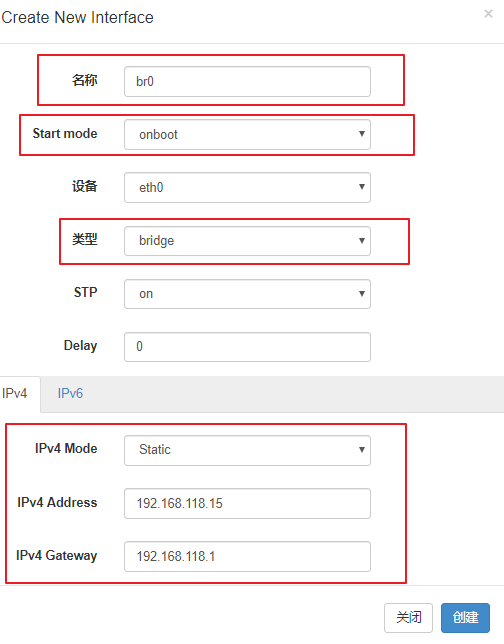
1. 创建网桥 在创建网桥这一步要非常小心,因为稍微不注意网卡起不来就有可能直接无法连接服务器。 关闭 NetworkManager 服务 [[email protected] ~]#systemctl stop NetworkManager; systemctl disable NetworkManager
点击创建。 这里发现使用 web 页面创建网桥没有成功。 [[email protected] ~]#brctl show bridge name bridge id STP enabled interfaces如果没有创建成功,则直接通过命令行创建: [[email protected] ~]#virsh iface-bridge eth0 br0 Created bridge br0 with attached device eth0 Bridge interface br0 started [[email protected] ~]#brctl show bridge name bridge id STP enabled interfaces br0 8000.5254006205ad yes eth0
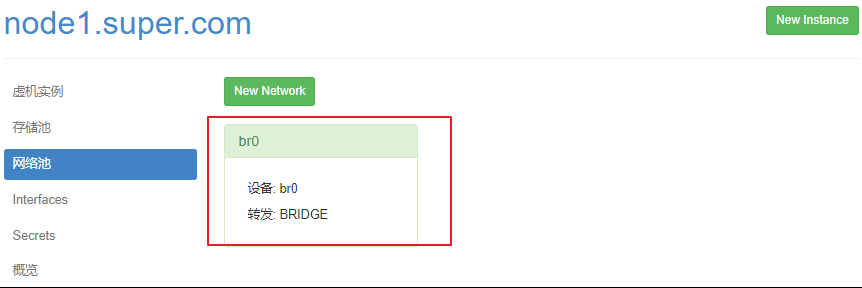
创建成功,切换到web页面刷新
创建的 br0 网桥已经出现。
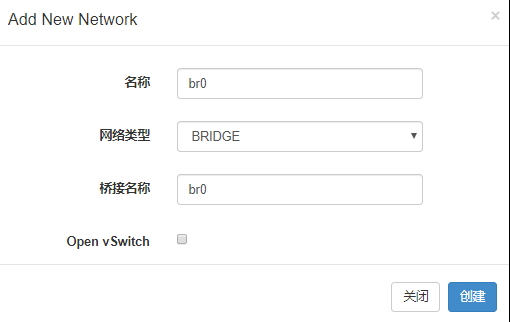
2. 创建网络池
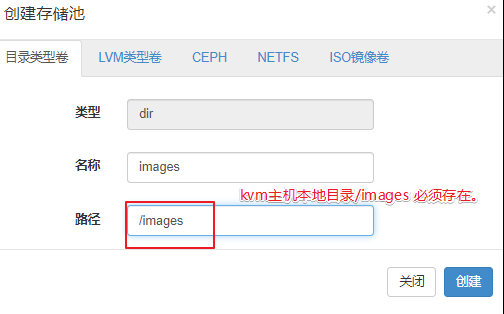
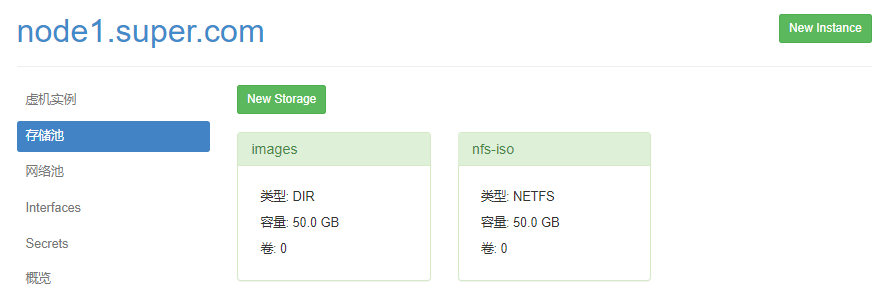
3. 创建存储池 一般可以创建两个存储池: (1) 用来存放虚拟磁盘文件(本地) (2) 用来存放 iso 文件 (nfs)
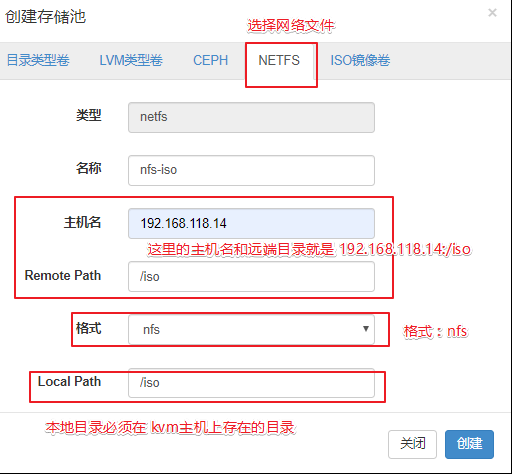
创建 iso 存储池需要在 webvirtmgr 节点安装 nfs 配置 [[email protected] ~]#yum install nfs-utils -y [[email protected] ~]#cat /etc/exports /iso *(rw,sync) [[email protected] ~]#systemctl start rpcbind [[email protected] ~]#systemctl start nfs
在 kvm 主机上测试 [[email protected] ~]#showmount -e 192.168.118.14 Export list for 192.168.118.14: /iso * [[email protected] ~]#mkdir -pv /iso mkdir: created directory ‘/iso’
ok,nfs是可以访问到的。切换到 web 界面进行配置
两个存储池创建成功,接下来就可以尝试创建虚拟机了。
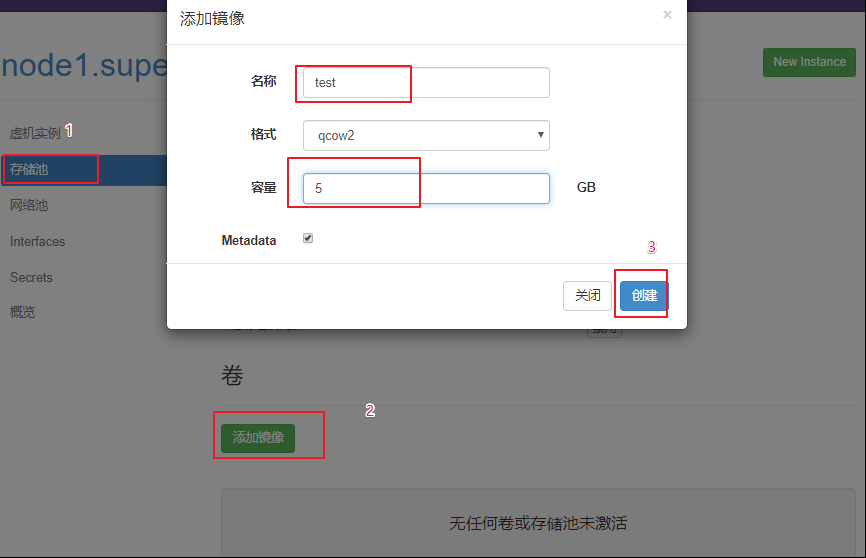
4. 创建虚拟机 (1)创建虚拟磁盘文件
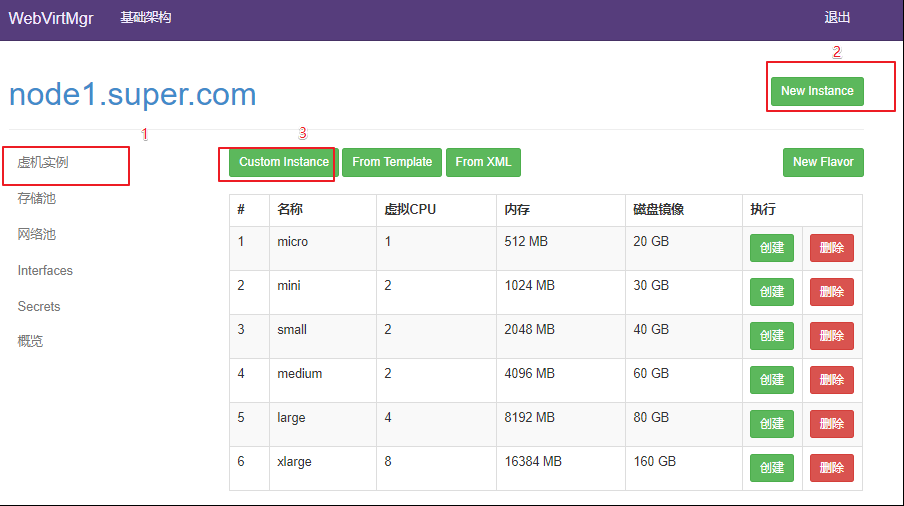
(2)创建虚拟机
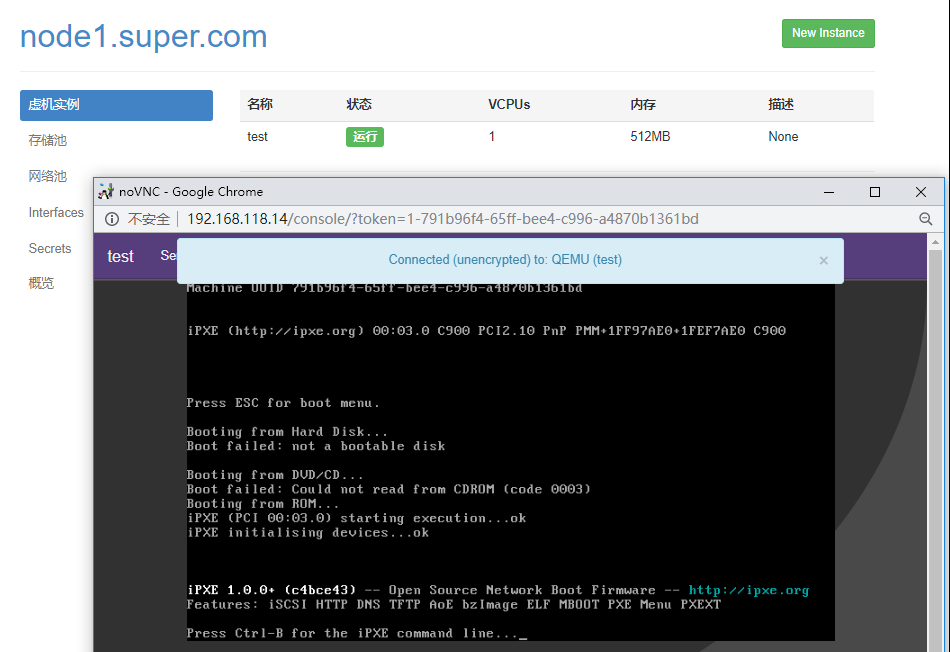
创建完成后,启动虚拟机
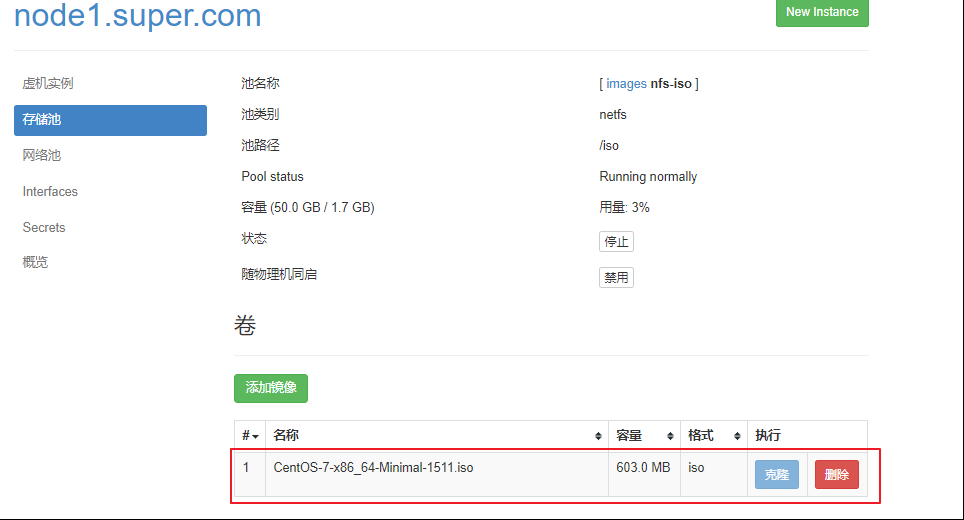
可以直接通过控制台查看虚拟机。虚拟机创建完成。 现在拷贝 Centos 7 镜像到 存储池的 iso 目录下。 [[email protected] ~]#scp 192.168.118.8:/usr/local/src/CentOS-7-x86_64-Minimal-1511.iso /iso/切换到web页面查看存储池。
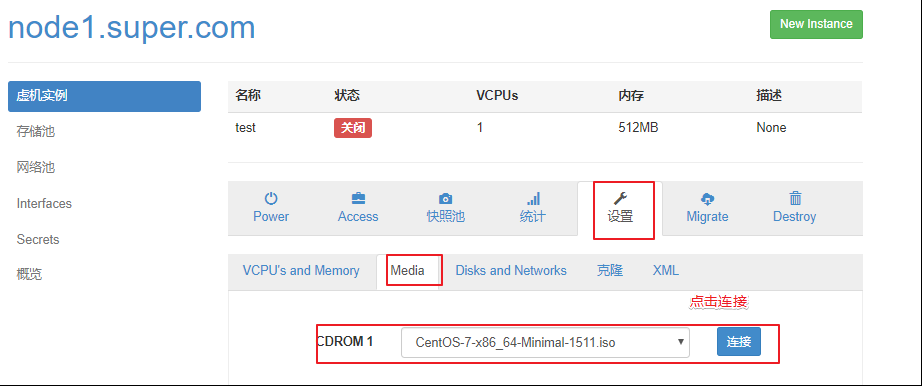
关闭当前虚拟机,为虚拟机添加 iso CDROM
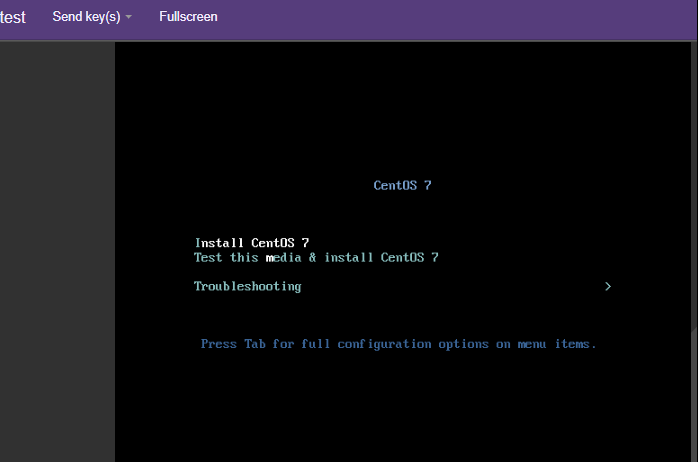
再次开启虚拟机,就可以为虚拟机安装操作系统了。
完毕。
|


【本文地址】