| RANSAC随机抽样一致性圆拟合 | 您所在的位置:网站首页 › opencv平面拟合ransac › RANSAC随机抽样一致性圆拟合 |
RANSAC随机抽样一致性圆拟合
|
概要
本文介绍基于ransac随机抽样一致性的圆拟合方法,涵盖一下的内容。 ransac的算法步骤 基于opencv编码实现 在上一篇文章【ransac随机抽样一致性直线拟合】介绍了基于ransac方法做直线拟合,本文基于ransac拟合圆思路与其一直,ransac的思想流程都是一样的,区别的是拟合的模型有所不同,关于ransac的思想与迭代参数的选择可以参考上一篇文章的介绍,下面直接给出算法流程步骤。
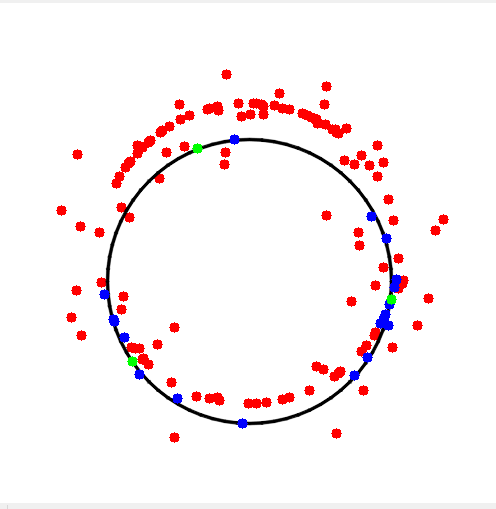
ransac算法流程是一样的,所以我们基于上一篇文章中的算法流程做简单修改即可,需要修改的地方有 采样点数由2个变为3个 直线拟合变为圆拟合 最优迭代次数公式中最小采样点数由2改为3圆拟合方法把【最小二乘法】文中的代码拿来直接用即可 1 2 3 4 5 6 7 8 9 10 11 12 13 14 15 16 17 18 19 20 21 22 23 24 25 26 27 28 29 30 31 32 33 34 35 36 37 38 39 40 41 42 43 44 45 46 47 48 49 50 51 52 53 54 55 56 57 58 59 60 61 62 63 64 65 66 67 68 69 70 71 72 73 74 75 76 77 78 79 80 81 82 83 84 85 86 87 88 89 90 91 92 93 94 95 96 97 98 99 100 101 102 103 104 105 106 107 108 109 110 111 112 113 114 115 116 117 118 119 120 121 122 123 124 125 126 127 128 129 130 131 132 133 134 135 136 137 138 139 140 141 142 143 144 145 146 147 148 149 150 151 152 153 154 155 156 157 158 159 160 161 162 163 164 165 166 167 168 169 170 171 172 173 174 175 176 177 178 179 180 181 182 183 184 185 186 187 188 189 190 191 192 193 194 195 196 197 198 199 200 201 202 203 204 205 206 207 208 209 210 211 212 213 214 215 216 217 218 219 220 221 222 223 224 225 226 227 228 229 230 231 232 233 234 235 236 237 238 239 240 241 242 243 244 245 246 247 248 249 250 251 252 253 254 255 256 257 258 #include "opencv2/opencv.hpp" #include #include #include #include std::tuple GetSample(const int& index_size, const std::vector& sampled_indexes) { assert(index_size > 2); static std::random_device rd; static std::mt19937_64 gen(rd()); static std::uniform_int_distribution dist(0, index_size - 1); while (true) { std::vector index = { dist(gen),dist(gen),dist(gen) }; if (index[0] == index[1] || index[0] == index[2] || index[1] == index[2]) { continue; } std::sort(index.begin(), index.end()); bool has_sampled = false; for (auto& [i, j, k] : sampled_indexes) { if (index[0] == i && j == index[1] && k == index[2]) { has_sampled = true; break; } } if (has_sampled) { continue; } else { return { index[0], index[1], index[2]}; } } } void Show(const std::vector& all_pts, const std::vector& inlier_pts, const std::vector& sample_pts, const int windows_size, const cv::Point2f& center, const float radius) { cv::Mat image = cv::Mat(windows_size, windows_size, CV_8UC3, cv::Scalar::all(255)); for (auto& p : all_pts) { if (p.x >= 0 && p.x = 0 && p.y = 0 && p.x = 0 && p.y = 0 && p.x = 0 && p.y |
【本文地址】
公司简介
联系我们