| NixOS & Legacy Boot(MBR) VmwareWorkstation安装向导 | 您所在的位置:网站首页 › mbr问题 › NixOS & Legacy Boot(MBR) VmwareWorkstation安装向导 |
NixOS & Legacy Boot(MBR) VmwareWorkstation安装向导
NixOS & Legacy Boot(MBR) VmwareWorkstation安装向导
目录
NixOS & Legacy Boot(MBR) VmwareWorkstation安装向导1. 下载镜像2. 创建空白虚拟机3. 使用命令行安装 NixOS3.1 Legacy Boot(MBR)3.2 格式化
4. configration.nix 配置文件==关于网络问题与镜像源选择(必看)====关于NixOS安装Vmware Tools(必看)==
5. 部署NixOS6. 部分教育站镜像源集合参考资料⚠️未解决的问题
1. 下载镜像
NixOS 清华大学开源镜像站NixOS 官方 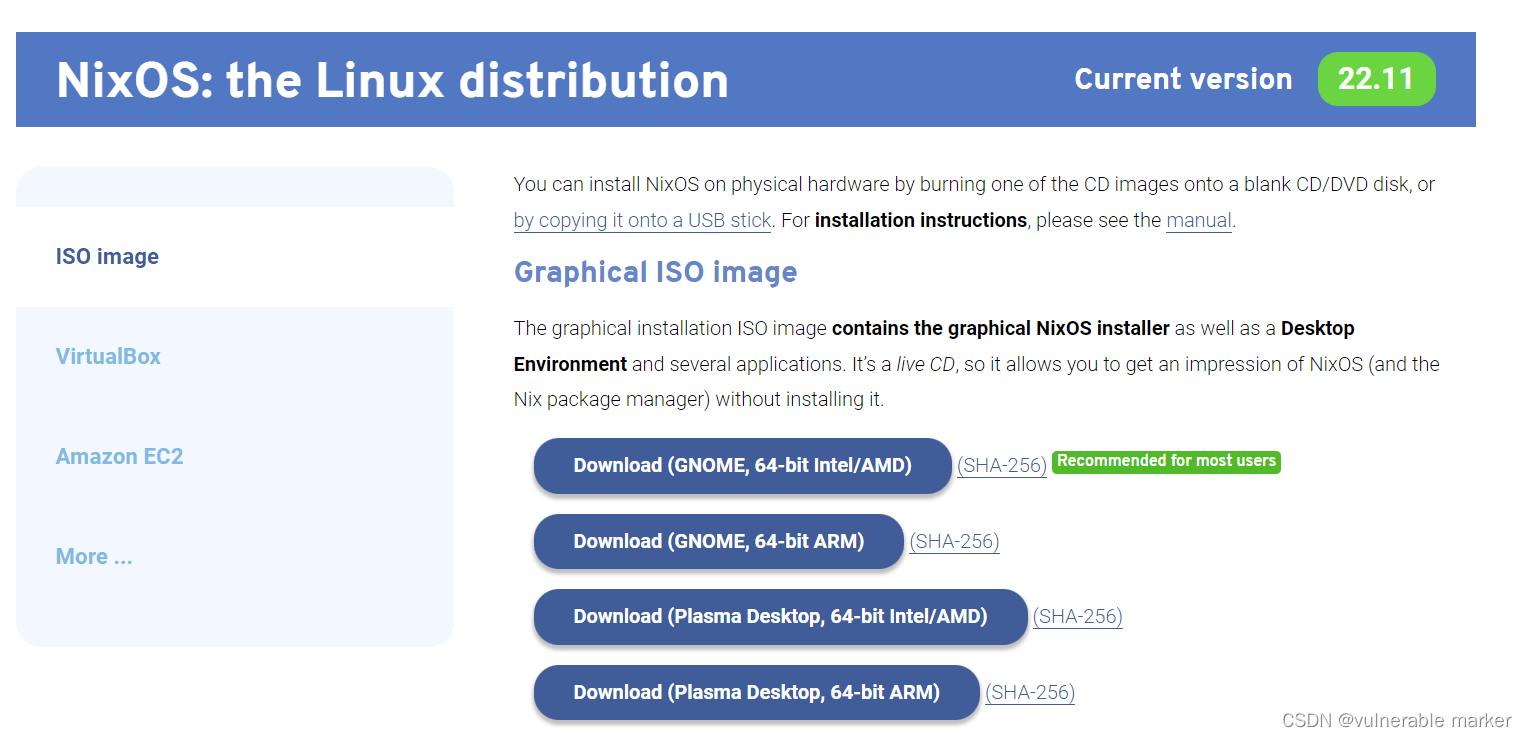 这里我选用GNOME版本作为安装演示ISO
2. 创建空白虚拟机 这里我选用GNOME版本作为安装演示ISO
2. 创建空白虚拟机
这里只演示需要修改的部分,其余不用修改的不做演示,直接下一步即可 新建虚拟机,选择自定义安装 选择稍后安装虚拟机 选择稍后安装虚拟机 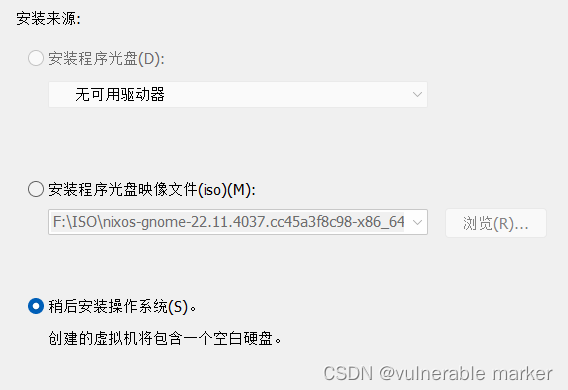 虚拟机版本选择 其他 Linux 5.x 内核 虚拟机版本选择 其他 Linux 5.x 内核  配置完成后,点击 编辑虚拟机设置
→
\rightarrow
→ 使用ISO映像文件 配置完成后,点击 编辑虚拟机设置
→
\rightarrow
→ 使用ISO映像文件 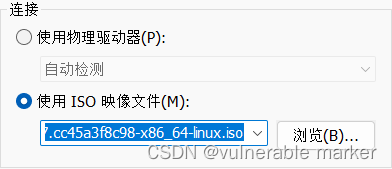 3. 使用命令行安装 NixOS
启动虚拟机,来到安装引导界面 首先使用管理员身份登录 sudo su root打开 /dev/sda 设备并进入 parted 命令行模式 parted /dev/sda创建MBR分区表 (parted) mklabel msdos创建一个新的主分区,从 1MB 开始,到倒数第 8GB 结束 (parted) mkpart primary 1MB -8GB将第一个分区的启动标志设置为 on,表示这个分区是可引导的 (parted) set 1 boot on创建一个新的主分区,类型为 linux-swap,从倒数第 8GB 开始,到最后结束 (parted) mkpart primary linux-swap -8GB 100%退出 (parted) quit 3.2 格式化在 /dev/sda1 上创建一个 ext4 文件系统,并将其标记为 nixos mkfs.ext4 -L nixos /dev/sda1创建一个新的交换分区,并将其标记为 swap mkswap -L swap /dev/sda2将 /dev/disk/by-label/nixos 挂载到 /mnt 目录下,使得该目录下的文件可以被访问 mount /dev/disk/by-label/nixos /mnt将 /dev/sda2 上的交换分区打开 swapon /dev/sda2在 /mnt 目录下生成 NixOS 的配置文件,该文件包含了 NixOS 的所有配置信息,包括系统的软件包、服务、用户等等 nixos-generate-config --root /mnt编辑 /mnt/etc/nixos/configuration.nix以满足你的需要 vim /mnt/etc/nixos/configuration.nix 4. configration.nix 配置文件configuration.nix 是 NixOS 系统的配置文件,它是一个声明式的配置文件,描述了整个系统的状态,包括应该安装哪些软件包以及各种系统设置和选项 # Edit this configuration file to define what should be installed on # your system. Help is available in the configuration.nix(5) man page # and in the NixOS manual (accessible by running ‘nixos-help’). { config, pkgs, ... }: { imports = [ # Include the results of the hardware scan. ./hardware-configuration.nix ]; # Use the GRUB 2 boot loader. boot.loader.grub.enable = true; boot.loader.grub.version = 2; # boot.loader.grub.efiSupport = true; # boot.loader.grub.efiInstallAsRemovable = true; # boot.loader.efi.efiSysMountPoint = "/boot/efi"; # Define on which hard drive you want to install Grub. boot.loader.grub.device = "/dev/sda"; # or "nodev" for efi only networking.hostName = "nixos"; # Define your hostname. # Pick only one of the below networking options. # networking.wireless.enable = true; # Enables wireless support via wpa_supplicant. networking.networkmanager.enable = true; # Easiest to use and most distros use this by default. # Set your time zone. time.timeZone = "Asia/Shanghai"; # Configure network proxy if necessary # networking.proxy.default = "http://user:password@proxy:port/"; # networking.proxy.noProxy = "127.0.0.1,localhost,internal.domain"; # Select internationalisation properties. i18n.defaultLocale = "en_US.UTF-8"; console = { font = "Lat2-Terminus16"; # keyMap = "us"; useXkbConfig = true; # use xkbOptions in tty. }; # Enable the X11 windowing system. services.xserver.enable = true; # Enable Vmware-Tools virtualisation.vmware.guest.enable = true; # Change Nix-Channel by TsingHua nix.settings.substituters = [ "https://mirrors.tuna.tsinghua.edu.cn/nix-channels/store" ]; # Enable the GNOME Desktop Environment. services.xserver.displayManager.gdm.enable = true; services.xserver.desktopManager.gnome.enable = true; # Configure keymap in X11 services.xserver.layout = "us"; # services.xserver.xkbOptions = { # "eurosign:e"; # "caps:escape" # map caps to escape. # }; # Enable CUPS to print documents. # services.printing.enable = true; # Enable sound. sound.enable = true; # hardware.pulseaudio.enable = true; # Enable touchpad support (enabled default in most desktopManager). # services.xserver.libinput.enable = true; # Define a user account. Don't forget to set a password with ‘passwd’. # users.users.alice = { # isNormalUser = true; # extraGroups = [ "wheel" ]; # Enable ‘sudo’ for the user. # packages = with pkgs; [ # firefox # thunderbird # ]; # }; # List packages installed in system profile. To search, run: # $ nix search wget environment.systemPackages = with pkgs; [ vim # Do not forget to add an editor to edit configuration.nix! The Nano editor is also installed by default. wget neofetch openssh bash-completion rxvt-unicode alacritty parted ]; # Some programs need SUID wrappers, can be configured further or are # started in user sessions. # programs.mtr.enable = true; # programs.gnupg.agent = { # enable = true; # enableSSHSupport = true; # }; # List services that you want to enable: # Enable the OpenSSH daemon. # services.openssh.enable = true; # Open ports in the firewall. # networking.firewall.allowedTCPPorts = [ ... ]; # networking.firewall.allowedUDPPorts = [ ... ]; # Or disable the firewall altogether. networking.firewall.enable = false; # Copy the NixOS configuration file and link it from the resulting system # (/run/current-system/configuration.nix). This is useful in case you # accidentally delete configuration.nix. # system.copySystemConfiguration = true; # This value determines the NixOS release from which the default # settings for stateful data, like file locations and database versions # on your system were taken. It‘s perfectly fine and recommended to leave # this value at the release version of the first install of this system. # Before changing this value read the documentation for this option # (e.g. man configuration.nix or on https://nixos.org/nixos/options.html). system.stateVersion = "22.11"; # Did you read the comment? } 关于网络问题与镜像源选择(必看)由于众所周知的国际网络原因,NixOS在下载部分配置文件时无法连接到国外的服务器,所以我们需要更换NixChannel和指定下载软件的镜像源 首选中国科技大学的软件源,打开终端添加channel,注意:在更换科大软件源的时候需要注意链接末尾的系统版本,这里我以22.11版本为例 nix-channel --add https://mirrors.ustc.edu.cn/nix-channels/nixos-22.11 nixos nix-channel --update在 configration.nix 中添加科大的软件源 nix.settings.substituters = [ "https://mirrors.ustc.edu.cn/nix-channels/store" ]; 关于NixOS安装Vmware Tools(必看)VMware Tools是一套可以提高虚拟机客户机操作系统性能并改善虚拟机管理的实用工具。它相当于VirtualBox中的增强功能(Sun VirtualBox Guest Additions),是VMware提供的增强虚拟显卡和硬盘性能、以及同步虚拟机与主机时钟的驱动程序。只有在VMware虚拟机中安装好了VMware Tools,才能实现主机与虚拟机之间的文件共享,同时可支持自由拖拽的功能,鼠标也可在虚拟机与主机之前自由移动(不用再按ctrl+alt),且虚拟机屏幕也可实现全屏化 在NixOS中,由于特殊的包管理机制和声明式函数配置文件,使得NixOS不依赖外部的安装Shell脚本安装程序,因为NixOS的特性基于函数式编程中的不可变性原则,因此我们需要在配置文件中声明并重新构建配置文件 你需要在 /etc/nixos/configration.nix 中添加: virtualisation.vmware.guest.enable = true;还需要在 /etc/nixos/configration.nix 中找到 environment.systemPackages 行并添加: environment.systemPackages = with pkgs;[ open-vm-tools ];重新构建NixOS nixos-rebuild switch -vv 5. 部署NixOS生成 configration.nix 配置文件后,由于网络原因 我们需要临时使用清华大学开源镜像站的Nix-channels配置 nixos-install --option substituters "https://mirrors.tuna.tsinghua.edu.cn/nix-channels/store" -vv这里更推荐中国科技大学的软件源,如果遇到报错了,可以重新选择软件源重新构建 但是有时候清华的软件源不是很稳定,可以尝试其他的,这里以中国科学技术大学为例 nixos-install --option substituters https://mirrors.ustc.edu.cn/nix-channels/store安装完成后,系统会提示你设置root账户的密码 setting root password... New password: *** Retype new password: ***之后输入 reboot 重启 NixOS 即可 6. 部分教育站镜像源集合 中国科学技术大学Nix源使用帮助 | 个人觉得最稳定清华大学开源镜像站 Nix Channels 镜像使用帮助 | 对一些Github的配置文件无法下载上海交通大学nix-channels/store镜像源服务 参考资料How to Install VMware Tools (Open VM Tools) in NixOS Linux 20.09 NixOS Installation Guide 从⑨开始的NixOS | 安装篇 --作者:农企中国 从⑨开始的NixOS | 安装篇 --特别补充 --作者:农企中国 ⚠️未解决的问题Vmware Tools 安装后无法根据显示器大小自适应缩放,已经在 NixOS Wiki 社区提问。Display scaling issue with VMware tools in NixOS [2023.05.07] 已解决,具体看这篇文章 → \rightarrow → 解决NixOS在Vmware中无法自适应显示缩放问题 |
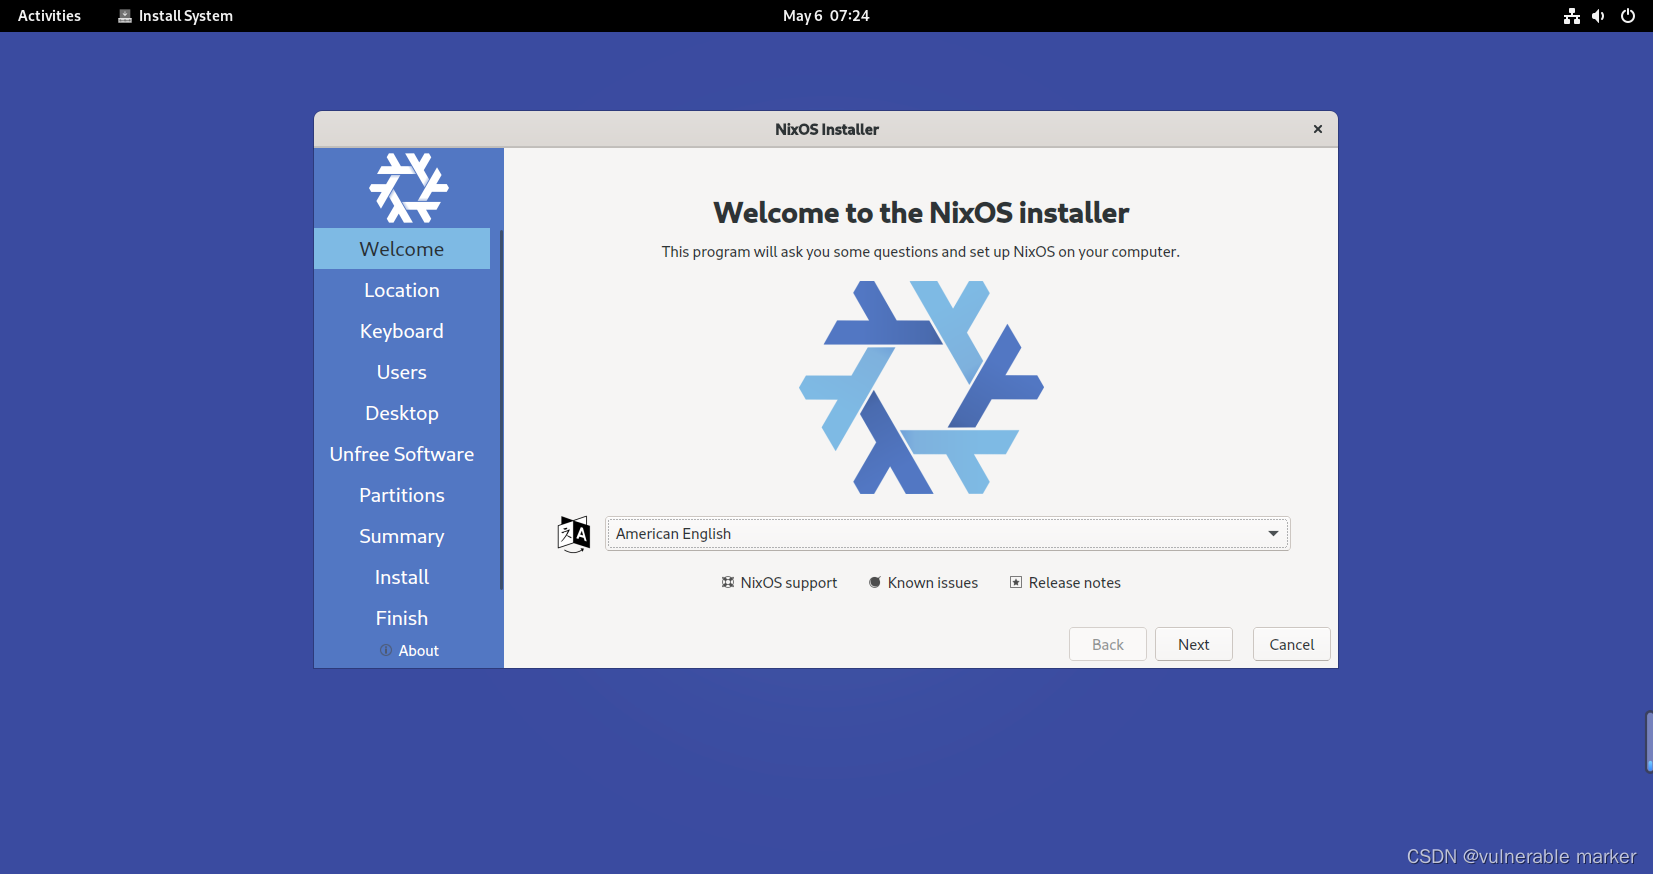 关闭 NixOS Installer,点击左上角的Activities,选择底部Dock栏的Console
 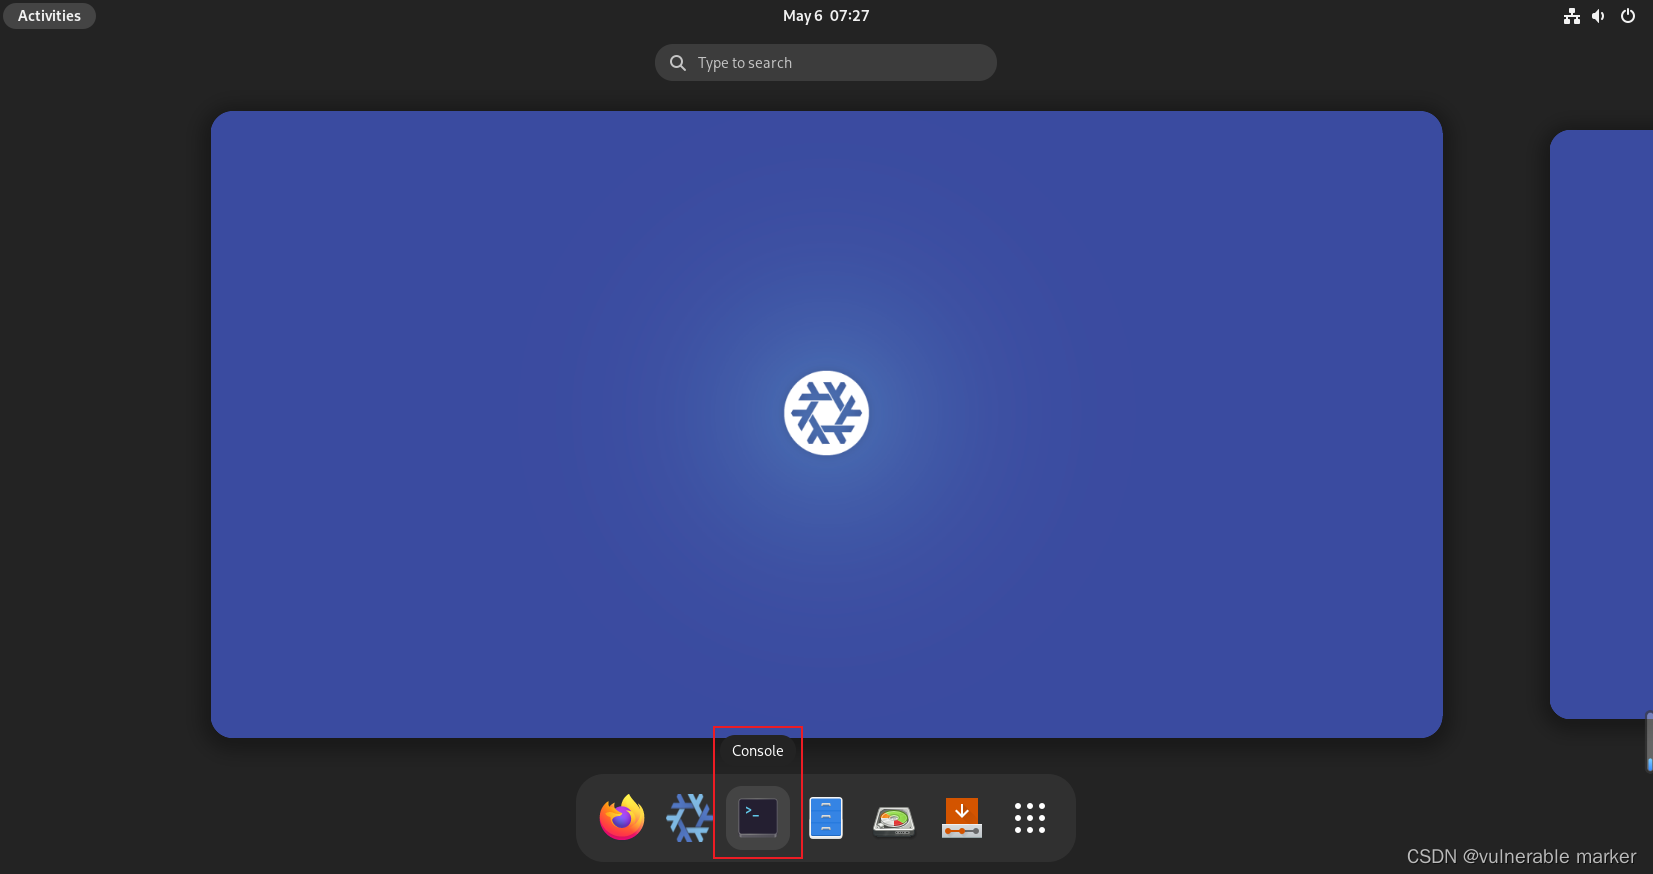 这里由于 VmwarkStation 默认是使用BIOS 传统引导(Legacy Boot)MBR 方式启动,所以演示以 Legacy Boot(MBR) 为例子
【本文地址】