|
一 LCD屏幕
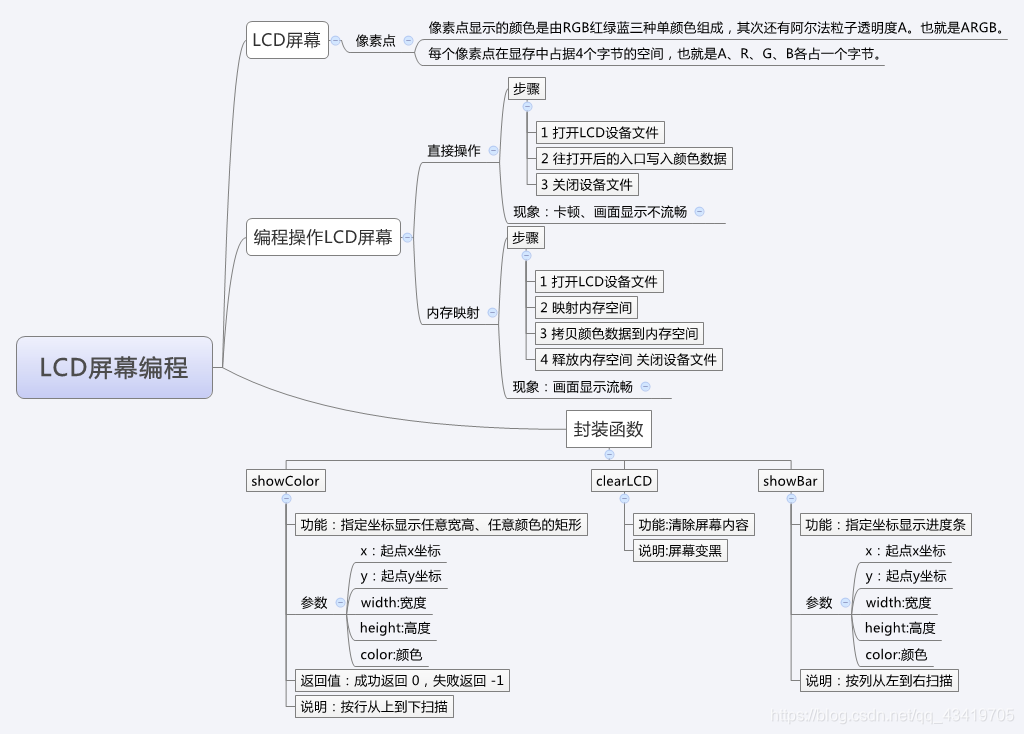
本次学习使用的LCD屏是一块 800*480 分辨率的全彩屏幕。 分辨率的意思是:每行有800个像素点,一共有480行。 全彩的意思是:像素点显示的颜色是由RGB红绿蓝三种单颜色组成,其次还有阿尔法粒子透明度A。也就是ARGB。
LCD显示屏在工作中需要显卡,显卡中要有显存。而本次学习的开发板没有独立显卡,所以需要分配虚拟显存。而每个像素点在显存中占据4个字节的空间,也就是A、R、G、B各占一个字节。
二 操作显示屏
1 直接操作
我们仿照对文件的读写操作方法,来直接读写LCD显示屏。
对文件的操作可翻阅: 文件IO
首先,理一下思路,步骤是: ① 打开LCD对应的设备文件,利用open函数,权限是可读写,返回入口指针; ② 利用write函数往打开后的入口写入颜色数据; ③ 关闭设备文件,close函数。
这样做的依据与原理是什么呢? 如图,这样做的原理是编写程序直接访问LCD的设备文件,LCD属于字符设备,通过给设备文件写入数据,然后设备文件的驱动会一直被系统所调用,不断地来读取设备文件里面的数据,从而将其转化为实际的效果,也就是LCD屏幕像素点的显示效果。像图中,我们为第三个像素点写入0xff0000的数据,它将显示为红色。一个像素点的数值刚好为一个int型,也就是四个字节。 如图,这样做的原理是编写程序直接访问LCD的设备文件,LCD属于字符设备,通过给设备文件写入数据,然后设备文件的驱动会一直被系统所调用,不断地来读取设备文件里面的数据,从而将其转化为实际的效果,也就是LCD屏幕像素点的显示效果。像图中,我们为第三个像素点写入0xff0000的数据,它将显示为红色。一个像素点的数值刚好为一个int型,也就是四个字节。
我们创建一个lcd.c文件,编写代码来实现这个原理。
#include
/* open */
#include
#include
#include
/* write close */
#include
int main()
{
int colorbuf[800*480] = {0};
int i;
//1 打开lcd,权限为读写
int lcd_fd = open("/dev/fb0", O_RDWR);
if(lcd_fd == -1)
{
perror("打开lcd错误,原因是");
return -1;
}
// 准备颜色数据
for(i=0; i
int colorbuf[800*480] = {0};
int i;
//1 打开lcd
int lcd_fd = open("/dev/fb0", O_RDWR);
if(lcd_fd == -1)
{
perror("open lcd error");
return -1;
}
//映射,返回映射空间的首地址
int *lcd_memory = mmap(NULL, //映射空间的首地址, 如果写NULL 表示由系统自动分配空间
800*480*4, //要映射的空间的大小
PROT_READ|PROT_WRITE, //权限可读可写
MAP_SHARED, //映射空间的作用为共享内存
lcd_fd, //有效的文件描述符(入口)
0); //偏移量
// 准备颜色数据
for(i=0; i
int lcd_fd = open("/dev/fb0",O_RDWR);
int color_buf[800 * 480]={0};
//红橙黄绿青蓝紫
int color_caihong[7]={0xFF0000,0xFF6100,0xFFFF00,0x00FF00,0x00FFFF,0x0000FF,0xA020F0};
int i,j;
int* lcd_memory = mmap( NULL,800*480*4,PROT_READ|PROT_WRITE,MAP_SHARED,lcd_fd,0);
//前6个区域,高为70
for(i=0;i
color_buf[i] = color_caihong[6];
}
//写入颜色
memcpy(lcd_memory,color_buf,800*480*4);
munmap(lcd_memory,800*480*4);
close(lcd_fd);
return 0;
}
作业1效果: 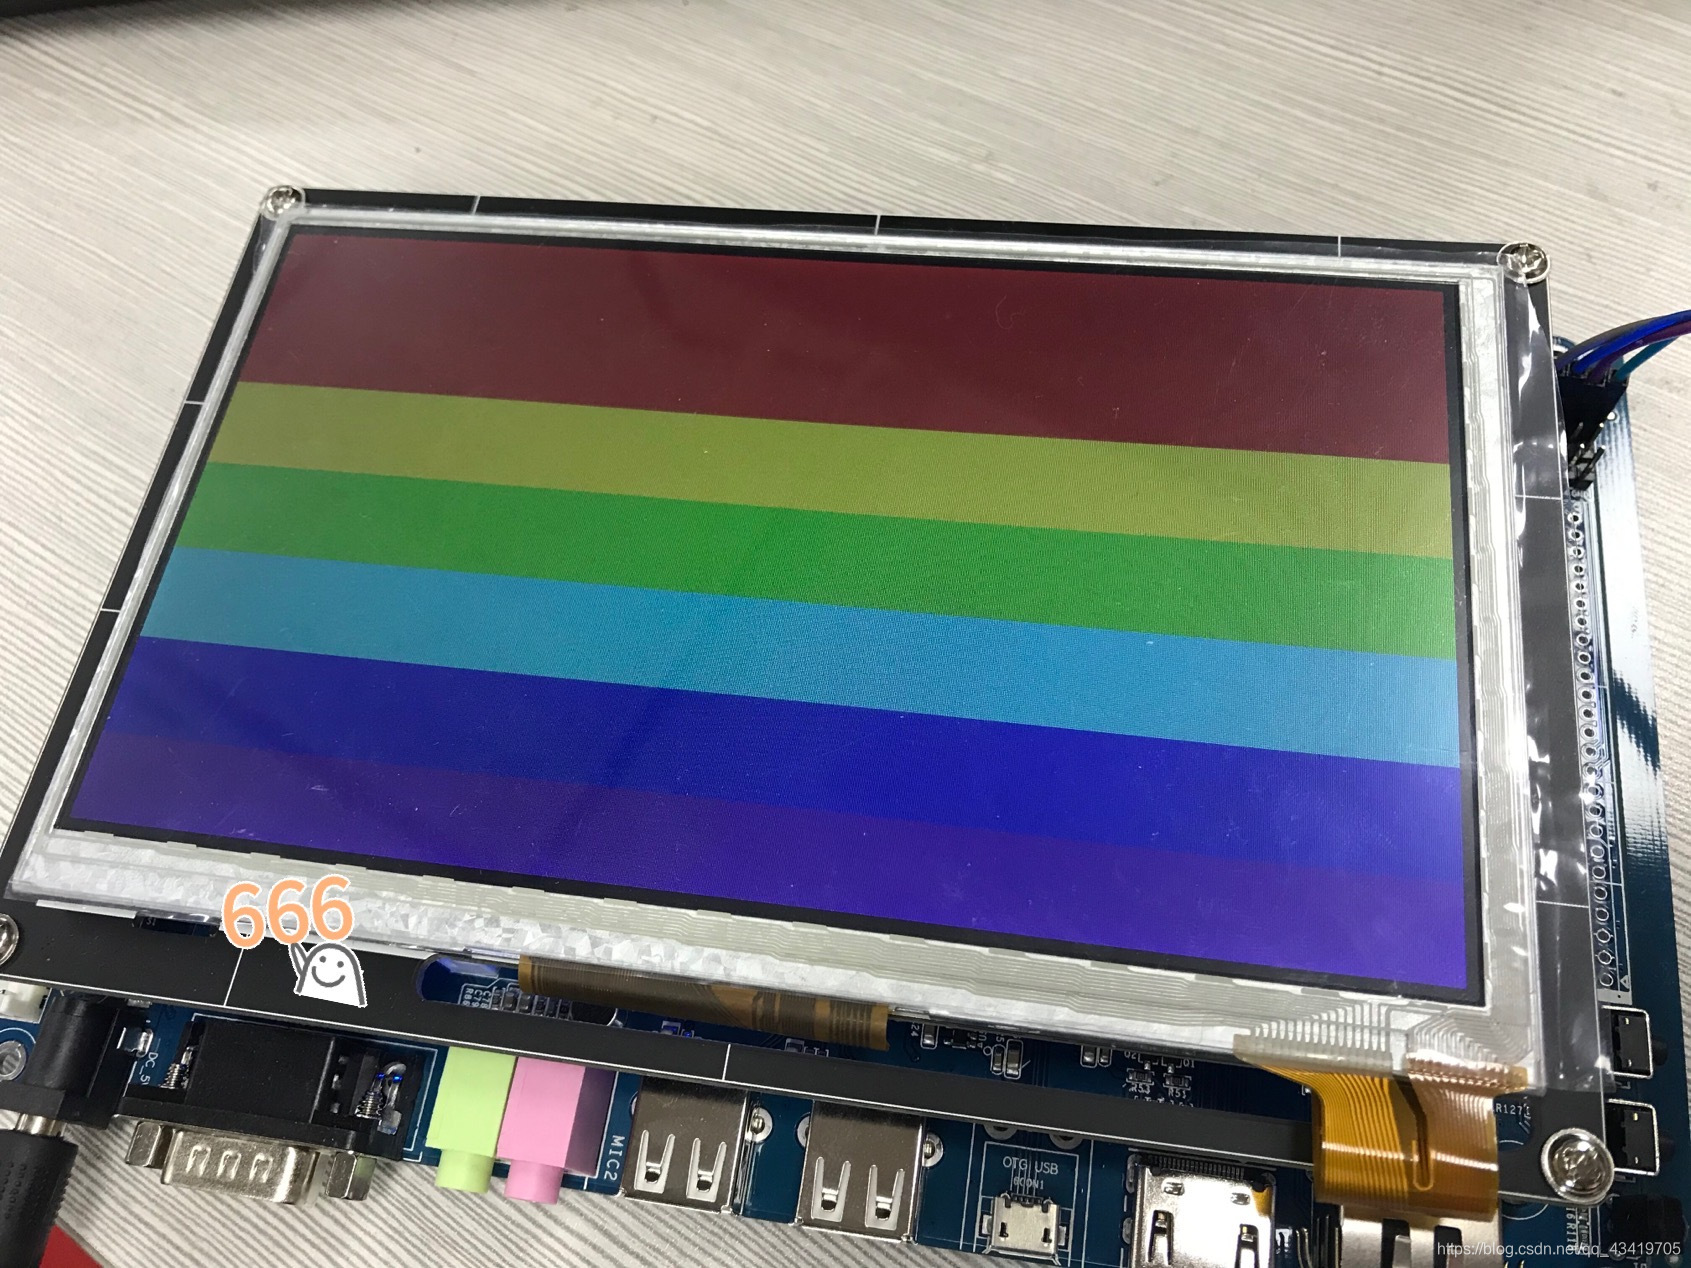
作业2代码:
/************ 作业2 *************/
#include "stdio.h"
#include
#include
#include
#include
#include
#include
/**************************************
* 函数功能:指定坐标显示任意宽高任意颜色的矩形
* 函 数 名:showColor
* 参 数:x :起点x坐标
* y :起点y坐标
* width :宽度
* height:高度
* color :颜色
* 返 回 值:成功返回 0,失败返回 -1
* 说 明:按行从上到下扫描
*****************************************/
int showColor(int x, int y, int width, int height, int color)
{
int i,j,x_end,y_end;
int lcd_fd = open("/dev/fb0", O_RDWR);
int* lcd_memory = mmap(NULL,800*480*4,PROT_READ|PROT_WRITE,MAP_SHARED,lcd_fd,0);
if(((x_end = x+width) > 800) || ((y_end = y+height) > 480))
{
printf("超过宽度或者高度限制\n");
return -1;
}
for(i=y; i
*(lcd_memory+i*800+j) = color;
}
}
munmap(lcd_memory,800*480*4);
close(lcd_fd);
return 0;
}
int main()
{
showColor(0,0,114,479,0xff0000);
showColor(114,0,114,479,0xff6100);
showColor(228,0,114,479,0xffff00);
showColor(342,0,114,479,0x00ff00);
showColor(456,0,114,479,0x00ffff);
showColor(570,0,114,479,0x0000ff);
showColor(684,0,114,479,0xa020f0);
return 0;
}
作业2效果: 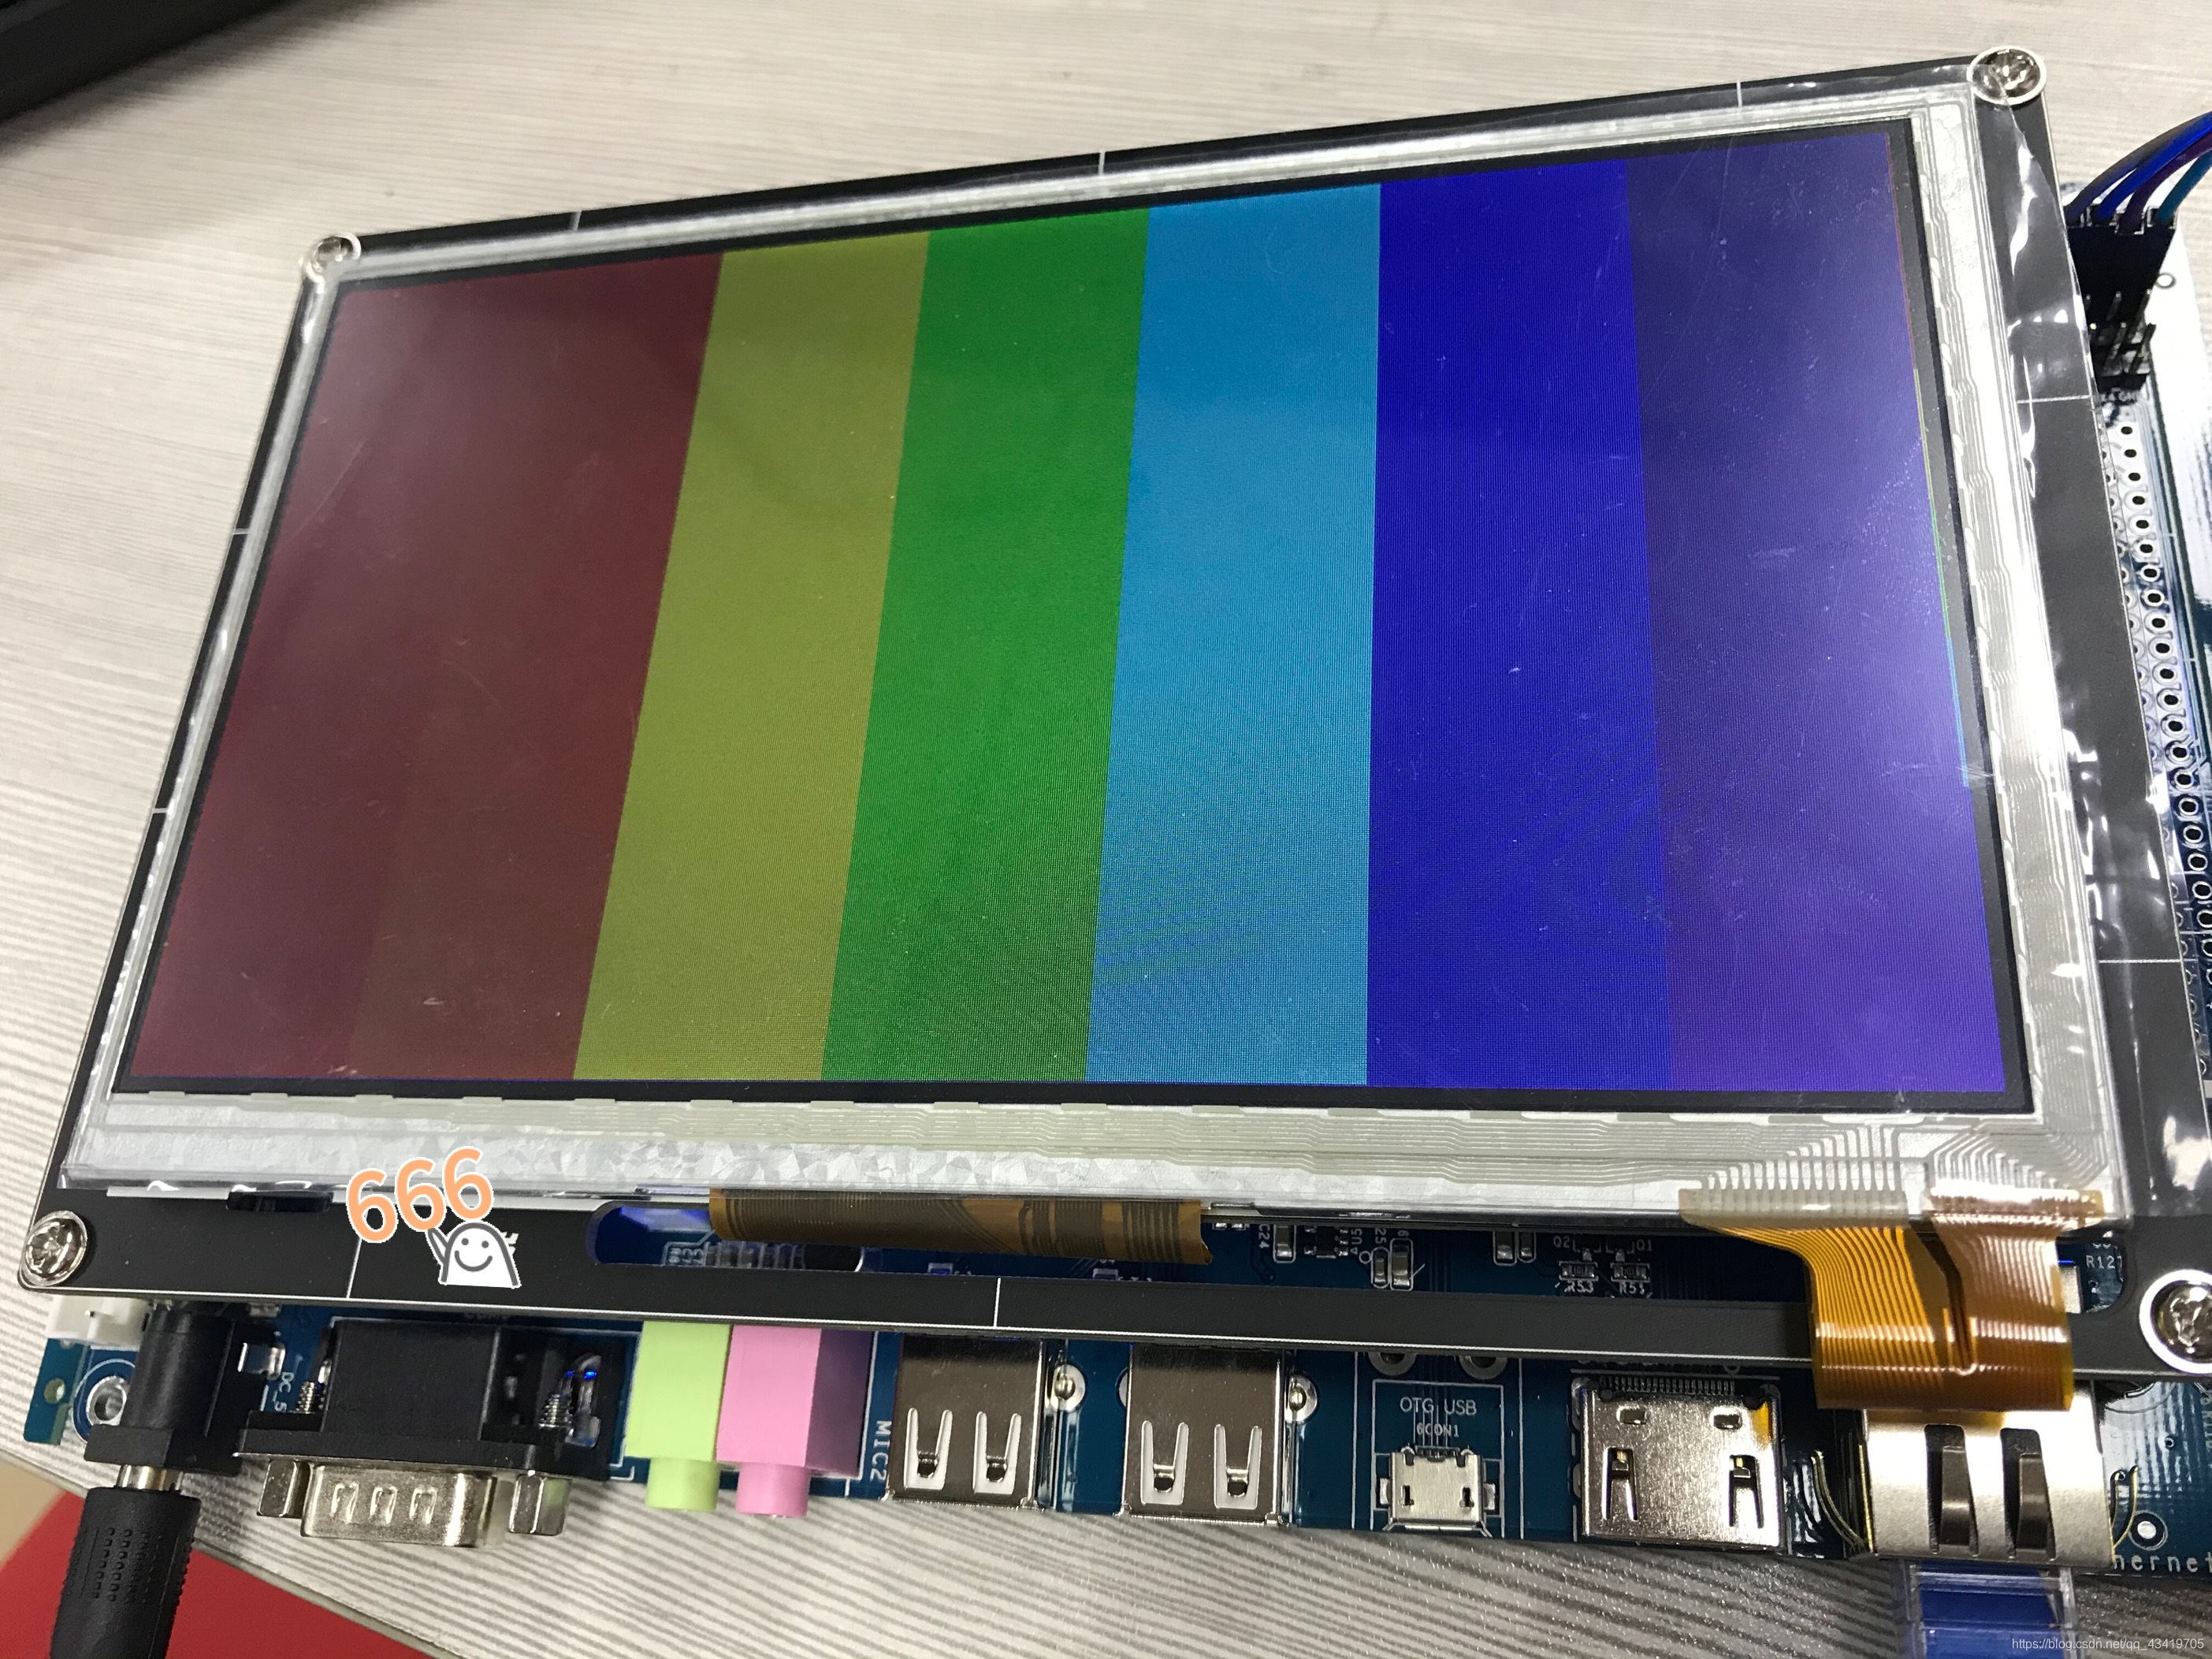
作业3代码:
#include "stdio.h"
#include
#include
#include
#include
#include
#include
/**************************************
* 函数功能:清除屏幕内容
* 函 数 名:clearLCD
* 说 明:屏幕变黑
*****************************************/
void clearLCD()
{
int lcd_fd = open("/dev/fb0", O_RDWR);
int* lcd_memory = mmap(NULL,800*480*4,PROT_READ|PROT_WRITE,MAP_SHARED,lcd_fd,0);
memset(lcd_memory,0,800*480*4);//将lcd_memory起始的800*480*4的空间设置为0
munmap(lcd_memory,800*480*4);
close(lcd_fd);
}
/**************************************
* 函数功能:指定坐标显示进度条
* 函 数 名:showBar
* 参 数:
* x :起点x坐标
* y :起点y坐标
* width :宽度
* height :高度
* color :颜色
* 说 明:按列从左到右扫描
*****************************************/
void showBar(int x,int y,int width,int height,int color)
{
int i,j;
int lcd_fd = open("/dev/fb0", O_RDWR);
int* lcd_memory = mmap(NULL,800*480*4,PROT_READ|PROT_WRITE,MAP_SHARED,lcd_fd,0);
for(j=x; j
lcd_memory[i*800+j] = color;
}
usleep(3000);//关键!!延时才能产生动态效果
}
munmap(lcd_memory,800*480*4);
close(lcd_fd);
}
int main()
{
clearLCD();
showBar(140,100,500,40,0xff0000);
return 0;
}
四 总结
|