| KubeSphere部署mysql、redis、nacos | 您所在的位置:网站首页 › kubesphere使用配置文件创建群组ssh无法连接 › KubeSphere部署mysql、redis、nacos |
KubeSphere部署mysql、redis、nacos
|
文章目录
一、Linux单节点部署KubeSphere1、节点要求2、准备KubeKey3、启用可插拔组件(可选)
二、在kubesphere部署mysql和redis1、部署mysql2、部署redis3、部署ElasticSearch4、部署Nacos
三、在安装KubeSphere后启用应用商店
一、Linux单节点部署KubeSphere
1、节点要求
节点必须能够通过 SSH 连接。 节点上可以使用 sudo/curl/openssl/tar 命令。 建议您的操作系统处于干净状态(不安装任何其他软件),否则可能会发生冲突。 如果您无法从 dockerhub.io 下载容器镜像,建议提前准备仓库的镜像地址(即加速器)。 2、准备KubeKeyKubeKey 可以将 Kubernetes 和 KubeSphere 一同安装。 详细文档查看官网: https://kubesphere.io/zh/docs/v3.3/quick-start/all-in-one-on-linux/ mkdir /opt/module/kubesphere cd /opt/module/kubesphere # ubuntu使用bash替换sh curl -sfL https://get-kk.kubesphere.io | VERSION=v1.1.1 sh - curl -sfL https://get-kk.kubesphere.io | VERSION=v1.1.1 bash - chmod +x kk # 若要同时安装 Kubernetes 和 KubeSphere,可参考以下示例命令: ./kk create cluster [--with-kubernetes version] [--with-kubesphere version] # 安装conntrack yum install -y conntrack # centos系统 apt install -y conntrack # ubuntu系统 ./kk create cluster --with-kubernetes v1.20.4 --with-kubesphere v3.1.1 # 执行该命令后,KubeKey 将检查您的安装环境,结果显示在一张表格中。输入 yes 继续安装流程。等待安装完后控制台出现: ##################################################### ### Welcome to KubeSphere! ### ##################################################### Console: http://192.168.0.2:30880 Account: admin Password: P@88w0rd NOTES: 1. After you log into the console, please check the monitoring status of service components in "Cluster Management". If any service is not ready, please wait patiently until all components are up and running. 2. Please change the default password after login. ##################################################### https://kubesphere.io 2023-05-04 00:22:24 ##################################################### INFO[00:22:30 CST] Installation is complete. Please check the result using the command: kubectl logs -n kubesphere-system $(kubectl get pod -n kubesphere-system -l app=ks-install -o jsonpath='{.items[0].metadata.name}') -f root@ubuntu:/opt/module/kubesphere#使用 kubectl get pod --all-namespaces 来检查 KubeSphere 相关组件的运行状况。 验证安装结果: kubectl logs -n kubesphere-system $(kubectl get pod -n kubesphere-system -l 'app in (ks-install, ks-installer)' -o jsonpath='{.items[0].metadata.name}') -f检查无误,我们就可以去页面登陆kubesphere系统了。 3、启用可插拔组件(可选)
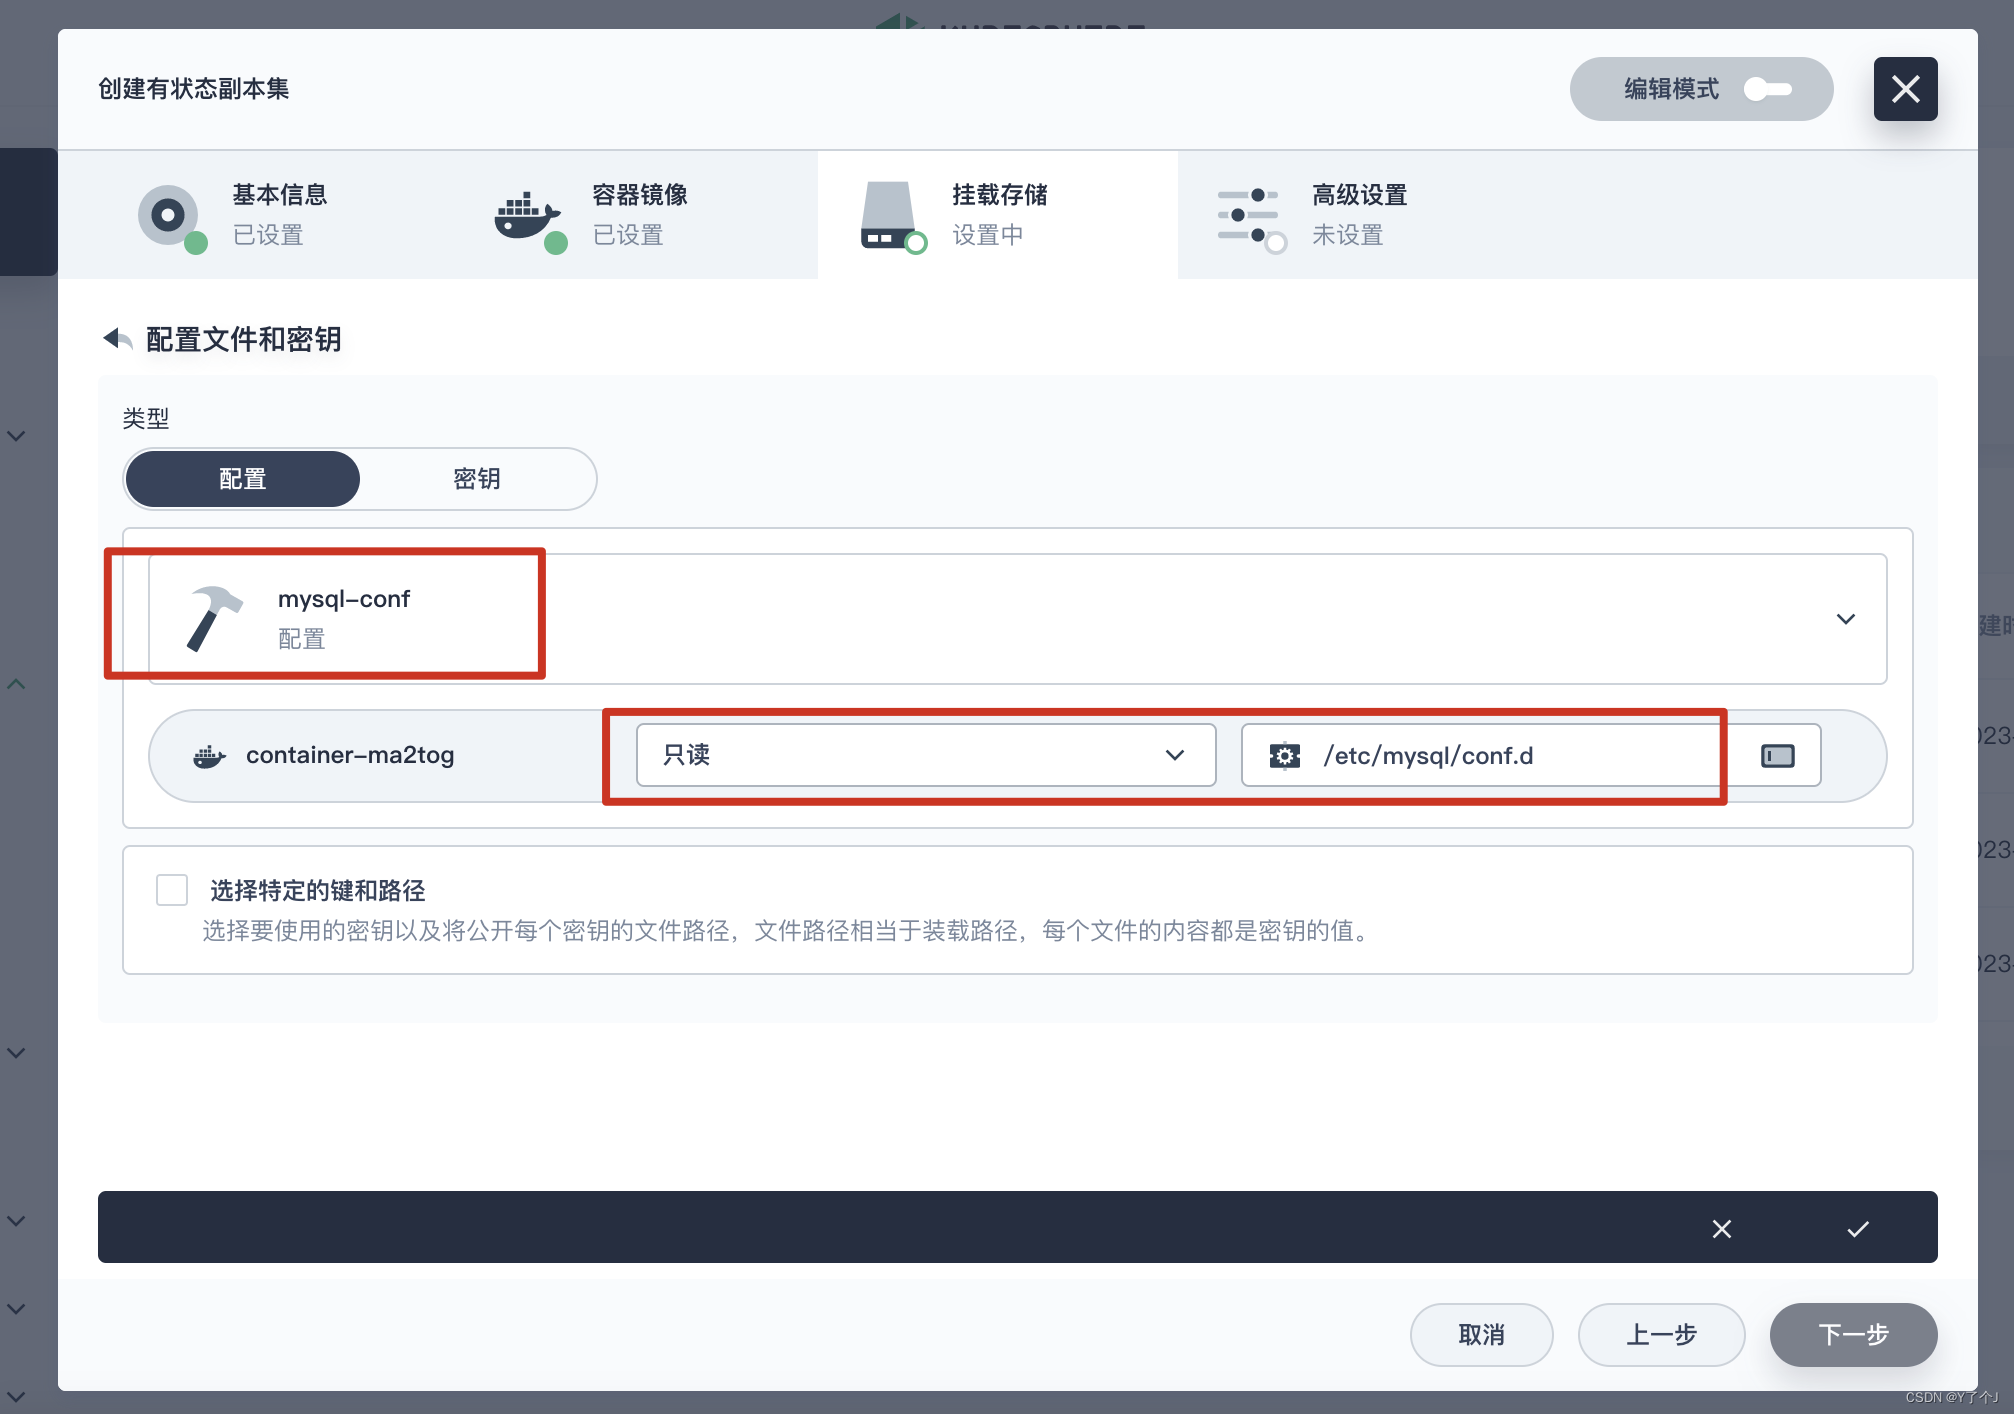
常规的mysql容器启动命令: docker run -p 3306:3306 --name mysql-01 \ -v /mydata/mysql/log:/var/log/mysql \ -v /mydata/mysql/data:/var/lib/mysql \ -v /mydata/mysql/conf:/etc/mysql/conf.d \ -e MYSQL_ROOT_PASSWORD=root \ --restart=always \ -d mysql:5.7mysql配置示例 [client] default-character-set=utf8mb4 [mysql] default-character-set=utf8mb4 [mysqld] init_connect='SET collation_connection = utf8mb4_unicode_ci' init_connect='SET NAMES utf8mb4' character-set-server=utf8mb4 collation-server=utf8mb4_unicode_ci skip-character-set-client-handshake skip-name-resolvemysql部署分析 在 kubesphere 配置中心创建配置
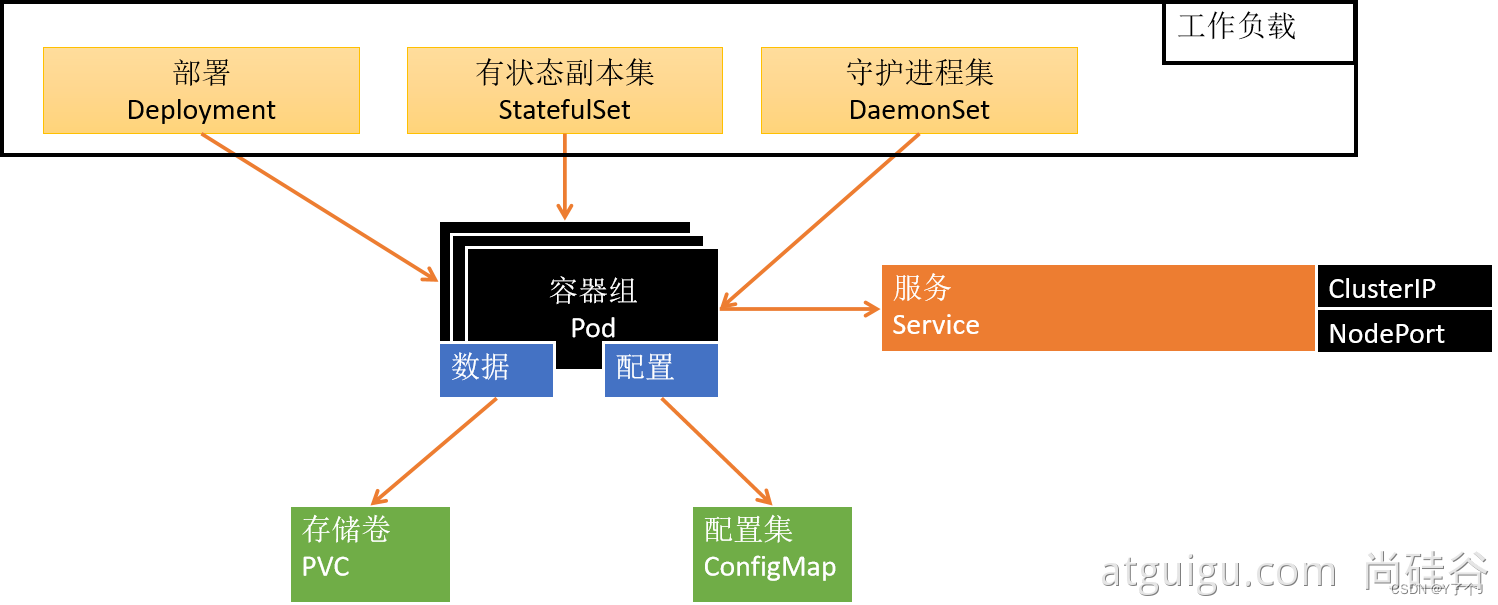
接着在kubesphere存储管理,创建存储卷 接着在kubesphere应用负载,工作负载下面创建有状态副本集
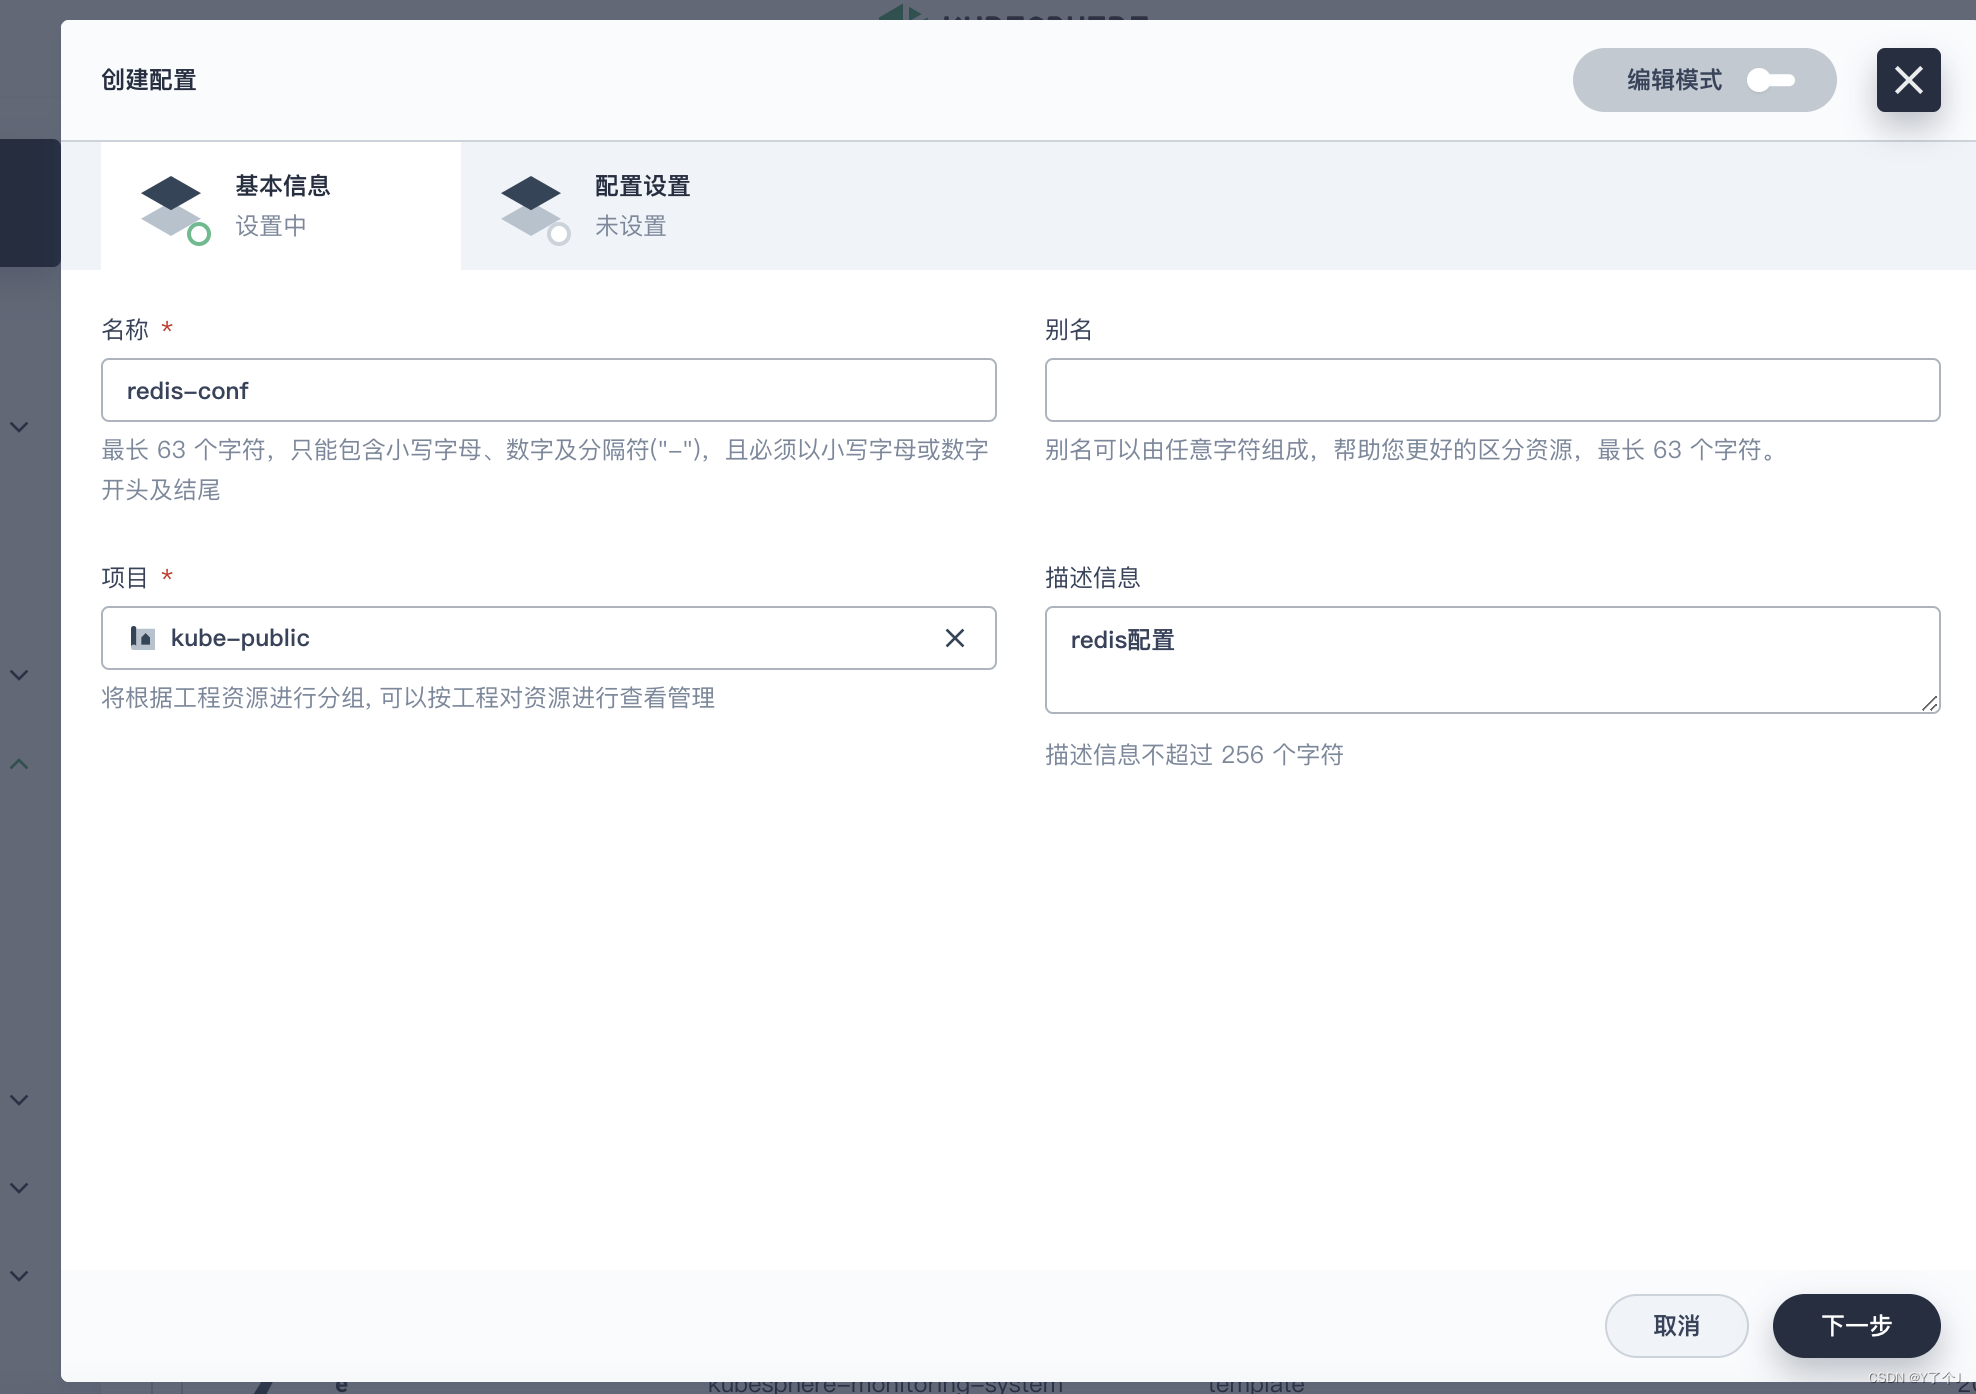
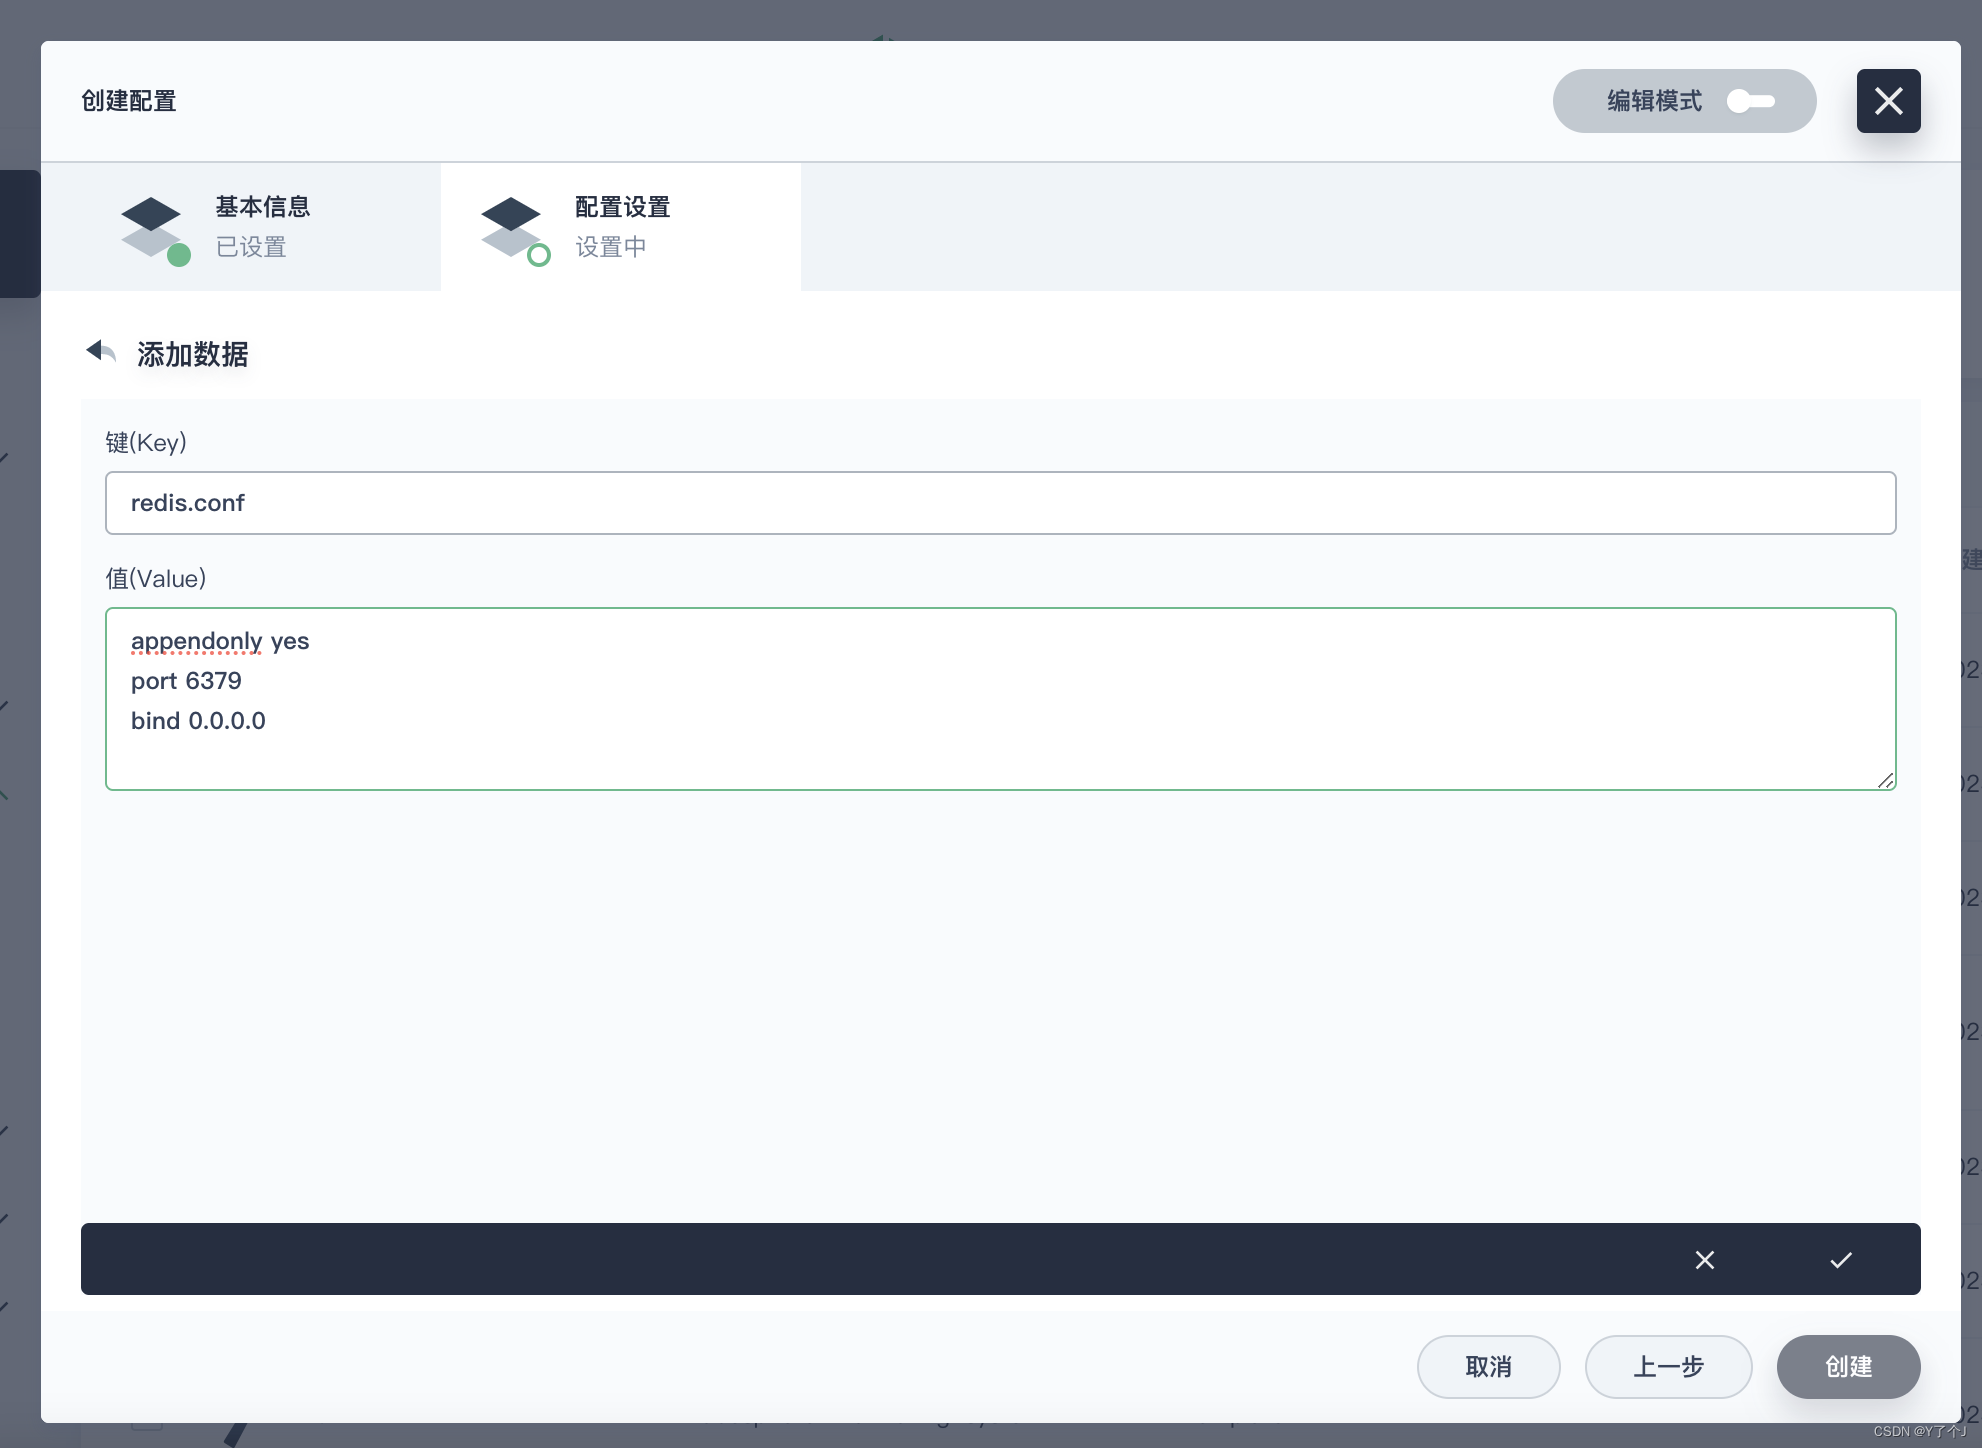
redis容器启动 #创建配置文件 ## 1、准备redis配置文件内容 mkdir -p /mydata/redis/conf && vim /mydata/redis/conf/redis.conf ##配置示例 appendonly yes port 6379 bind 0.0.0.0 #docker启动redis docker run -d -p 6379:6379 --restart=always \ -v /mydata/redis/conf/redis.conf:/etc/redis/redis.conf \ -v /mydata/redis-01/data:/data \ --name redis-01 redis:6.2.5 \ redis-server /etc/redis/redis.confredis部署分析 在 kubesphere 配置中心创建配置redis-conf
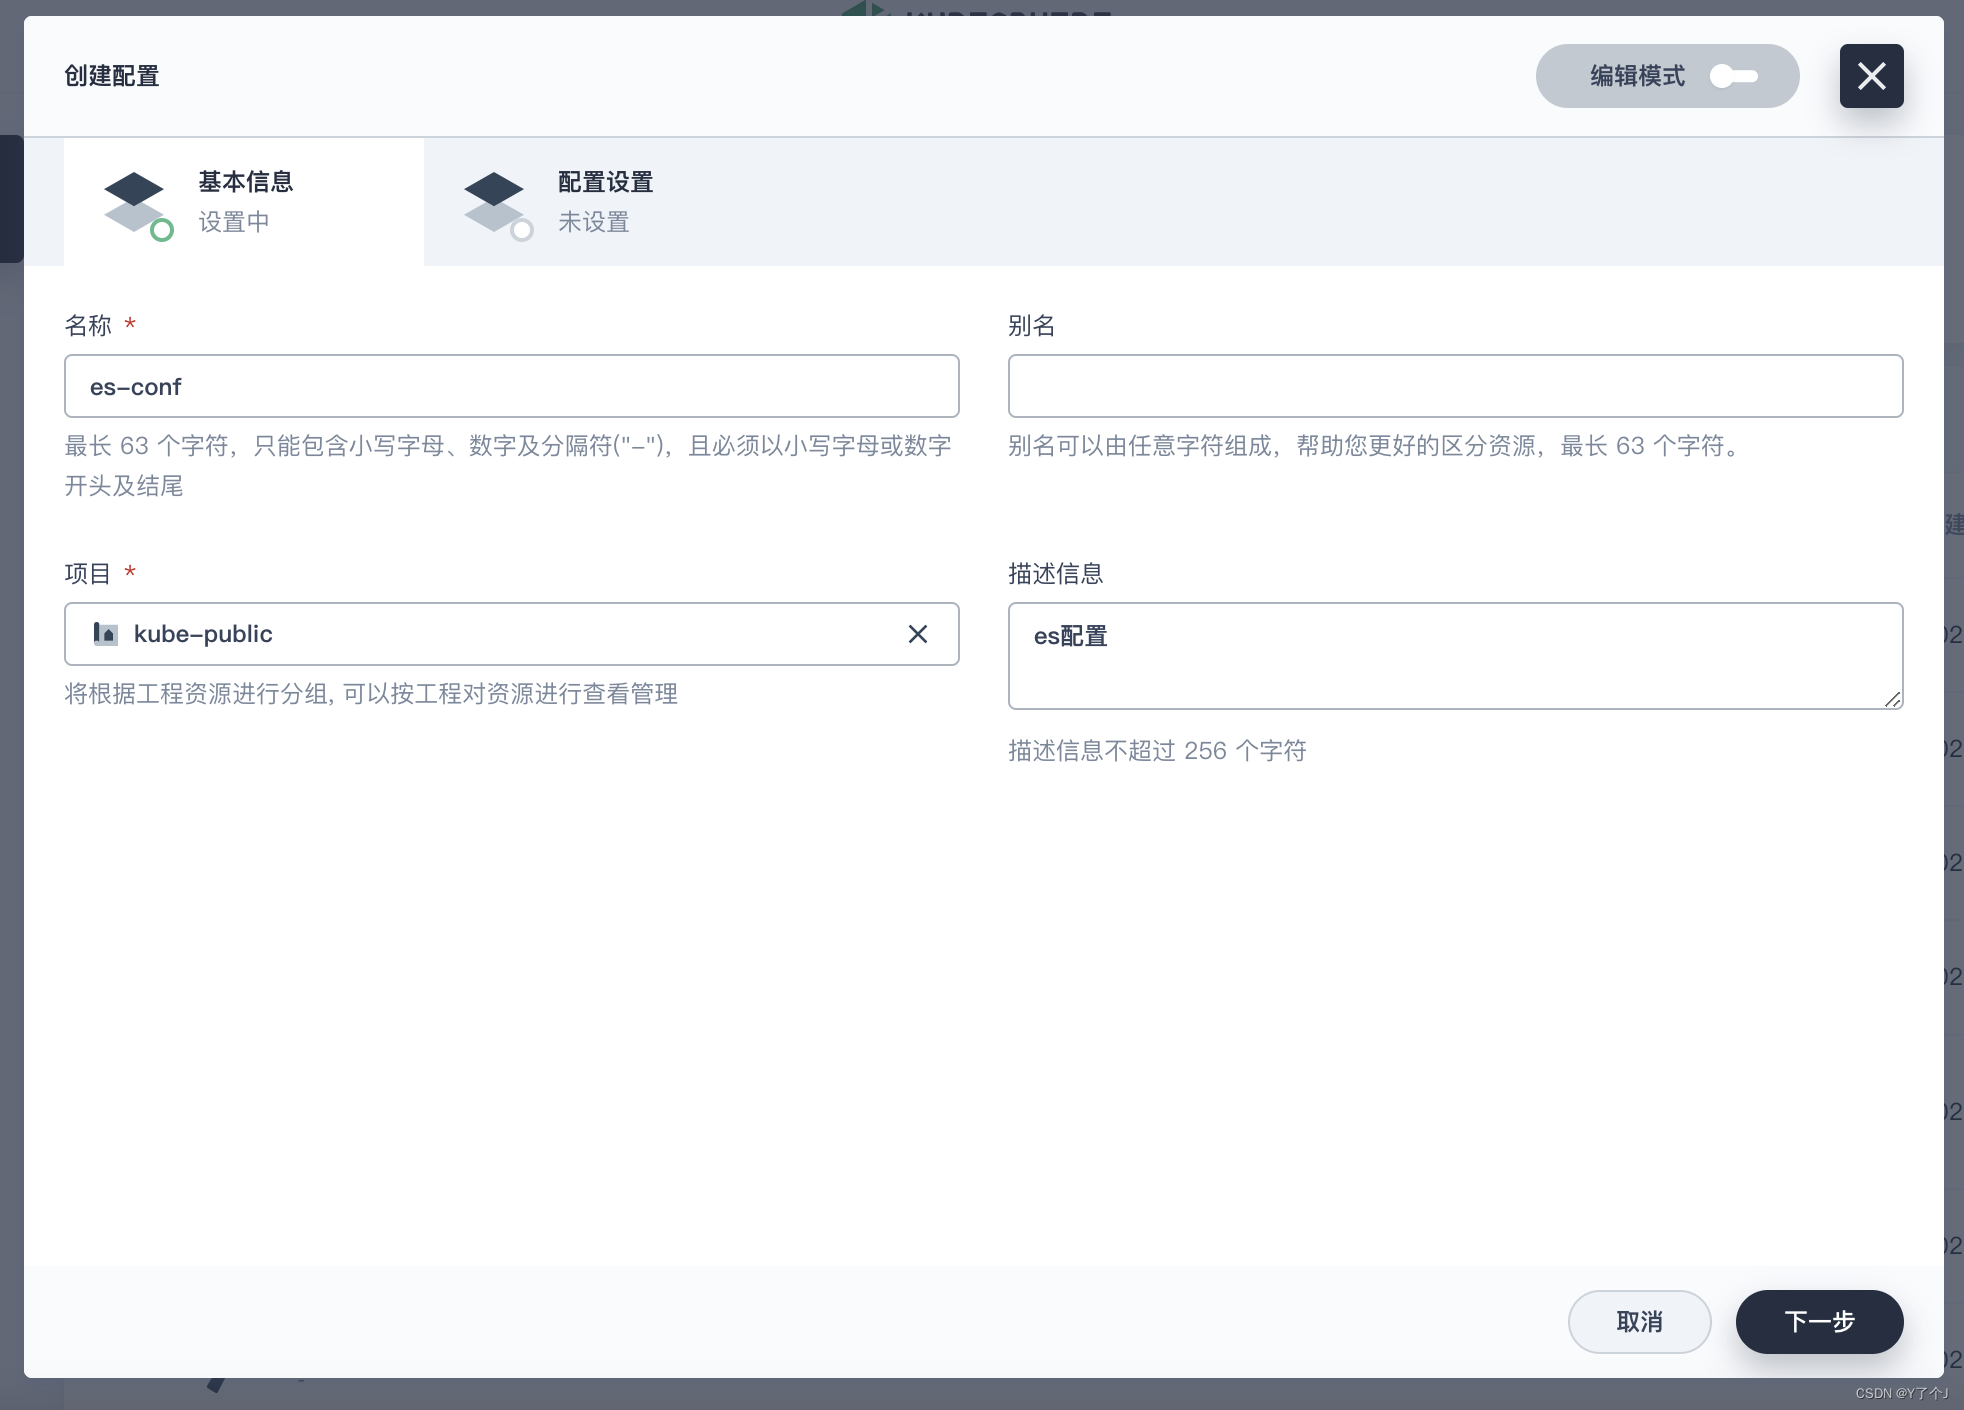
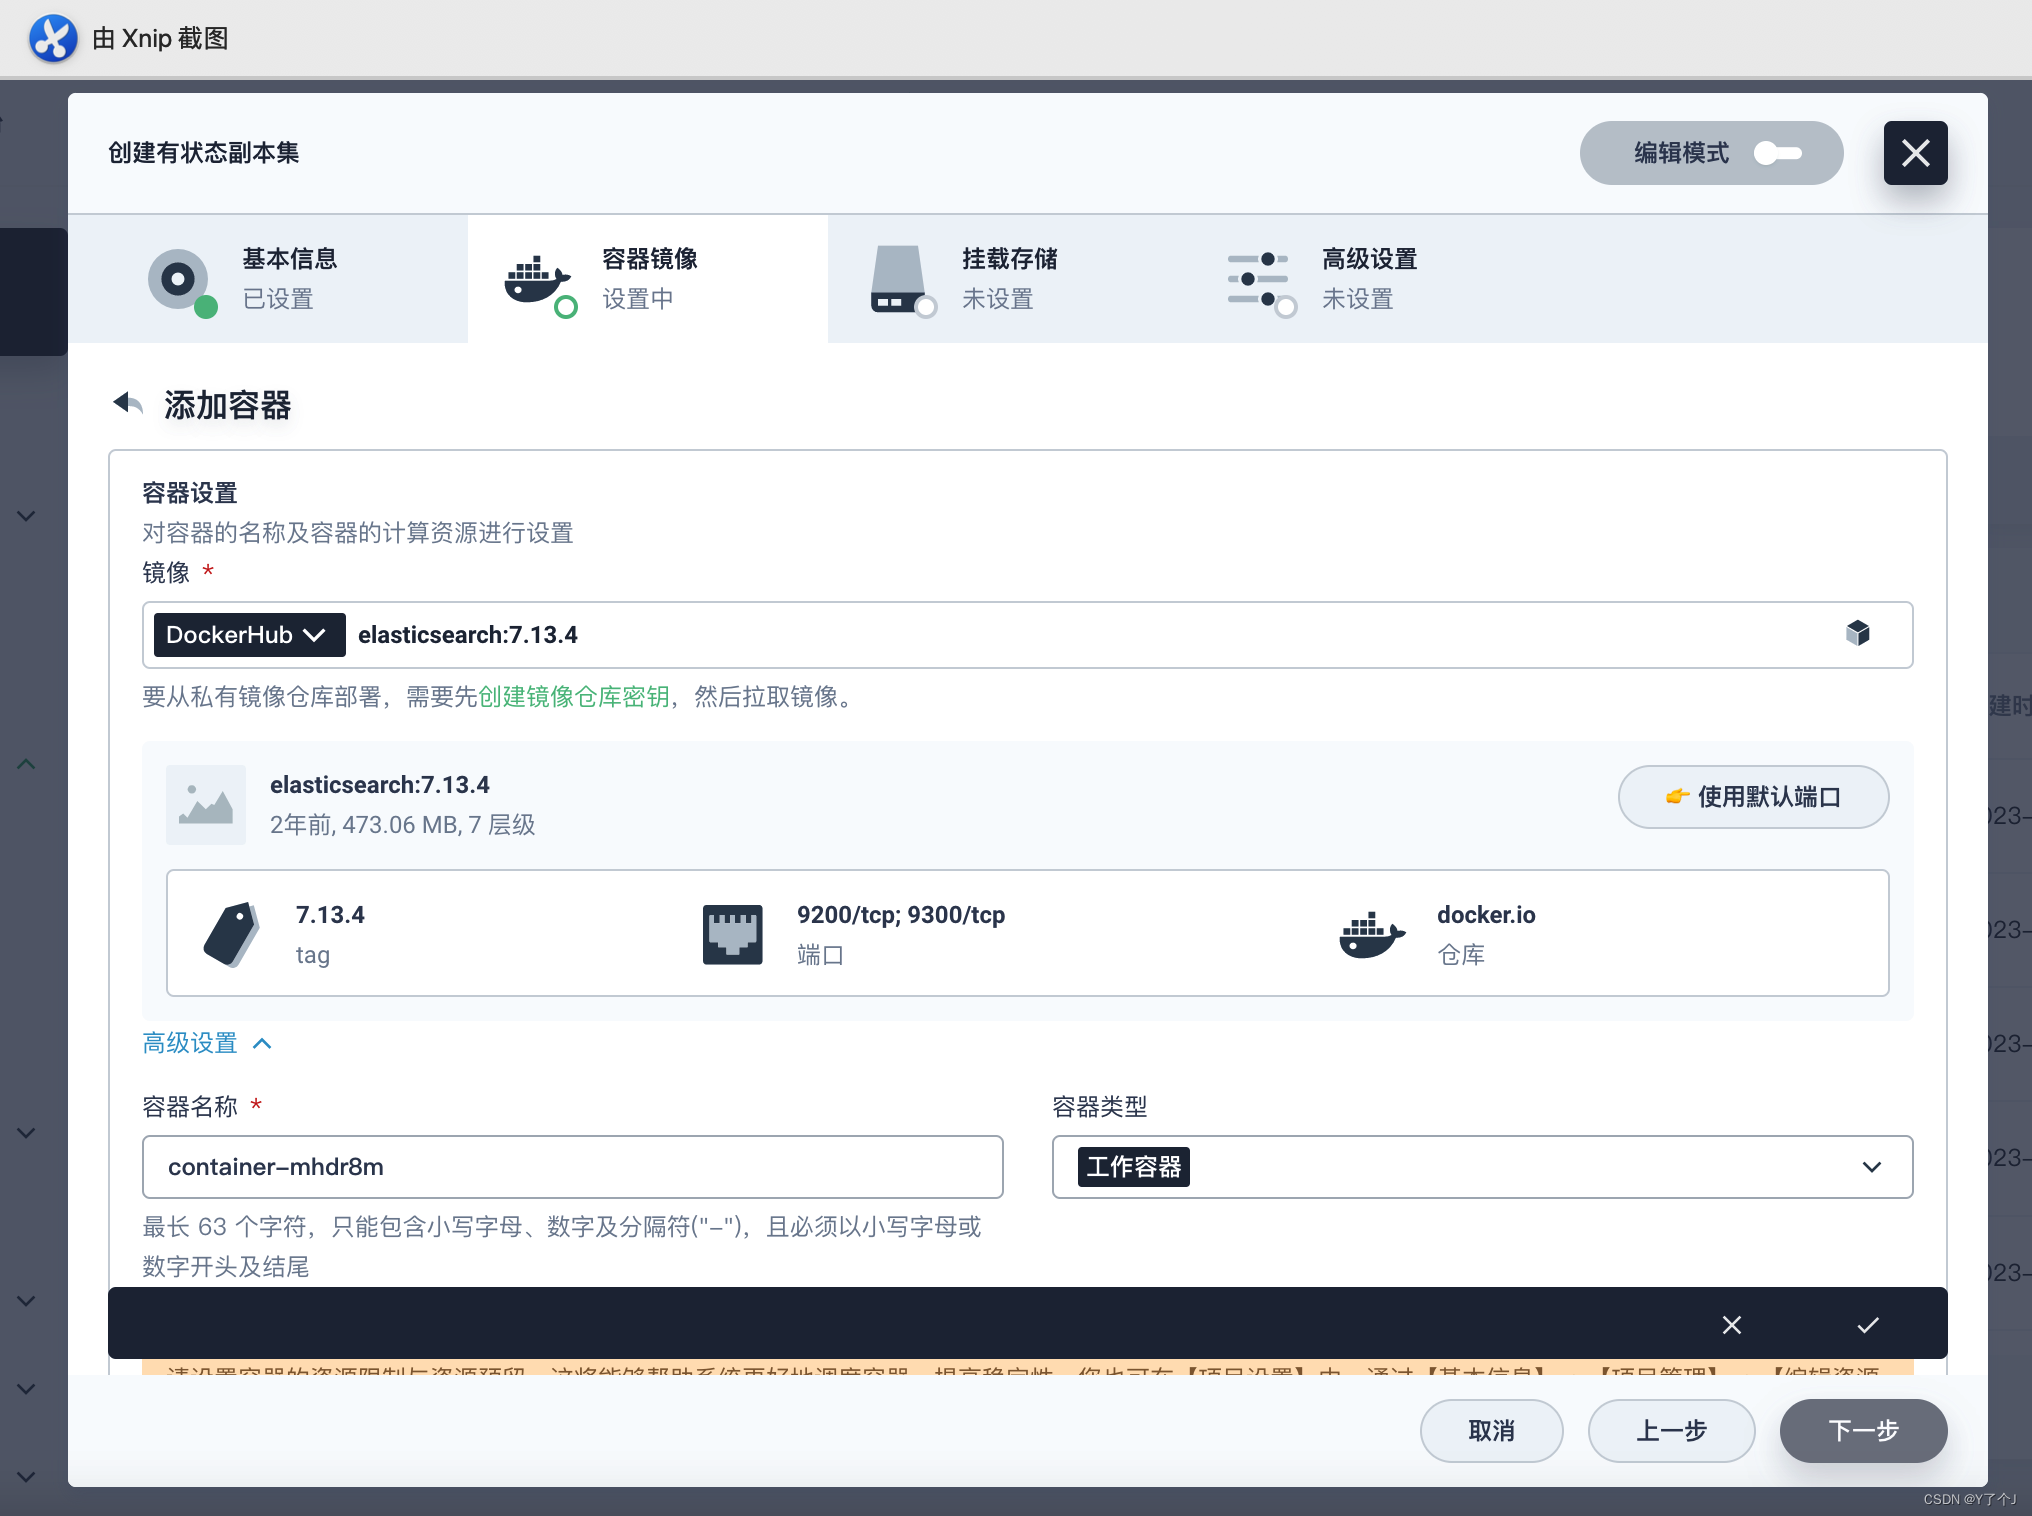
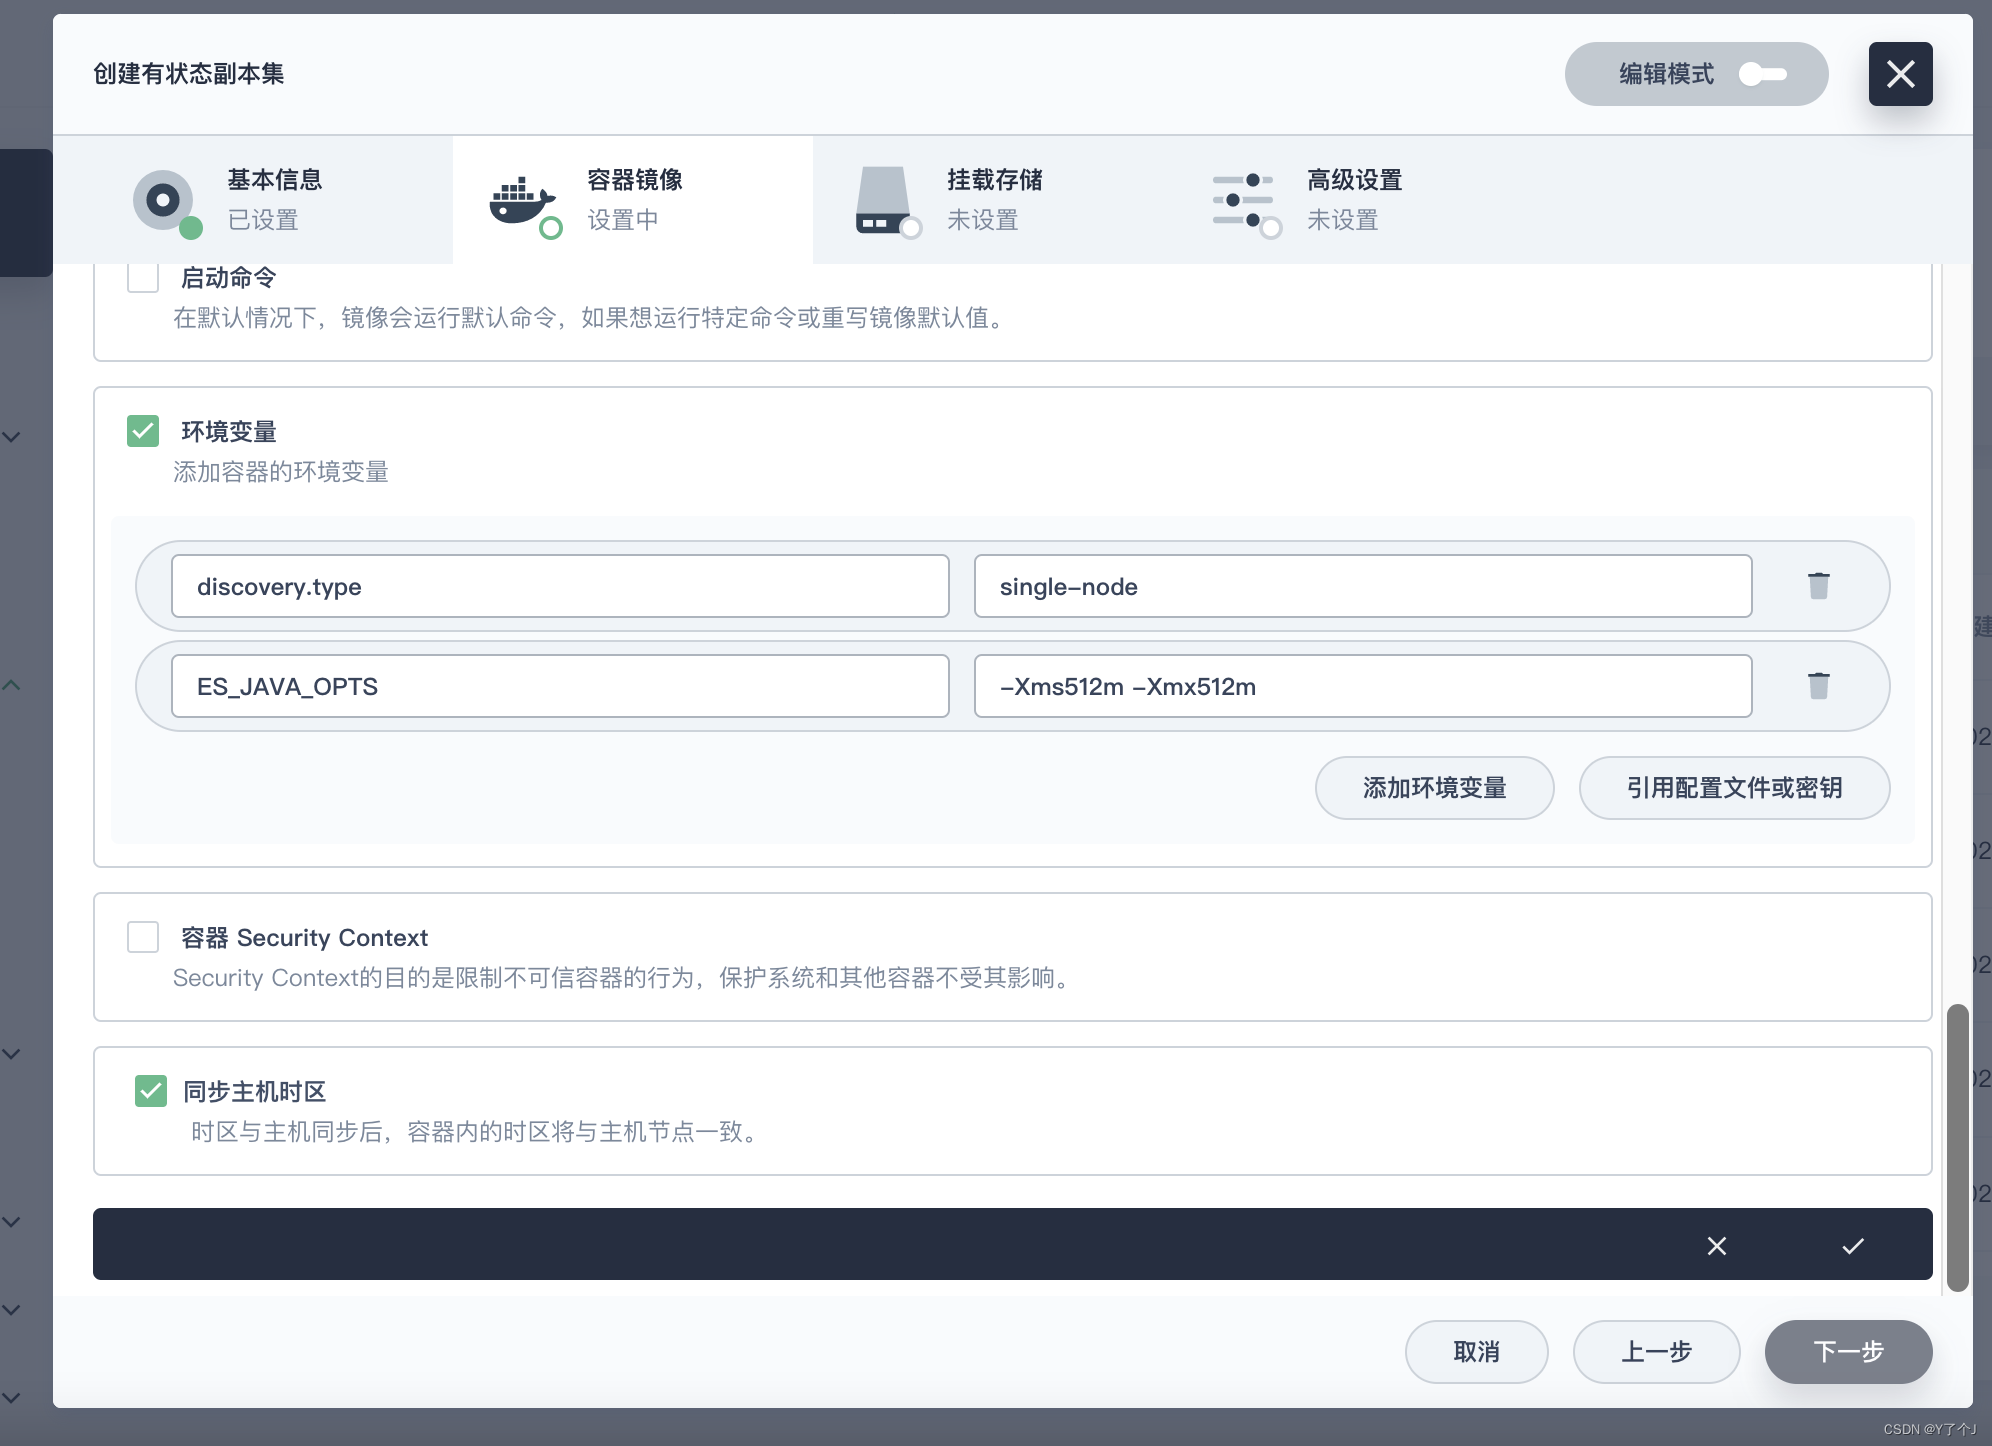
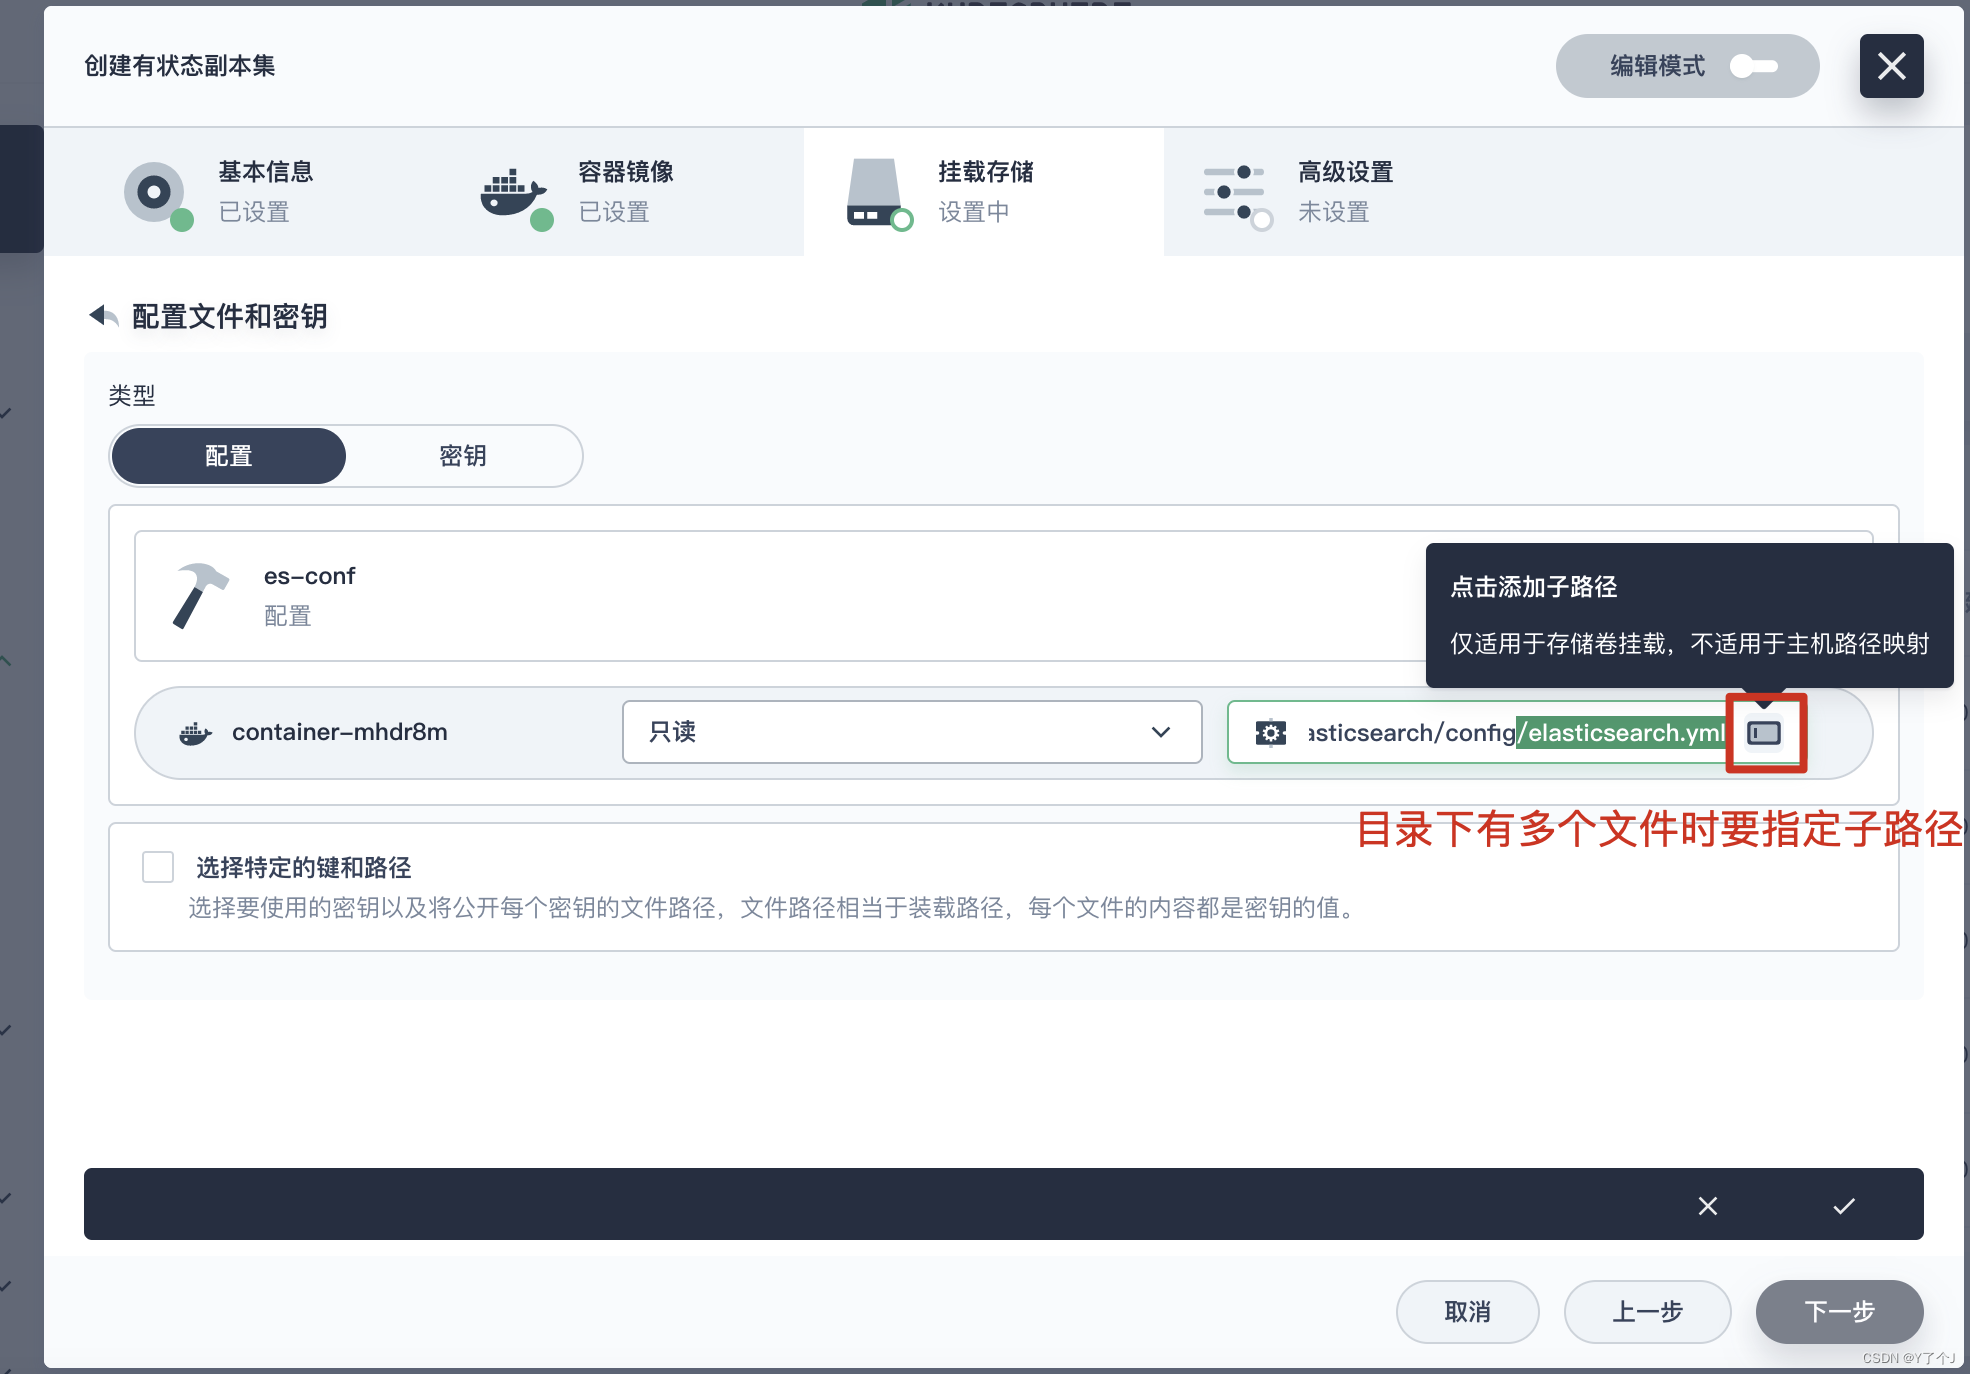
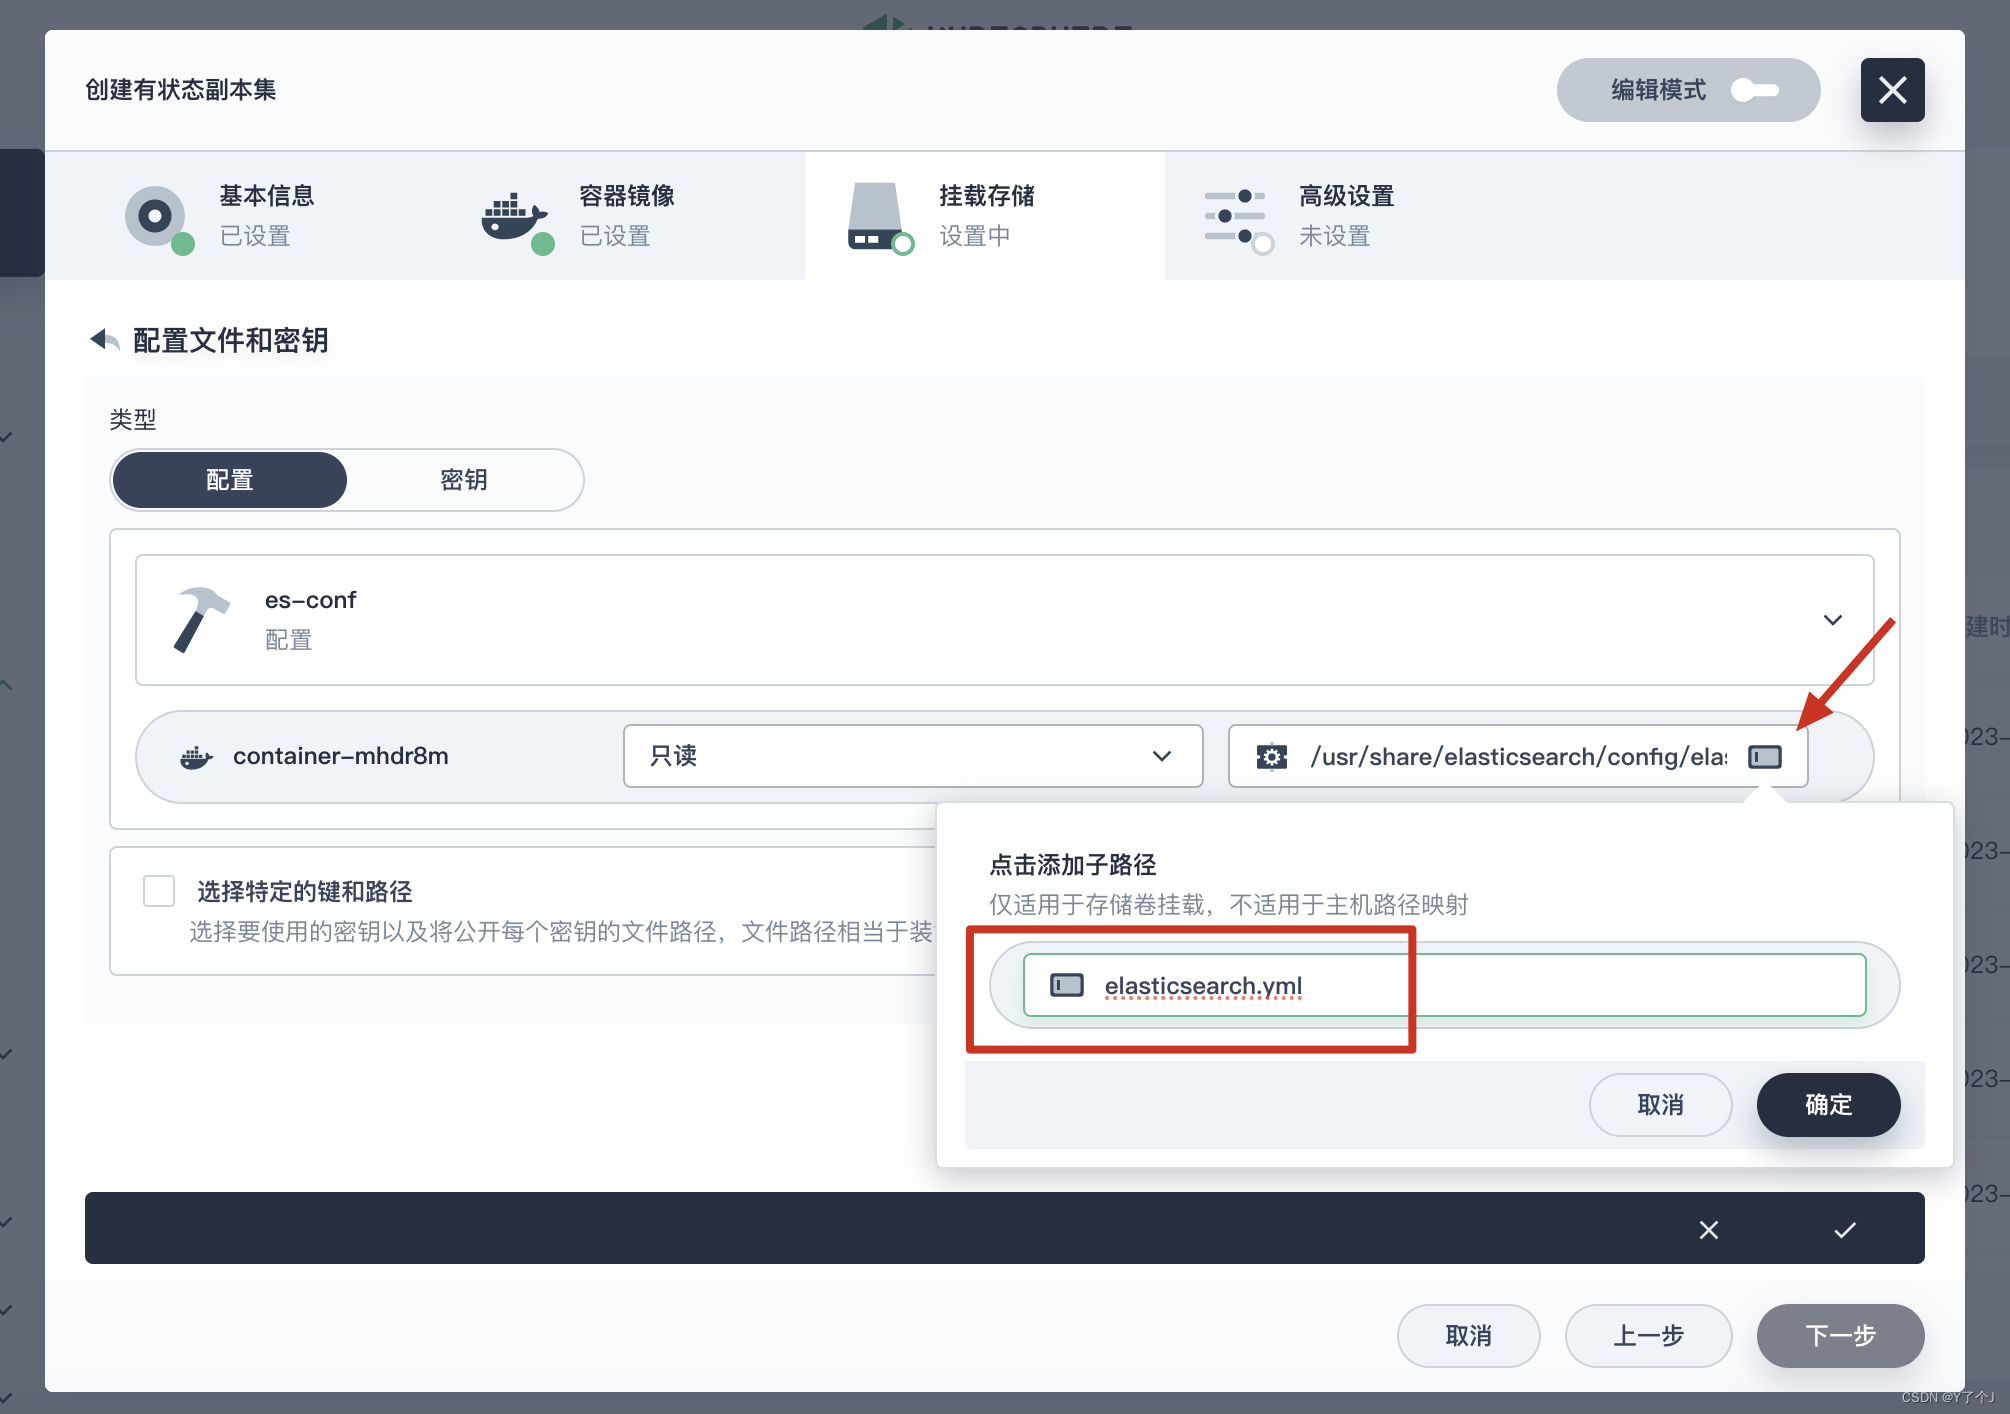
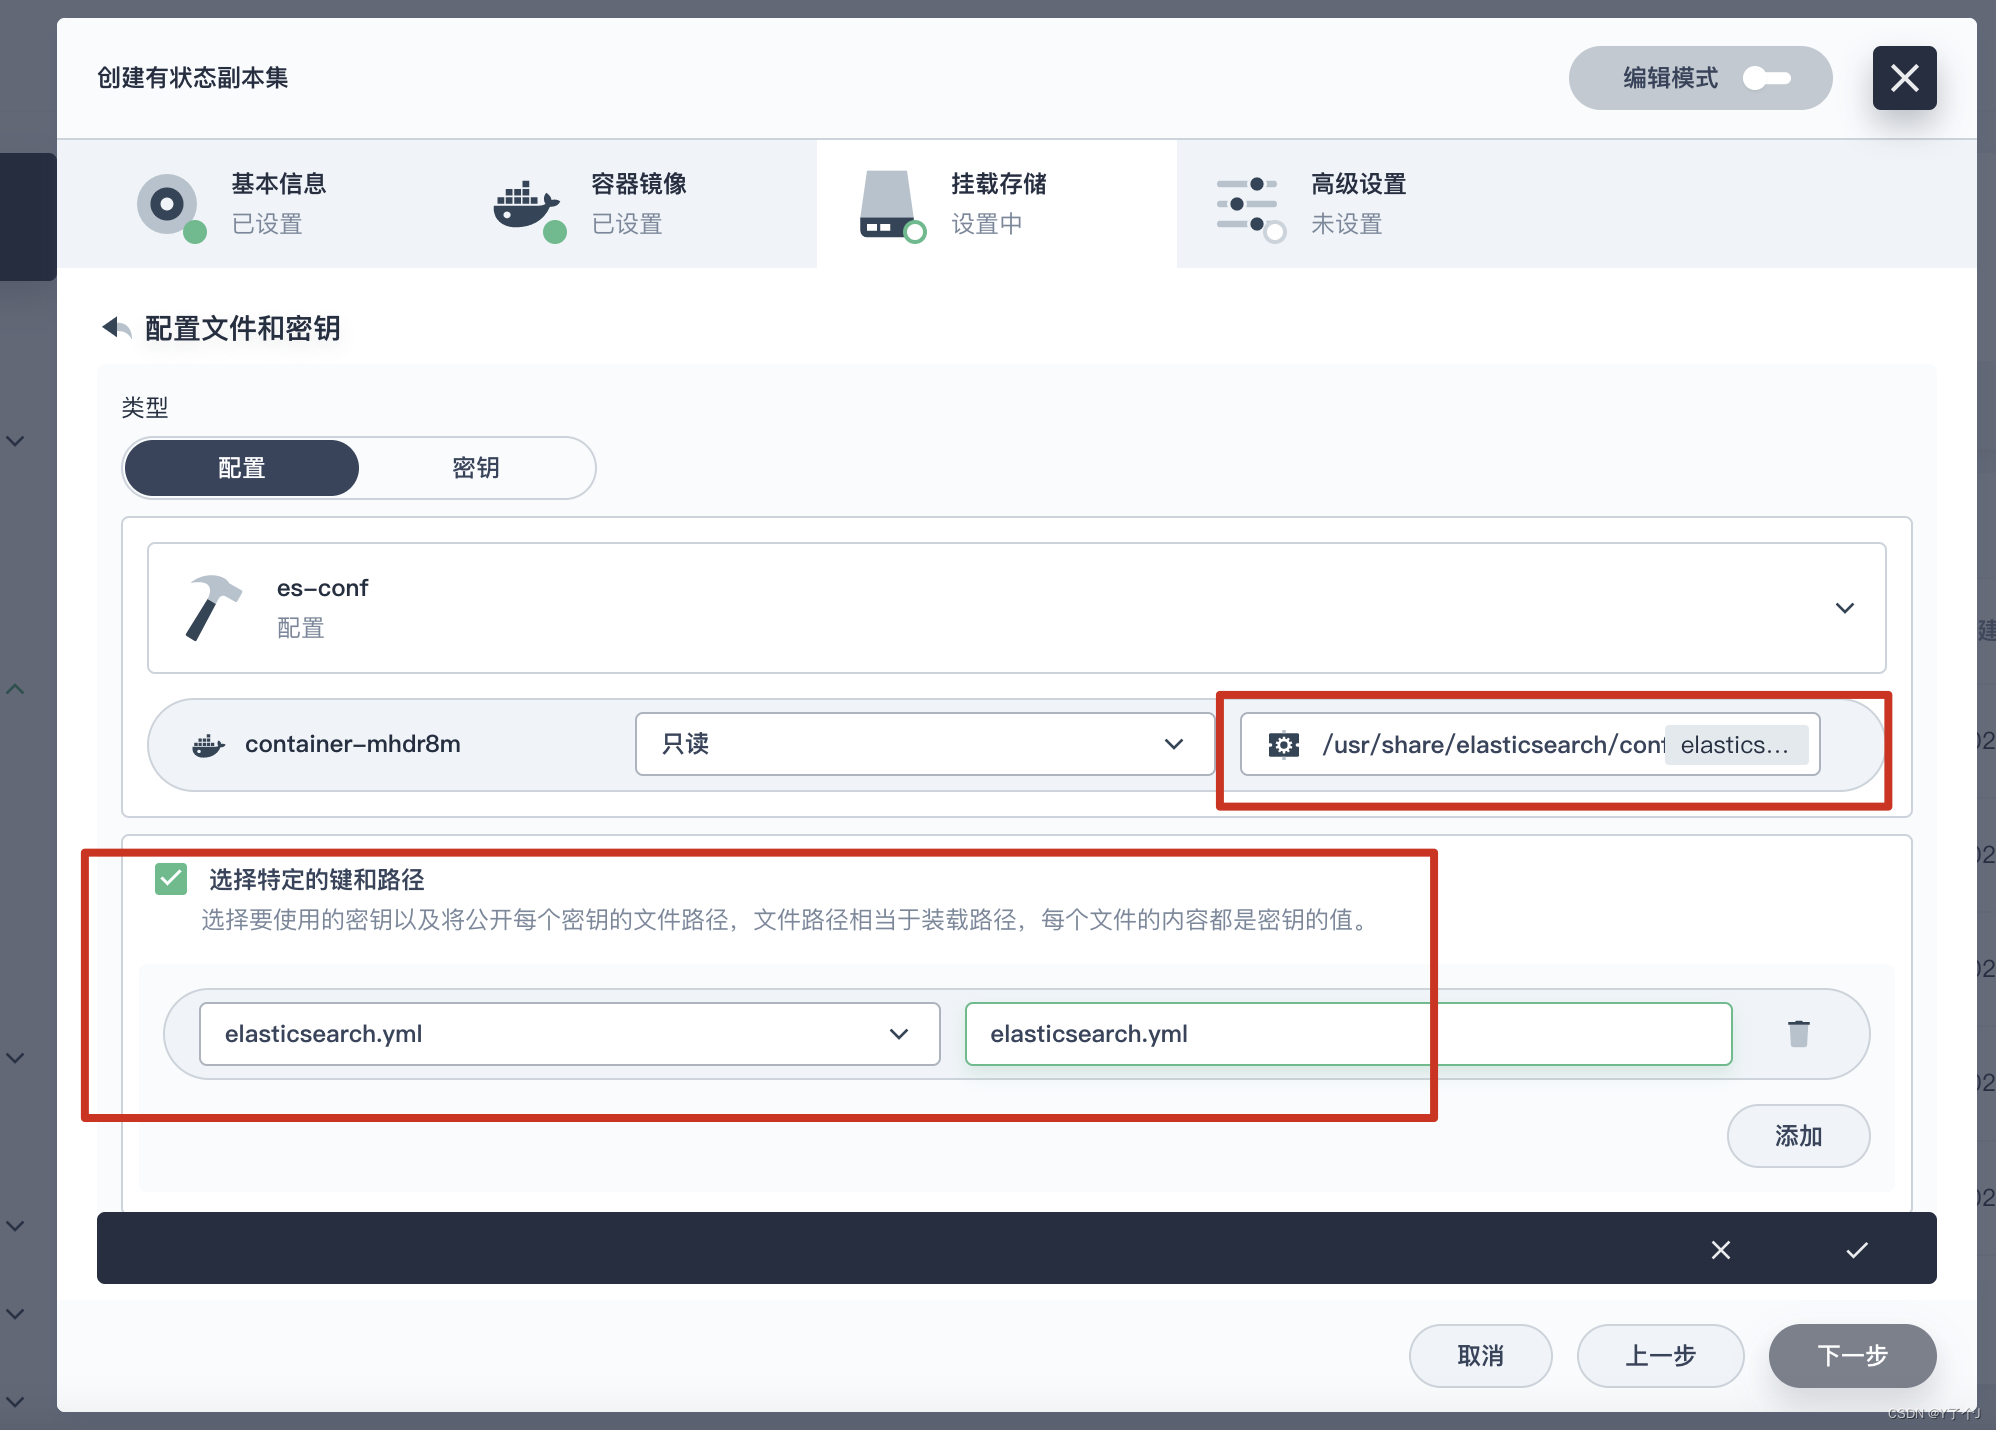
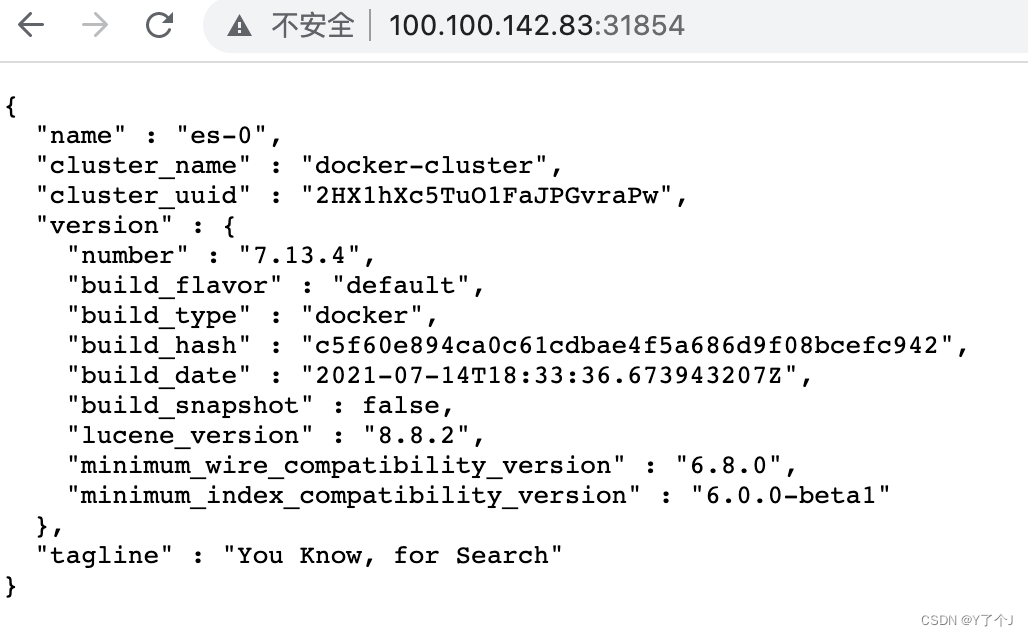
es容器启动 # 创建数据目录 mkdir -p /mydata/es-01 && chmod 777 -R /mydata/es-01 # 容器启动 docker run --restart=always -d -p 9200:9200 -p 9300:9300 \ -e "discovery.type=single-node" \ -e ES_JAVA_OPTS="-Xms512m -Xmx512m" \ #-v /mydata/es-01/es-config:/usr/share/elasticsearch/config \ #-v /mydata/es-01/data:/usr/share/elasticsearch/data \ --name es-01 \ elasticsearch:7.13.4先启动下es,获取 elasticsearch.yml 和 jvm.options 文件,待会会用到,获取到配置文件后可以删除该容器,(我启动时挂载文件不在,会报错,所以那两个文件还是去容器里面拷贝出来) es部署分析 注意: 子路径挂载,配置修改后,k8s不会对其Pod内的相关配置文件进行热更新,需要自己重启Pod
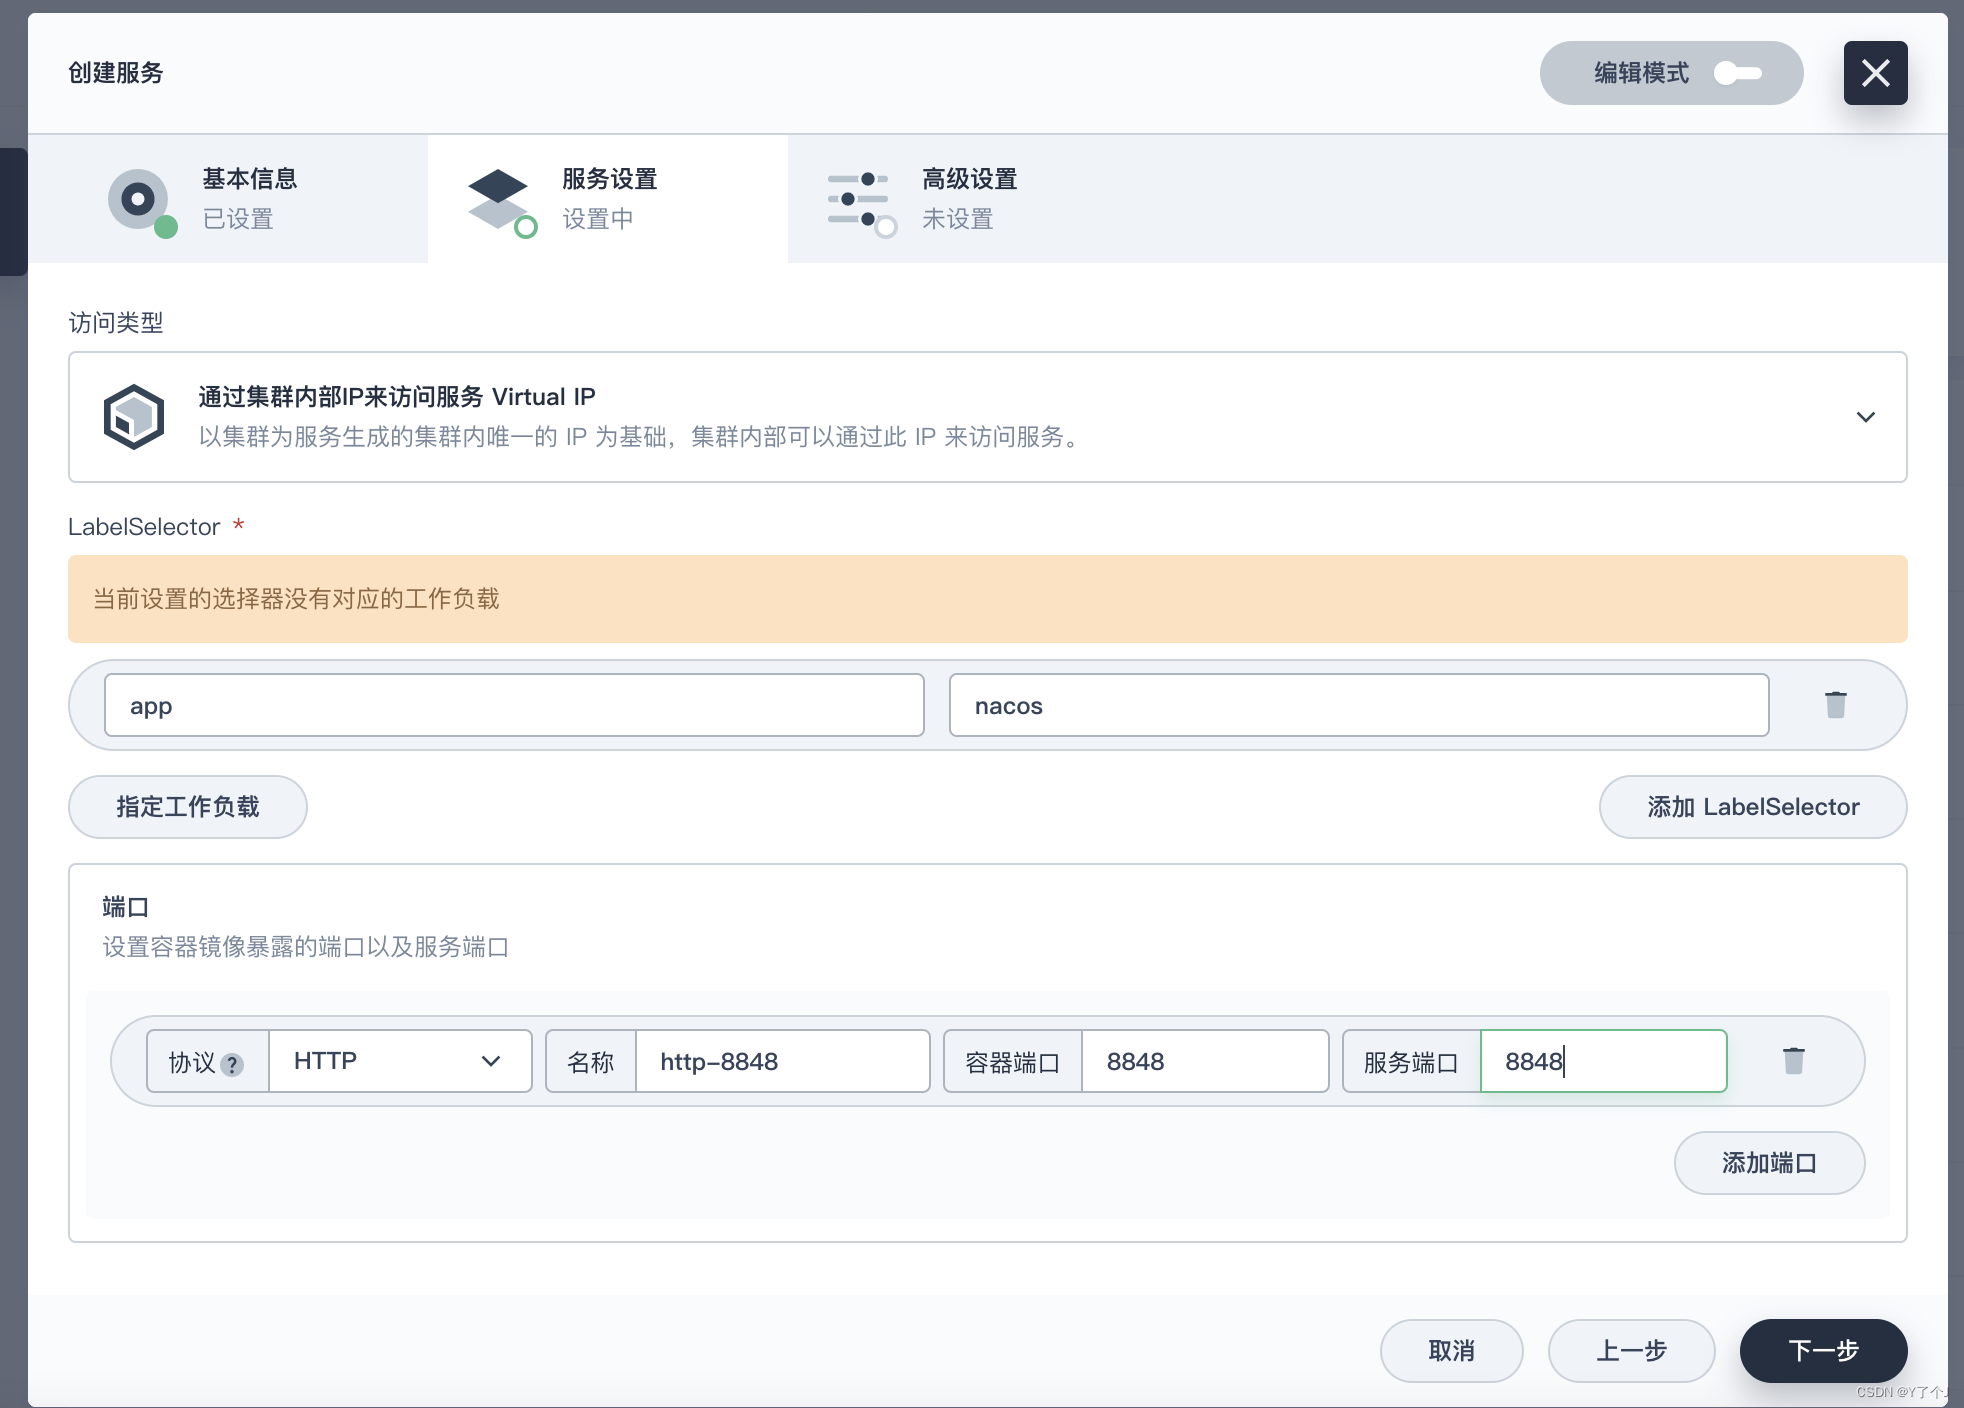
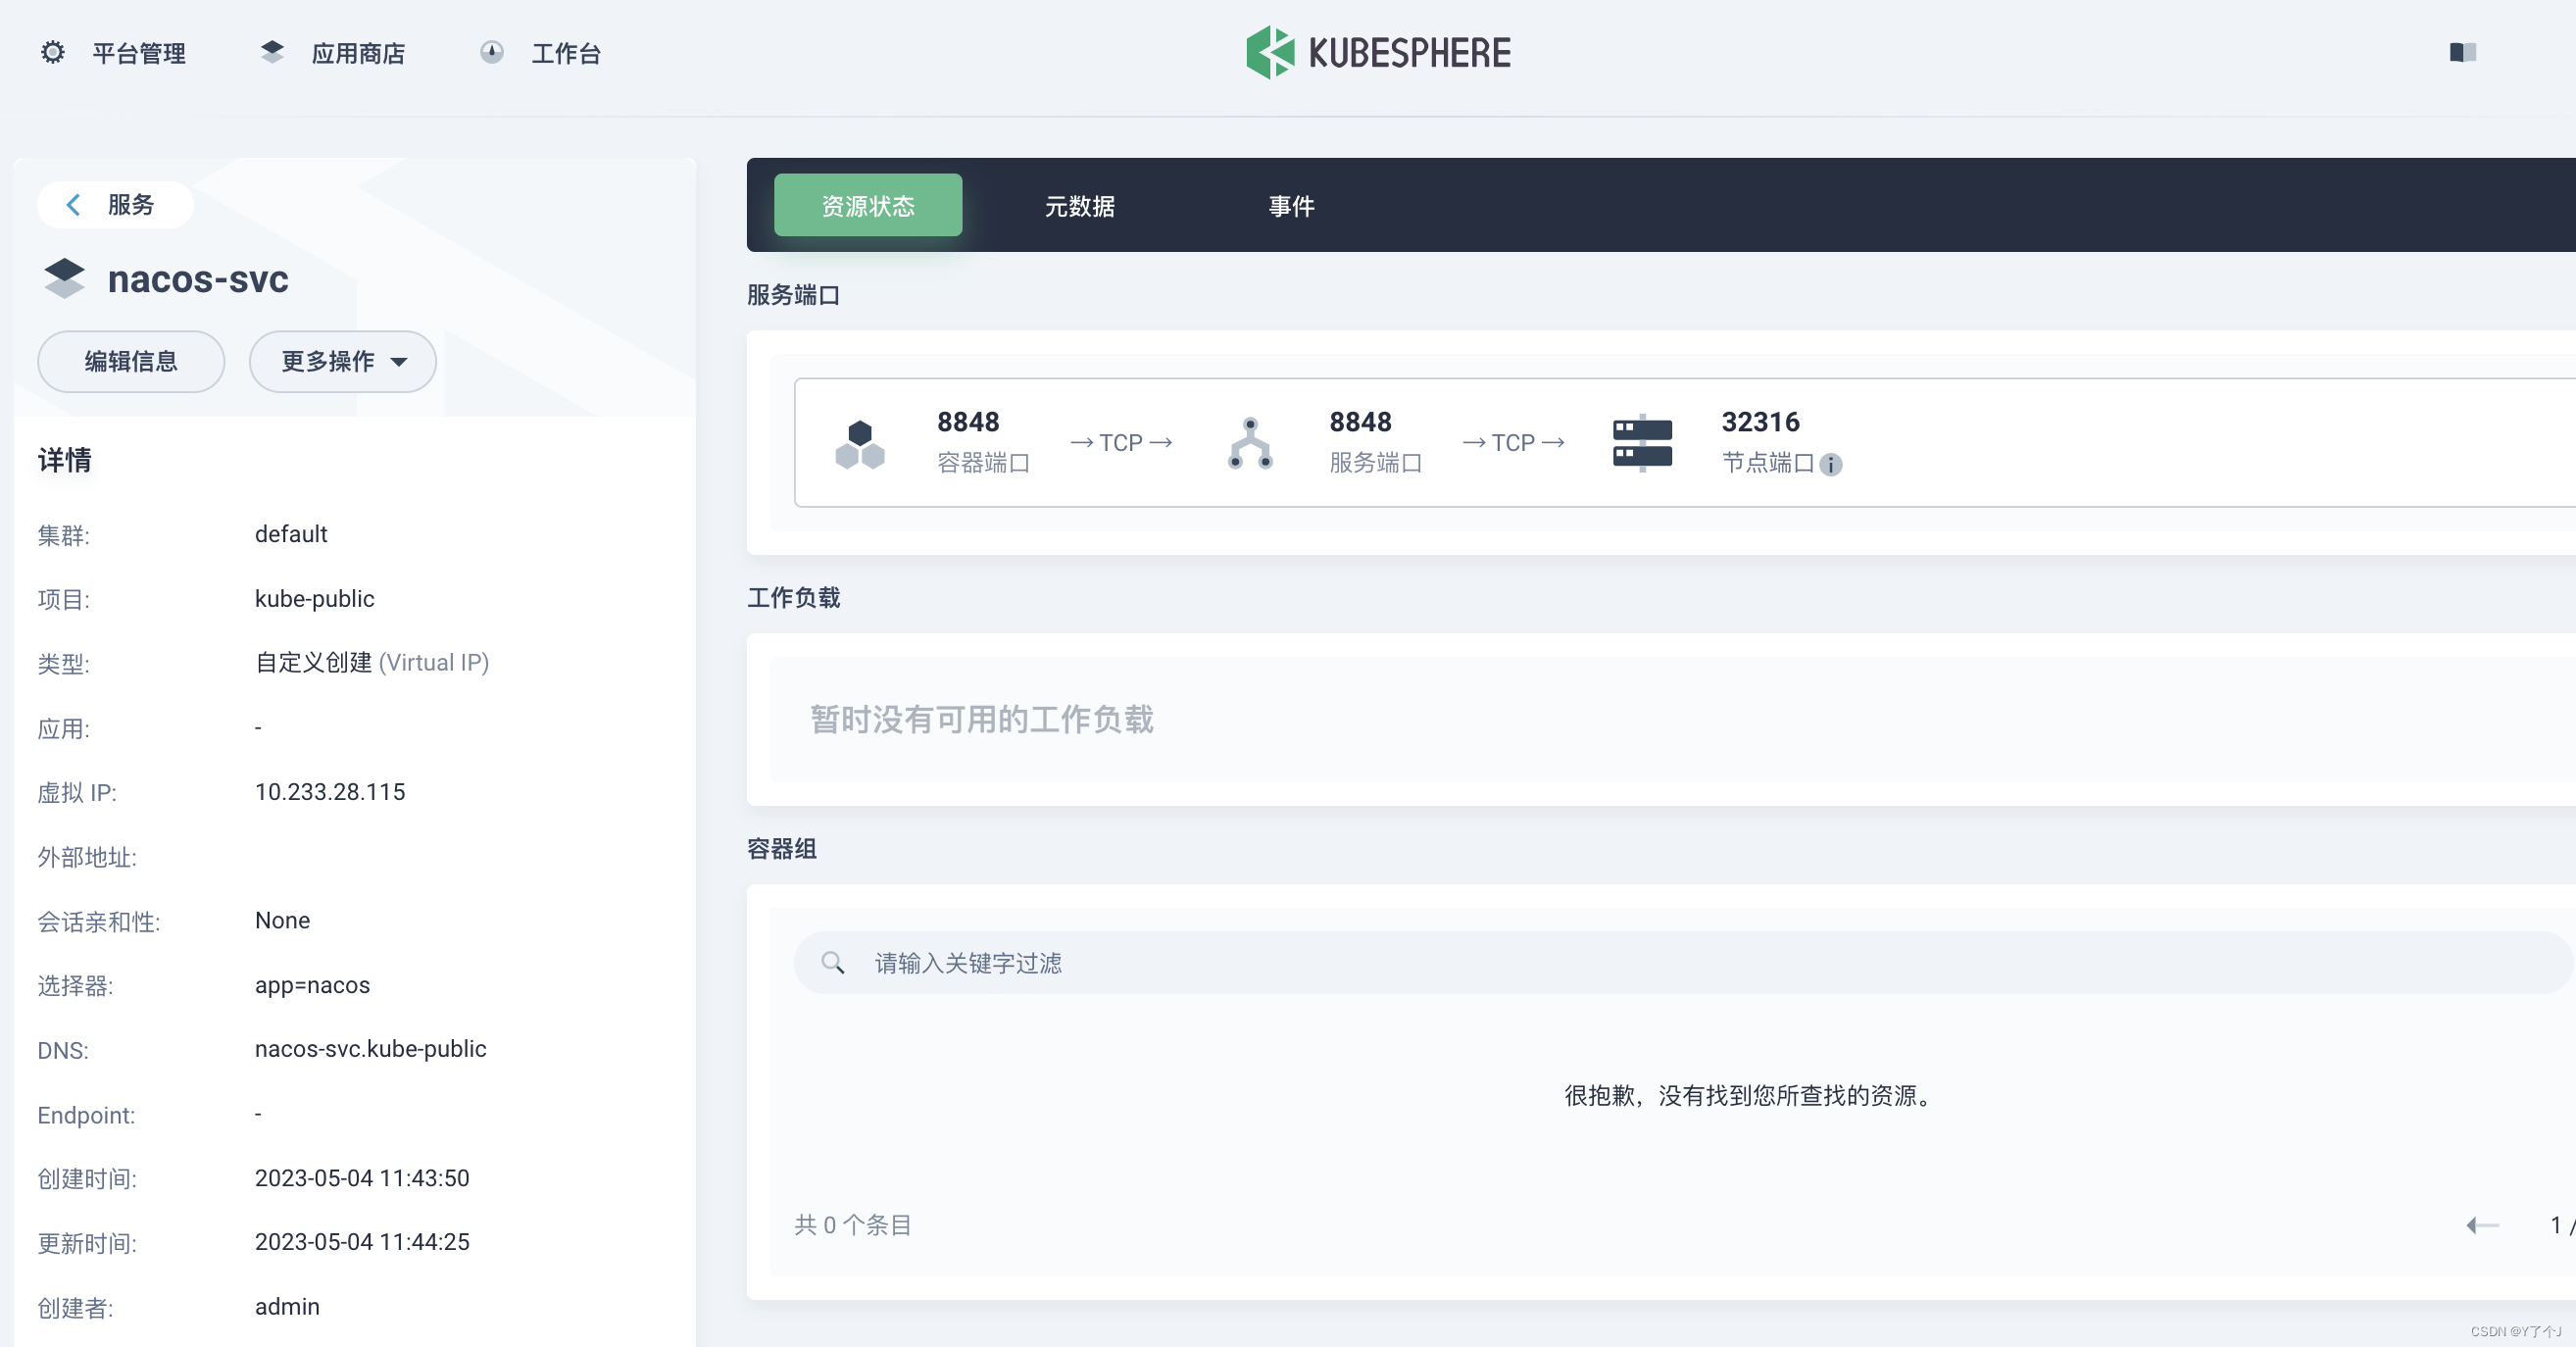
创建nacos服务 创建配置 挂载cluster.conf文件 在容器里ping 服务的DNS,发现pod的虚拟域名格式为:服务名.项目名.svc.cluster.local 如果是多个pod,则是:pod名称.服务名.项目名.svc.cluster.local
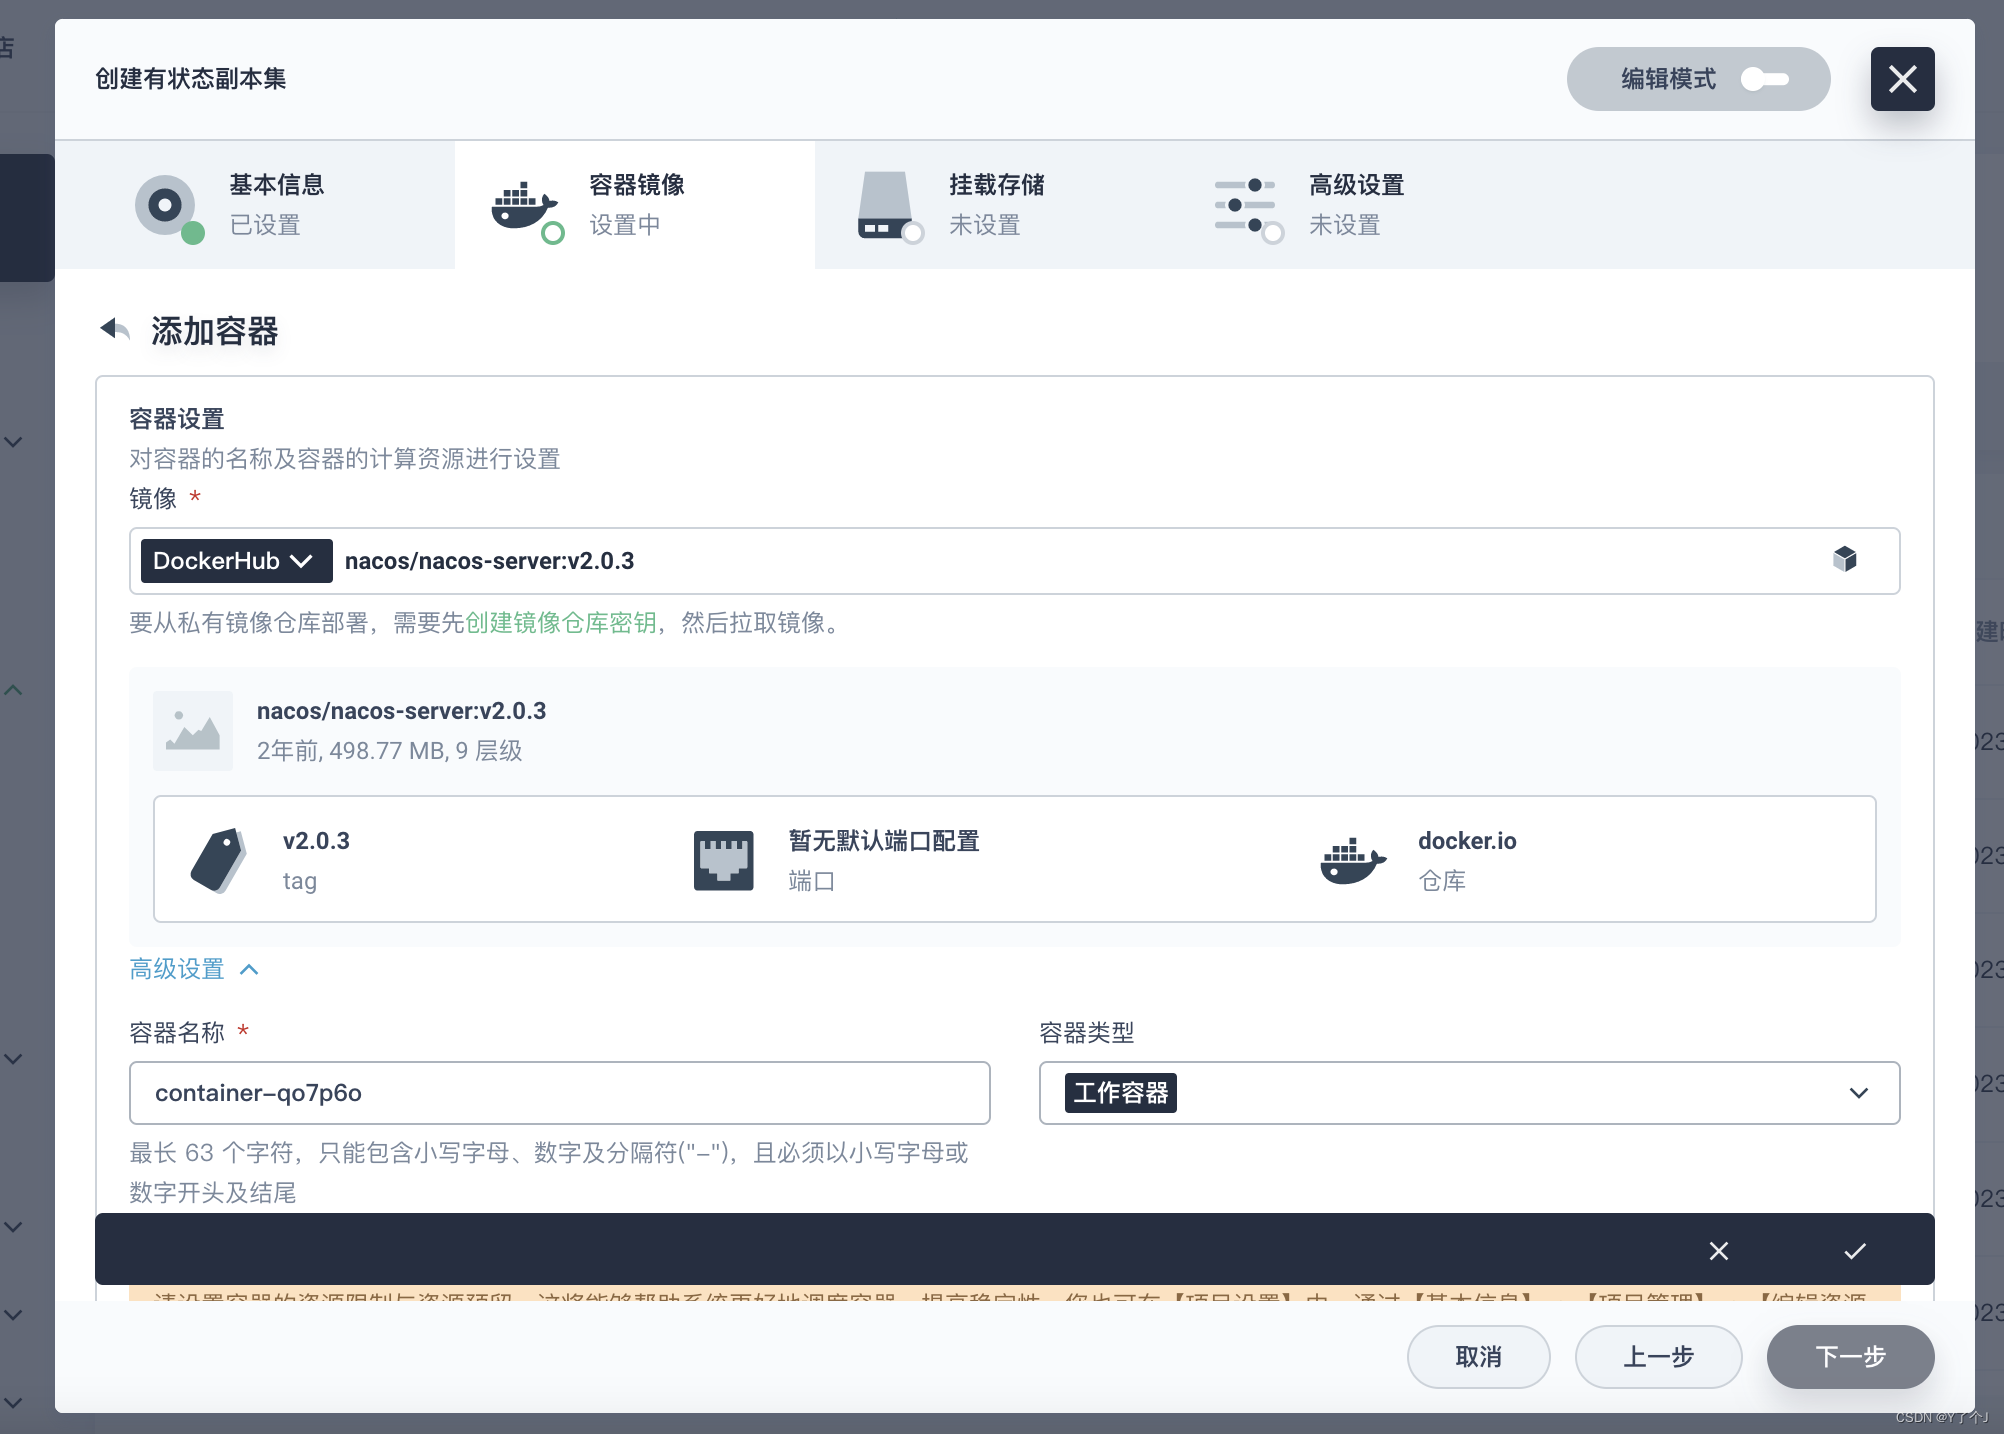
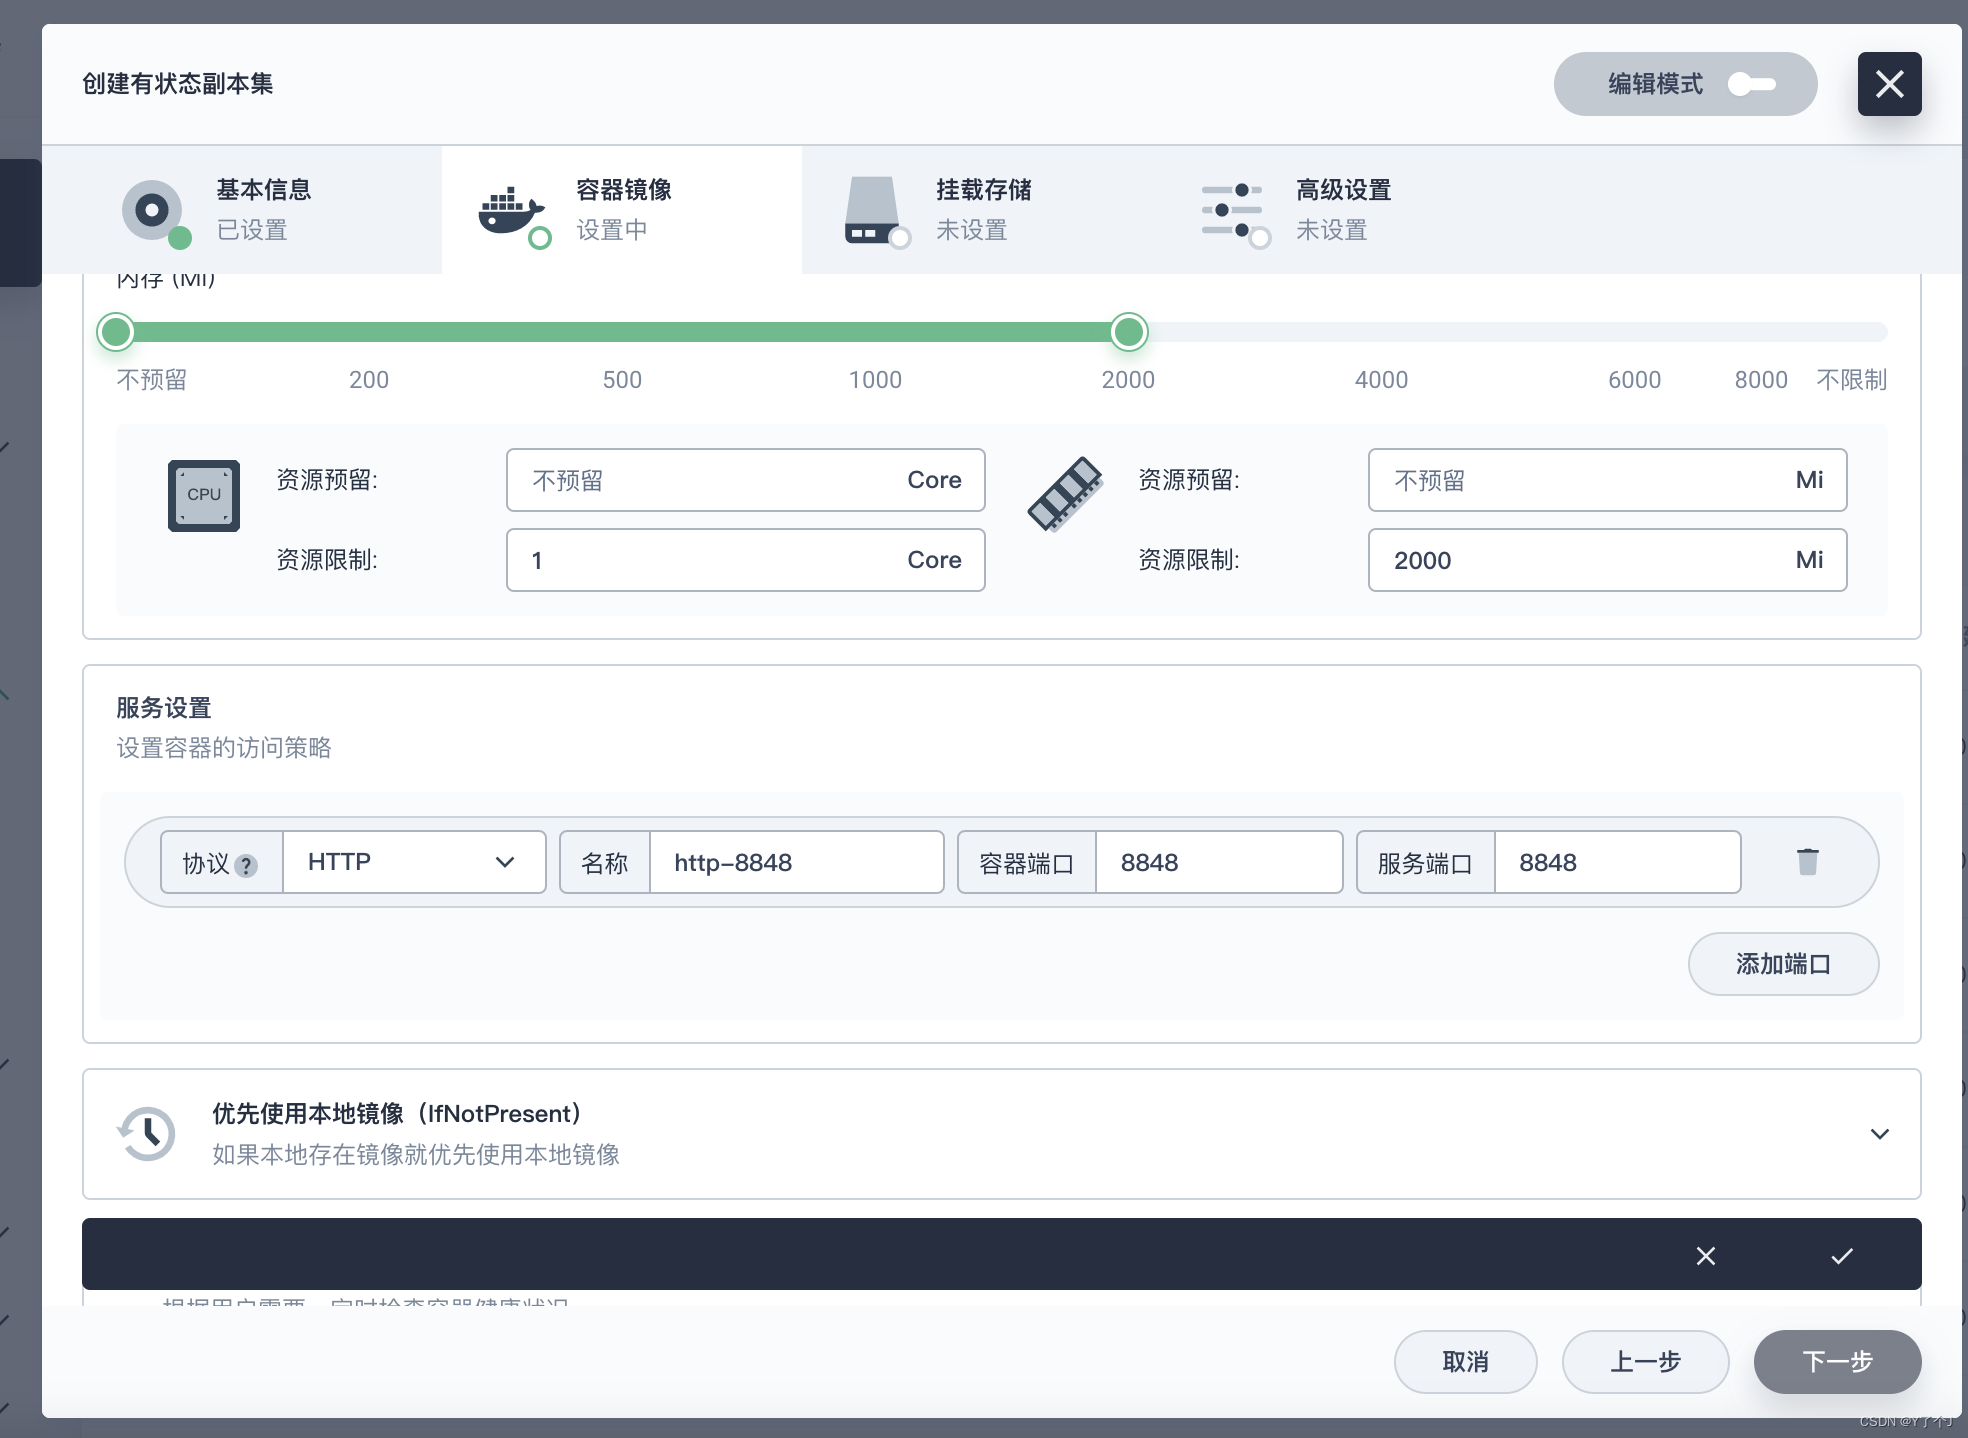
创建有状态工作负载,容器版本选择:nacos/nacos-server:v2.0.3
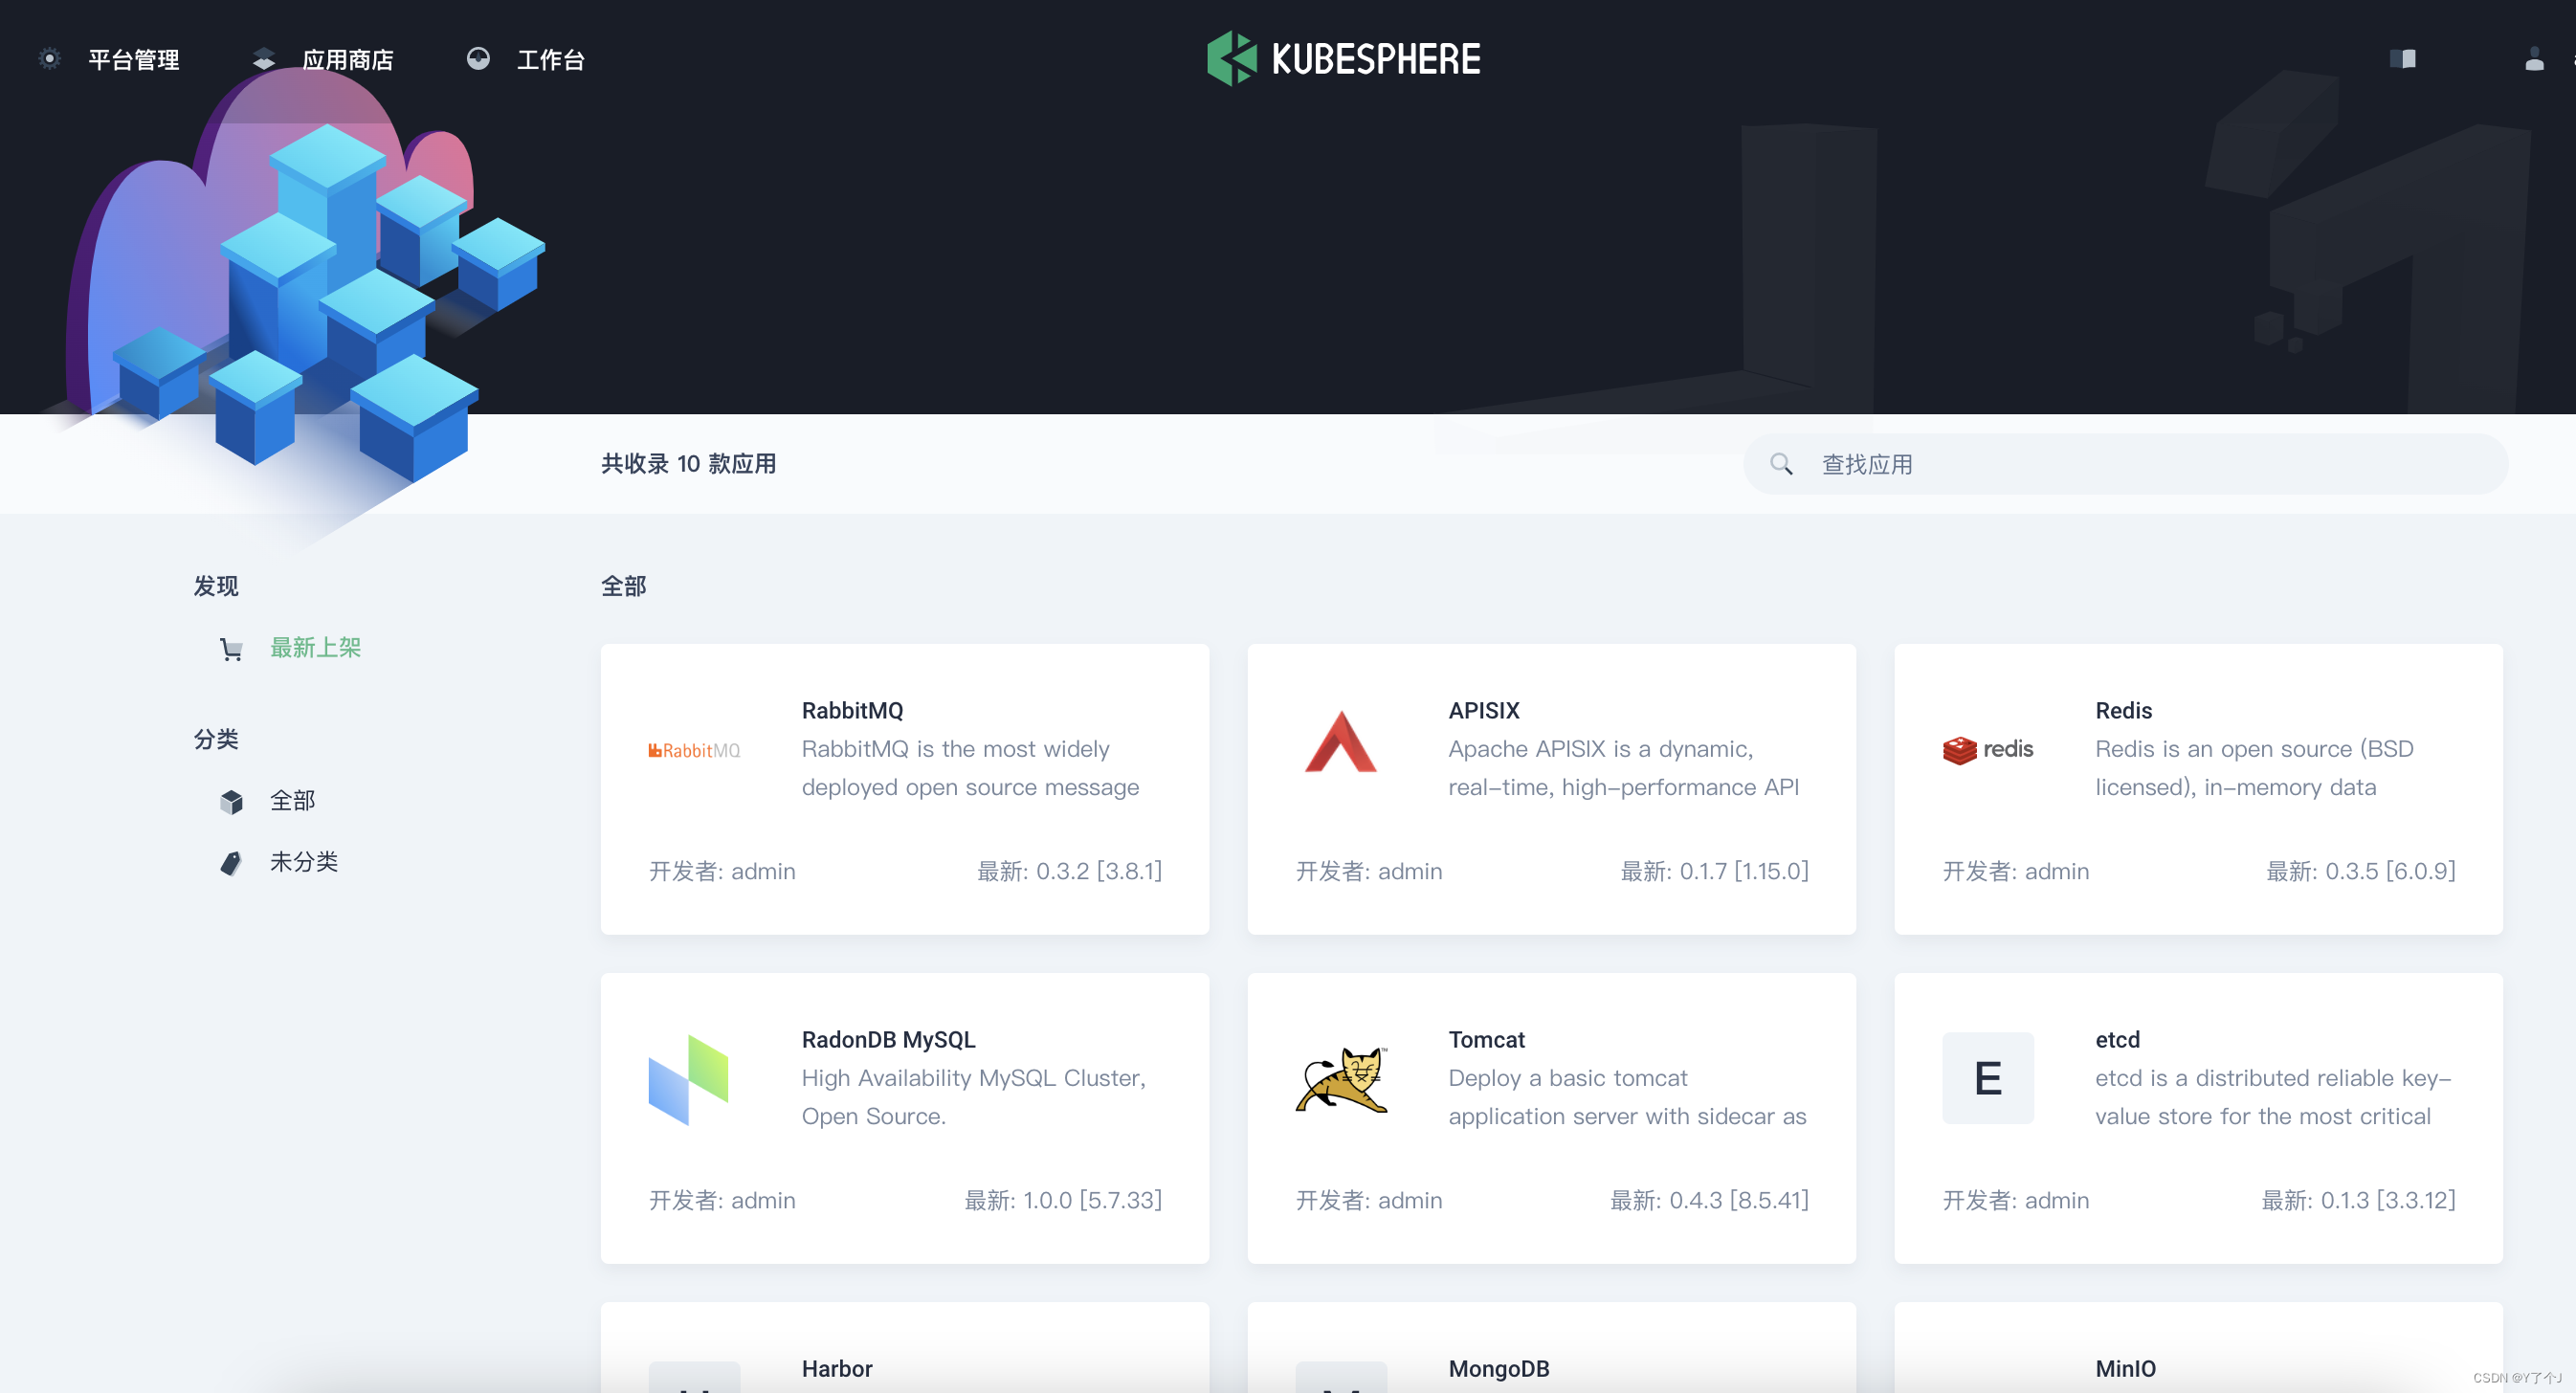
在该 YAML 文件中,搜索 openpitrix,将 enabled 的 false 改为 true。完成后,点击右下角的确定,保存配置。 openpitrix: store: enabled: true # 将“false”更改为“true”。在 kubectl 中执行以下命令检查安装过程: kubectl logs -n kubesphere-system $(kubectl get pod -n kubesphere-system -l 'app in (ks-install, ks-installer)' -o jsonpath='{.items[0].metadata.name}') -f详细参考官方文档 https://kubesphere.io/zh/docs/v3.3/pluggable-components/app-store/ 在您登录控制台后,如果您能看到页面左上角的应用商店以及其中的应用,则说明安装成功。 您可以在不登录控制台的情况下直接访问 :30880/apps 进入应用商店。 KubeSphere 3.2.x 中的应用商店启用后,OpenPitrix 页签不会显示在系统组件页面。 浏览器访问:http://100.100.142.83:30880/apps
|


 点下一步,再点添加数据,添加上面mysql配置示例内容,然后点创建

 给个5G大小,然后下一步创建。
 输入mysql镜像版本,在下面勾选环境变量,添加 MYSQL_ROOT_PASSWORD 变量, 勾选同步主机时区,再点下一步。
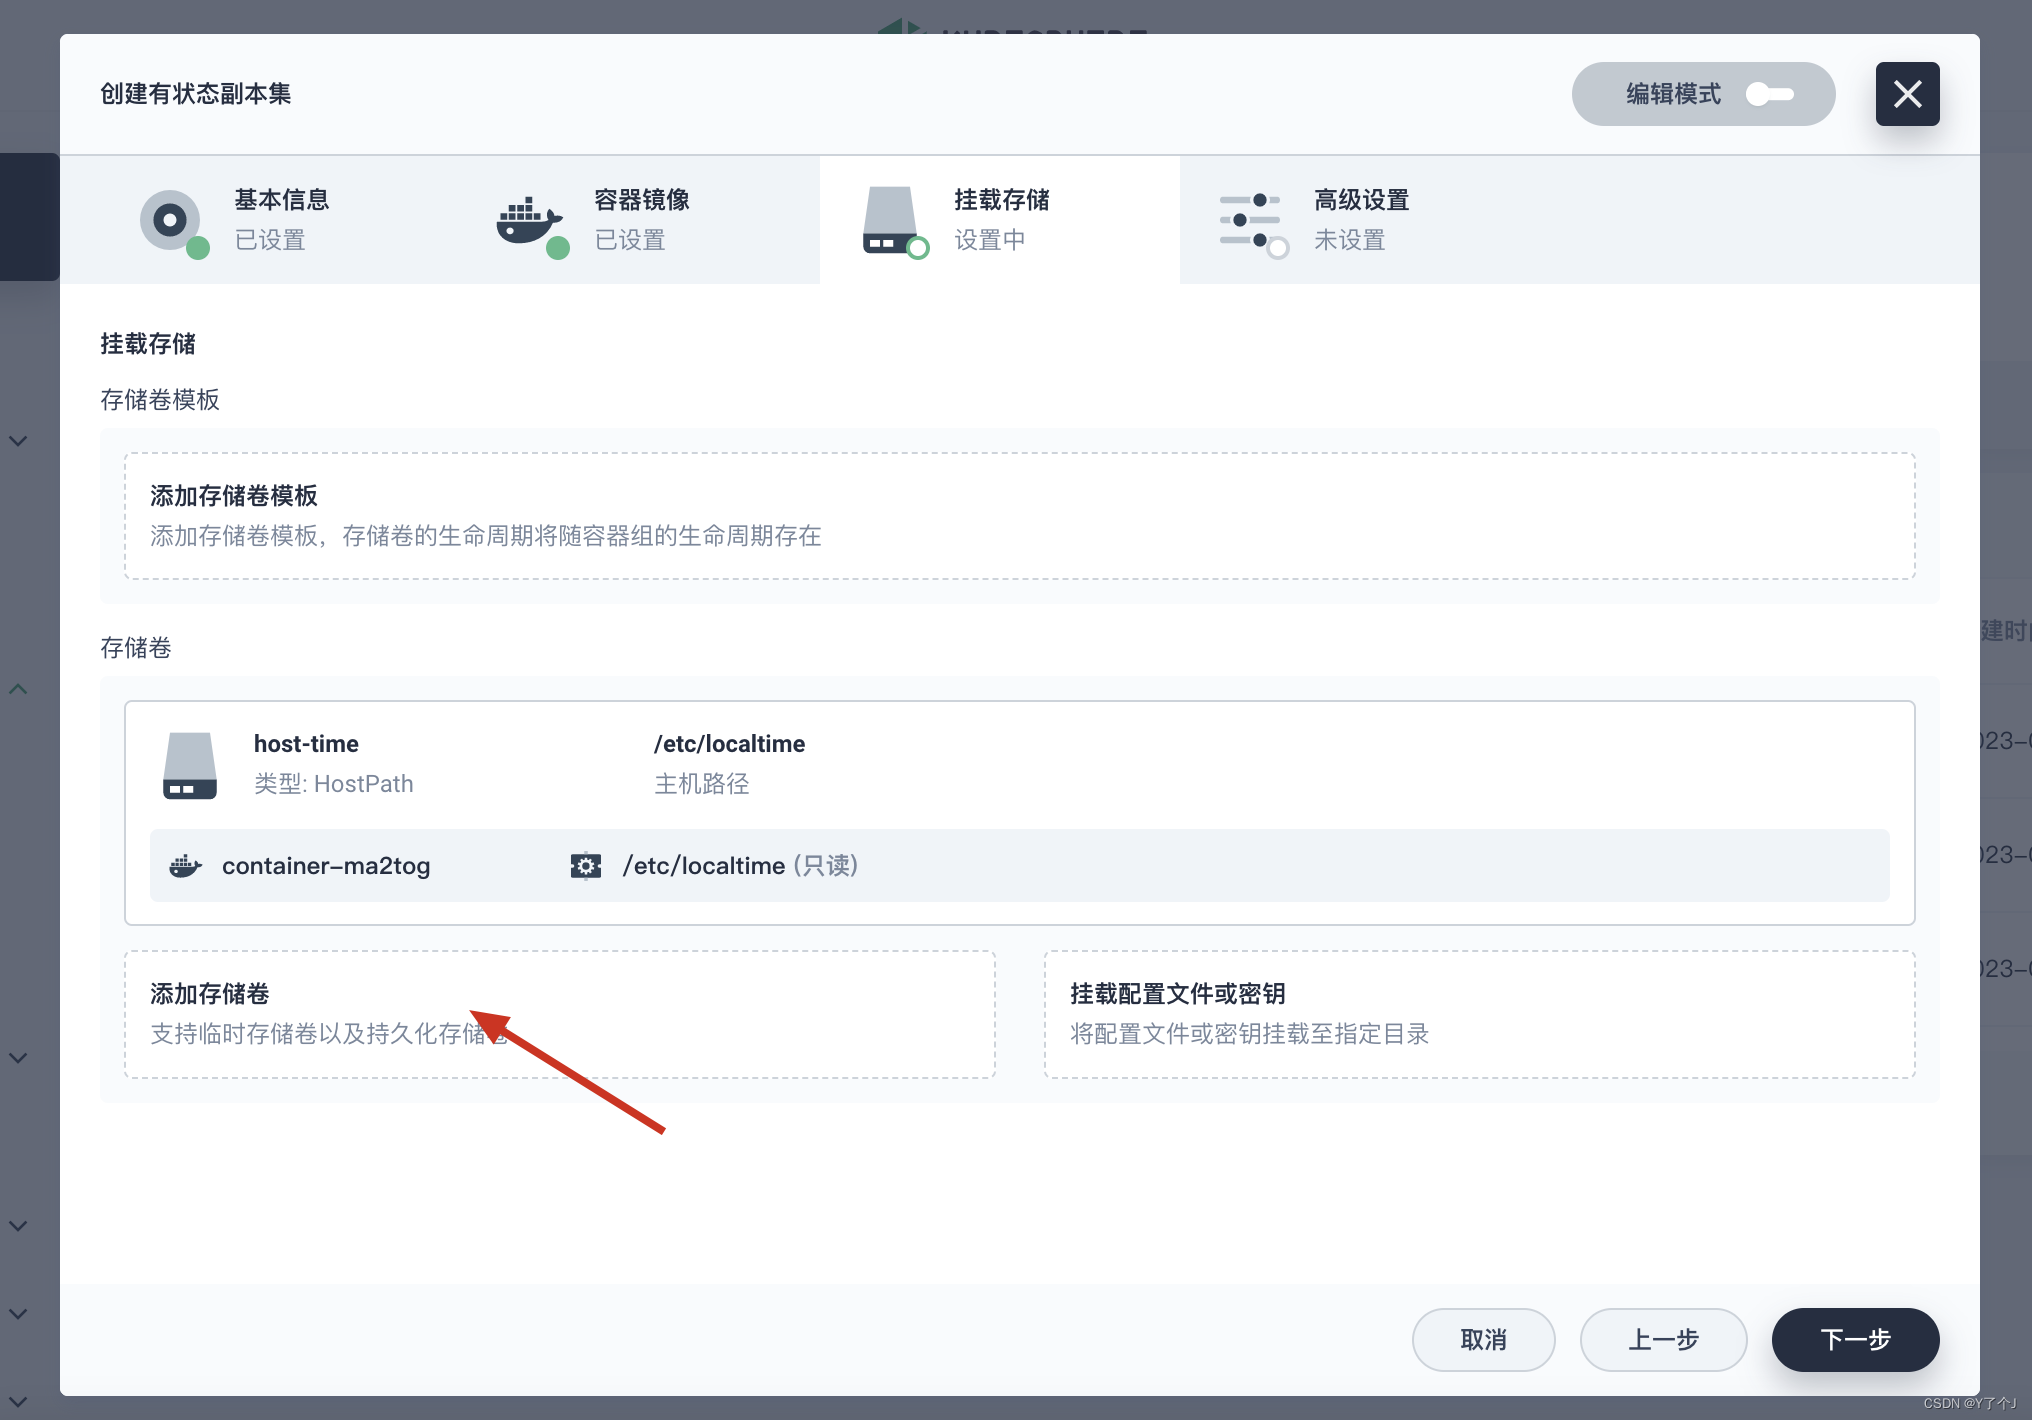
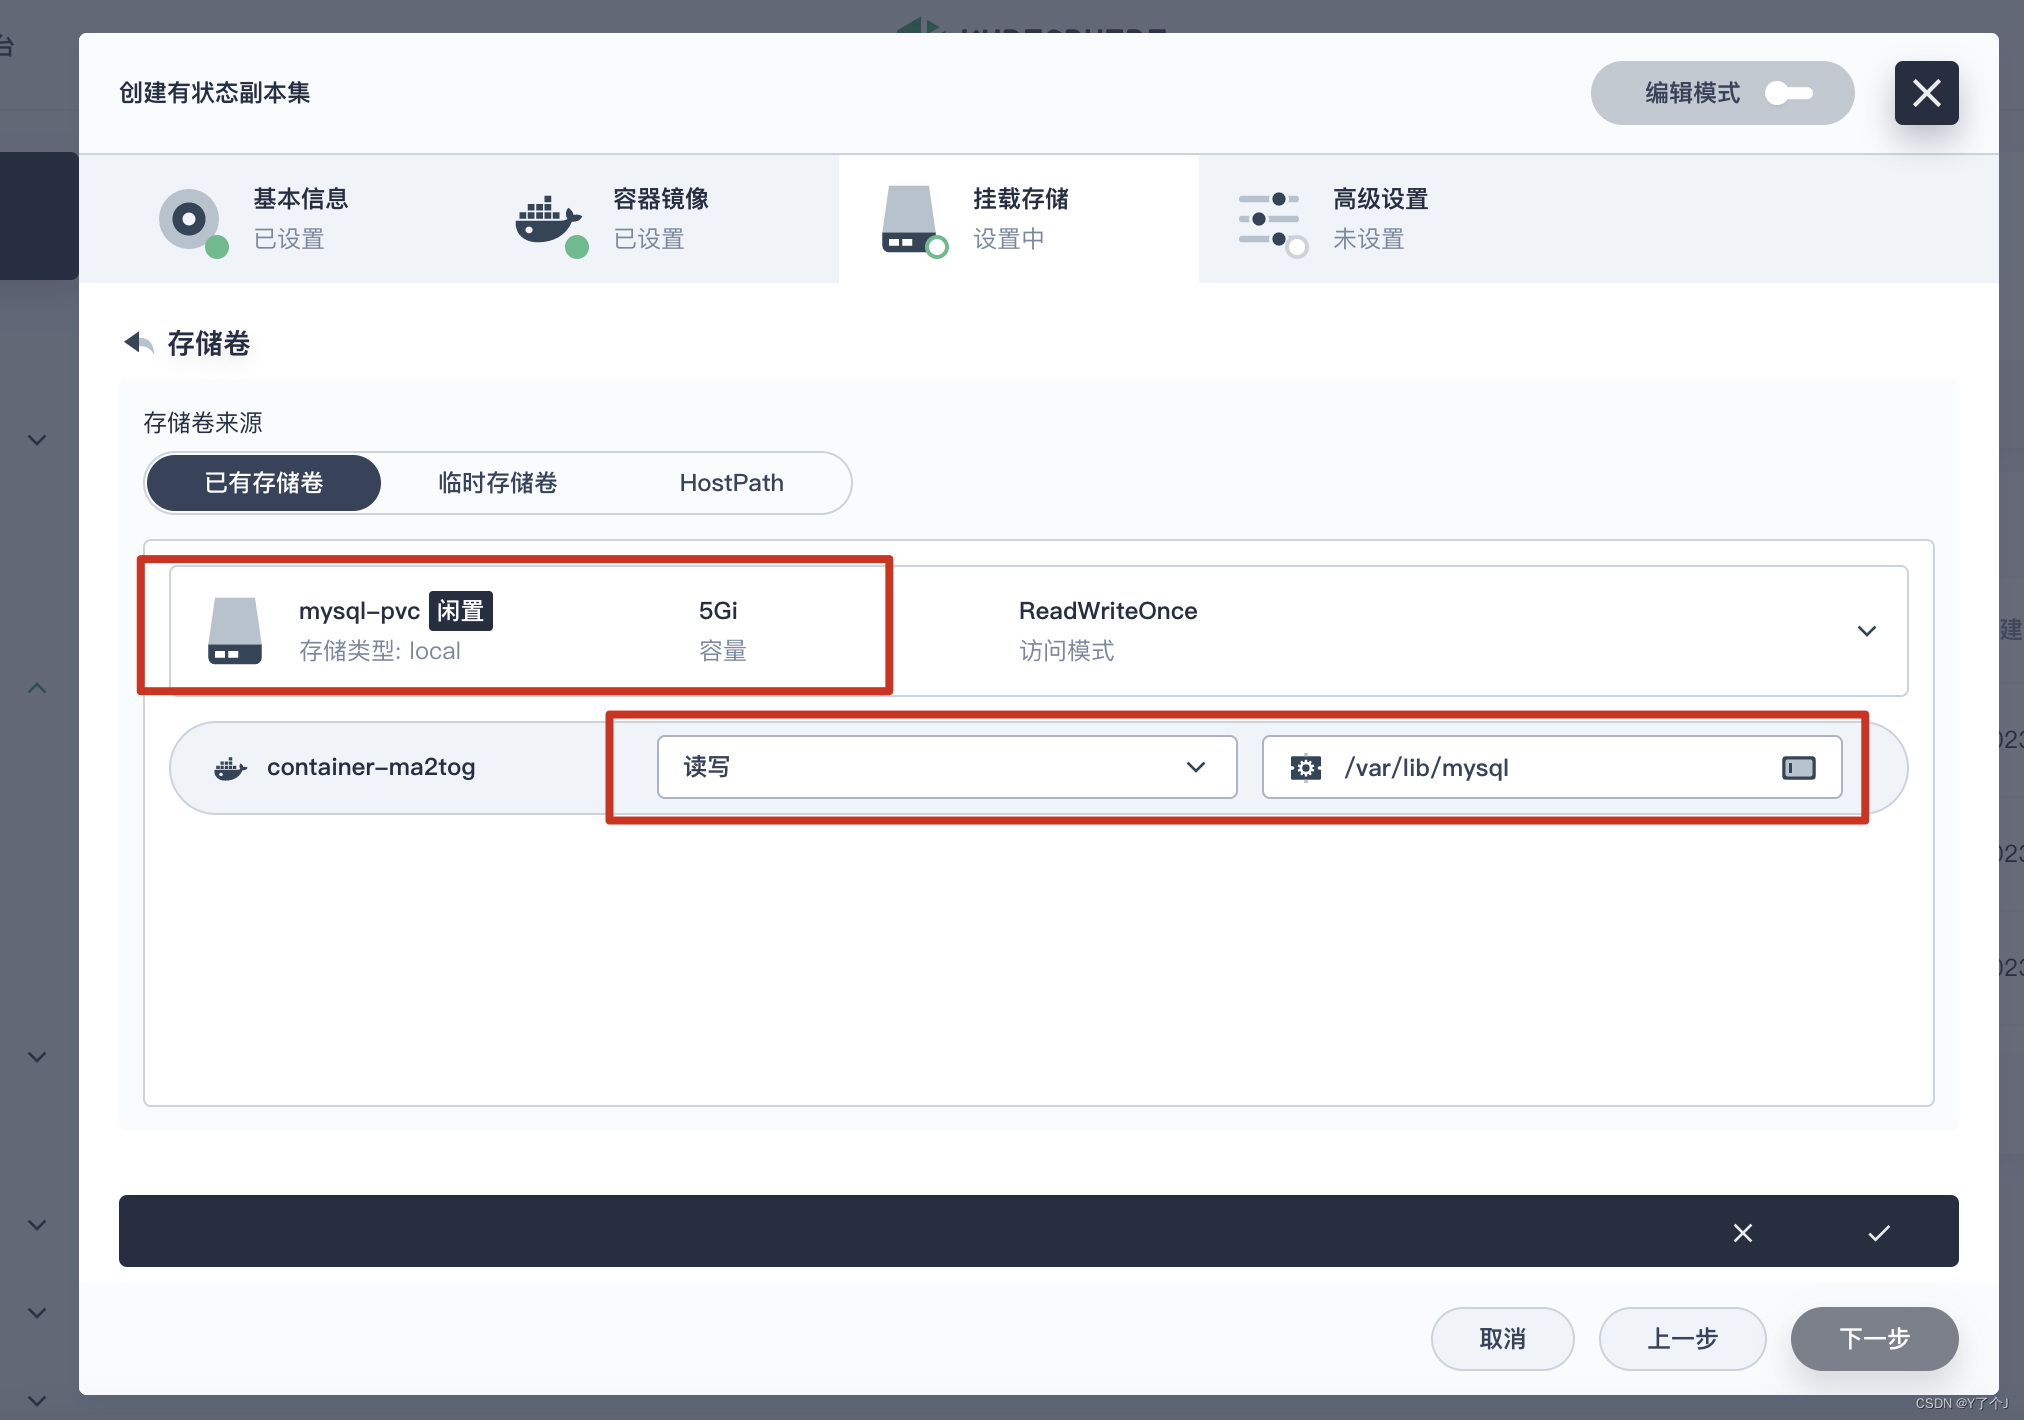 选择之前我们创建的数据卷
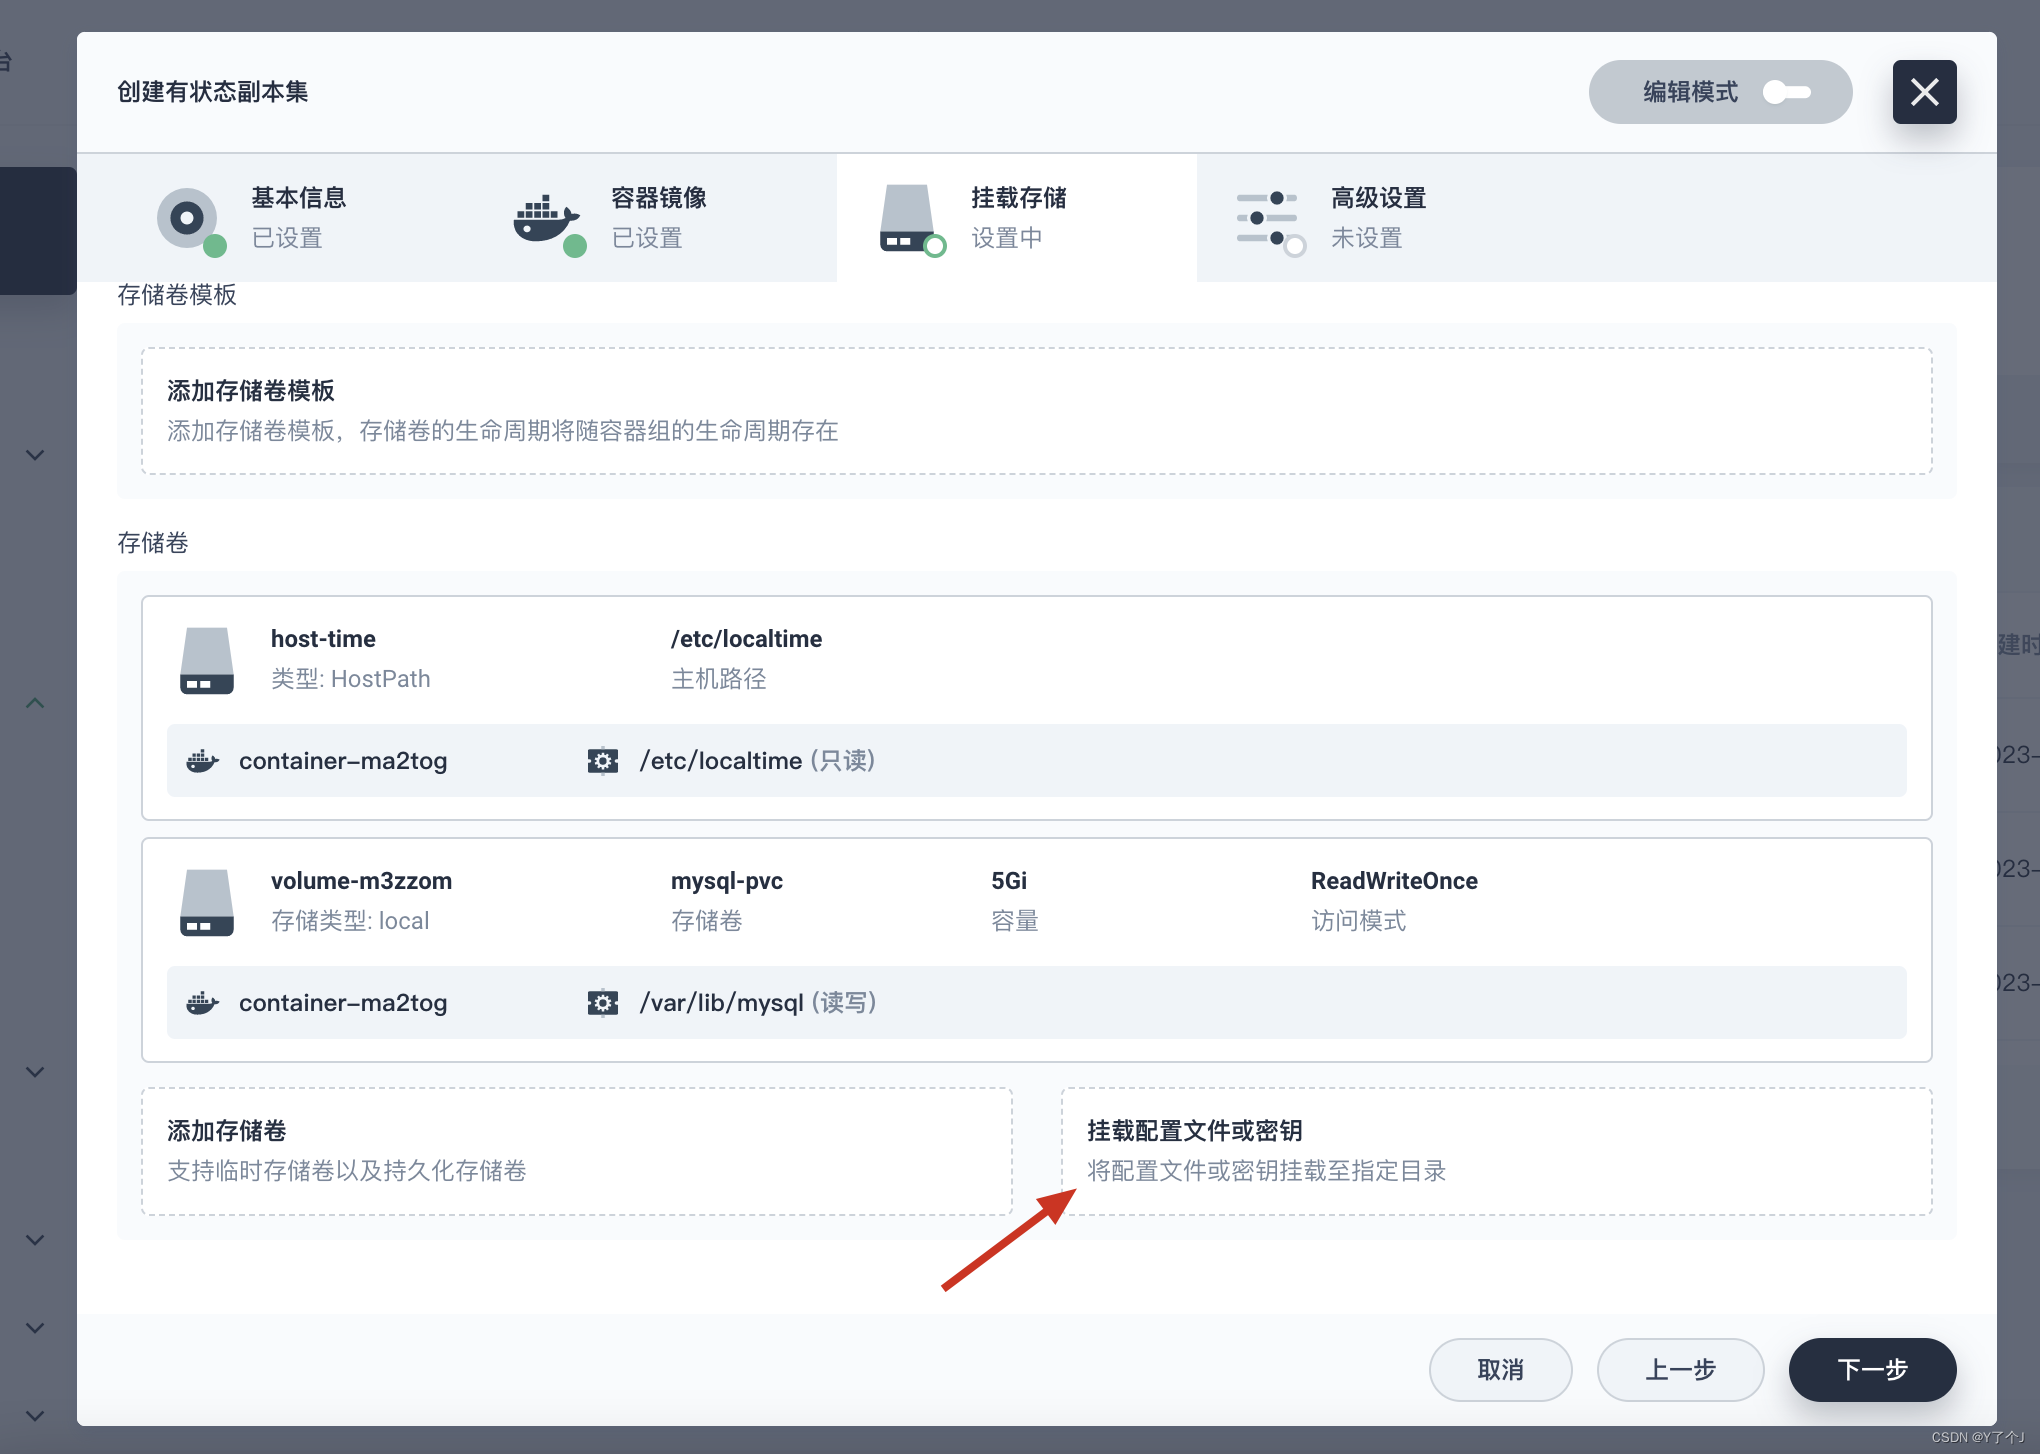
 然后点下一步,再点创建
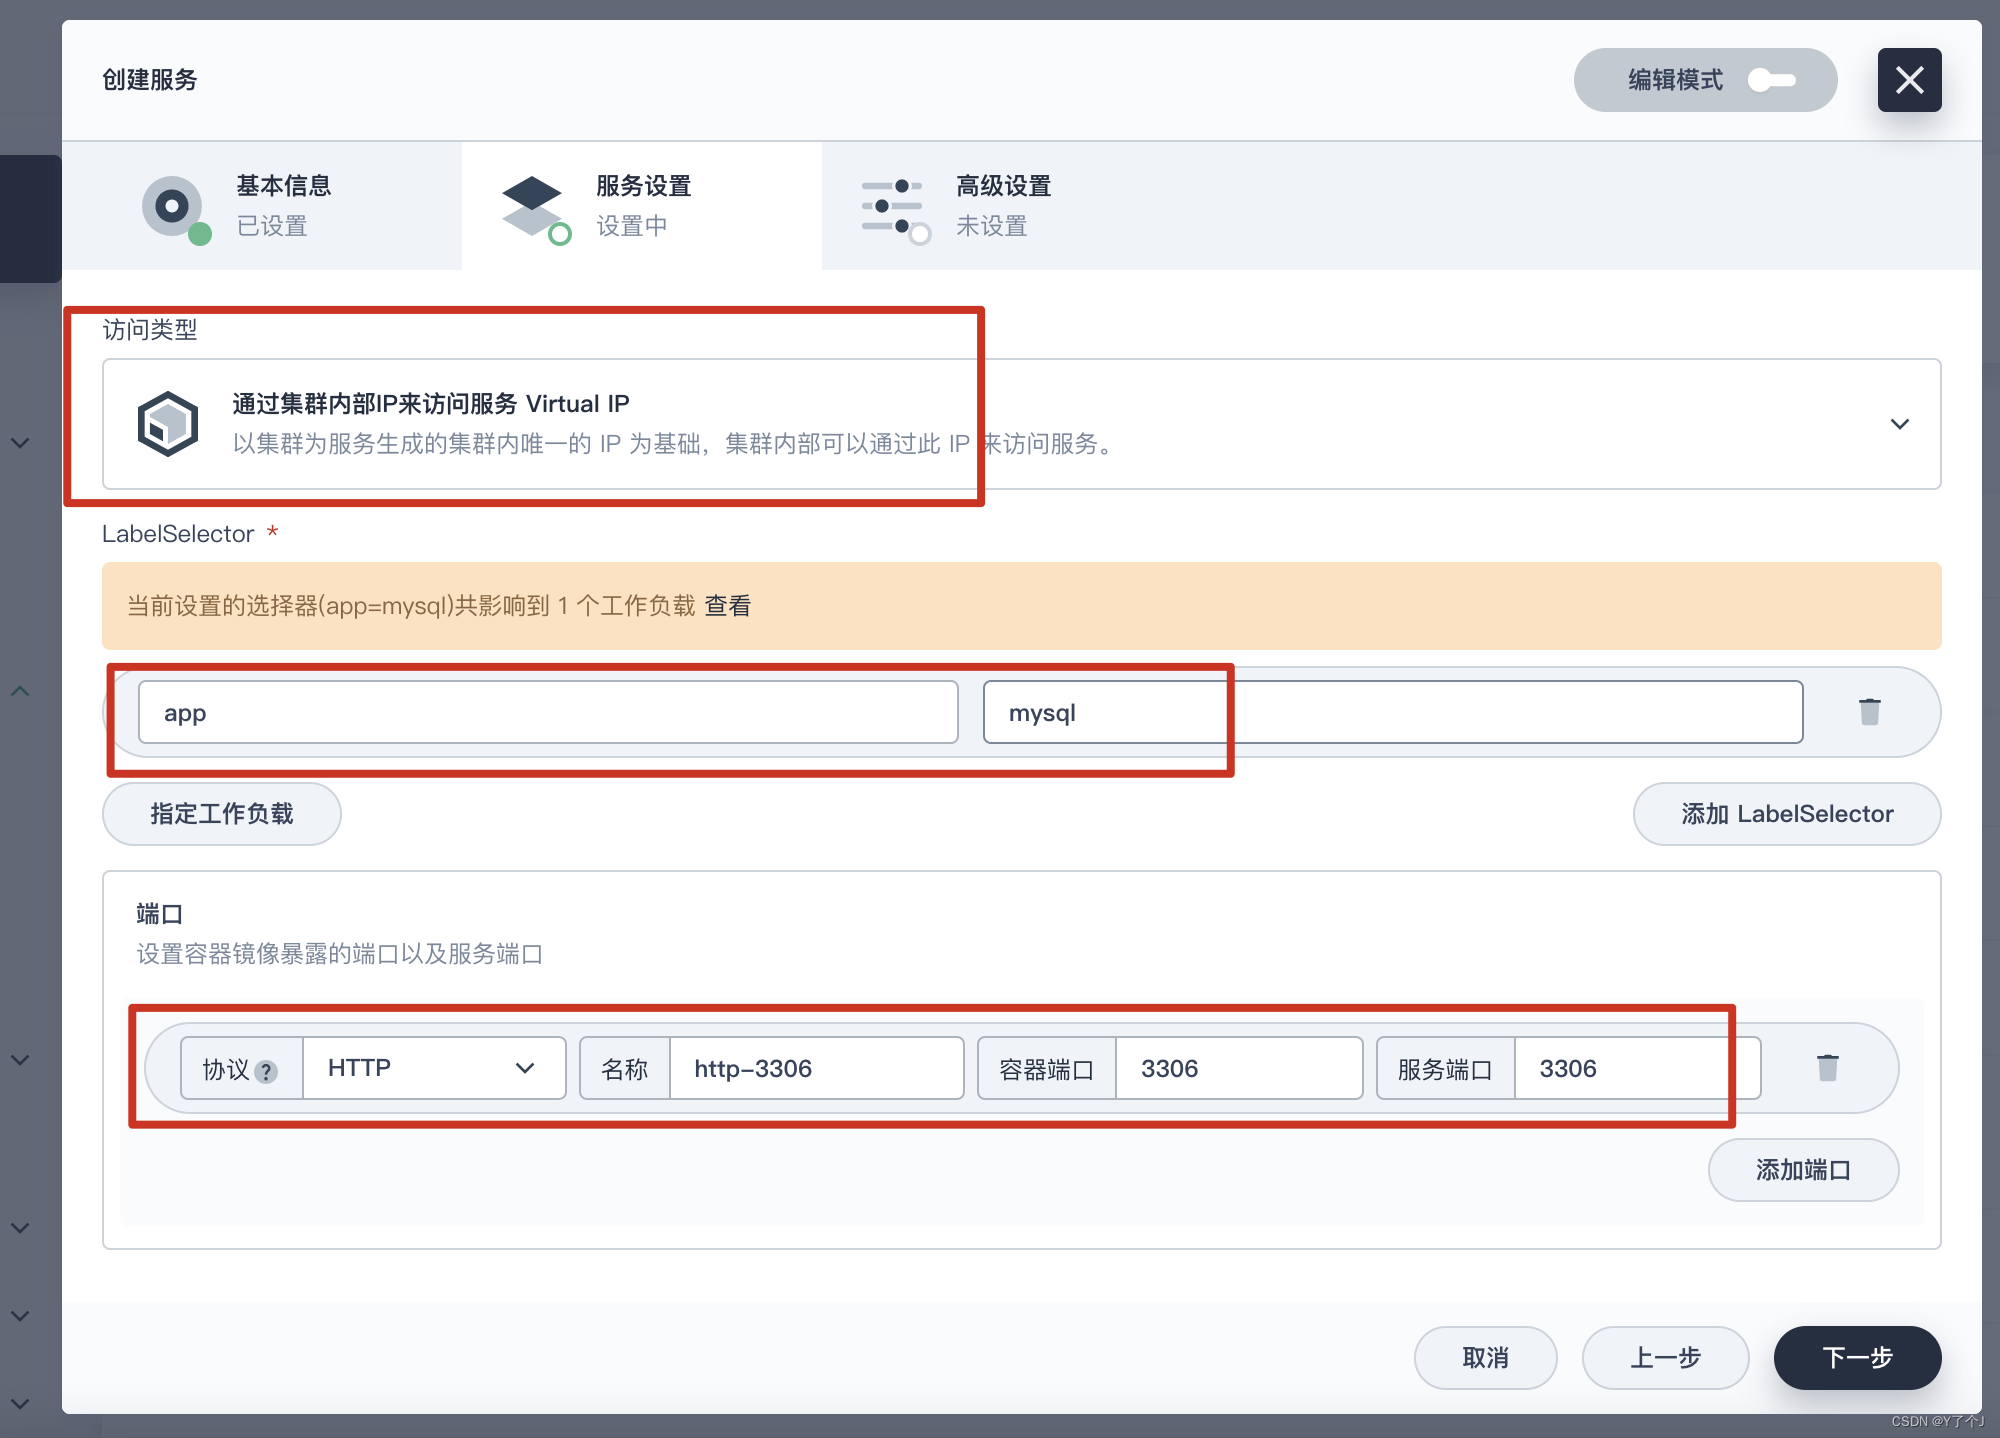
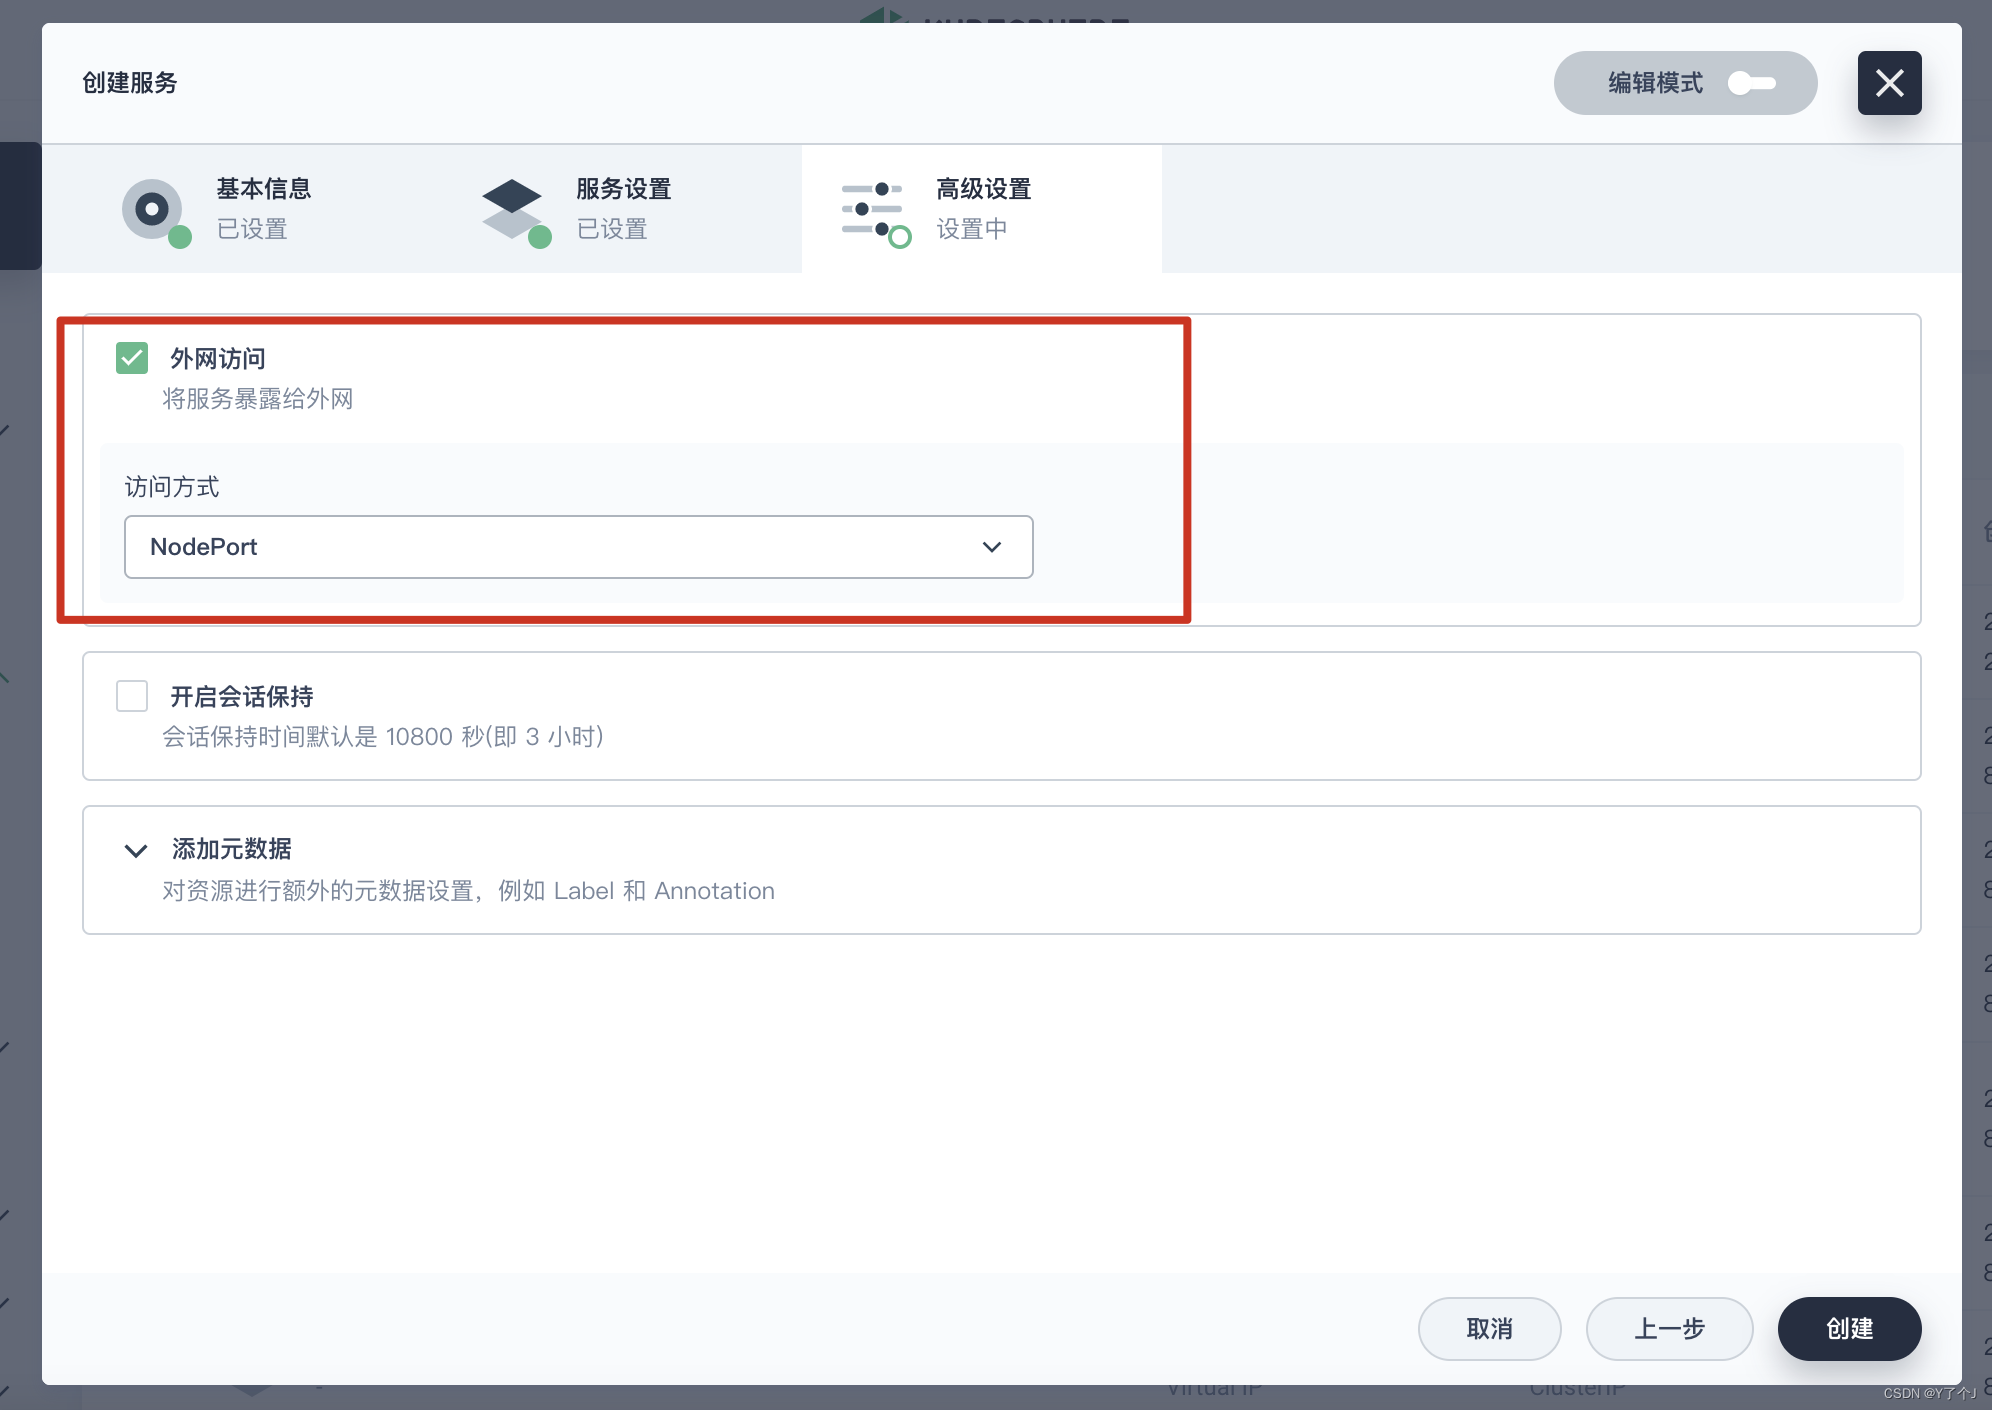
 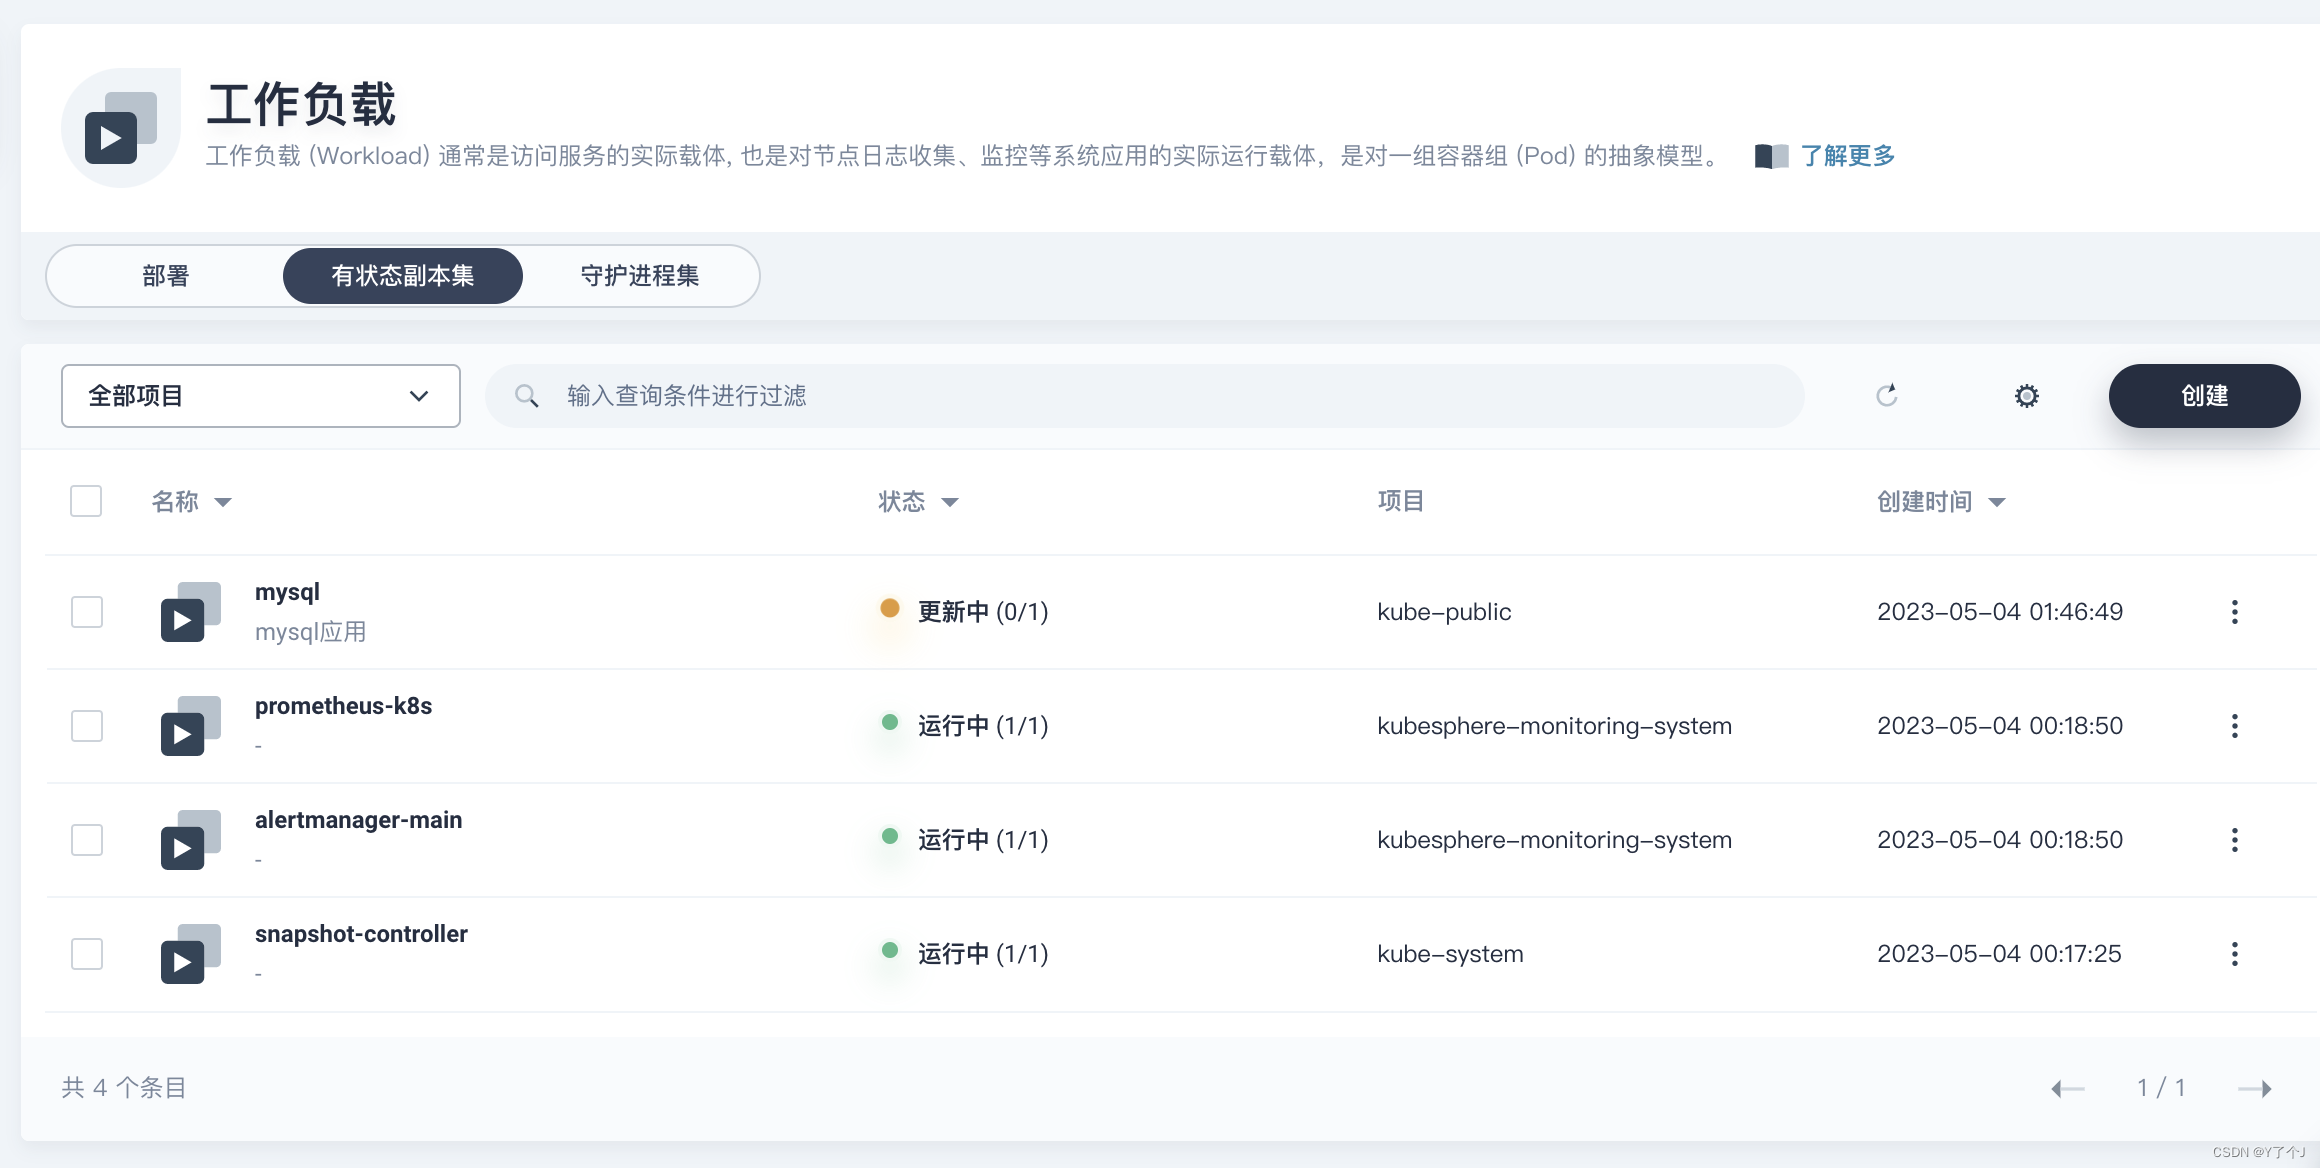 等待一会儿,mysql就运行起来了,同时kubesphere也给相应的创建了一个服务,但是这个服务是内网访问的,我们需要改为外网也能访问,我们把这个服务删除,再自己创建个对应的服务。
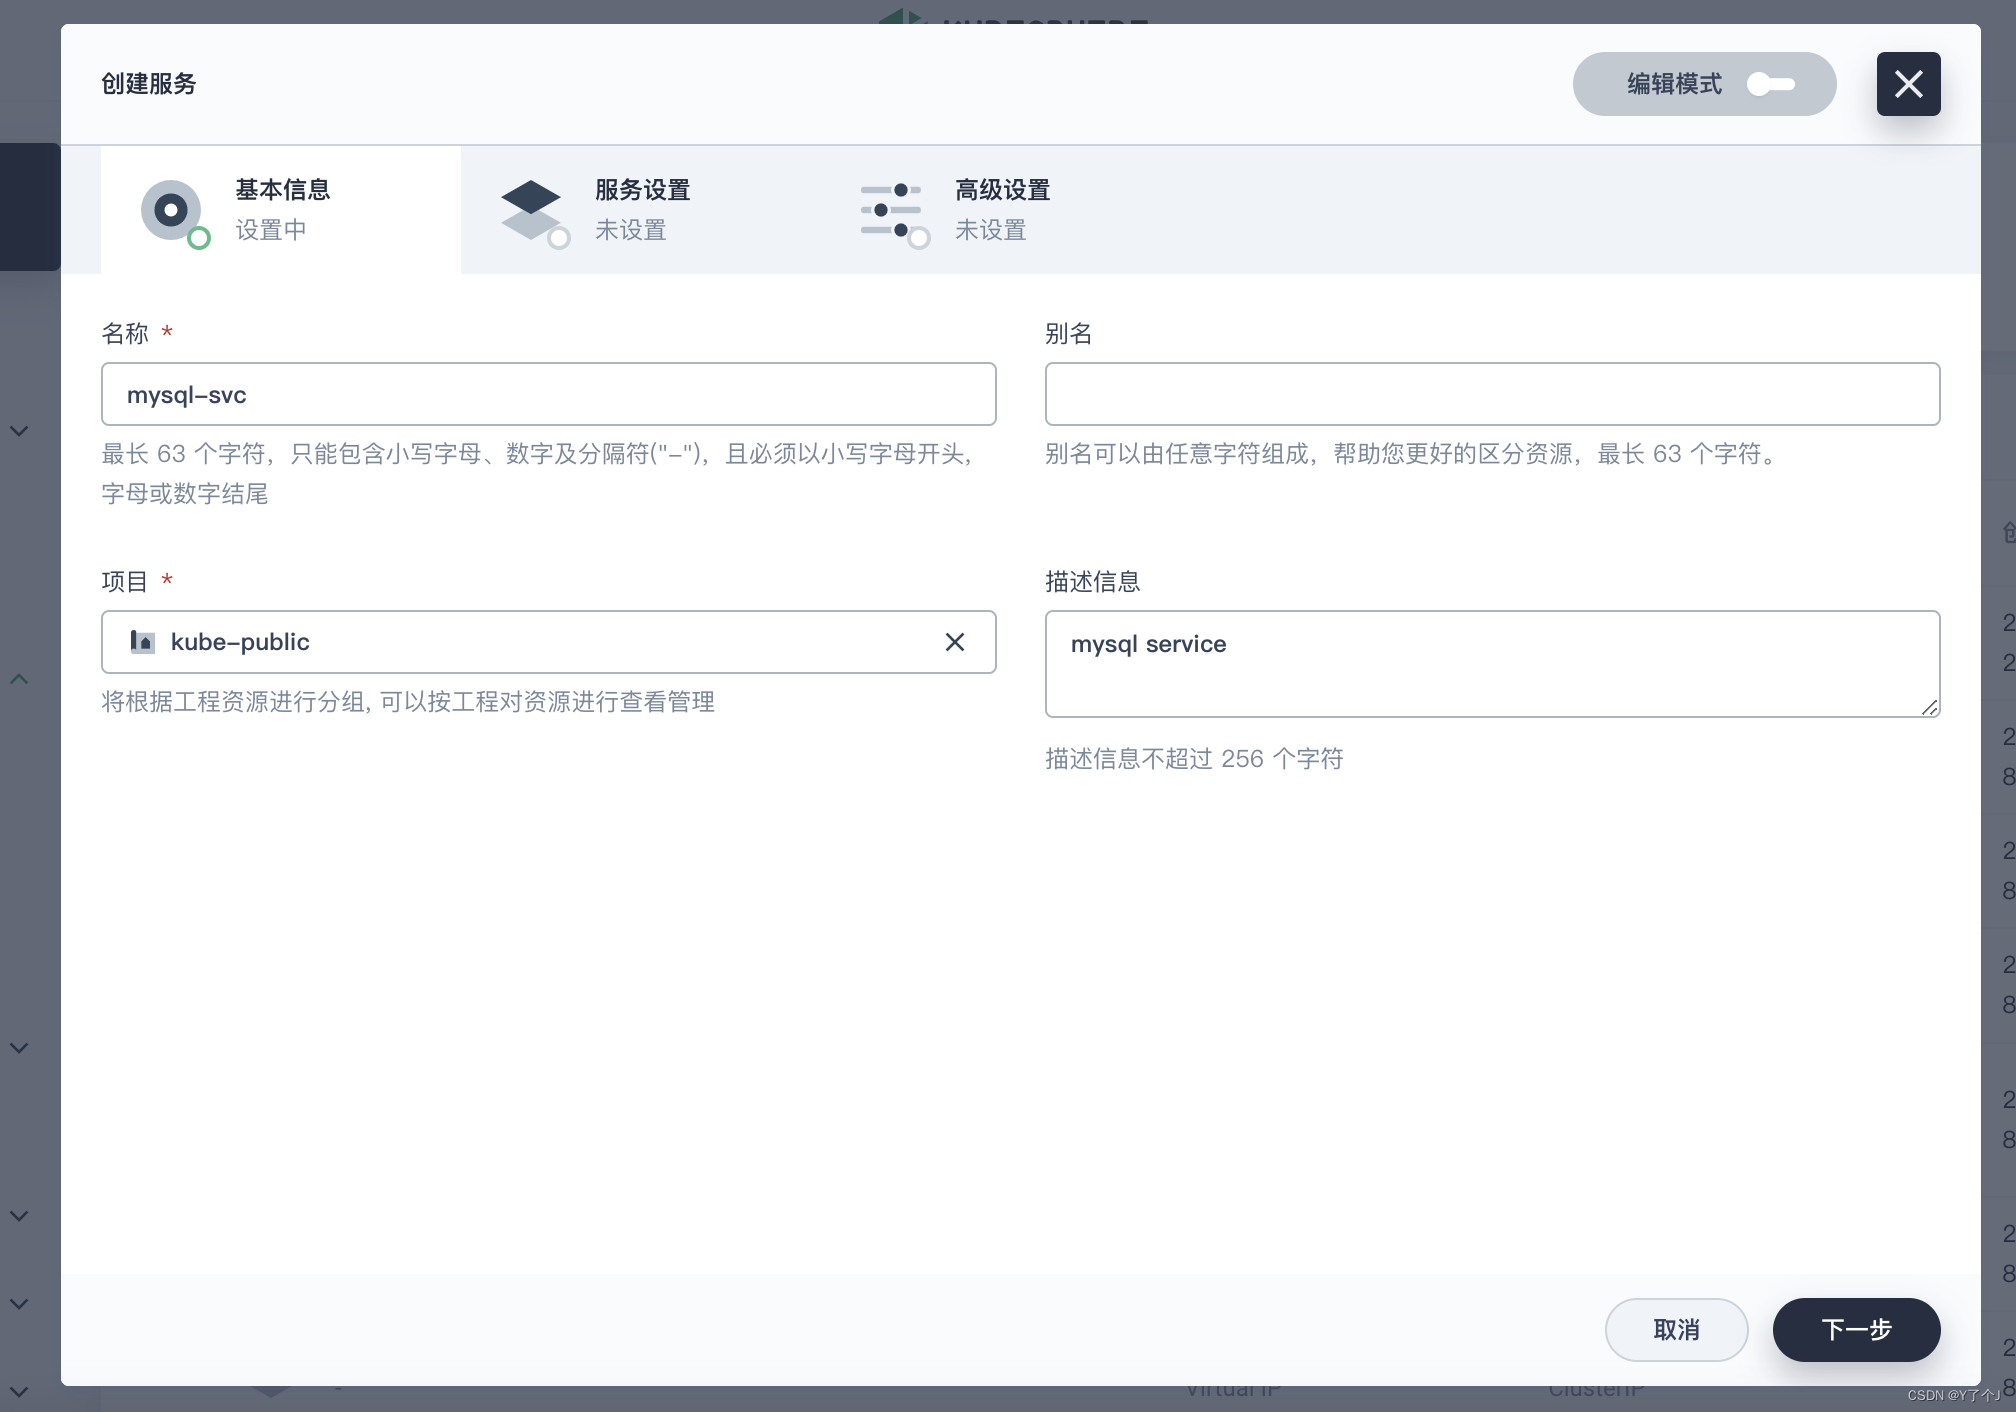
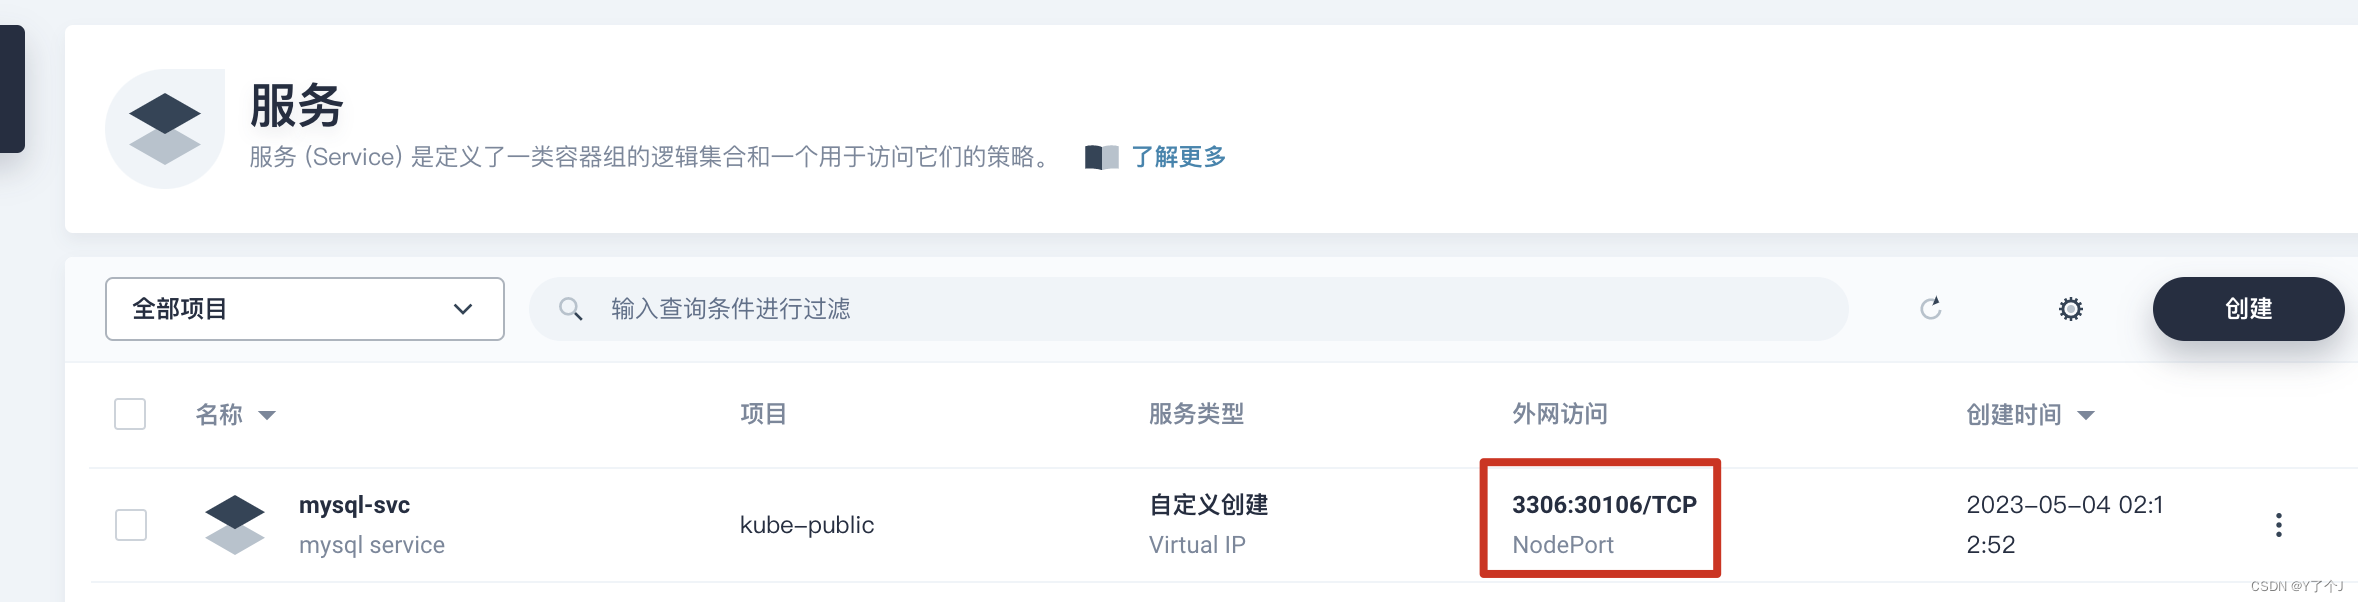 然后我们用navicat进行连接测试,注意上面外网端口号不是3306。
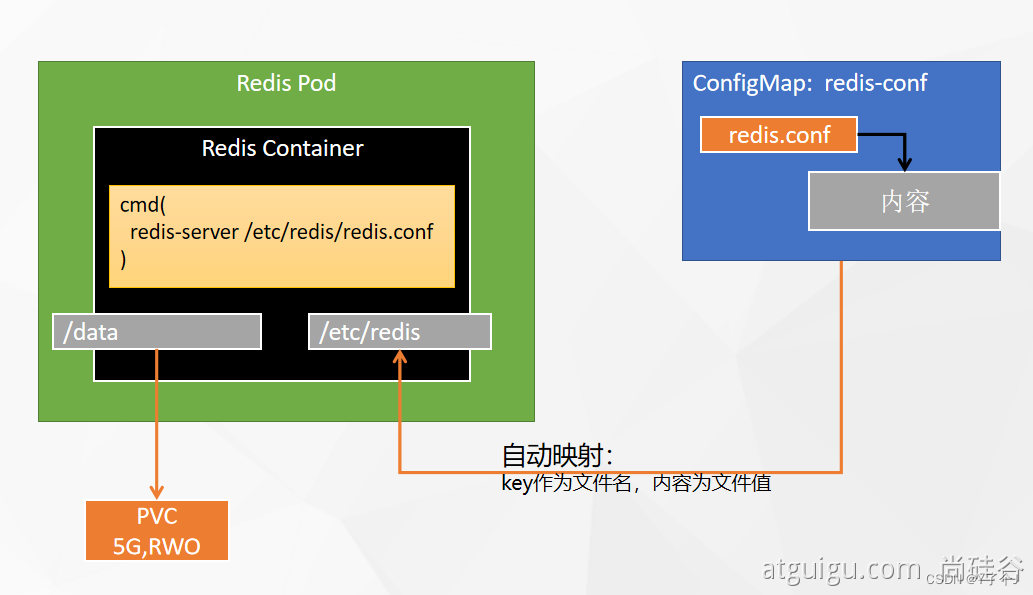
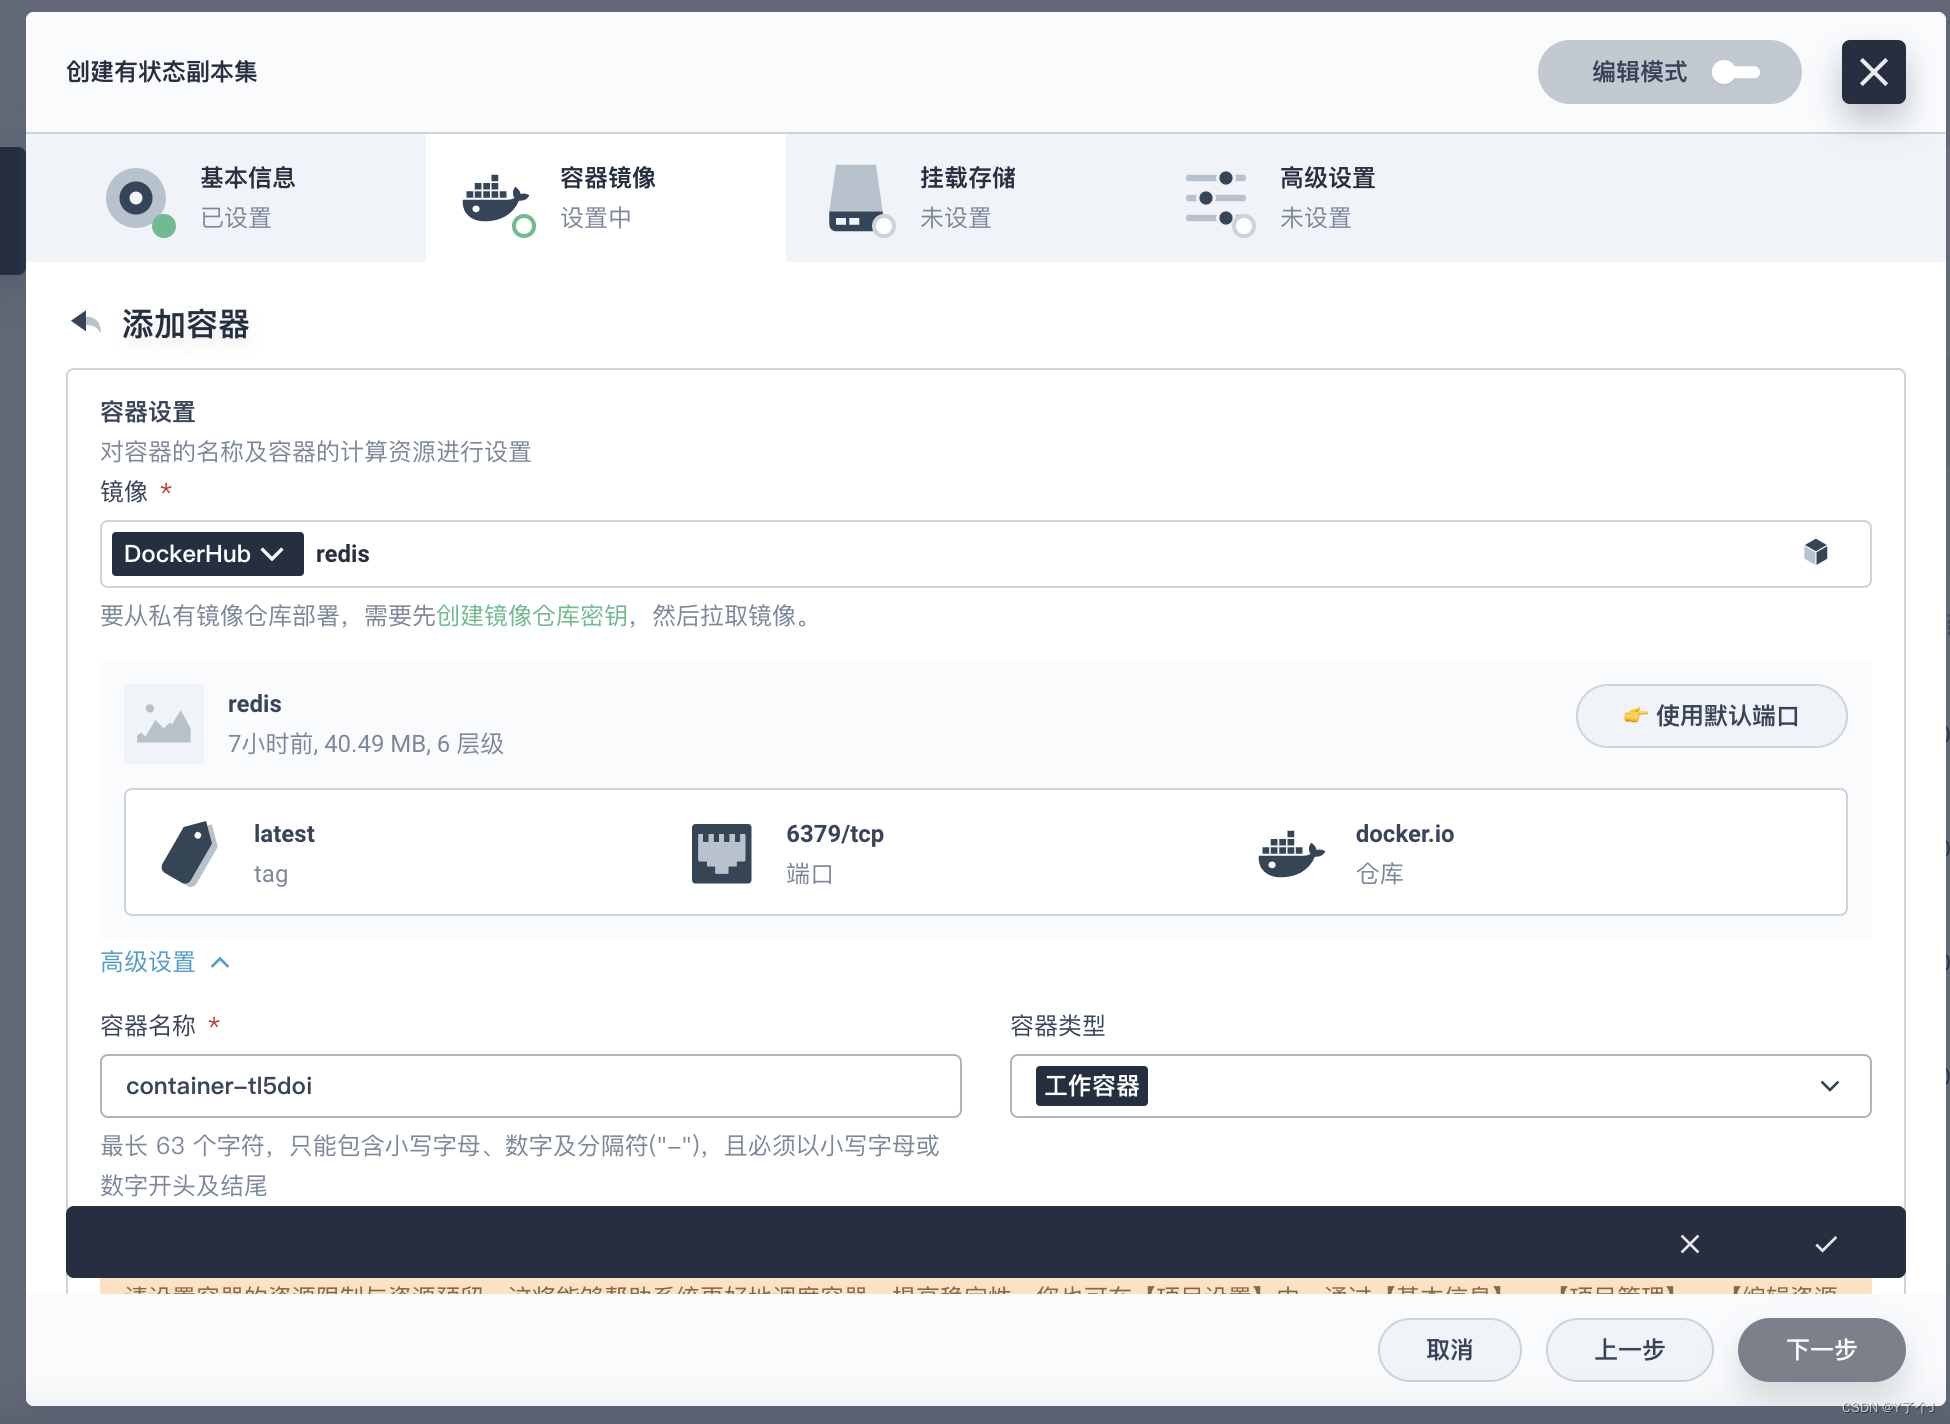
 接着在kubesphere应用负载,工作负载下面创建有状态副本集
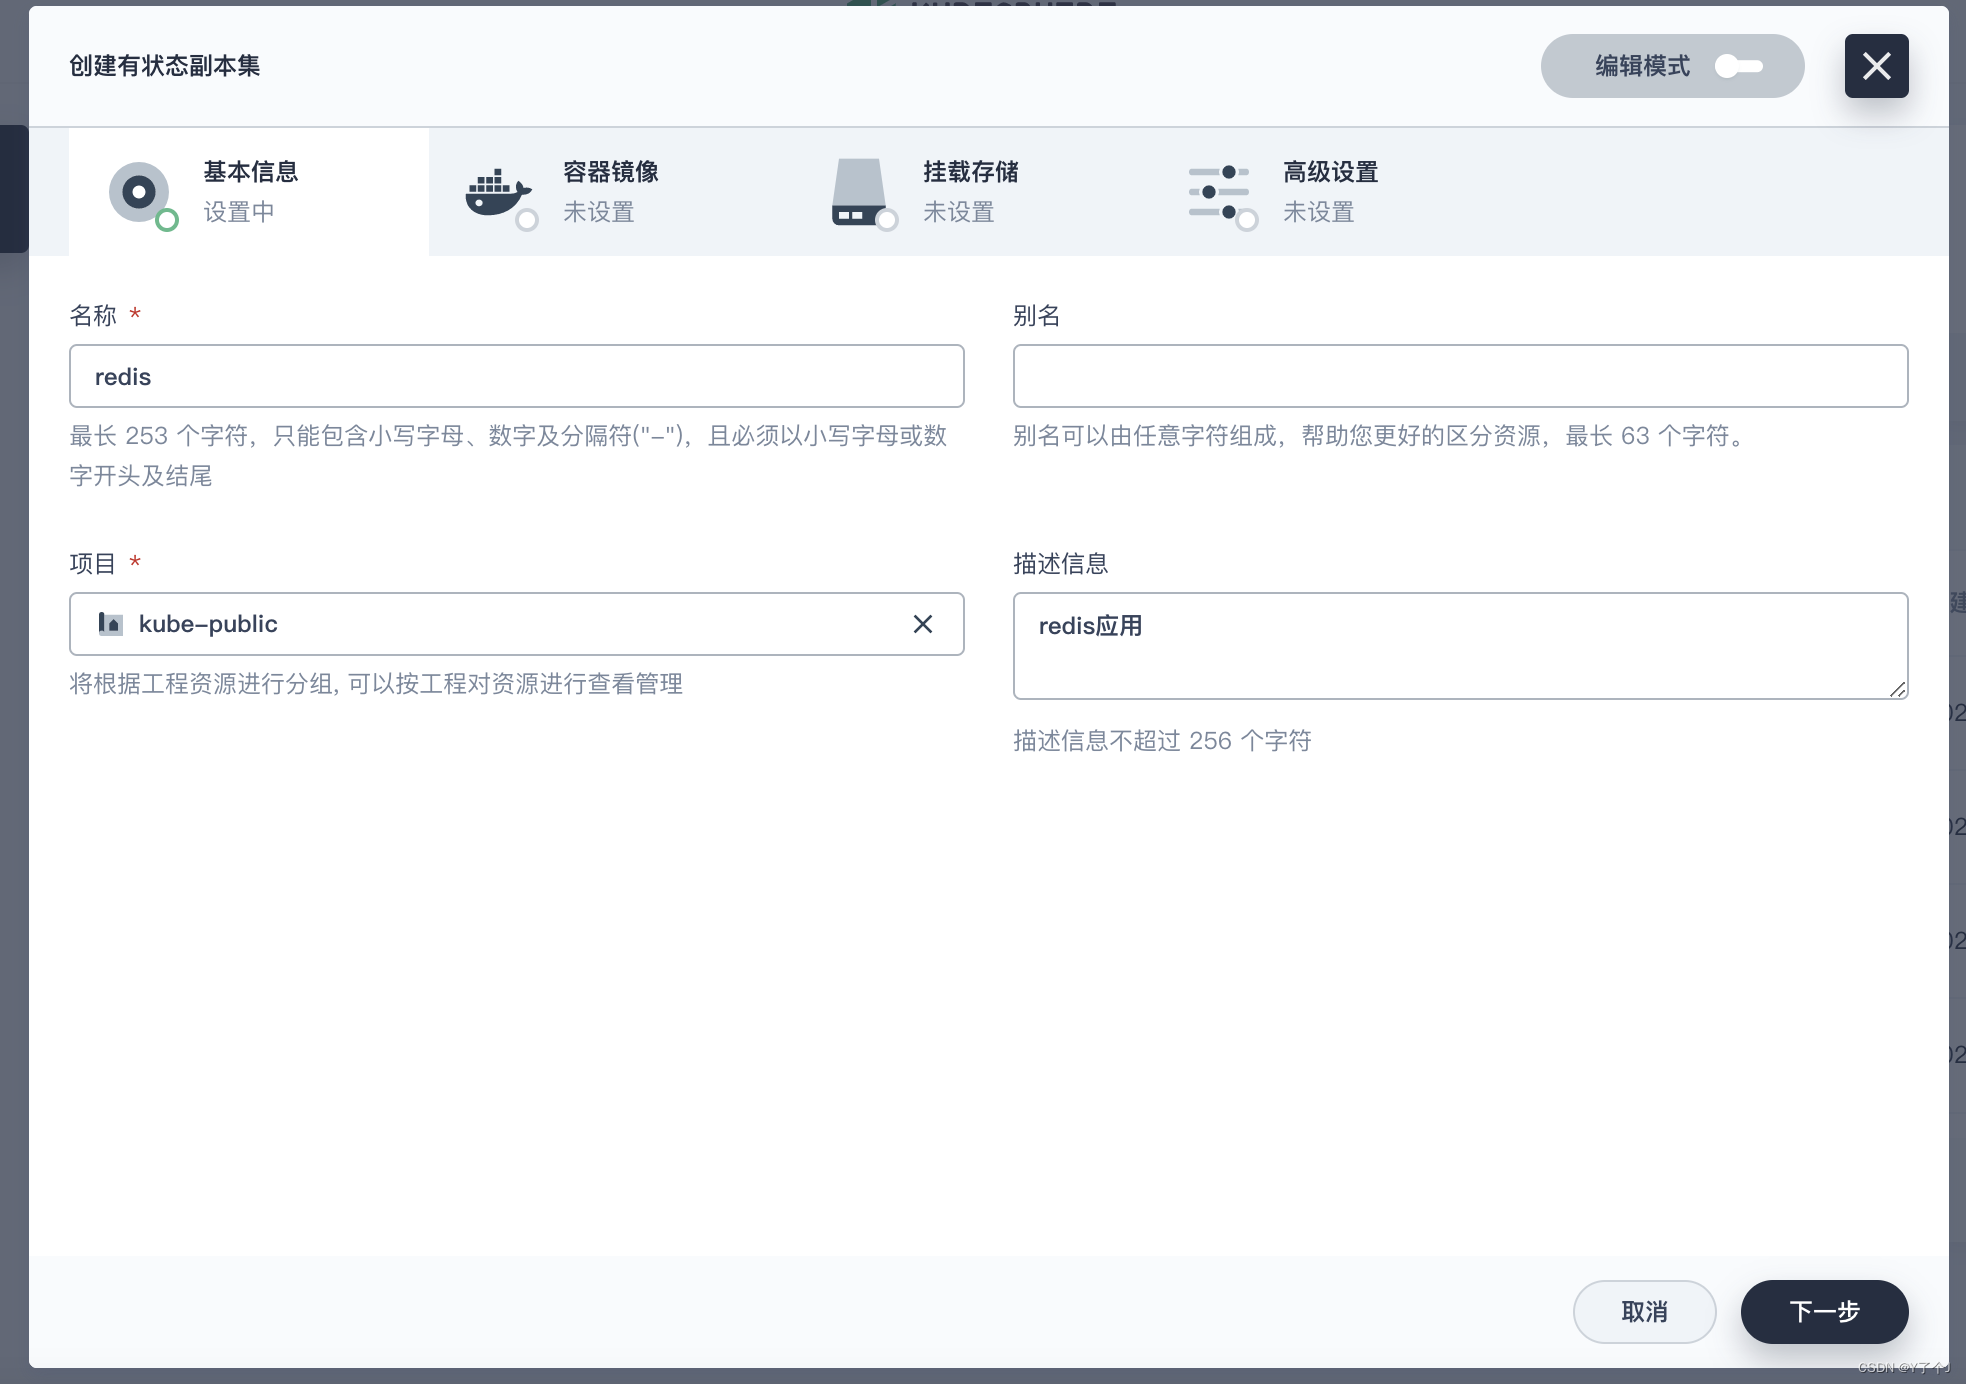
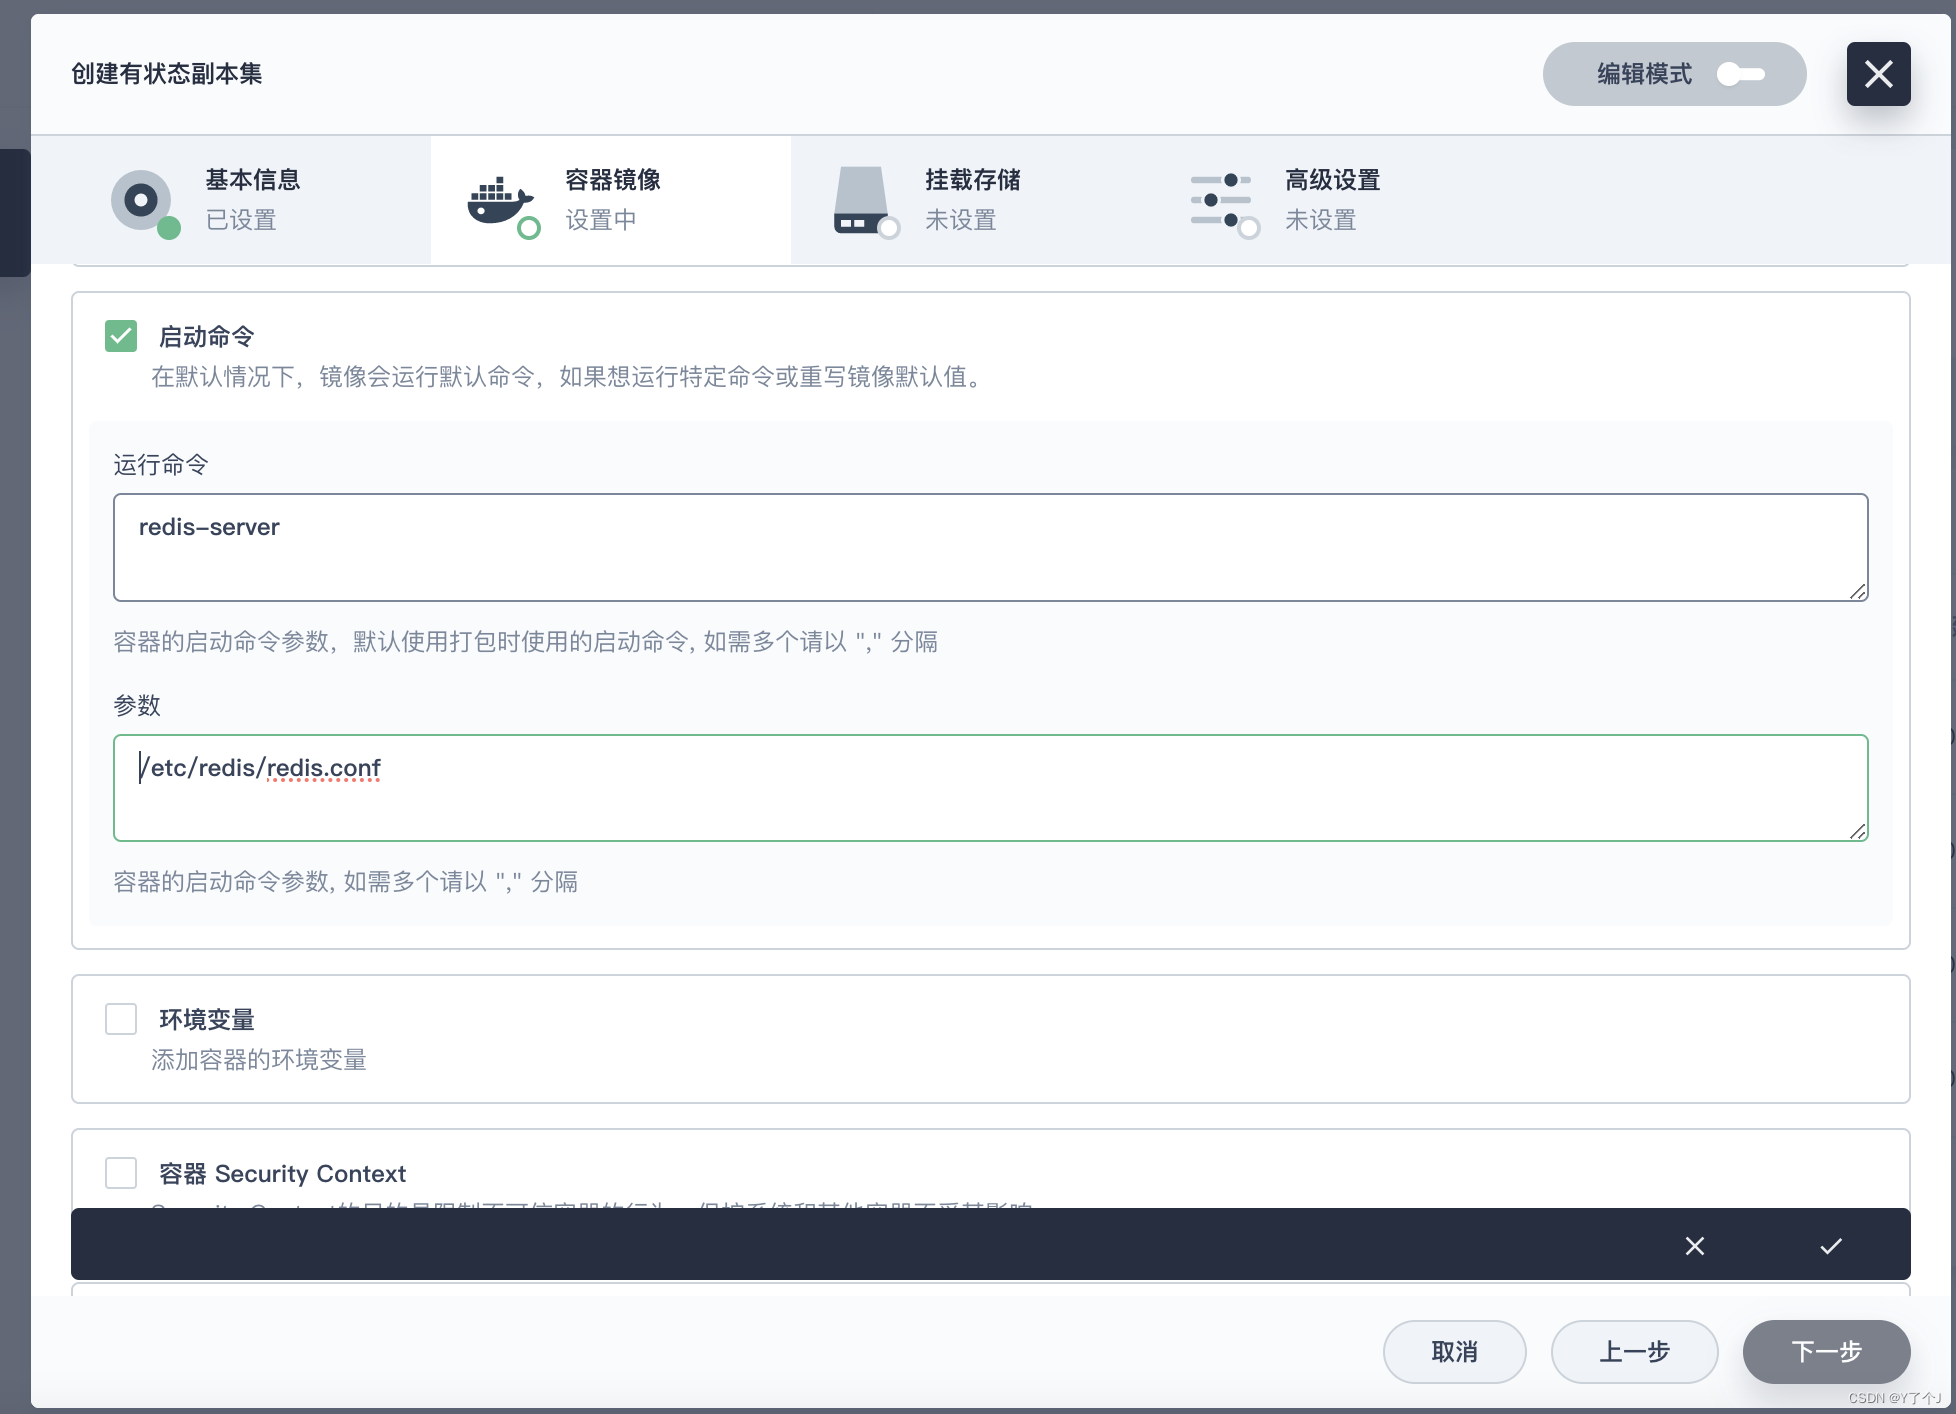 勾选启动命令,填入参数,再勾选同步主机时区
 因为没有提前创建存储卷,这里点击添加存储卷模版创建存储卷(有状态工作节点不建议提前创建存储卷,因为在扩容时,每个节点应该有自己独一的存储卷,这里会基于模版自动帮我们创建存储卷)
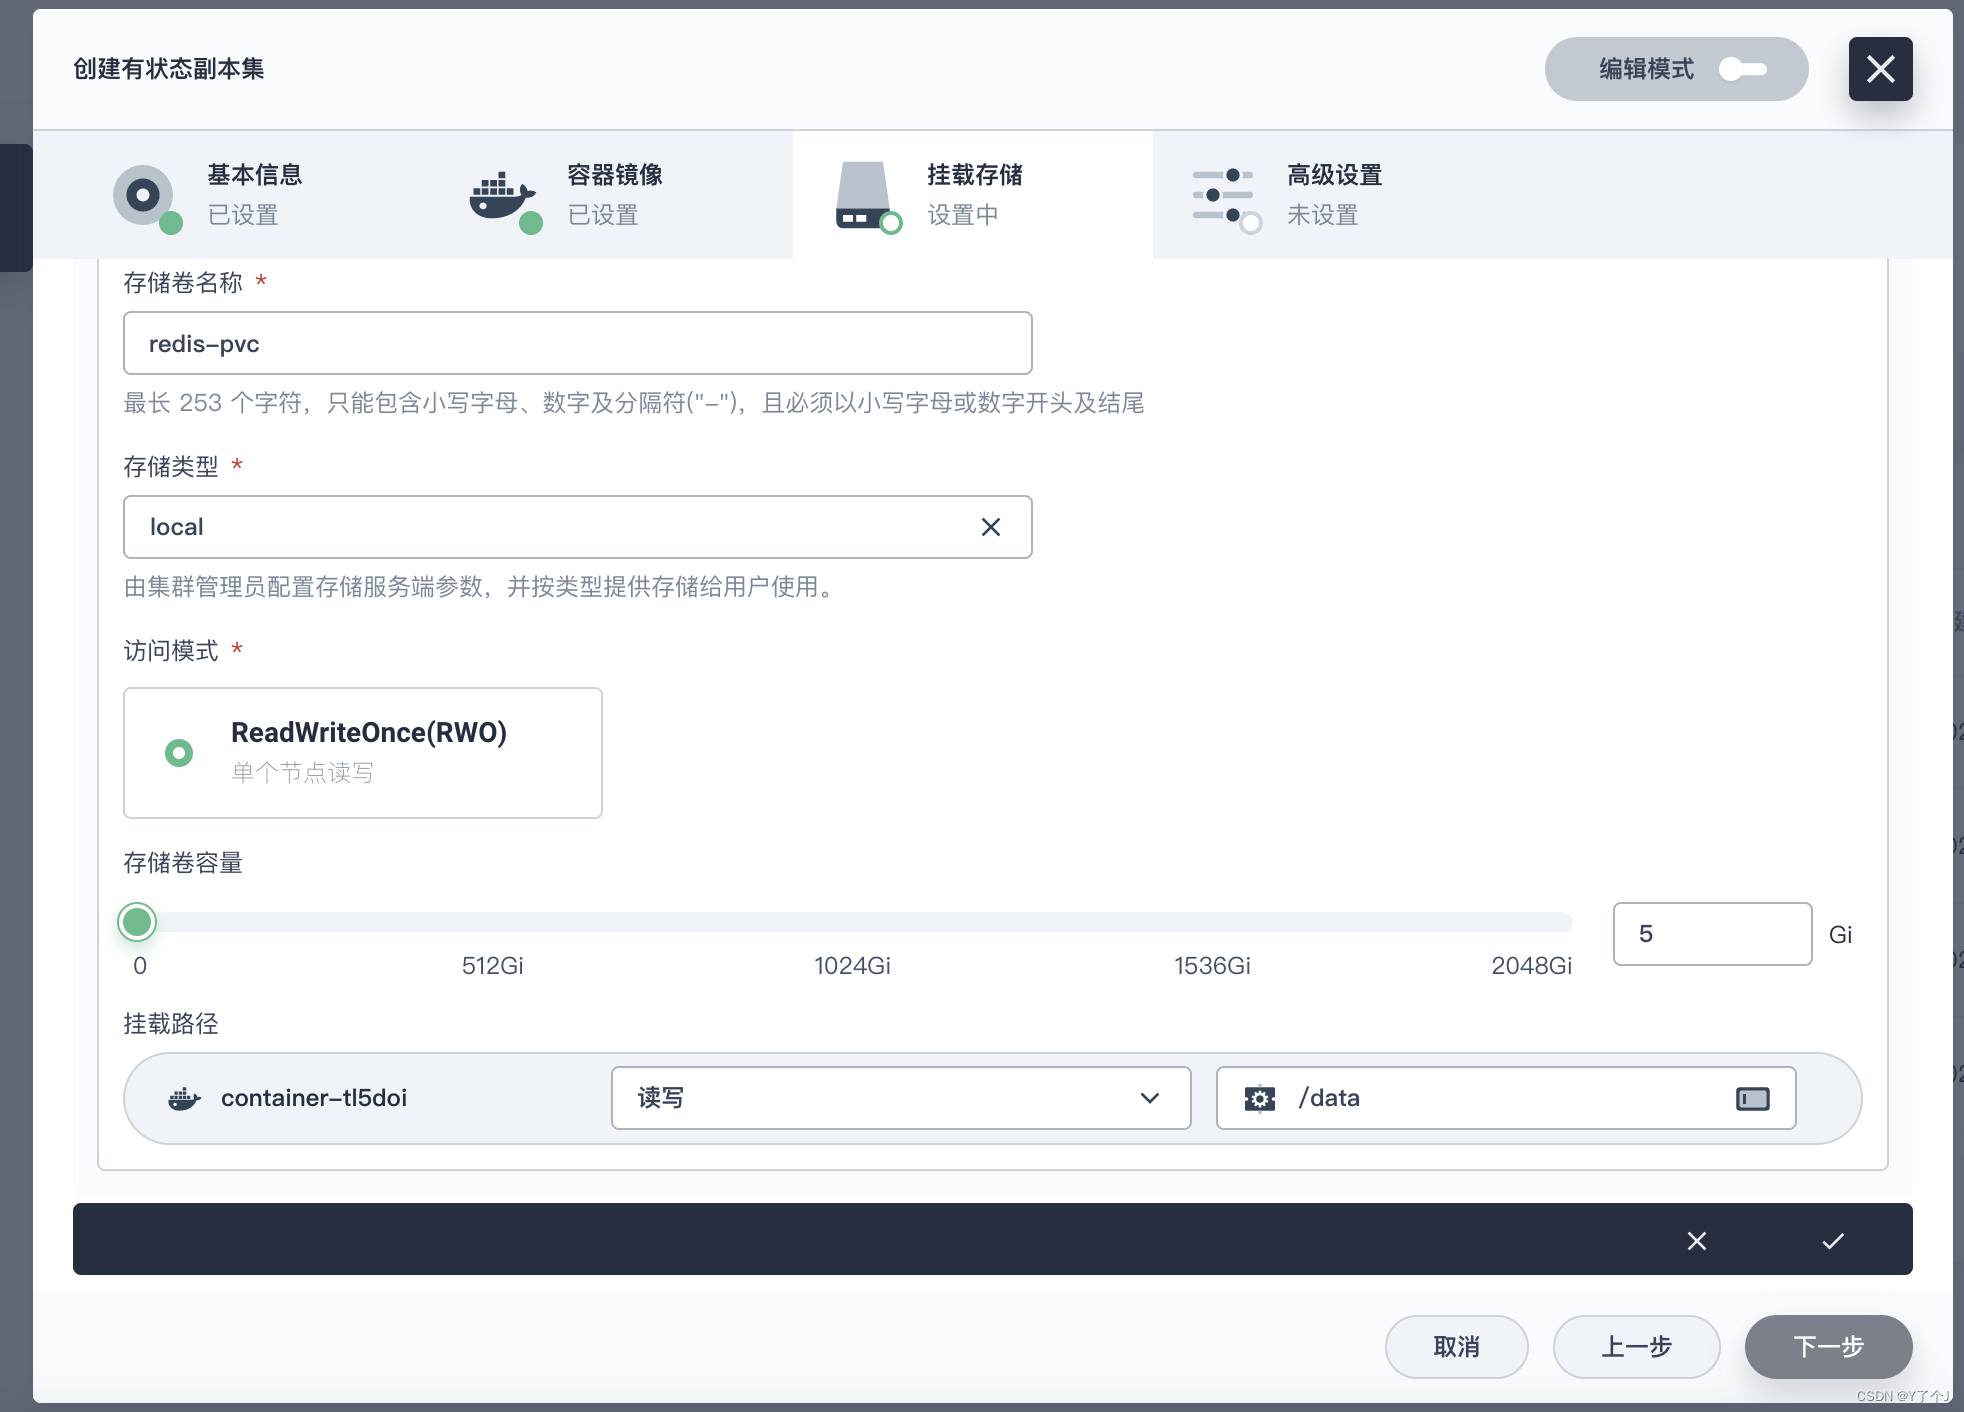
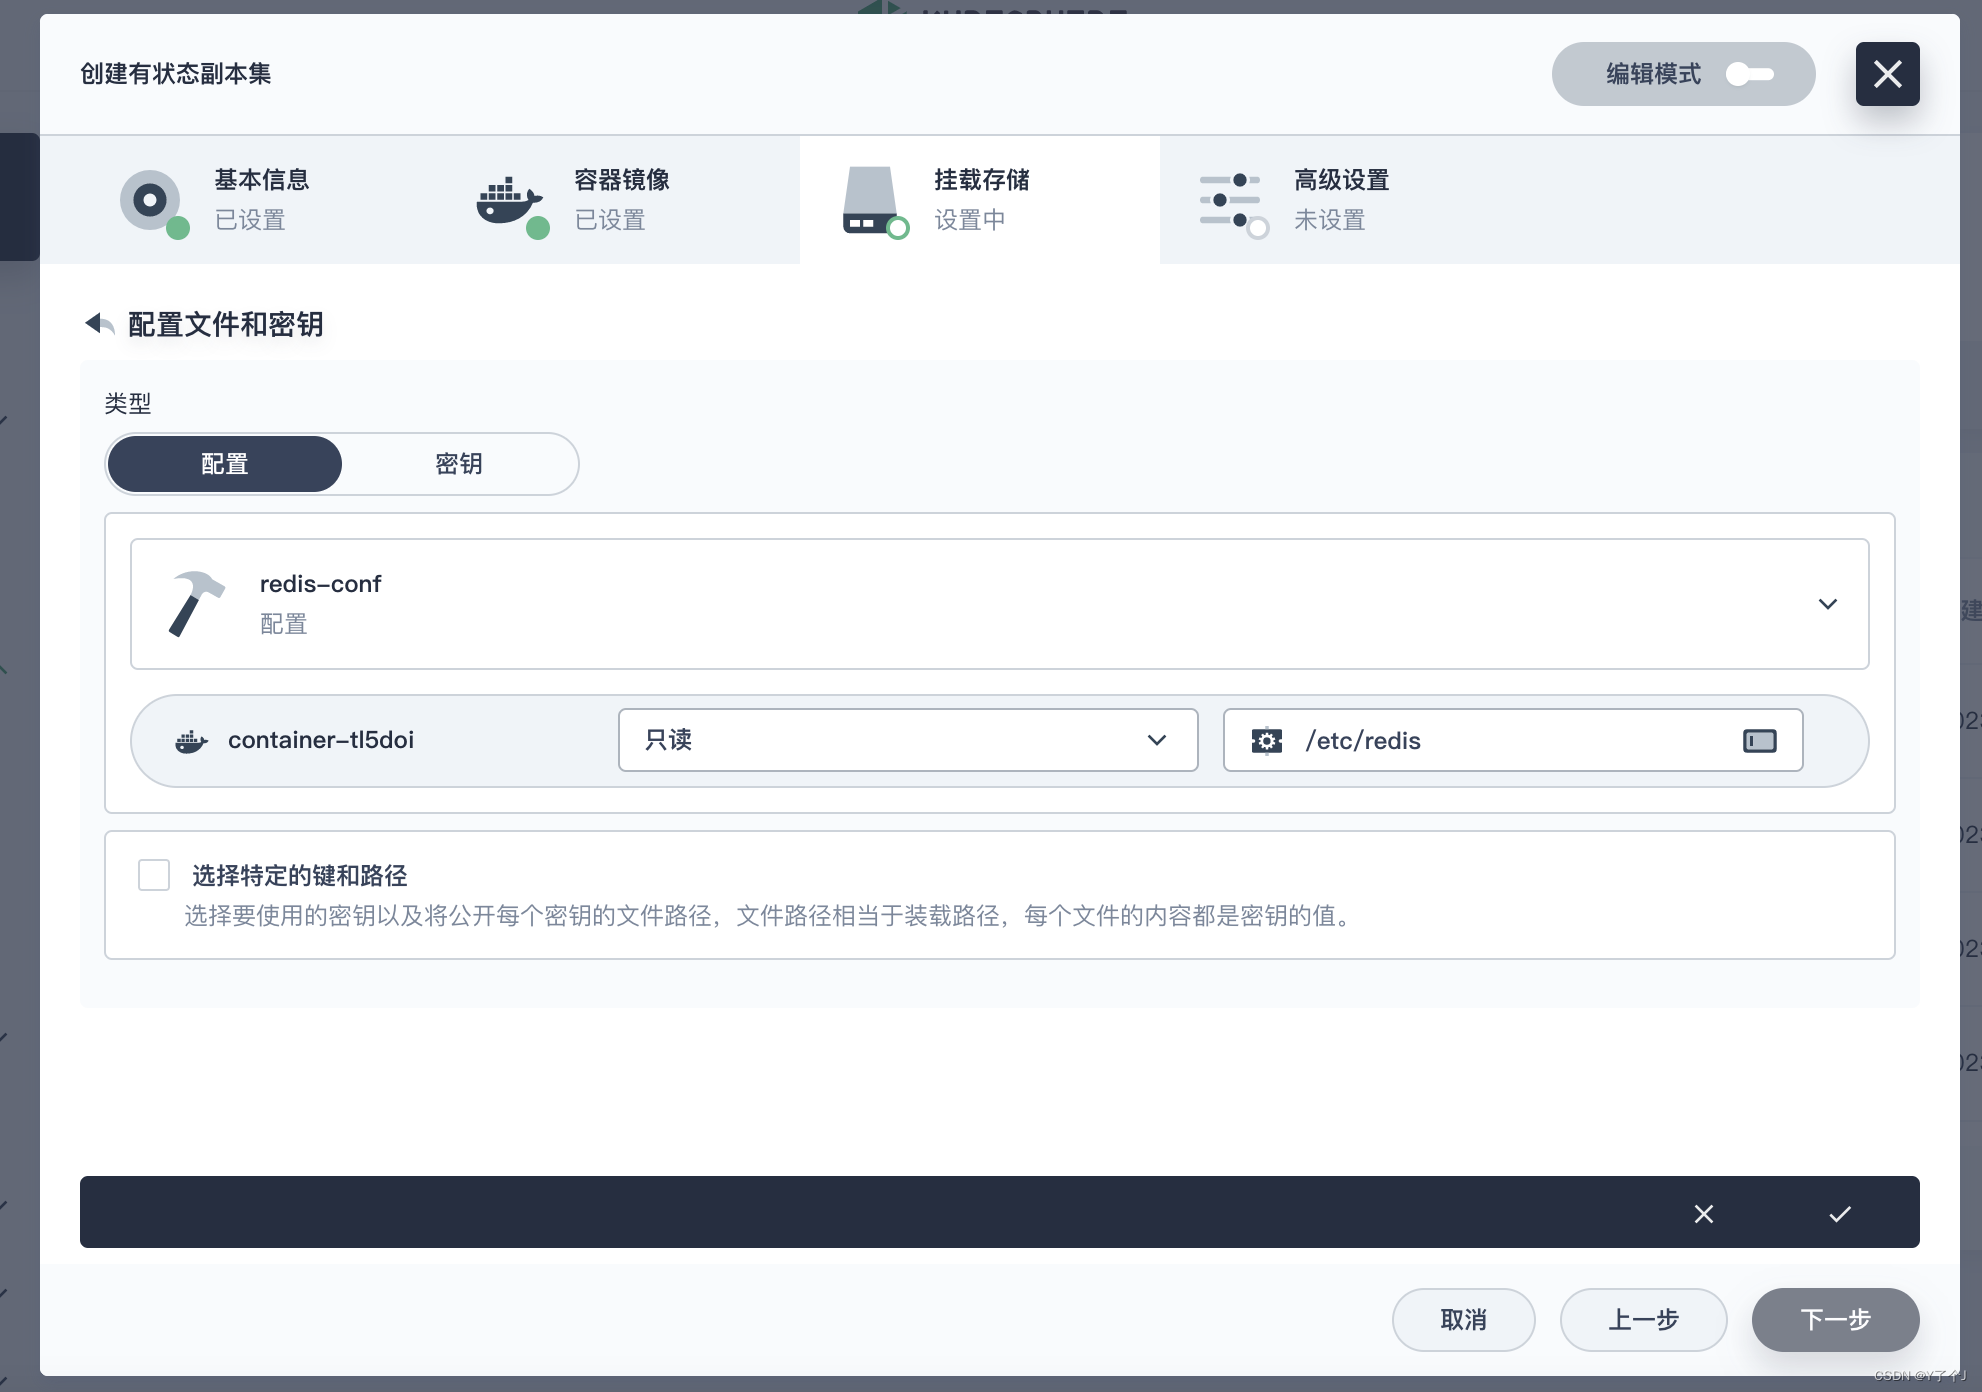 点击挂载文件,挂载我们创建的redis-conf
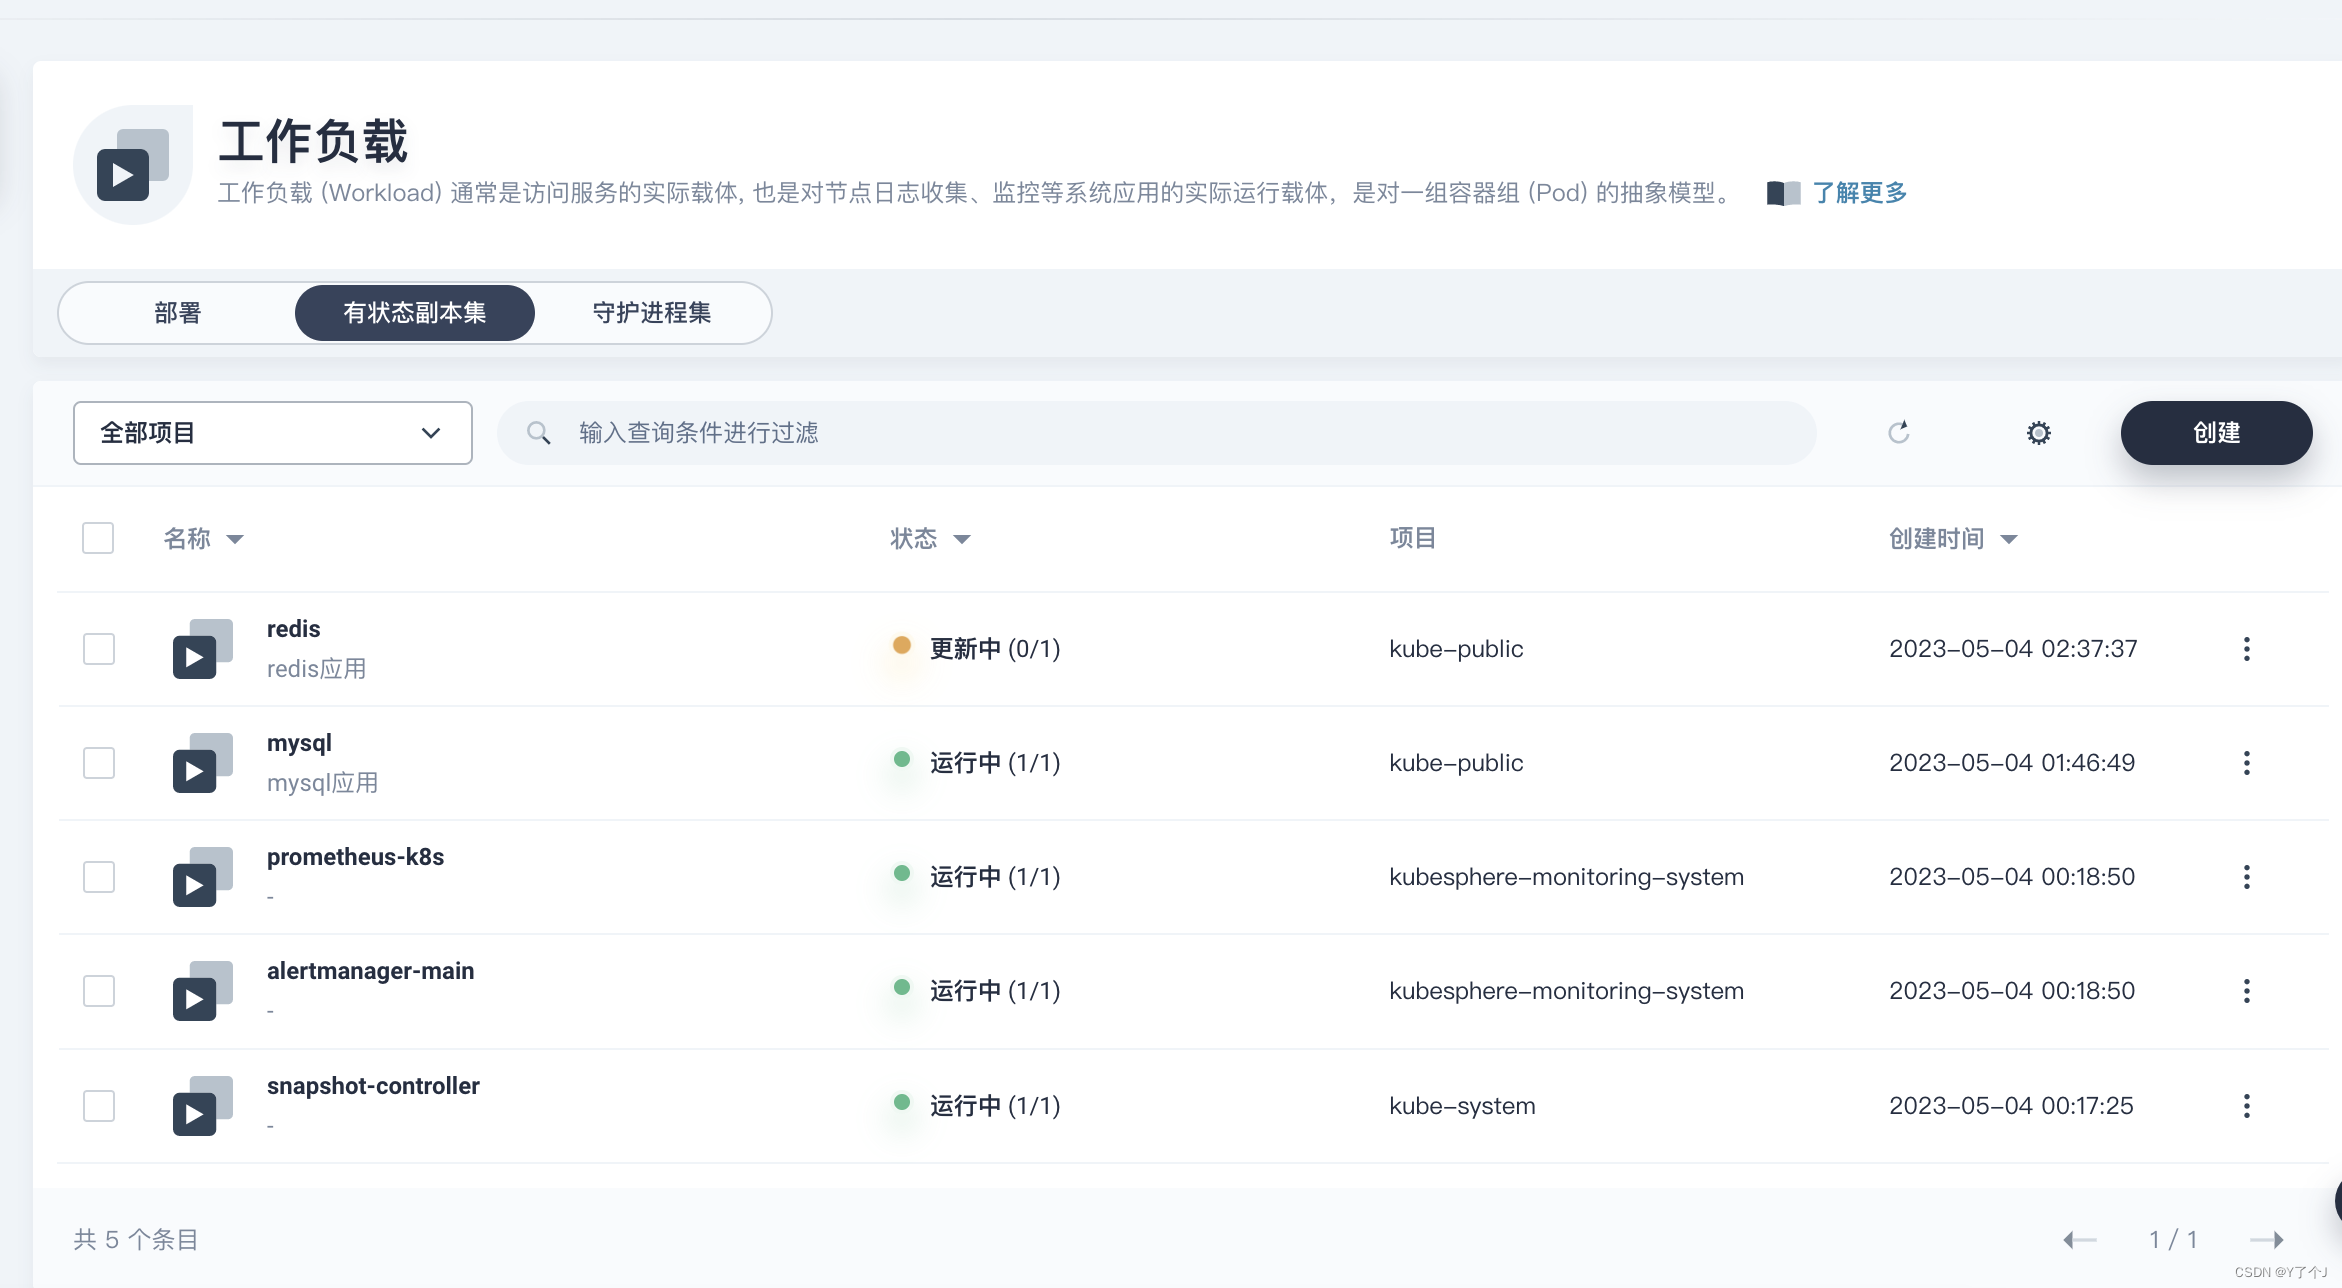 然后点创建,这里就会去帮我们创建好redis应用。
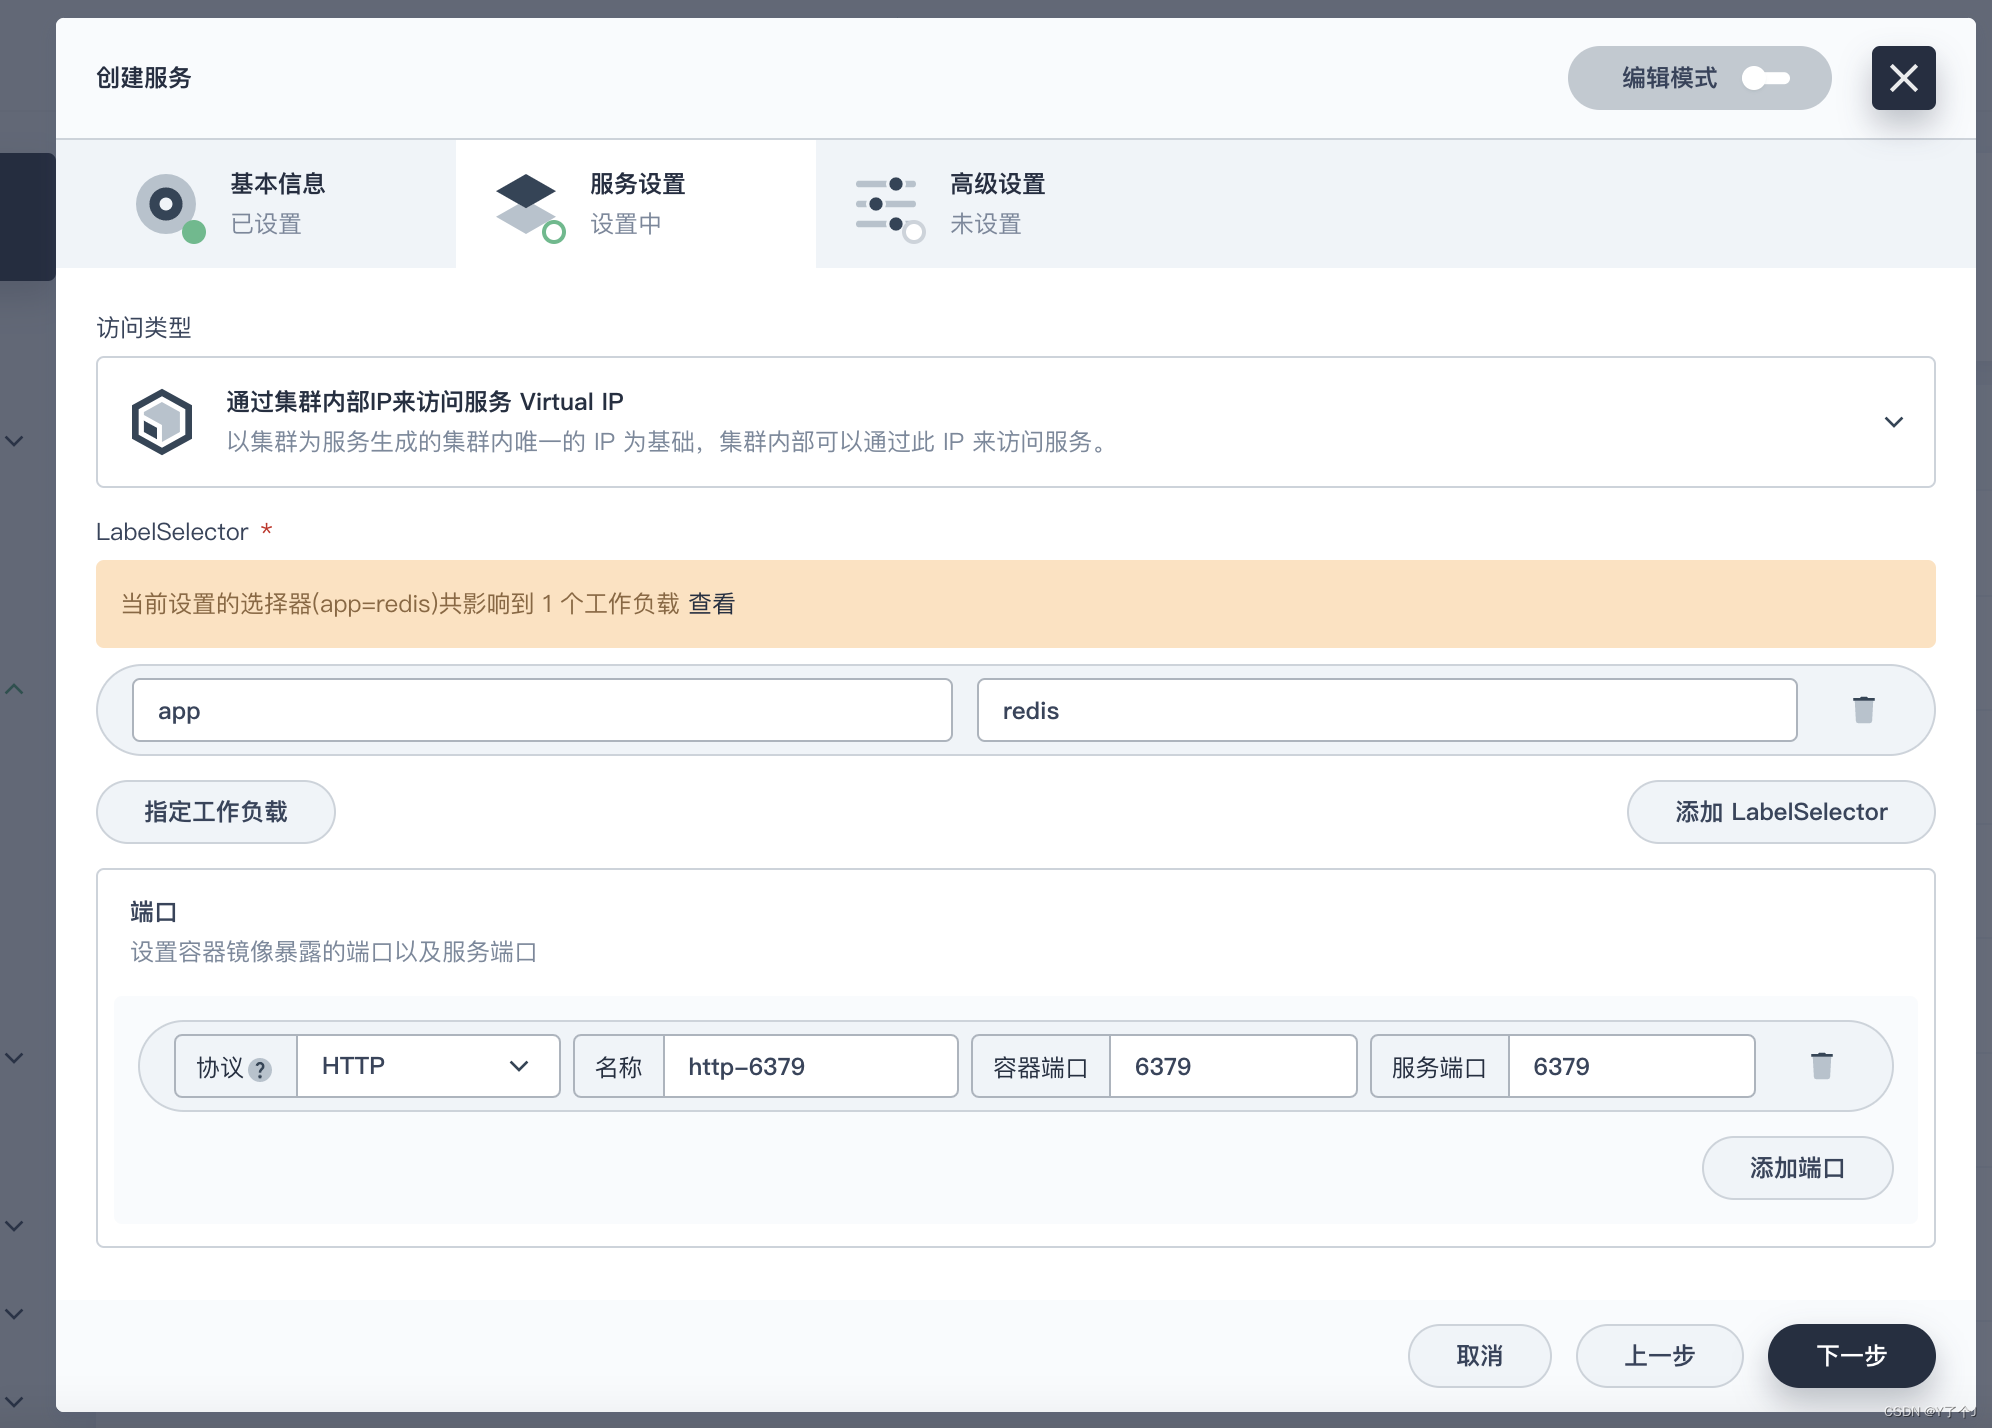
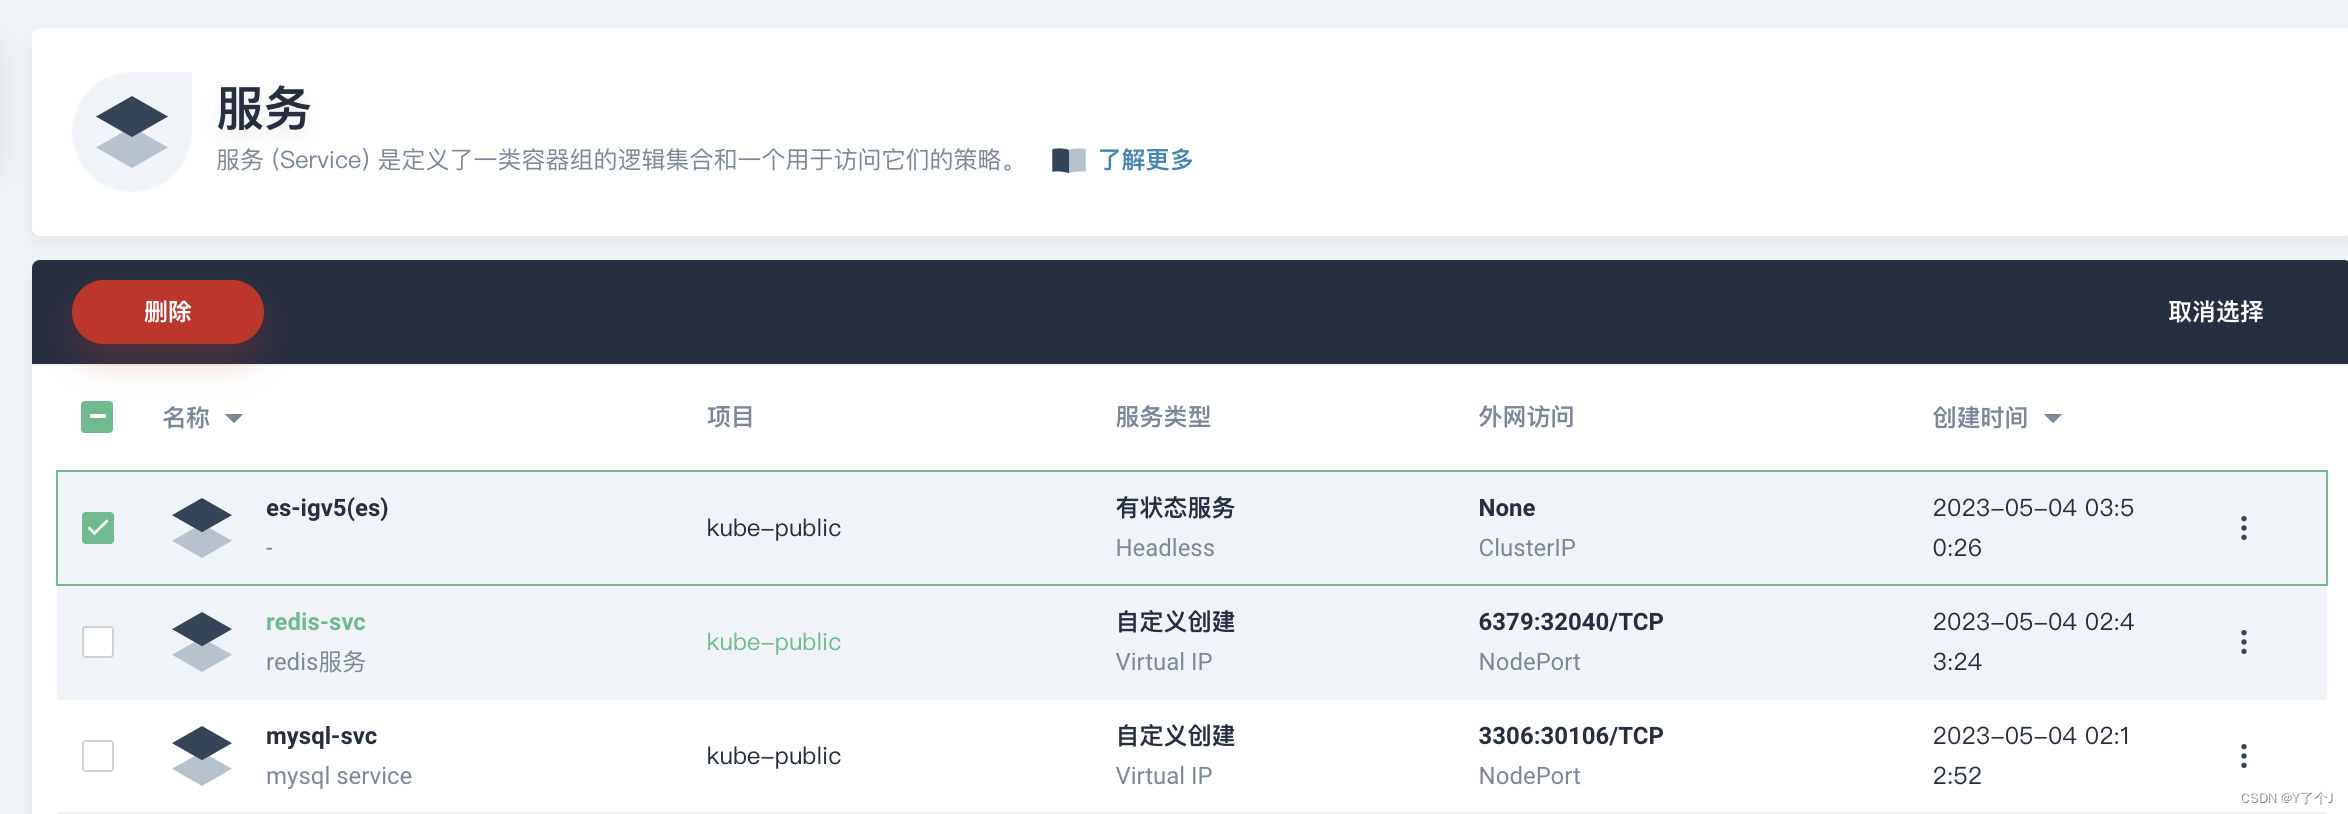
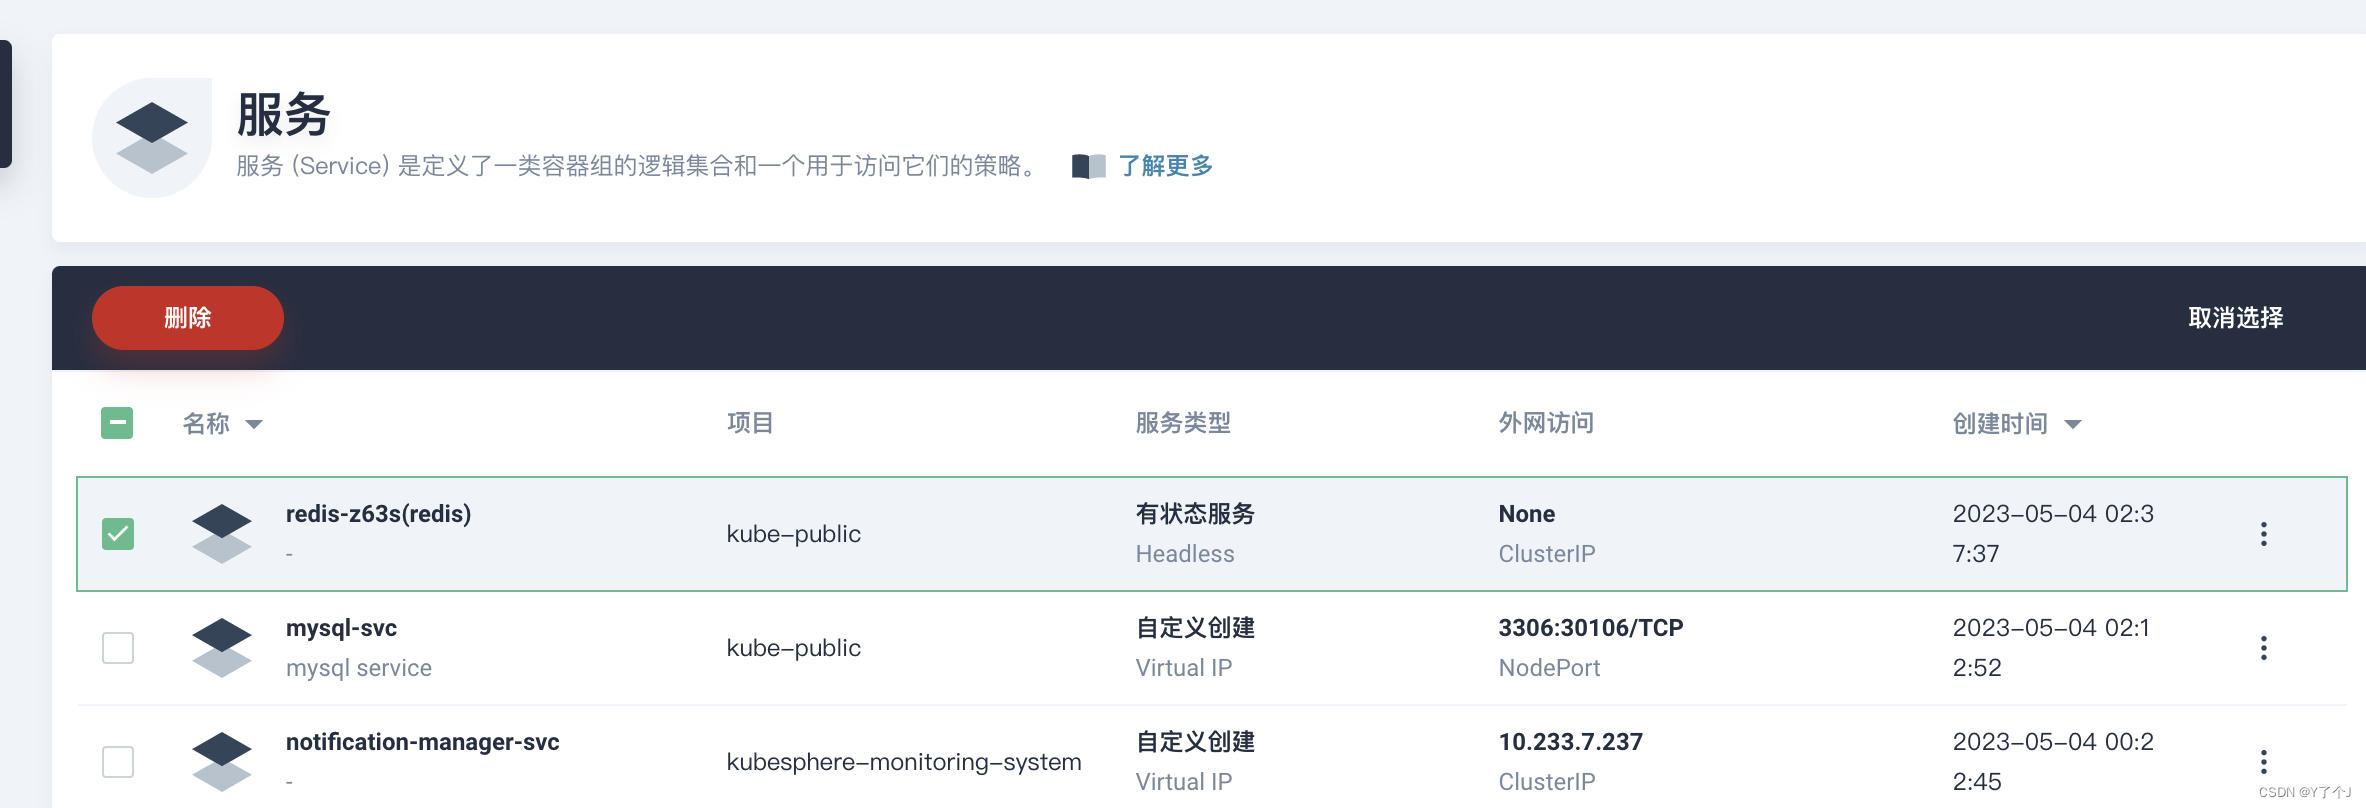 同样我们删除自动创建的服务,自己去创建对外能访问的redis服务
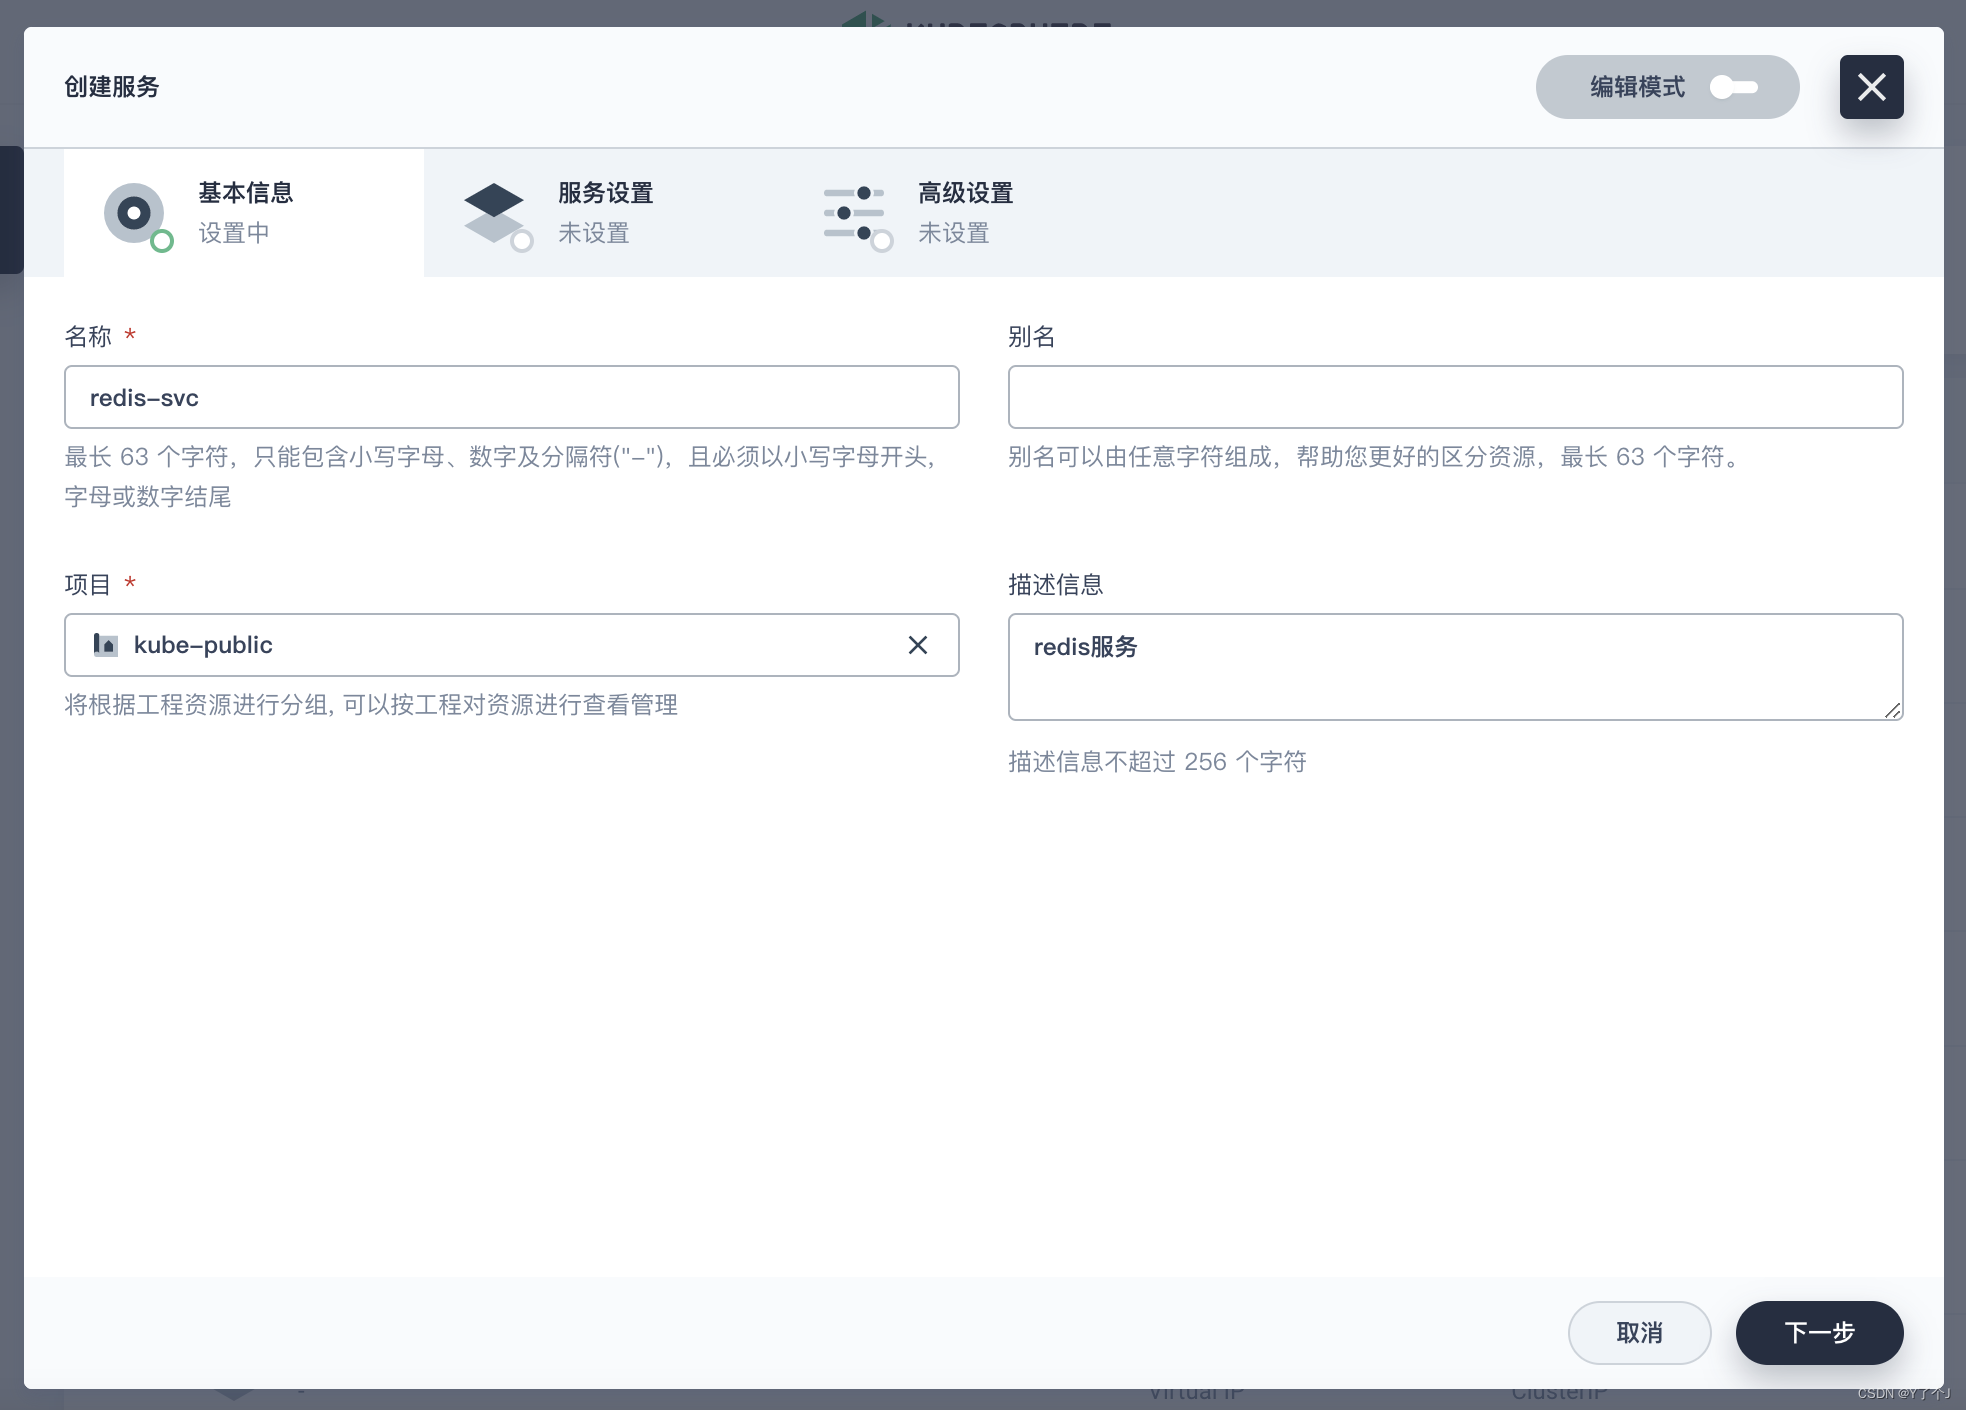
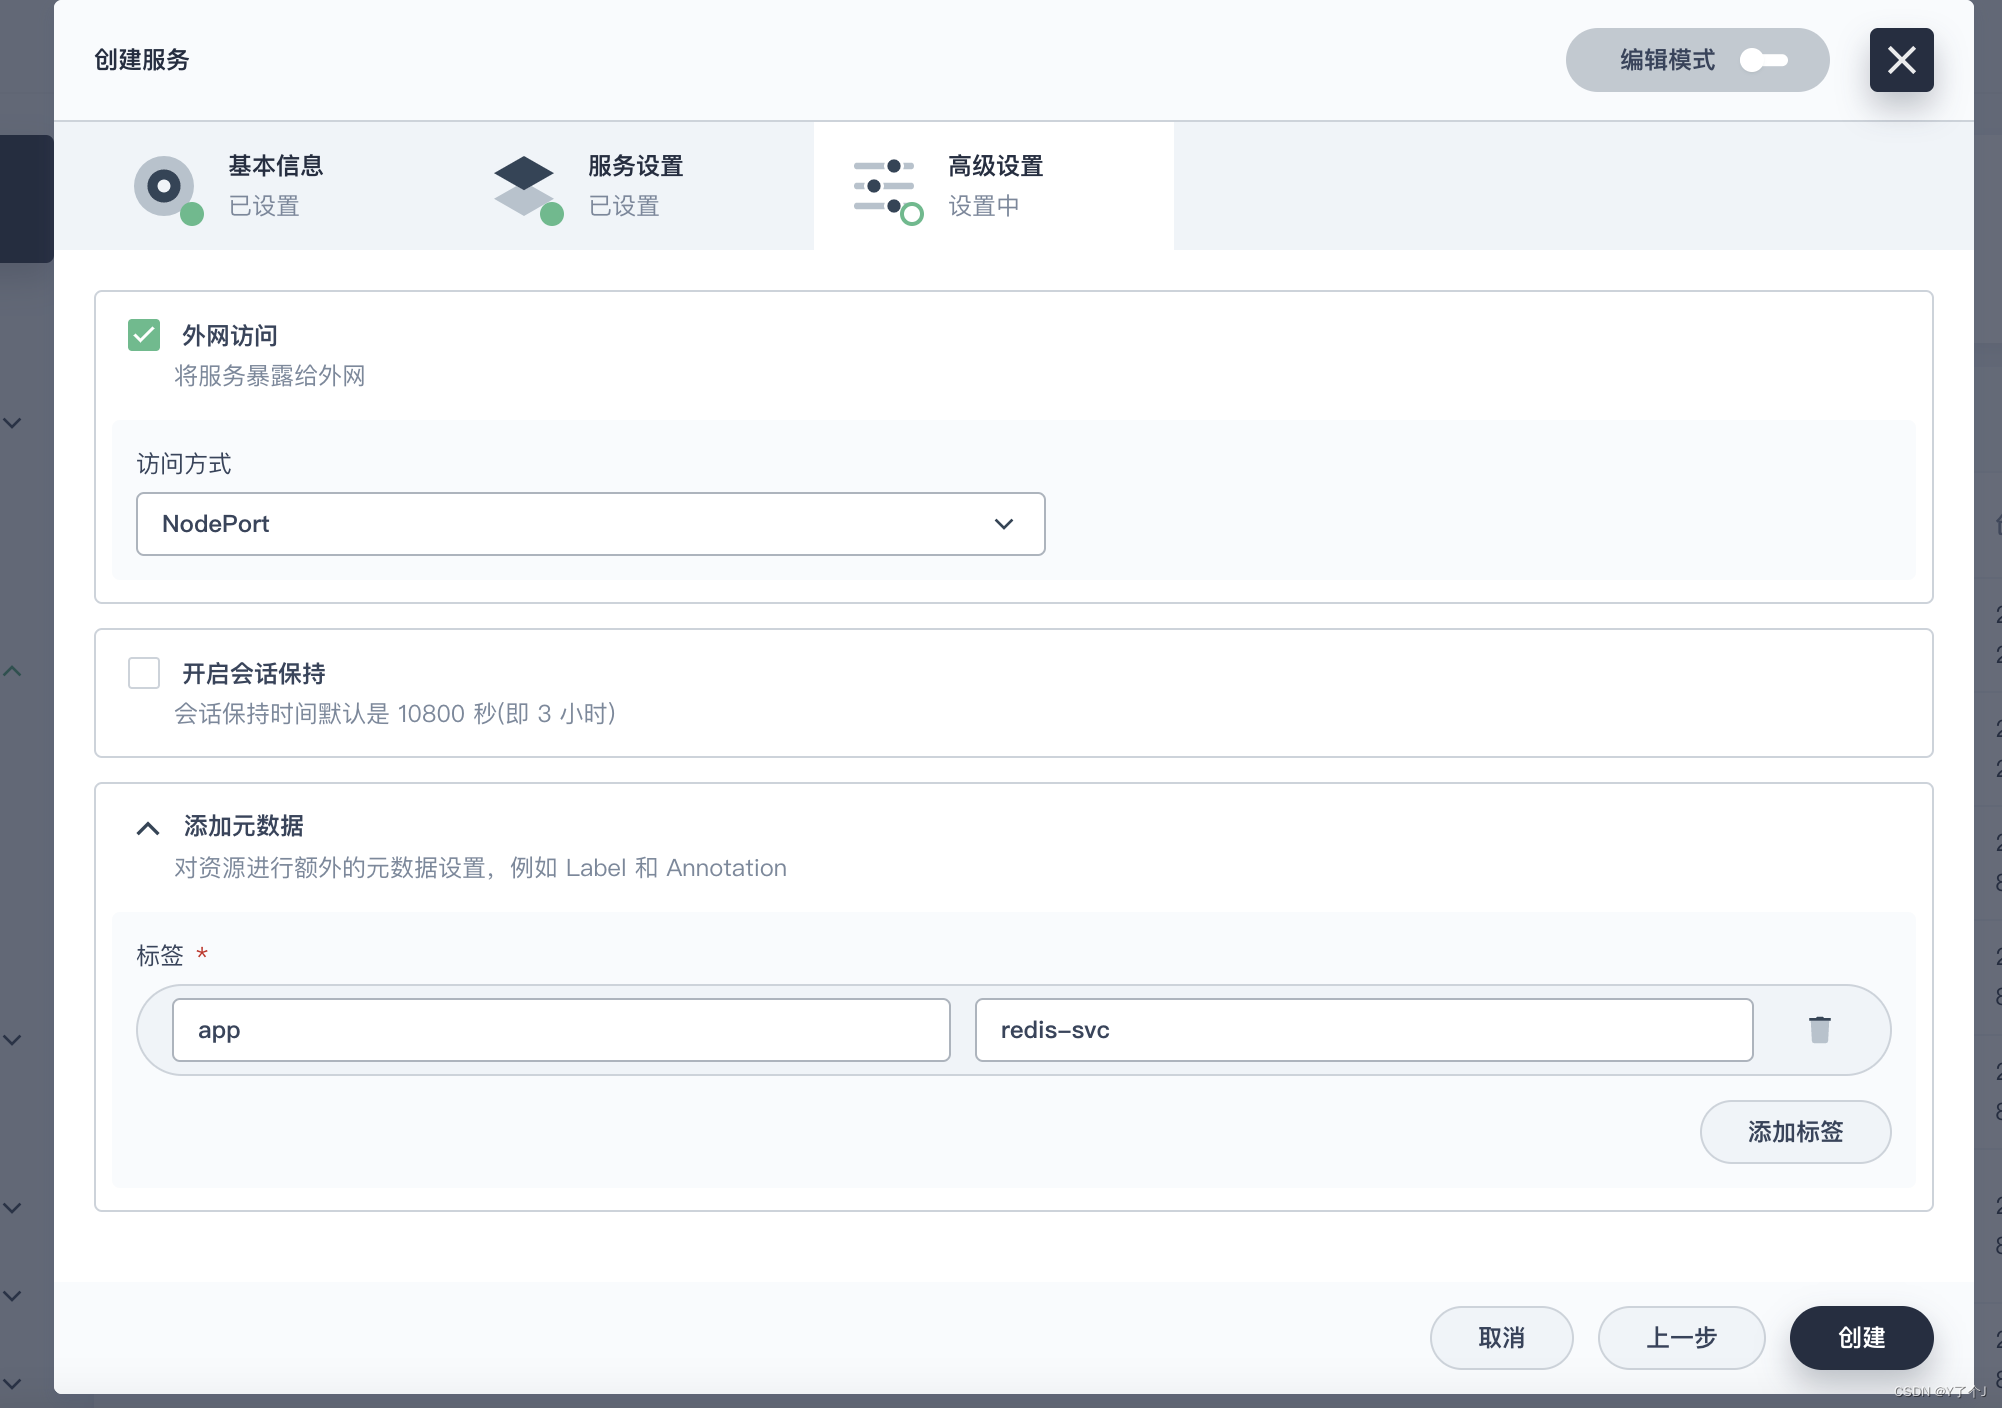 我们可以在外网用 32040 进行测试连接redis
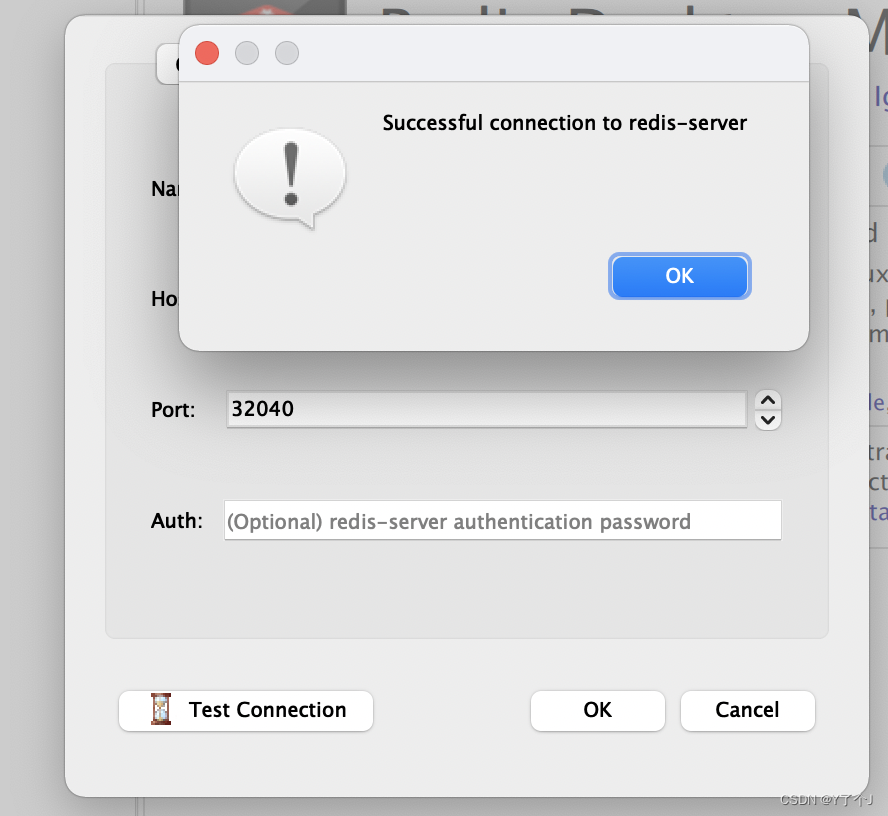
 点这里可以自动扩容。
 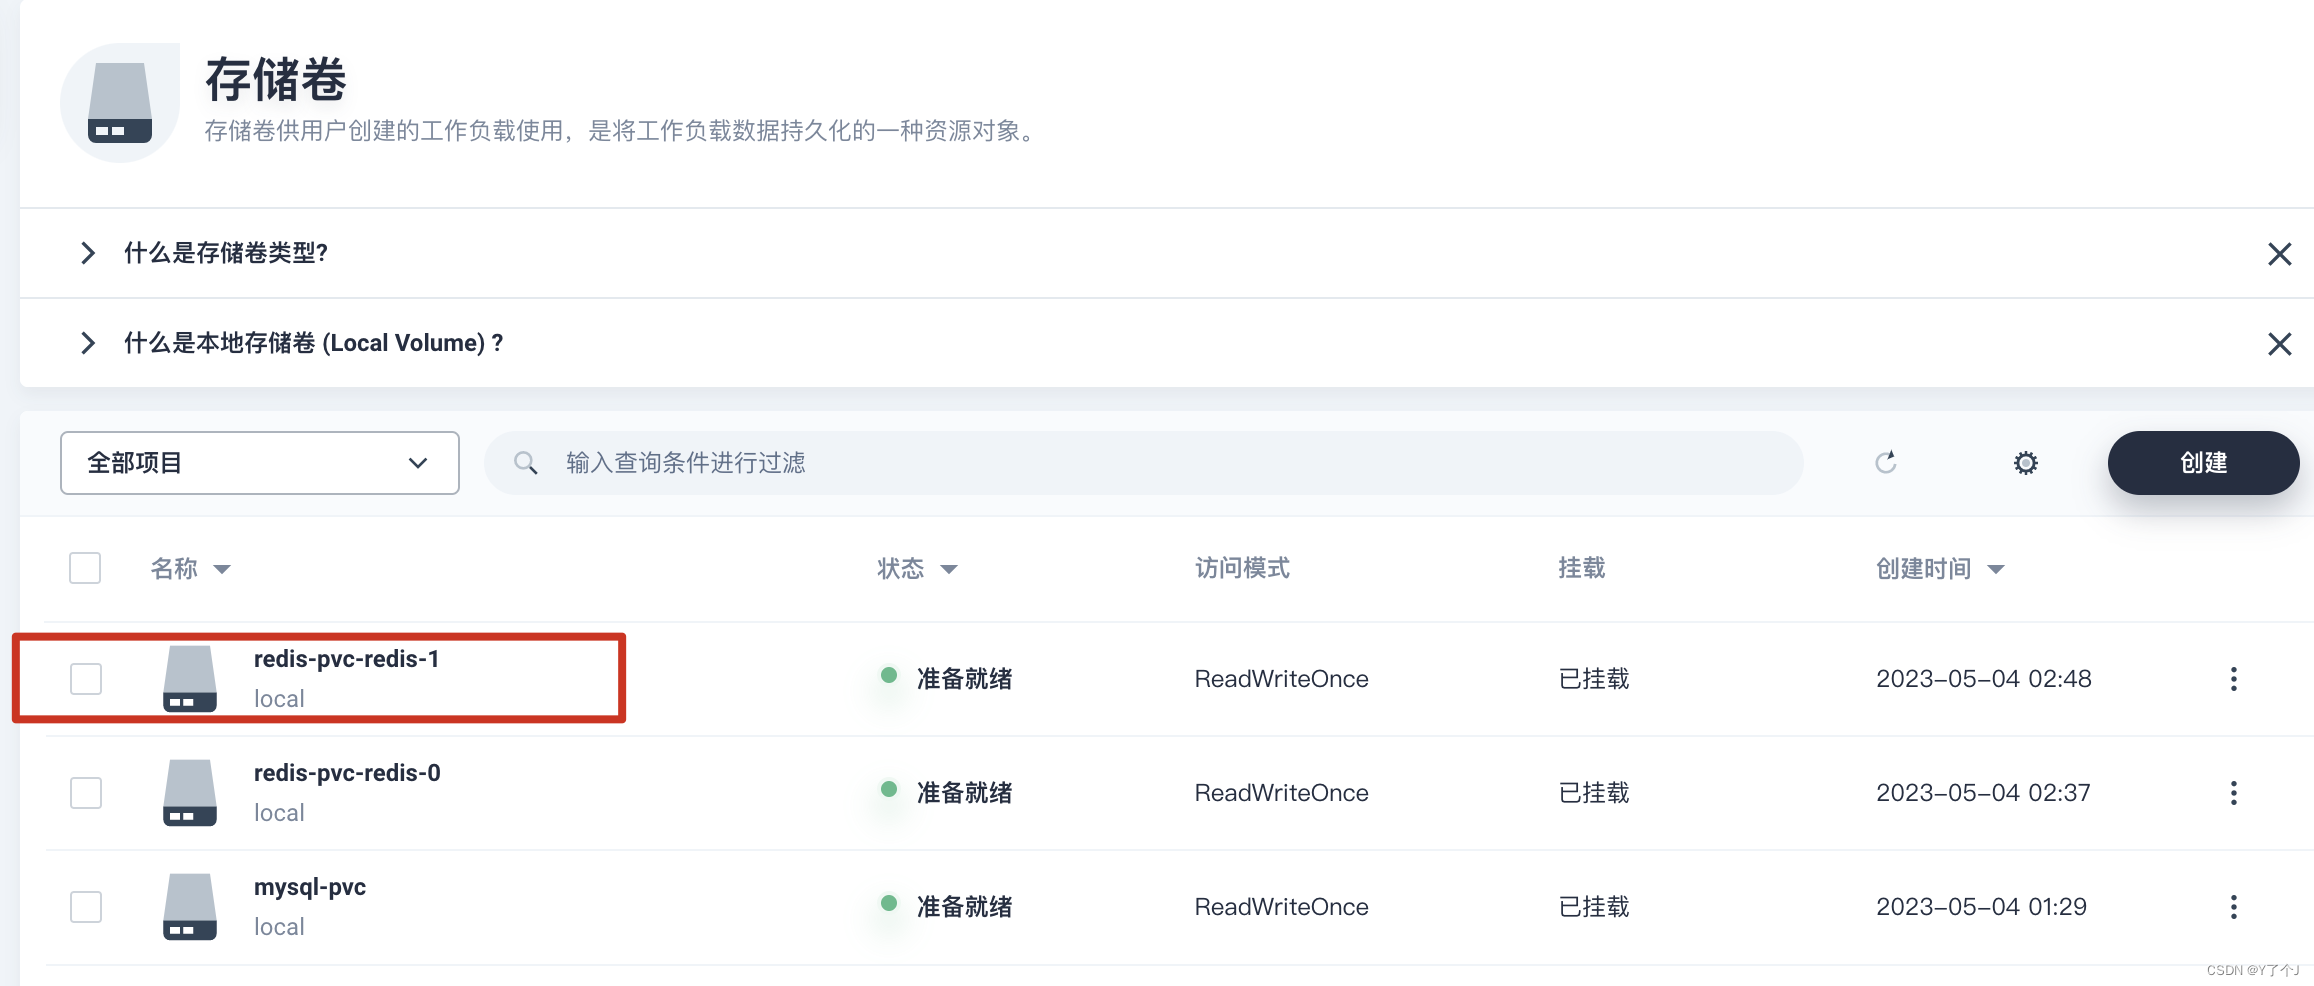 存储卷也会自动创建挂载。
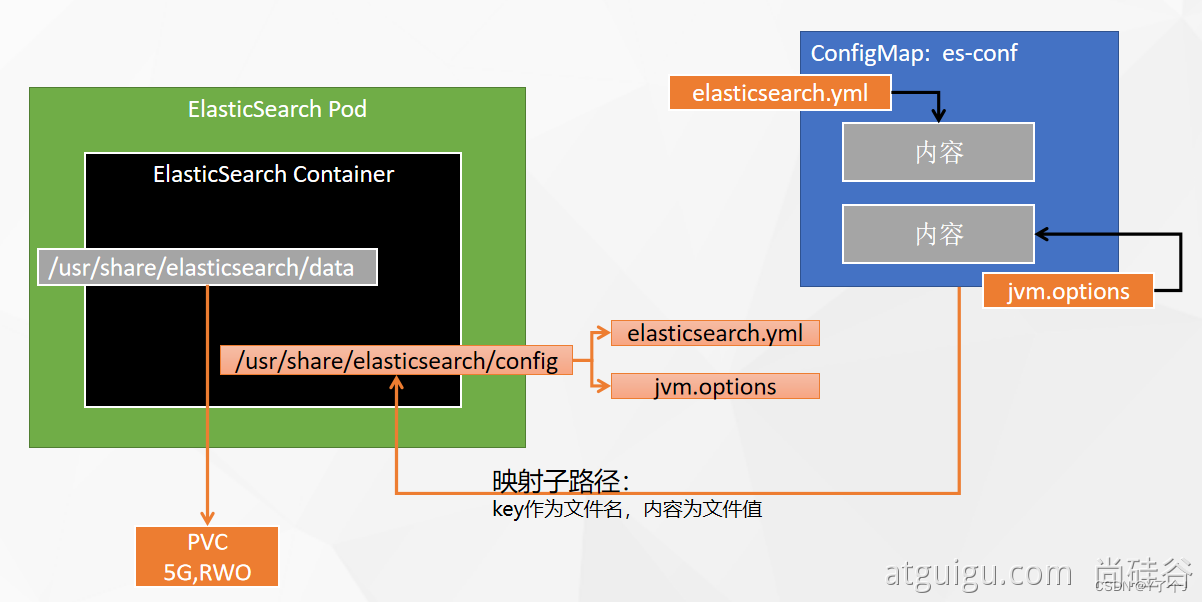
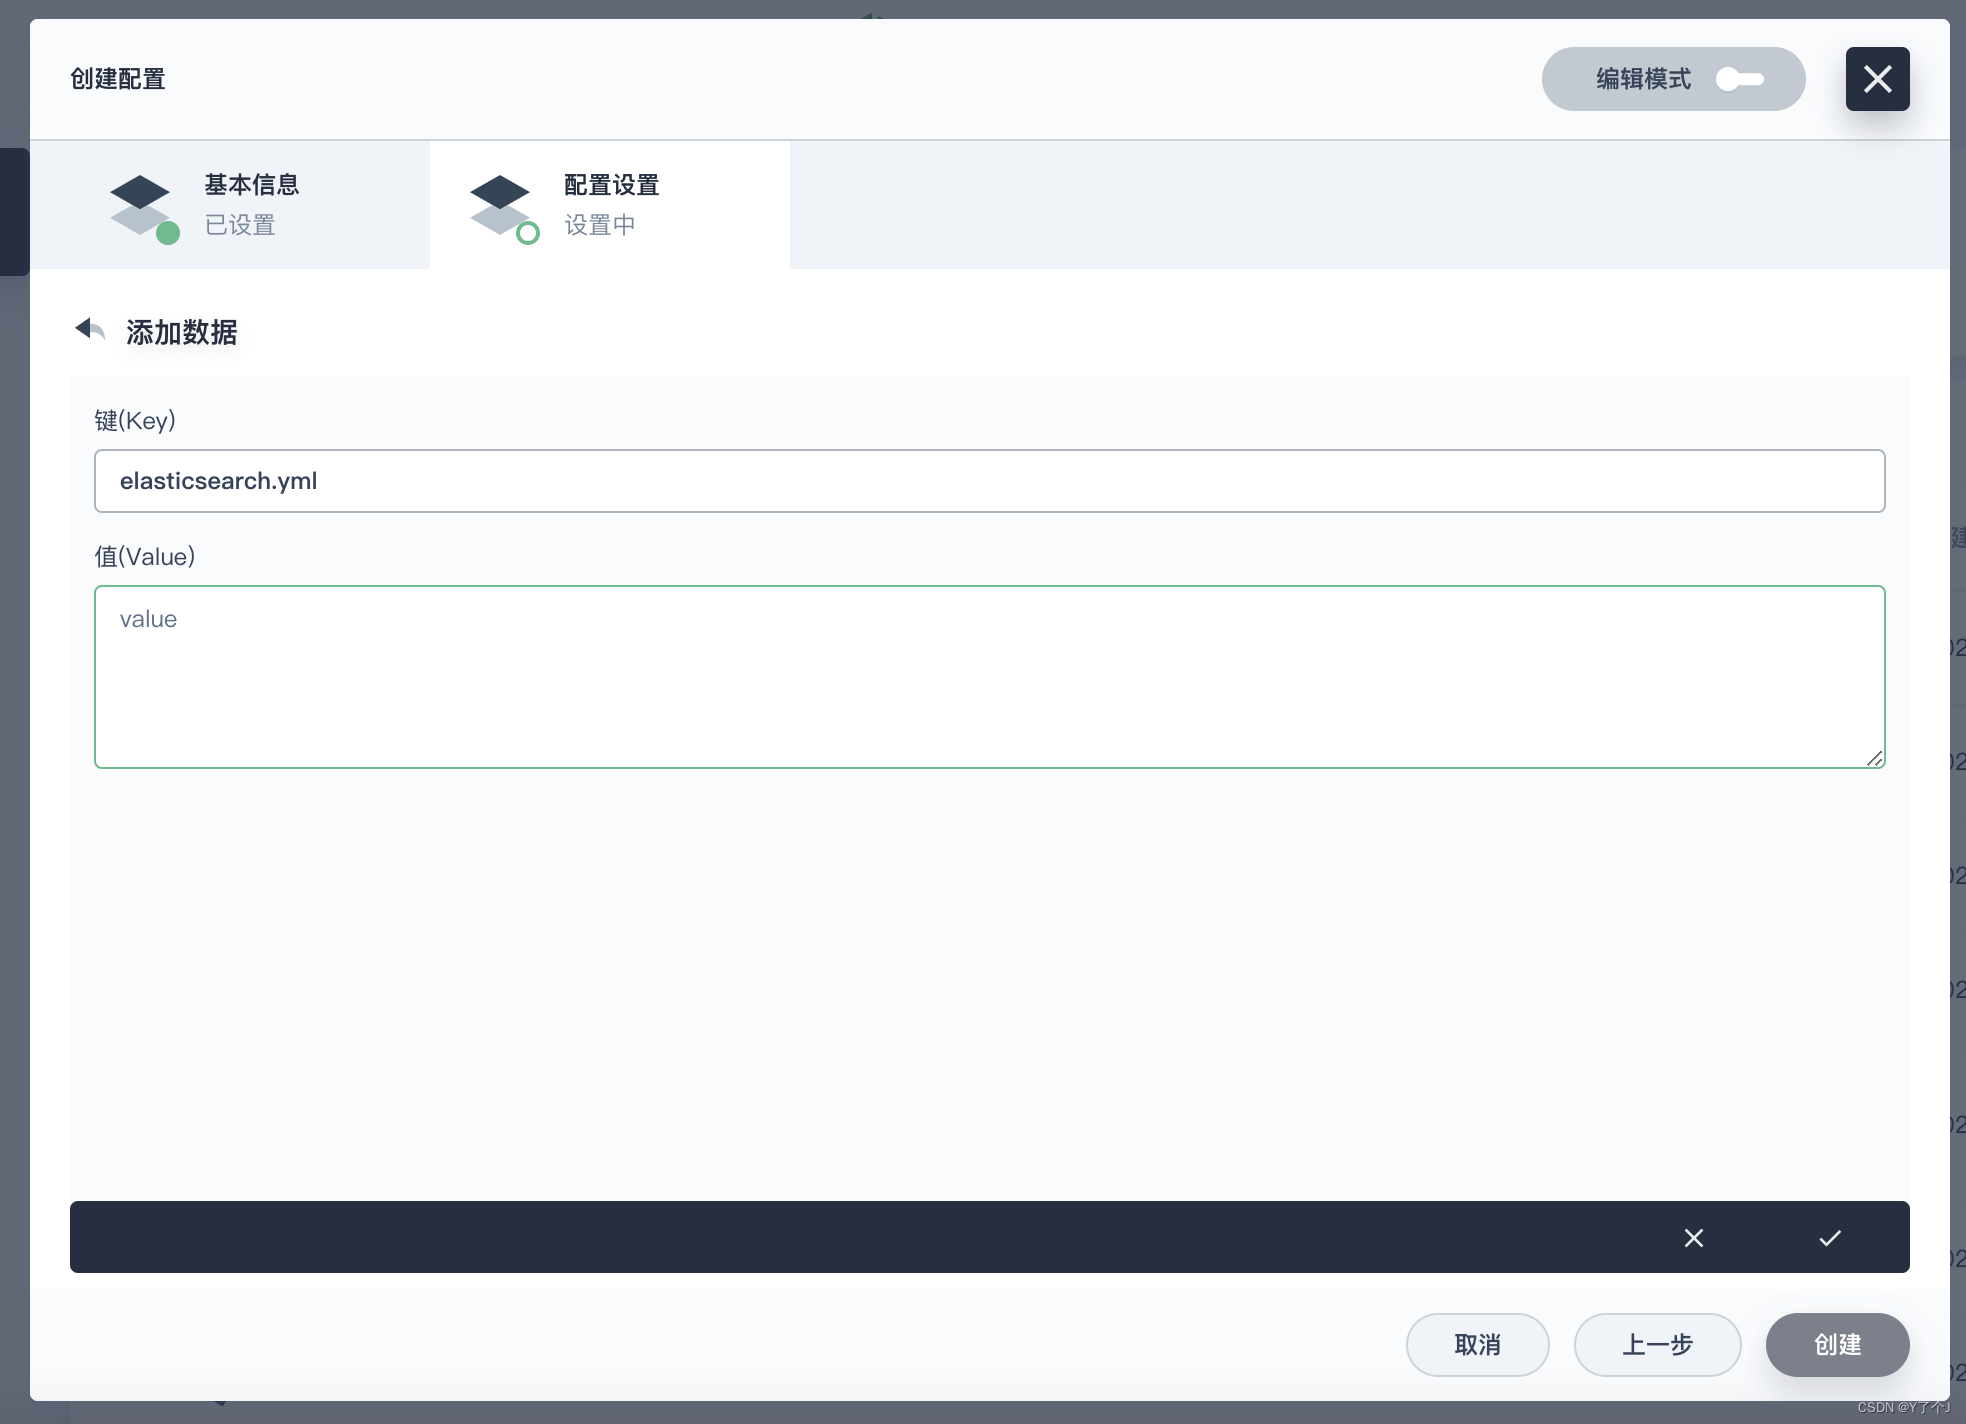 Value添加上面获取到的 elasticsearch.yml 里的内容
 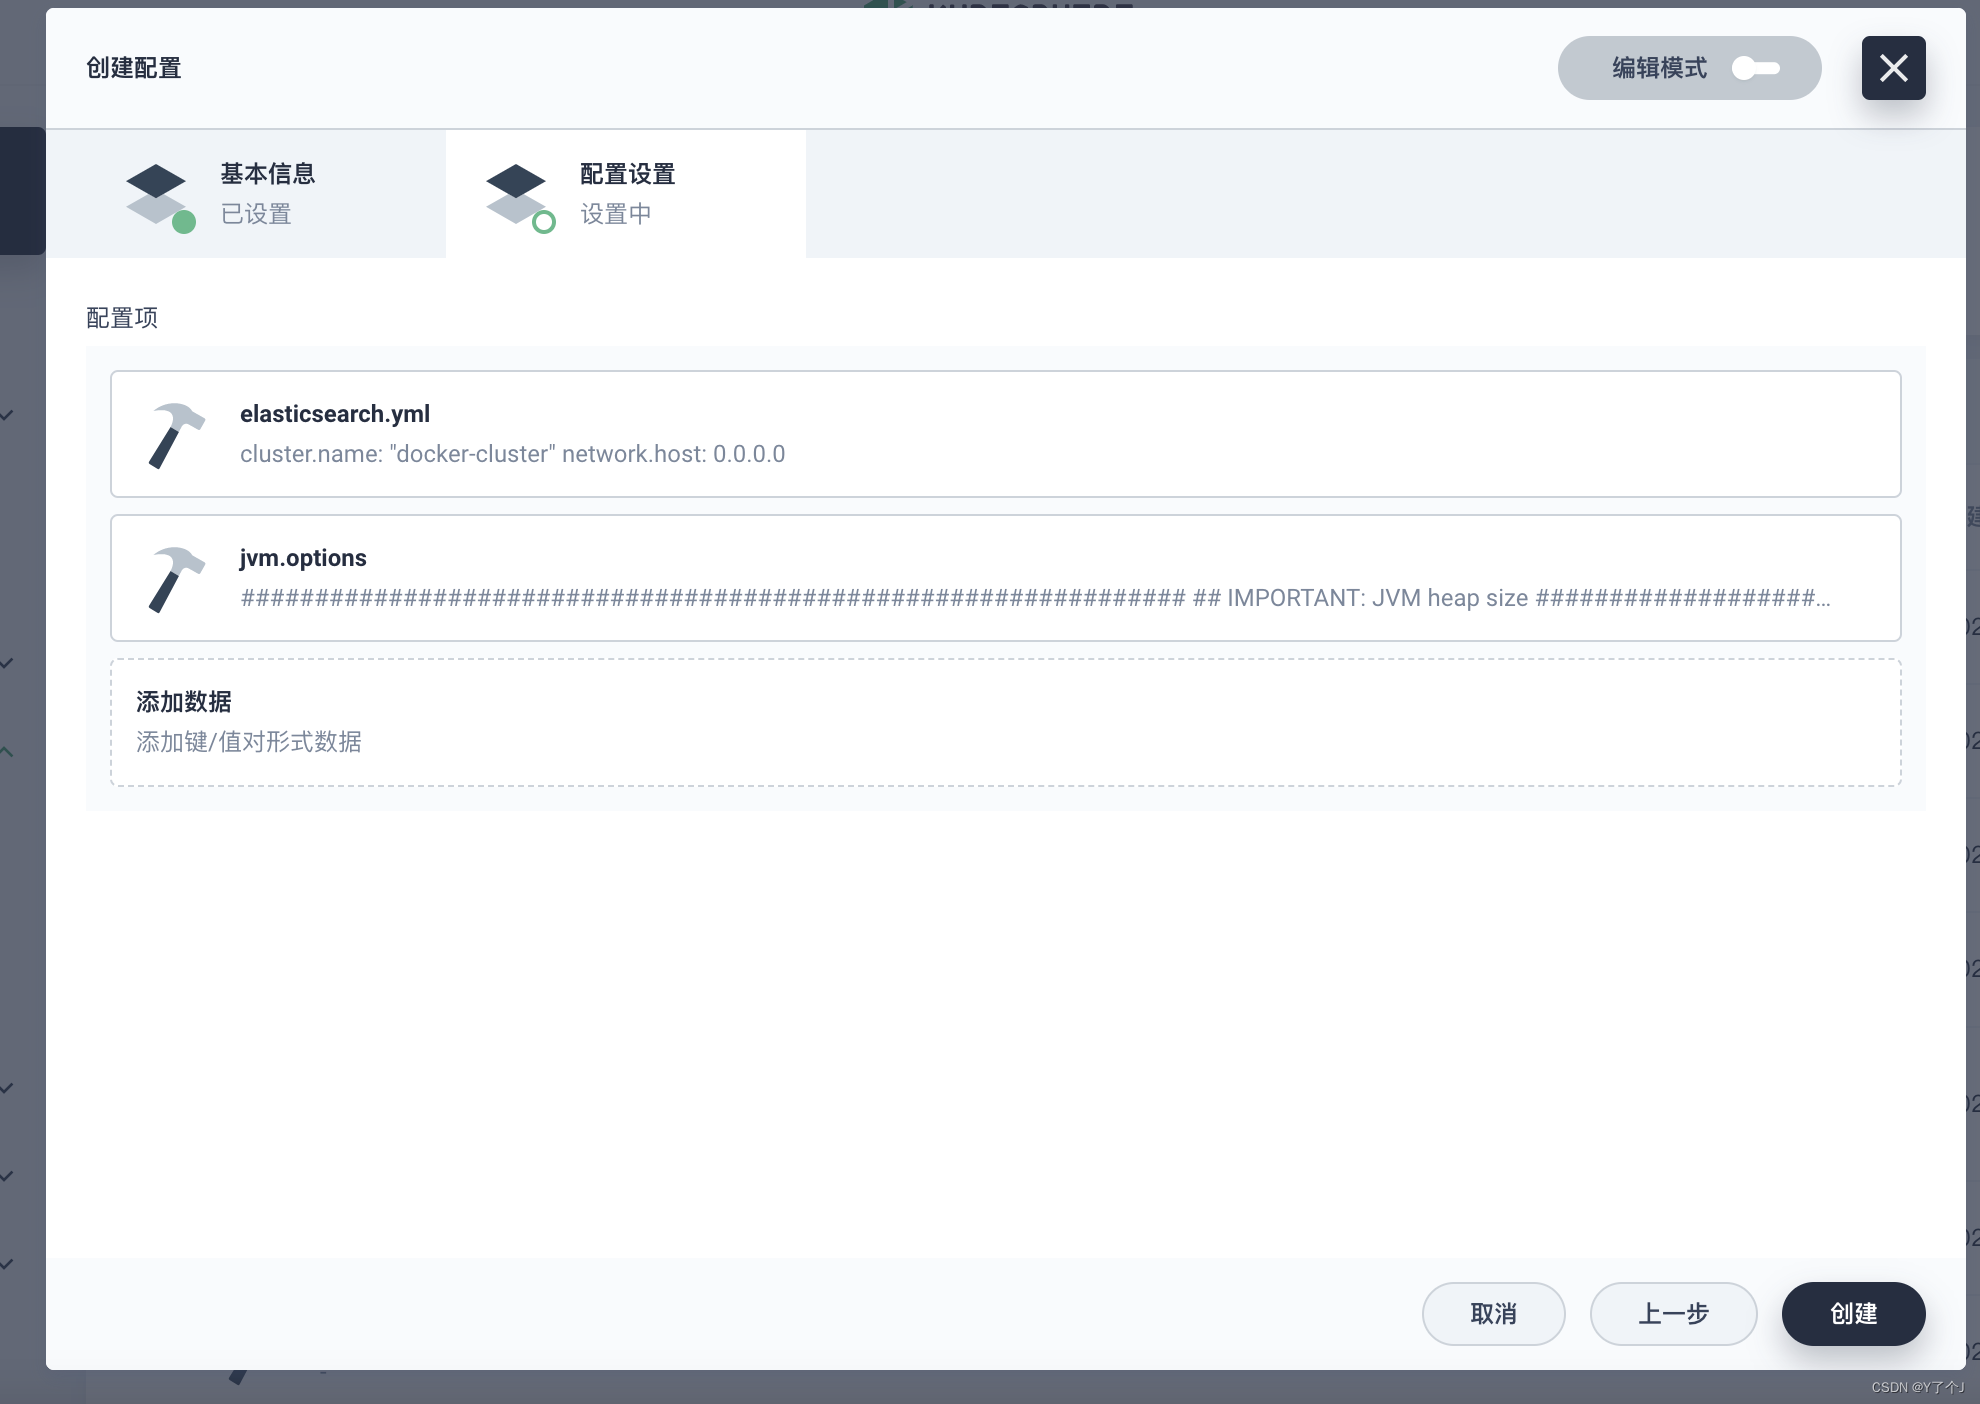 再添加一个 jvm.options,然后创建。
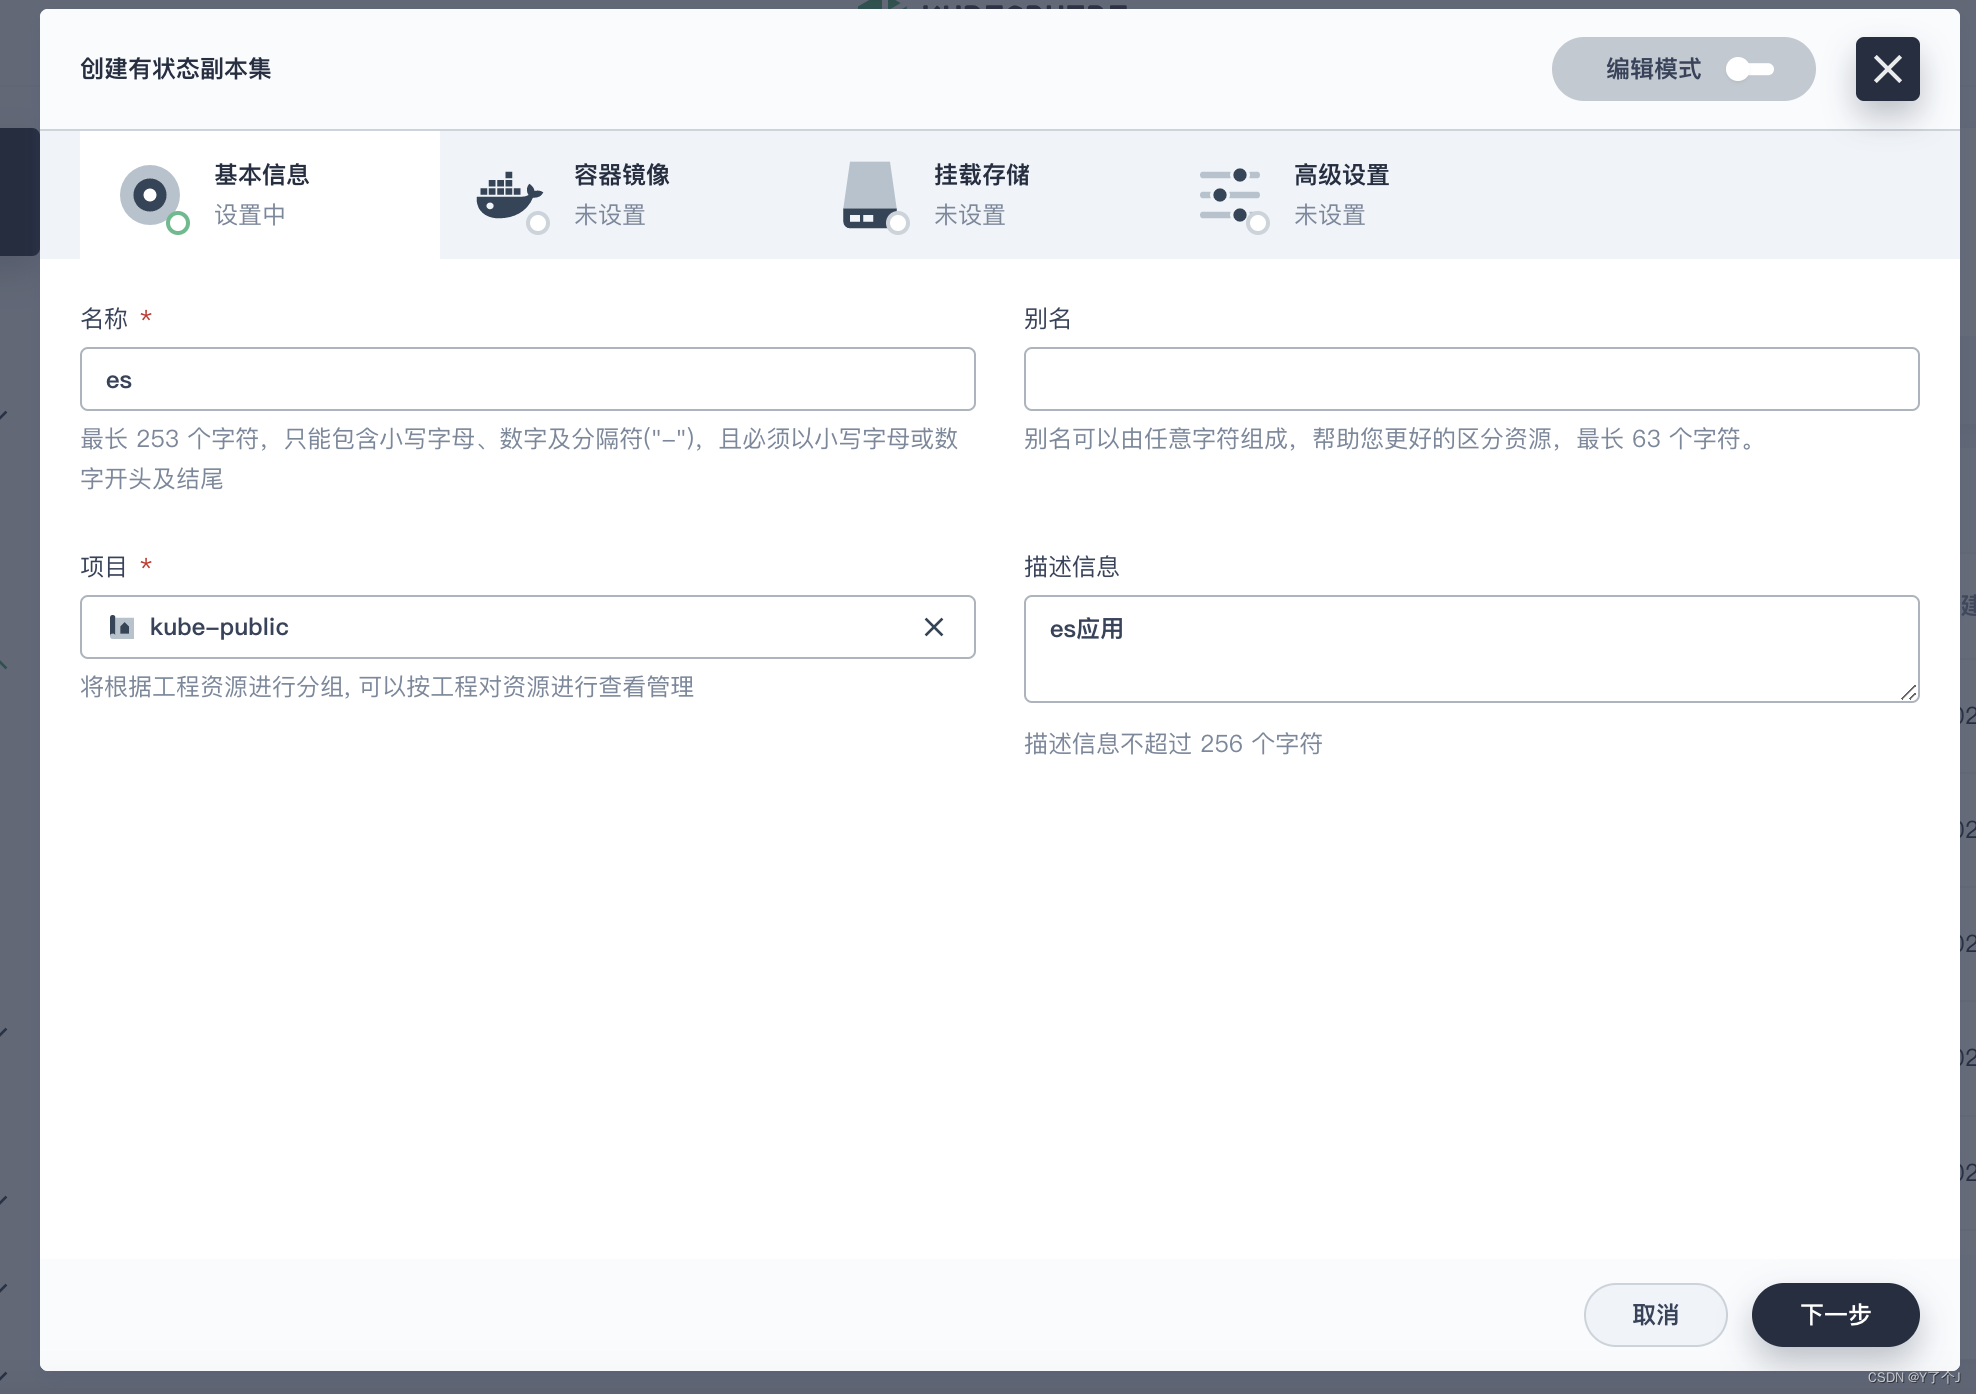
 jvm.options文件也要单独配置下
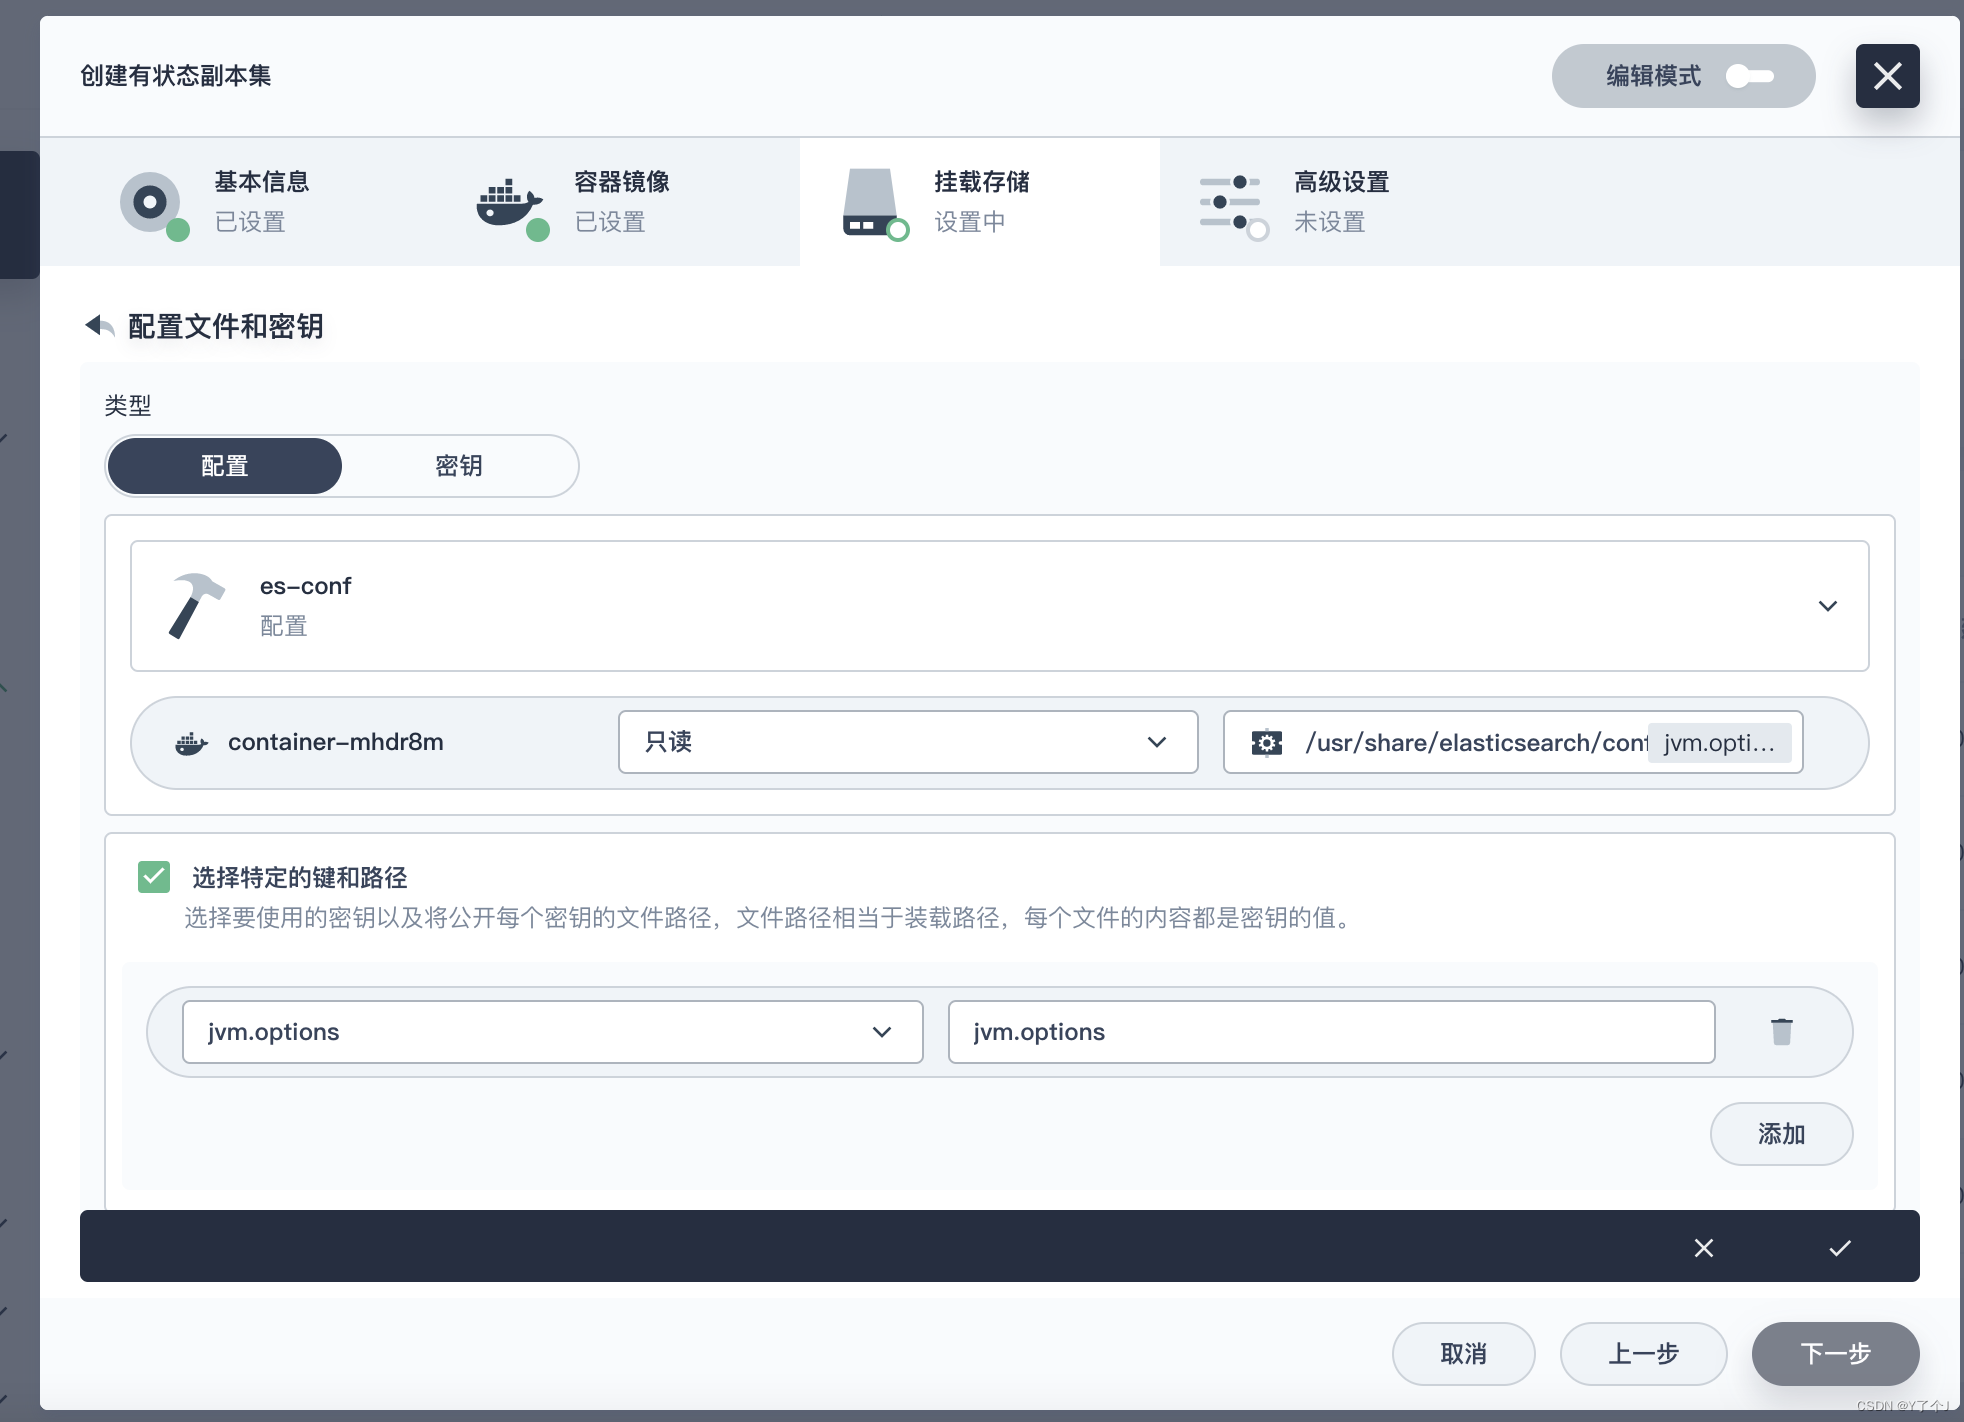
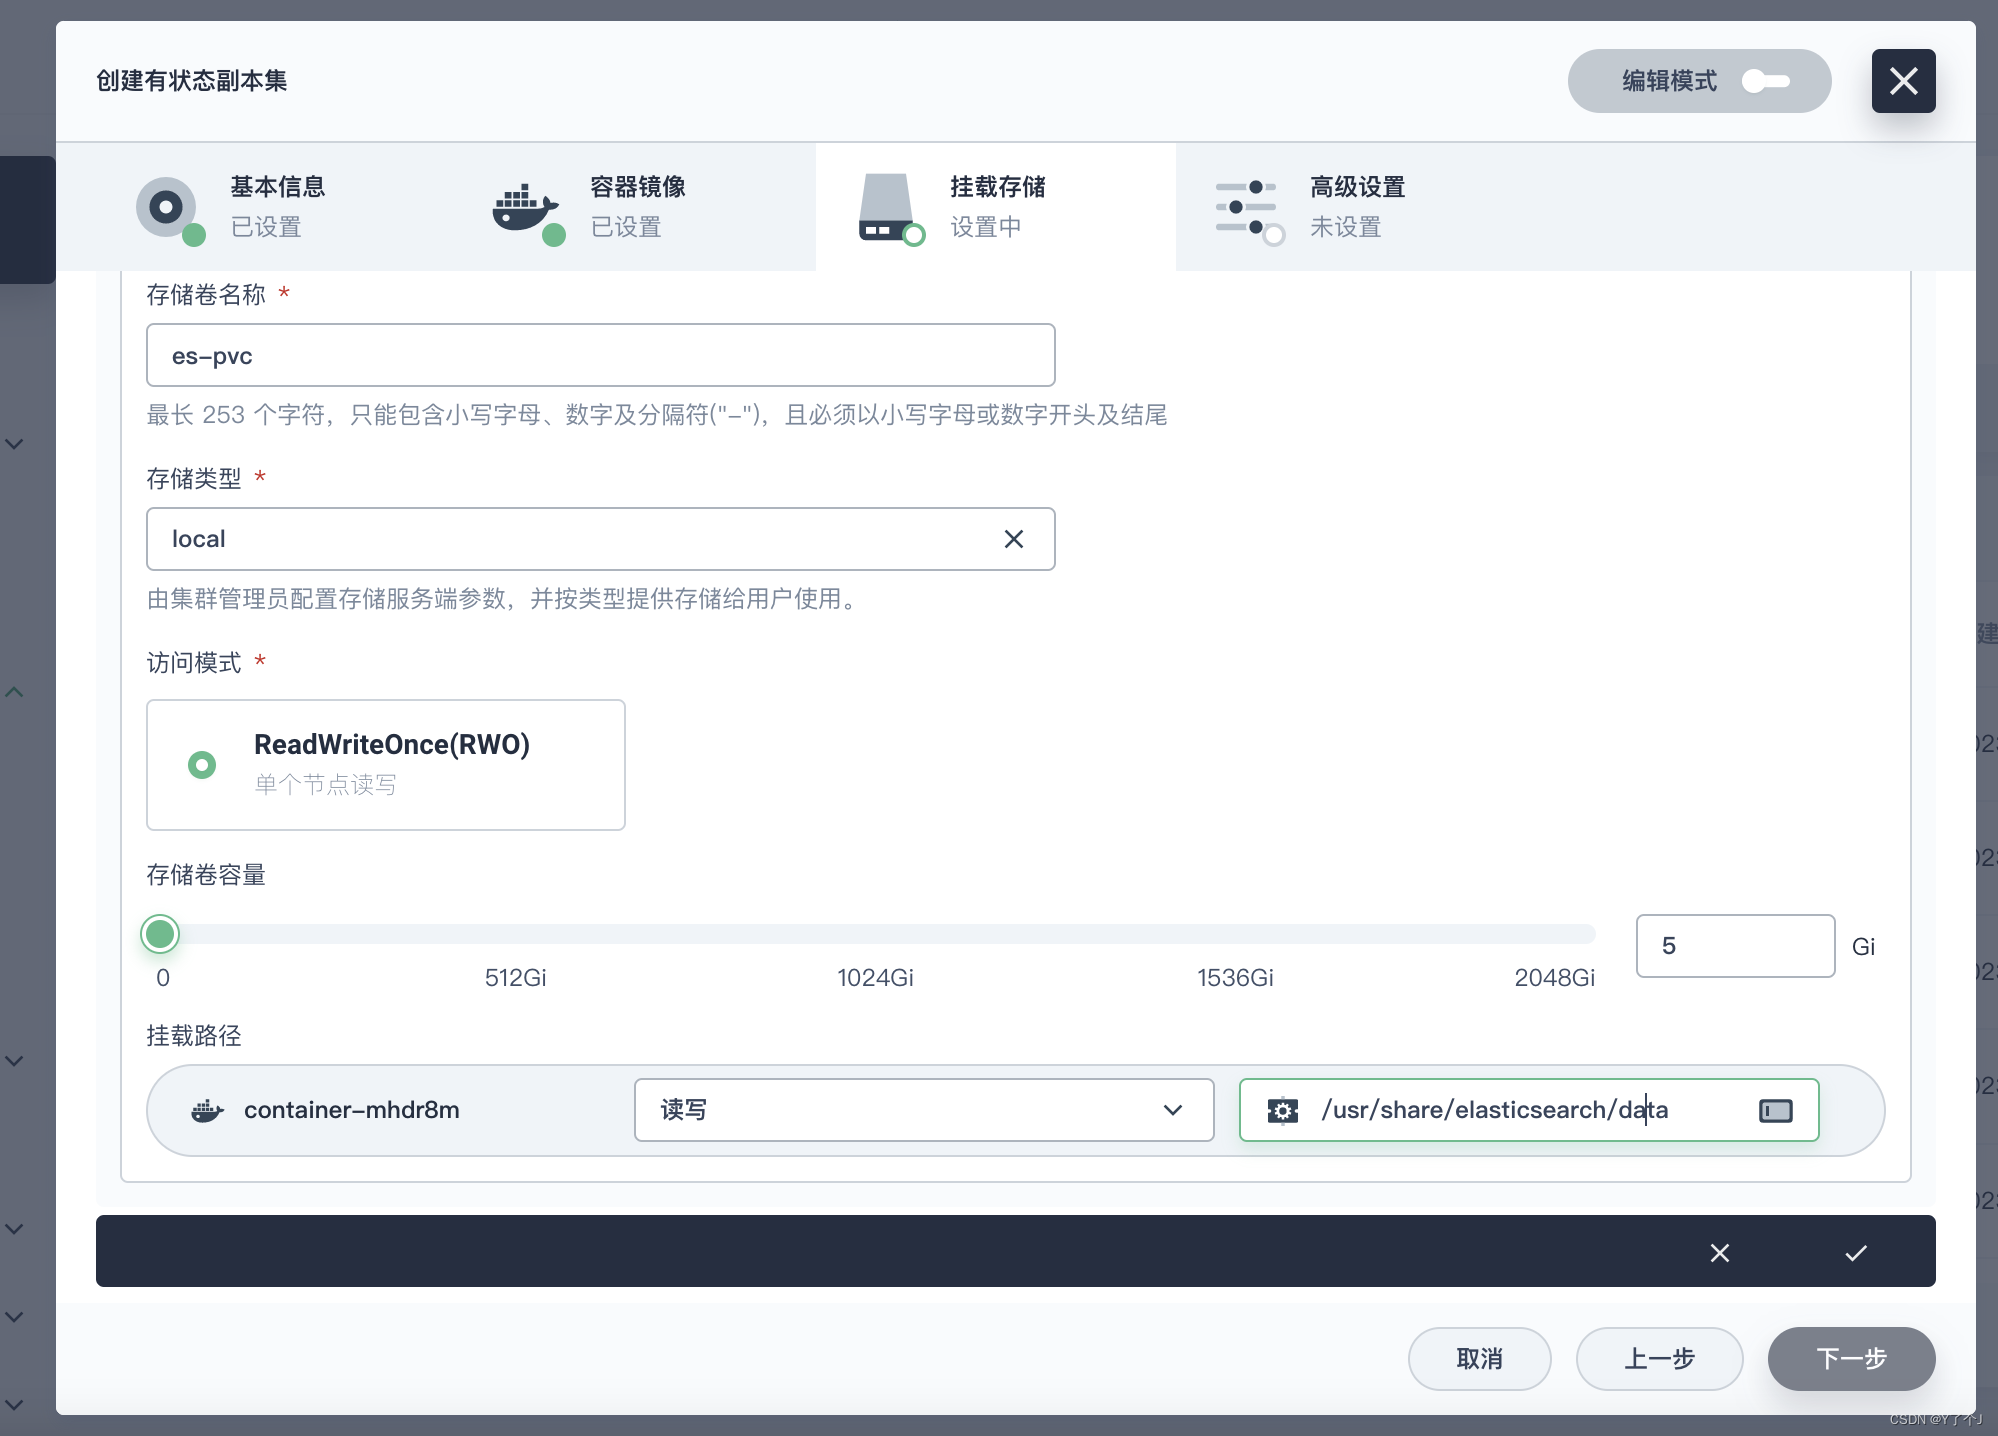
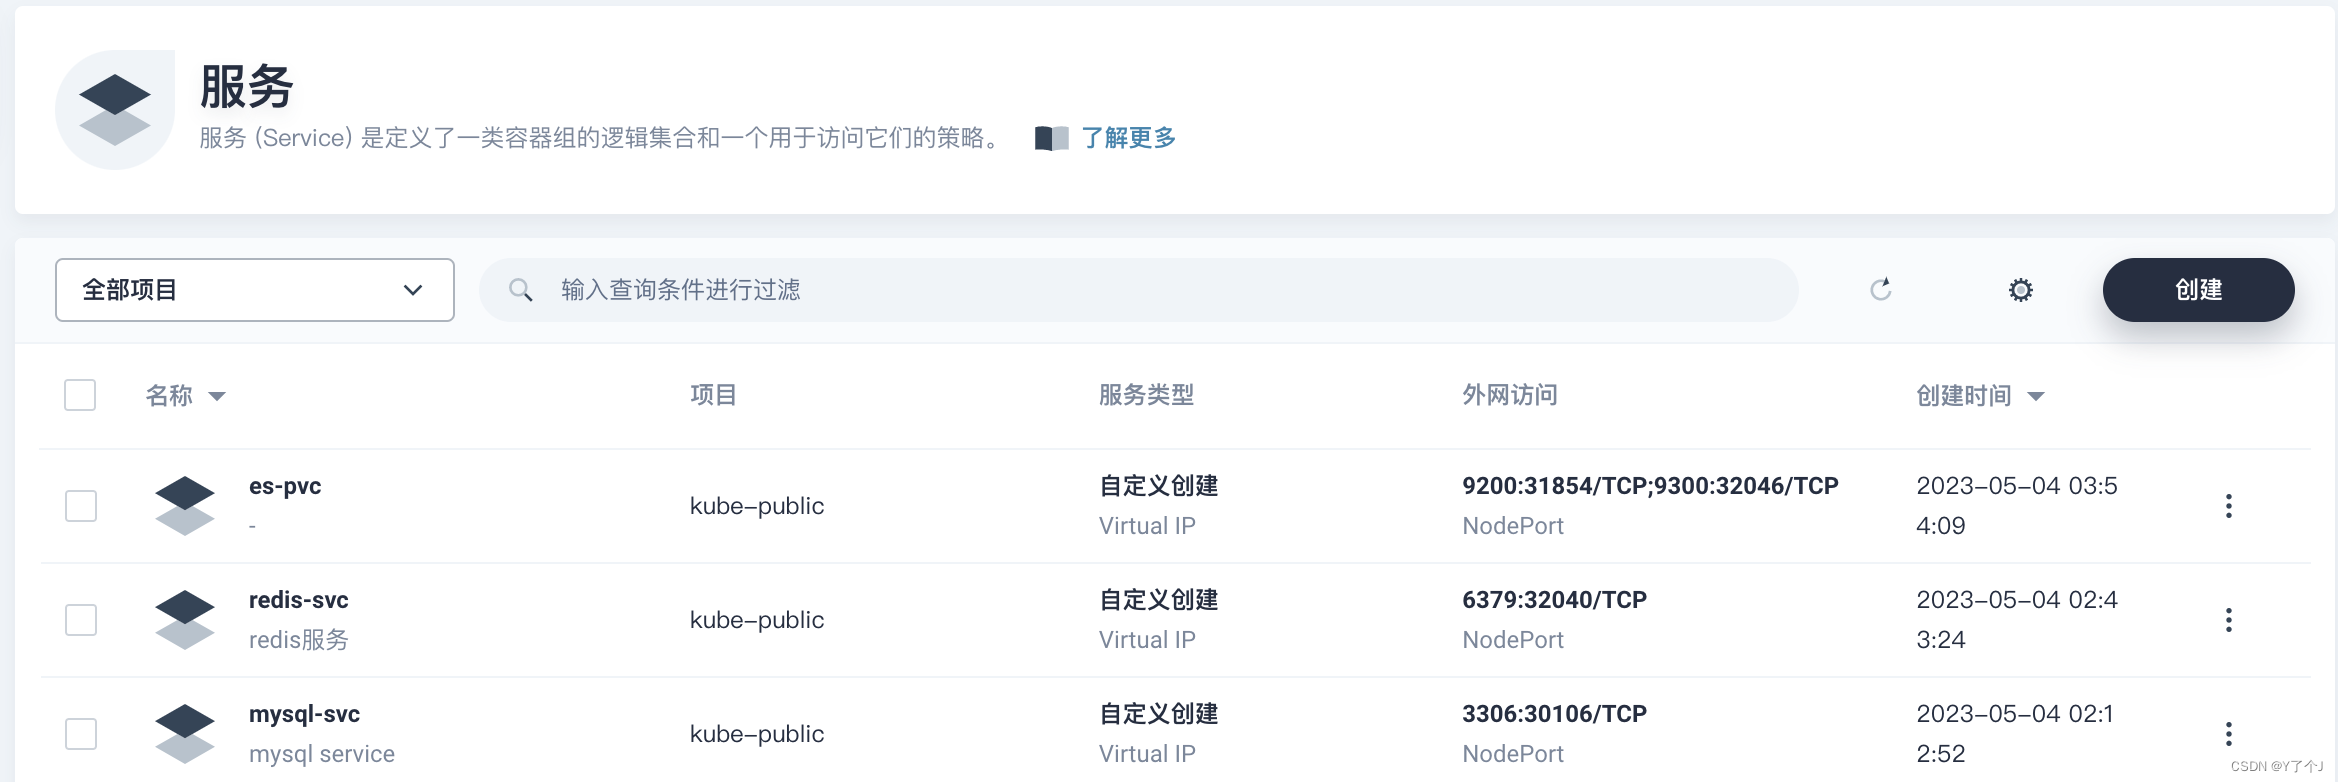
 同样我们自己创建一个es-pvc
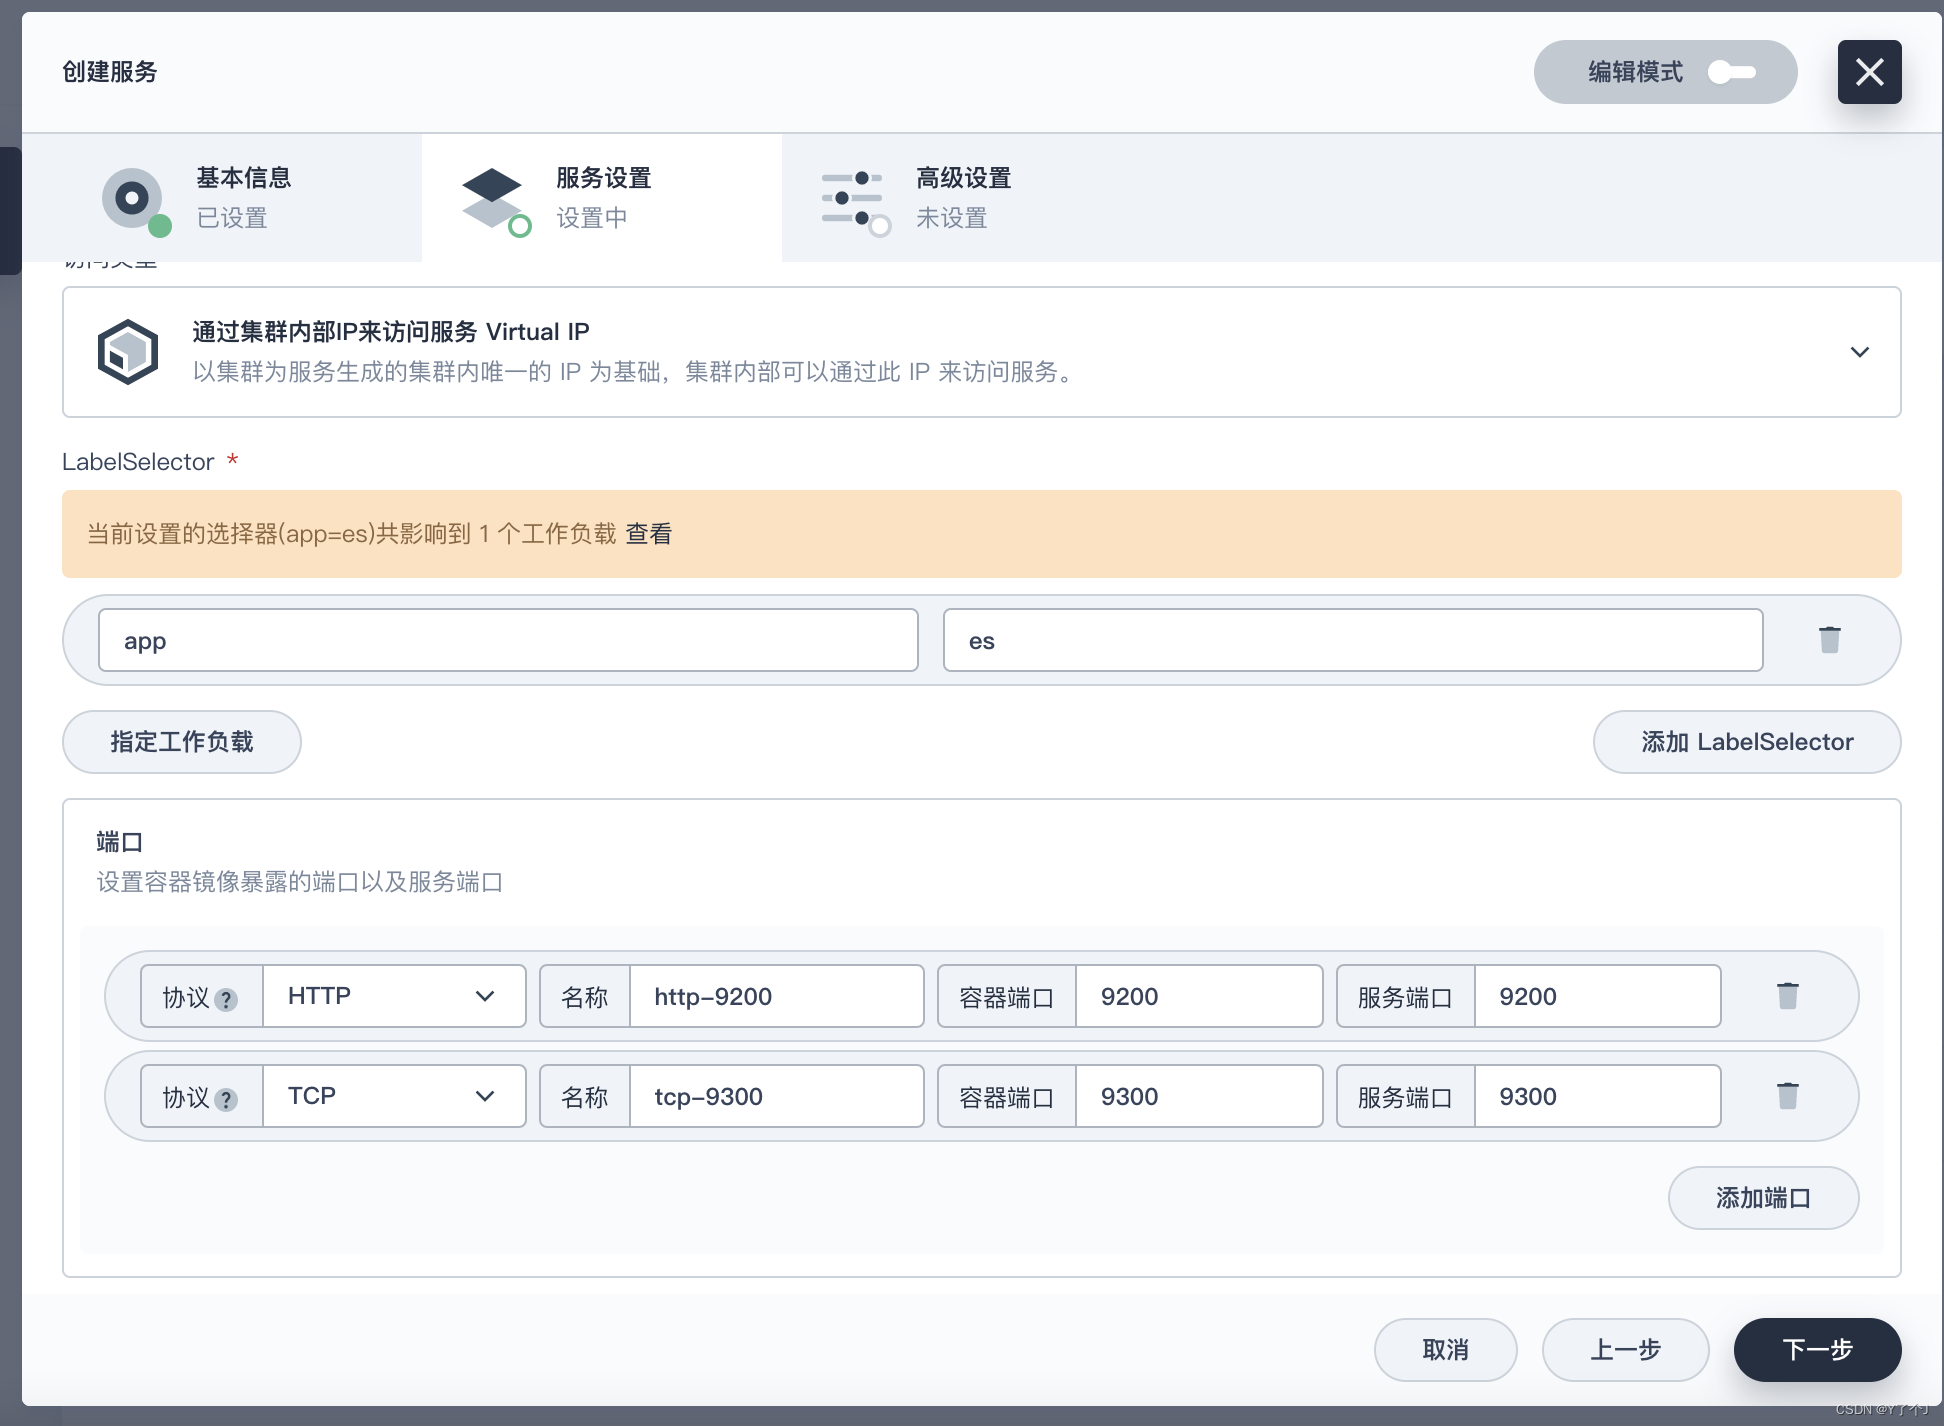
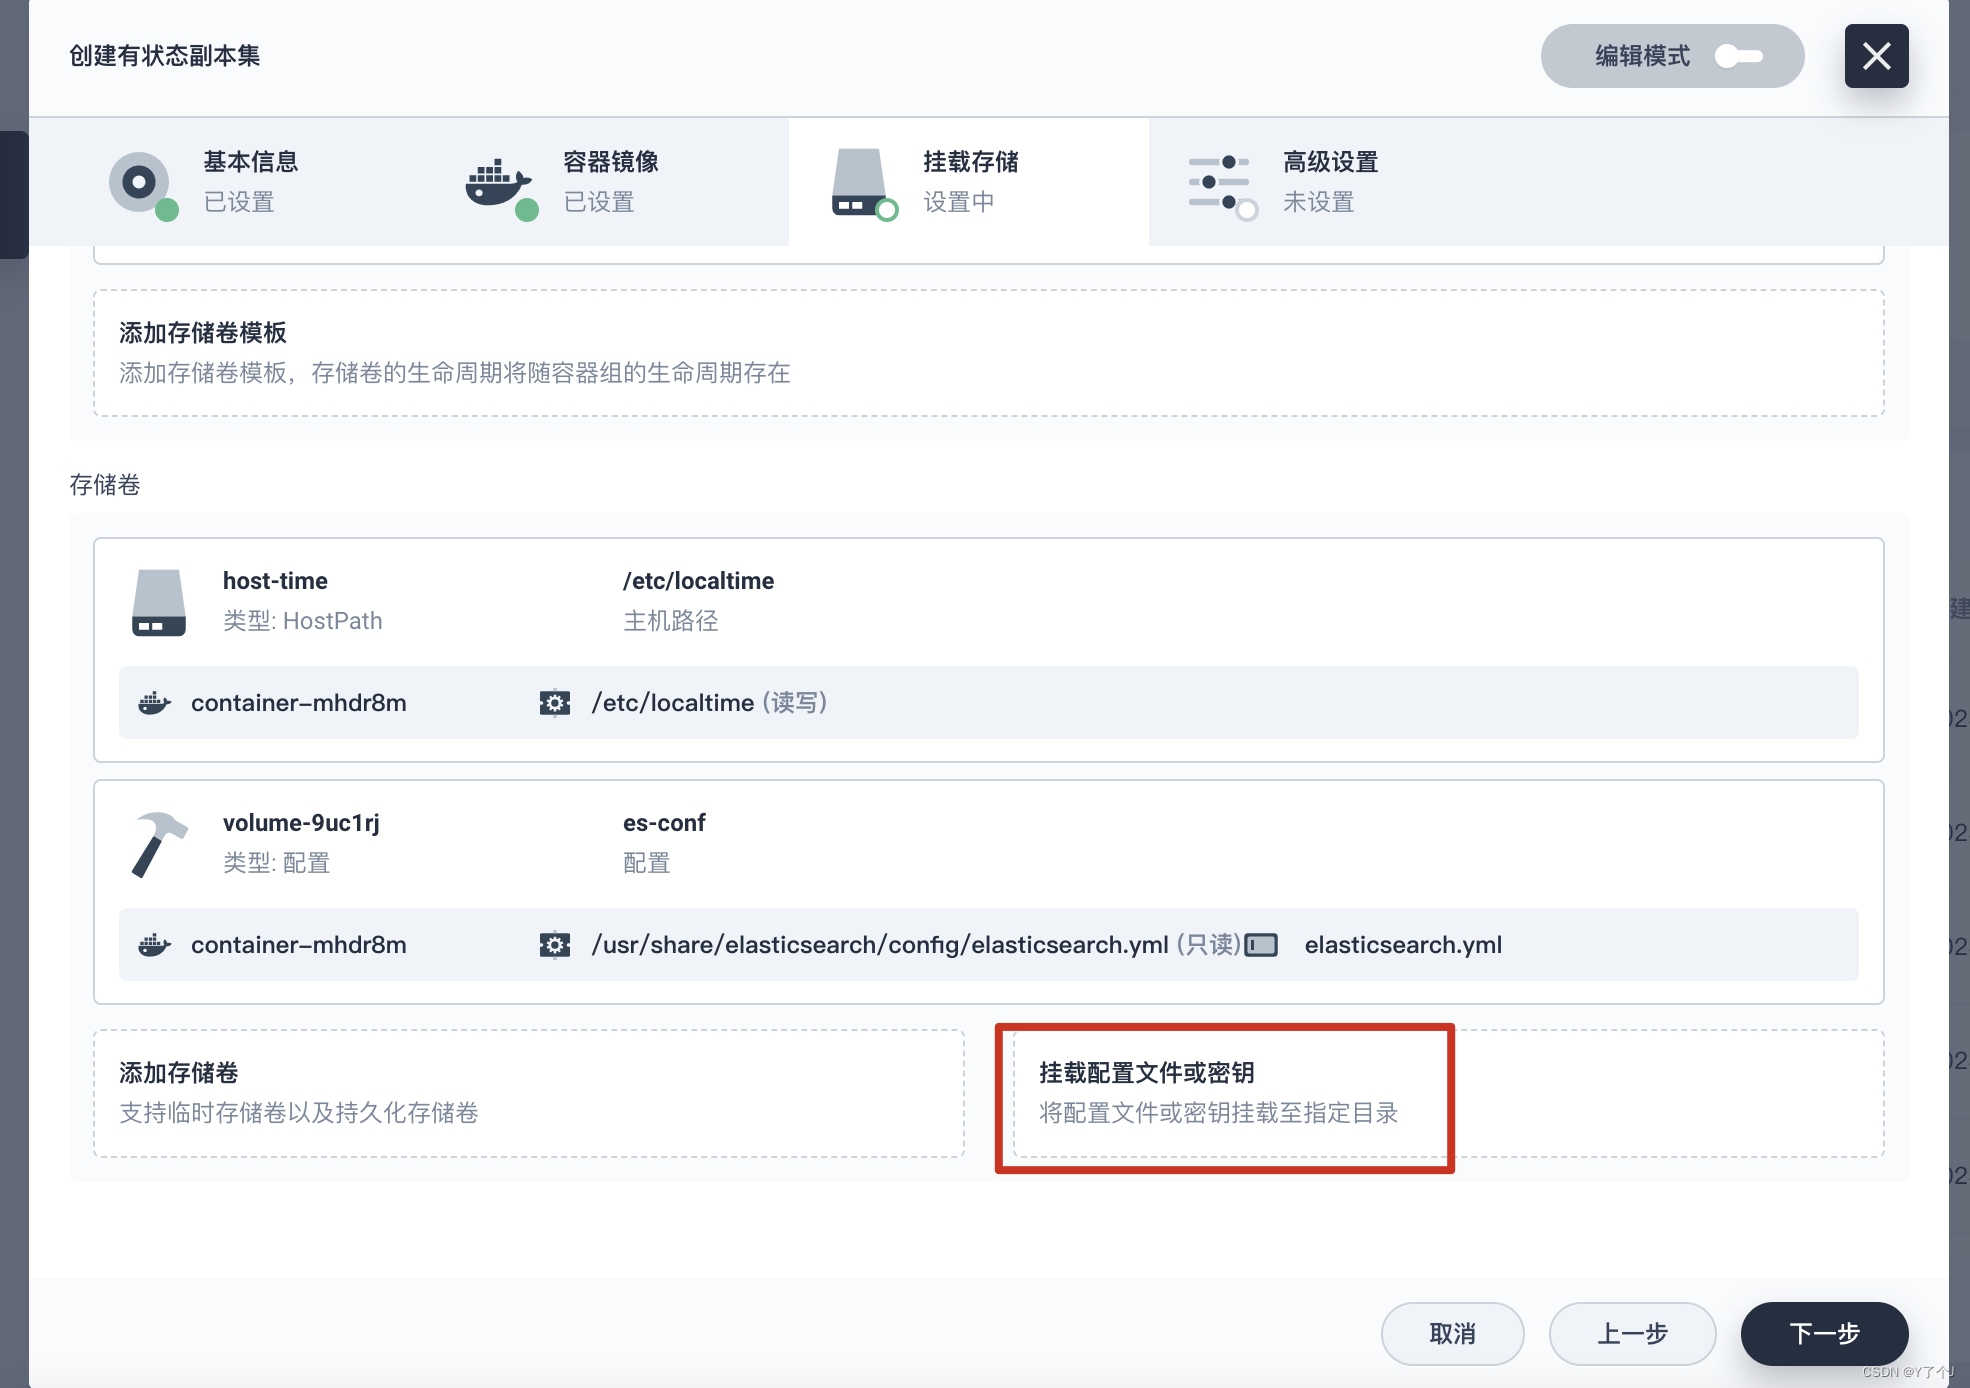
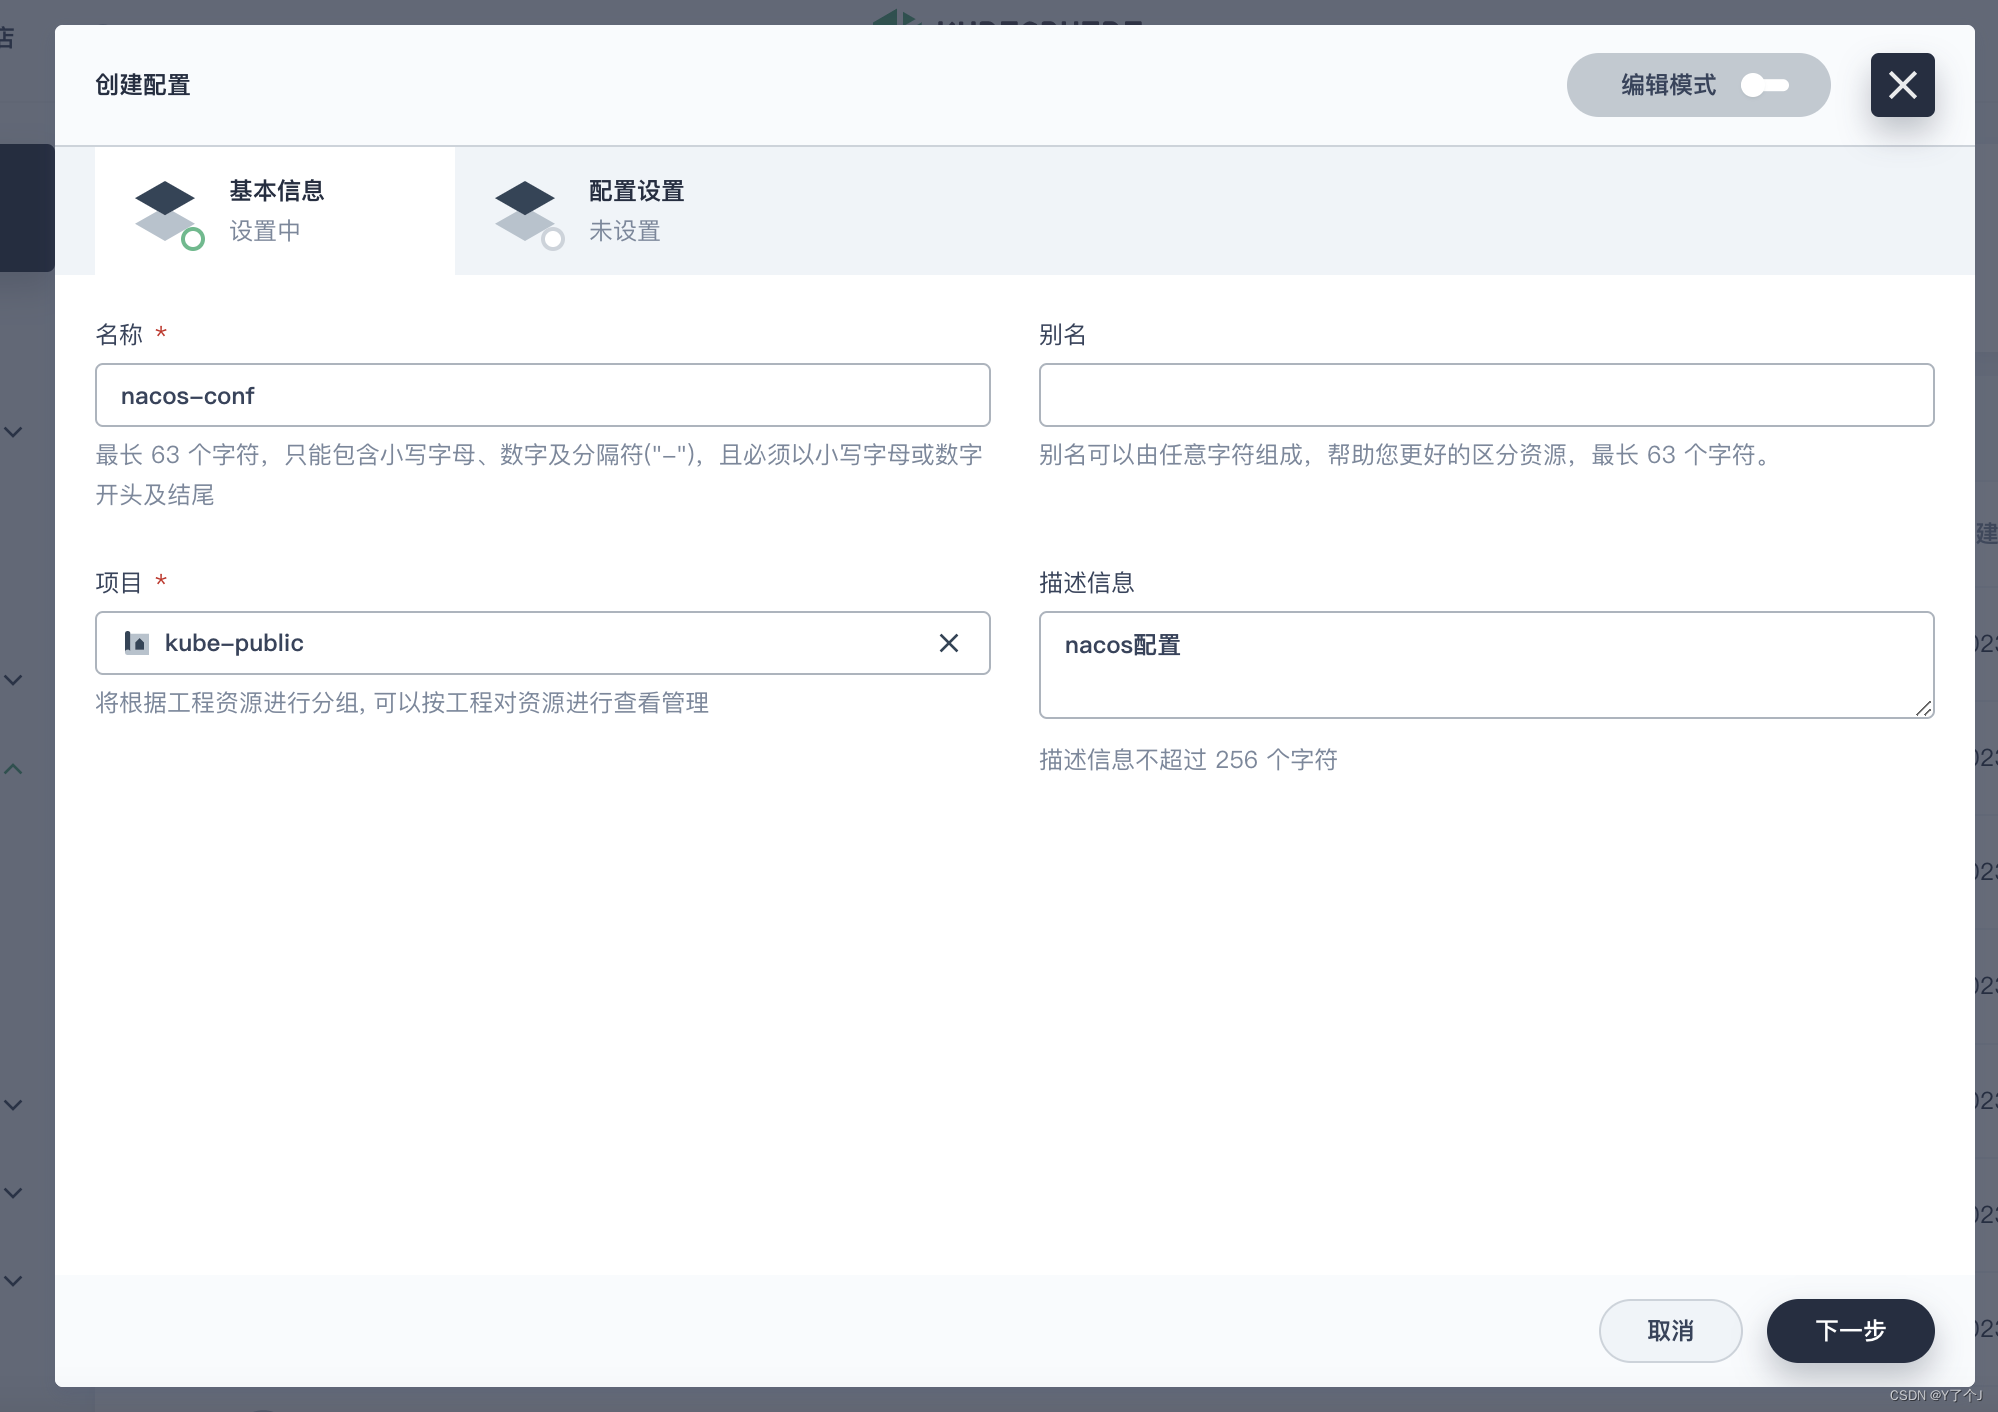 挂载application.porperties配置文件
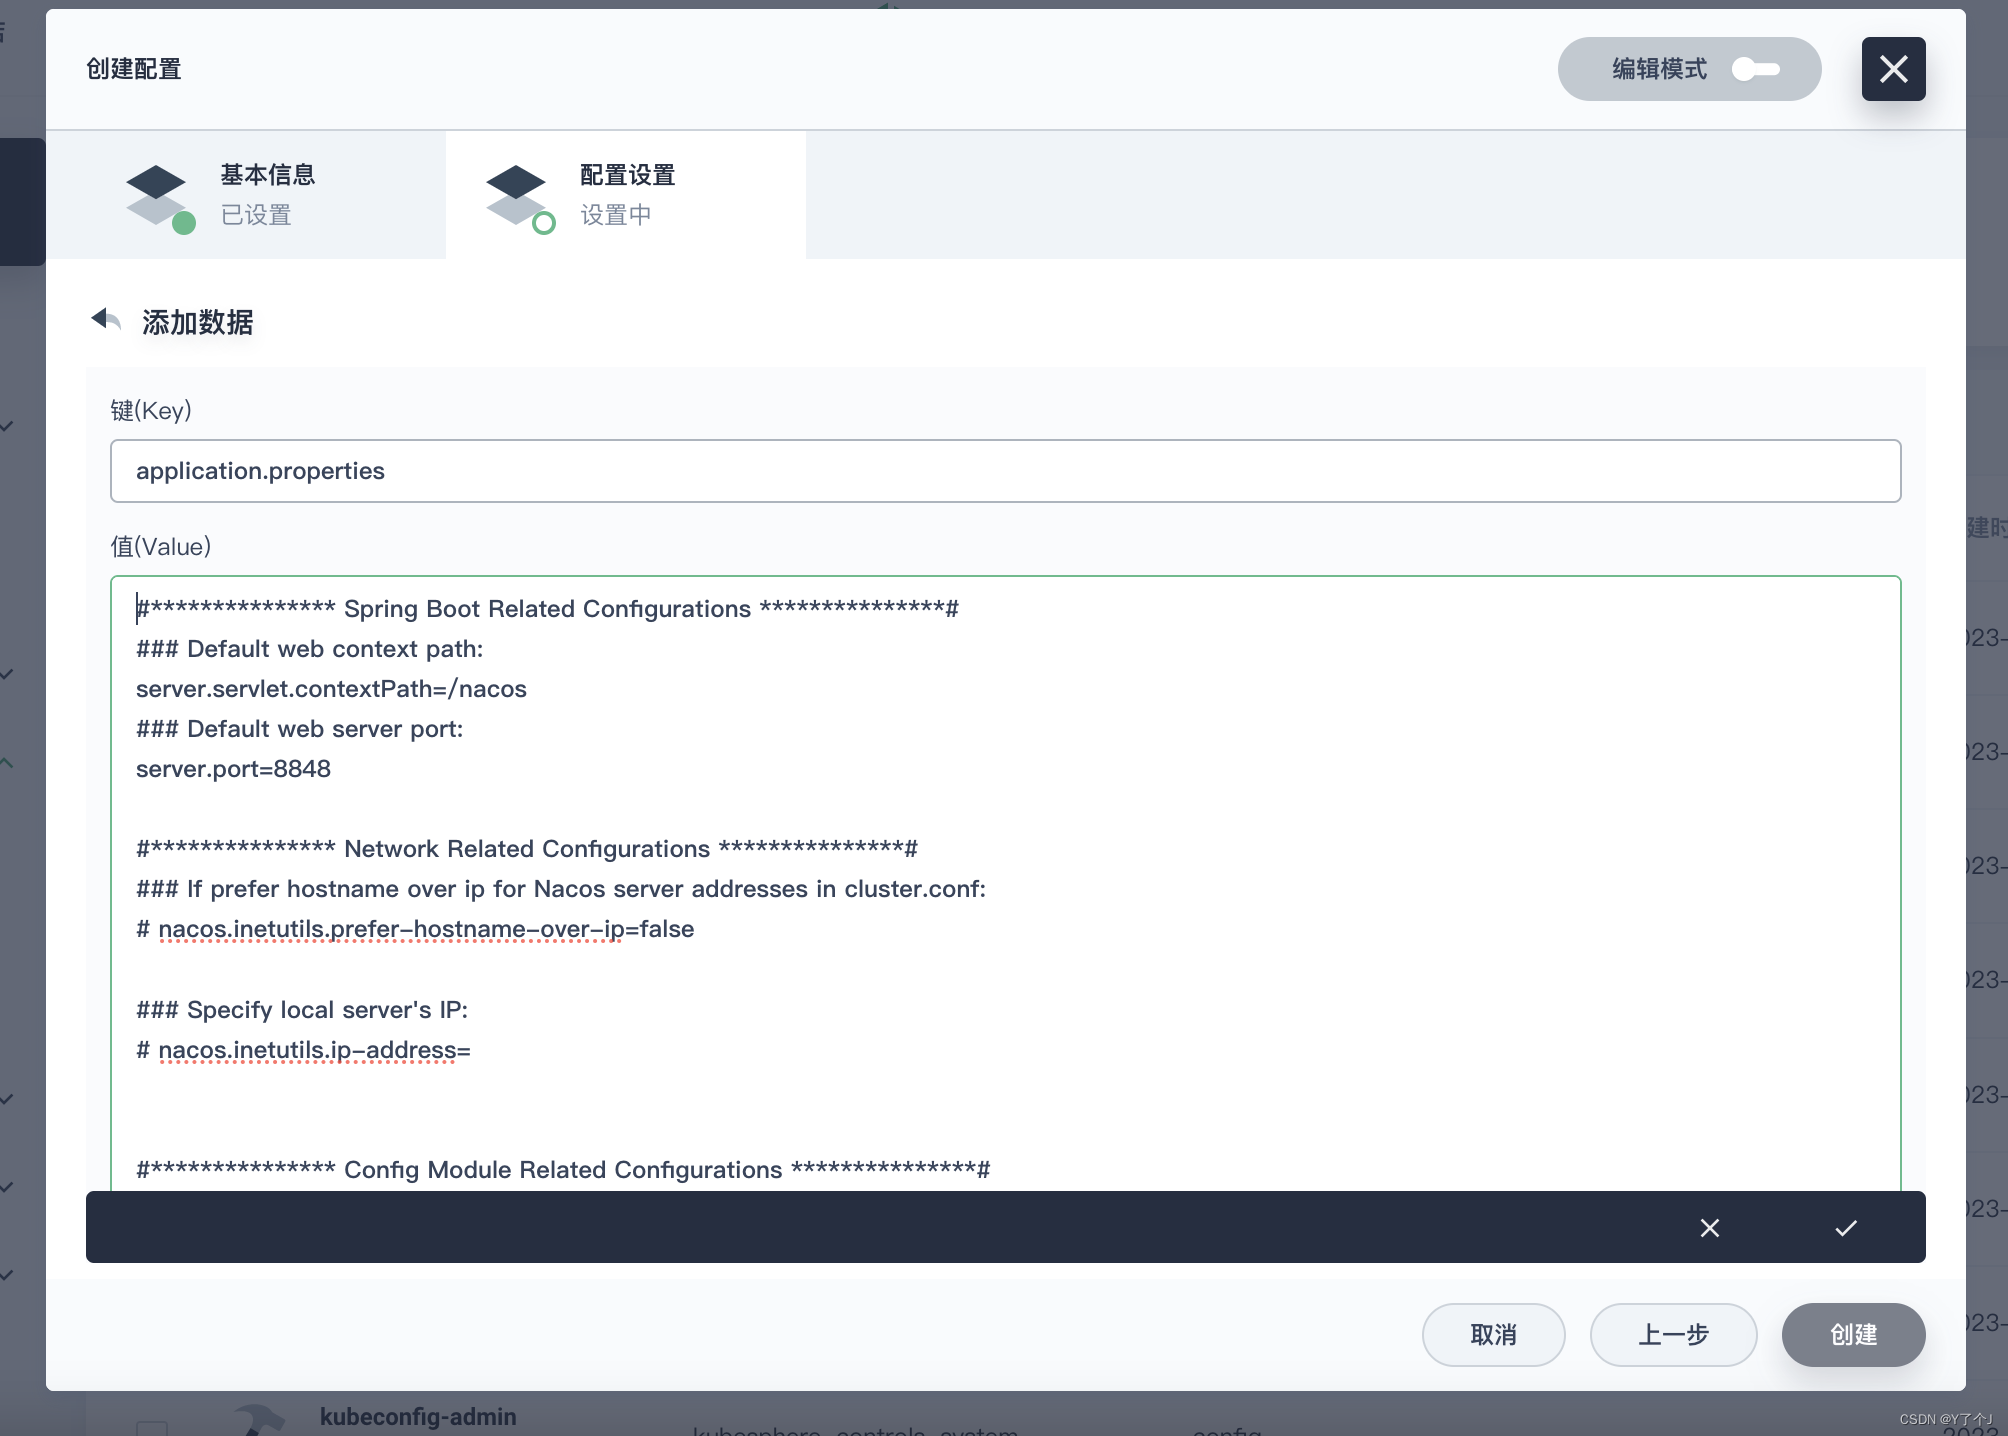
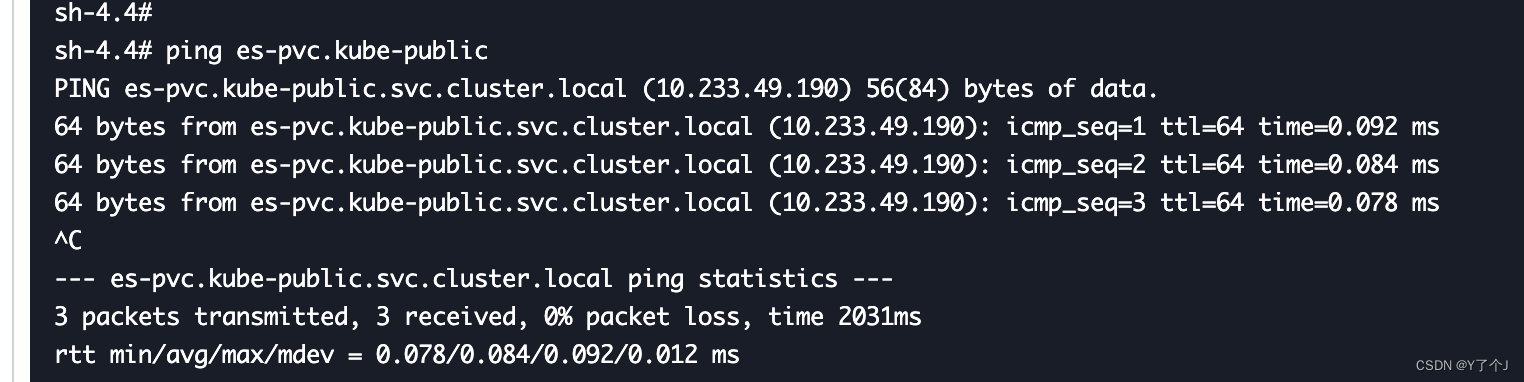 我们这nacos启动三个pod,所以nacos pod的固定虚拟域名为 nacos-0.nacos-svc.kube-public.svc.cluster.local nacos-1.nacos-svc.kube-public.svc.cluster.local nacos-2.nacos-svc.kube-public.svc.cluster.local
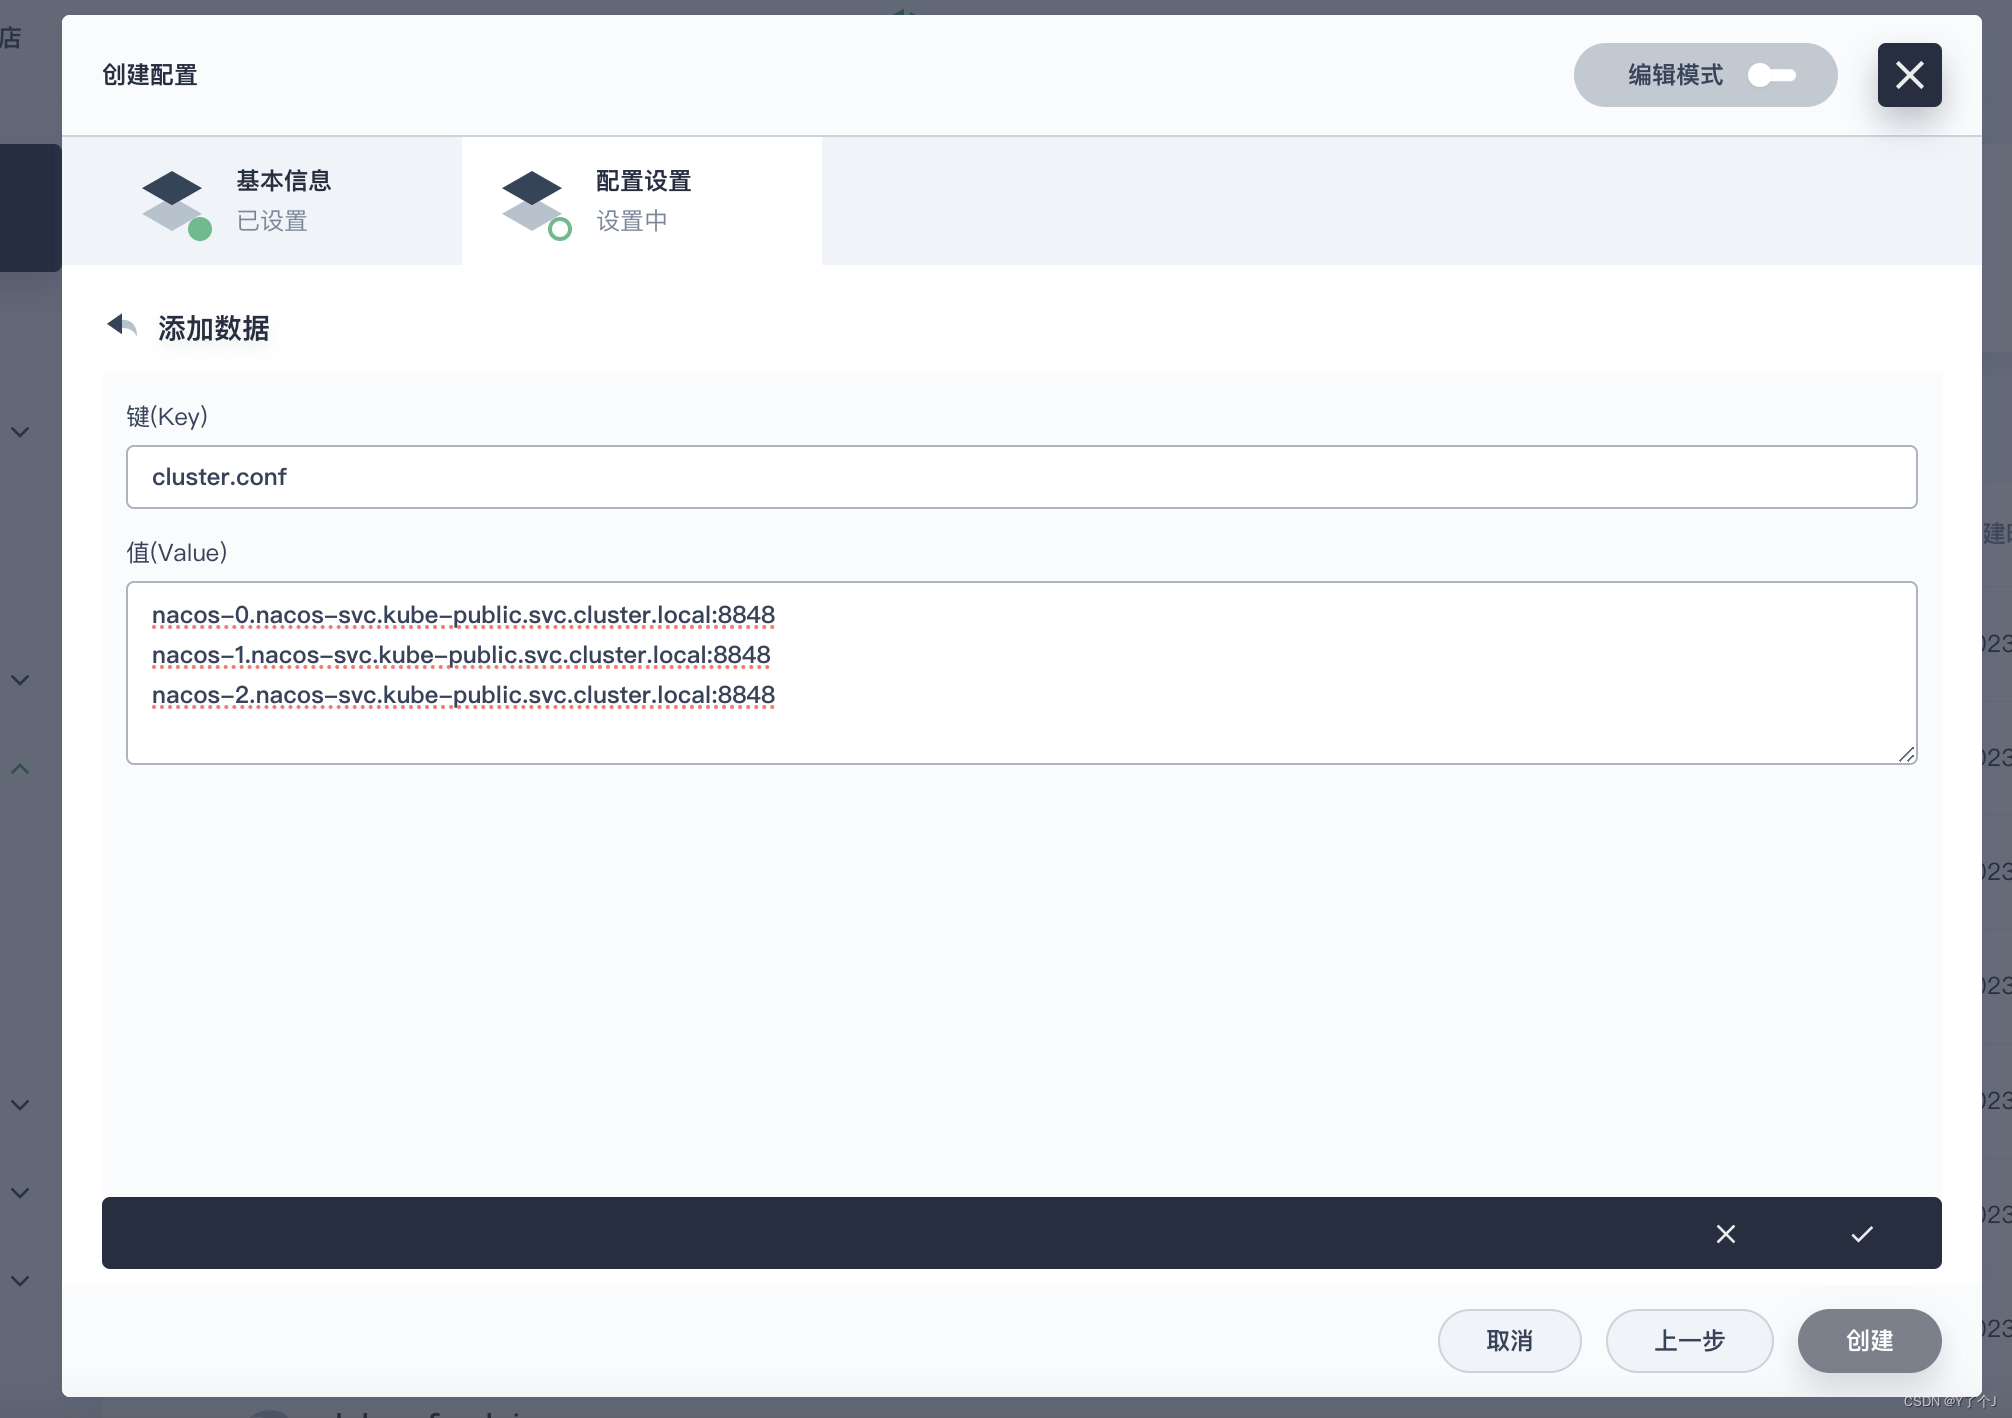
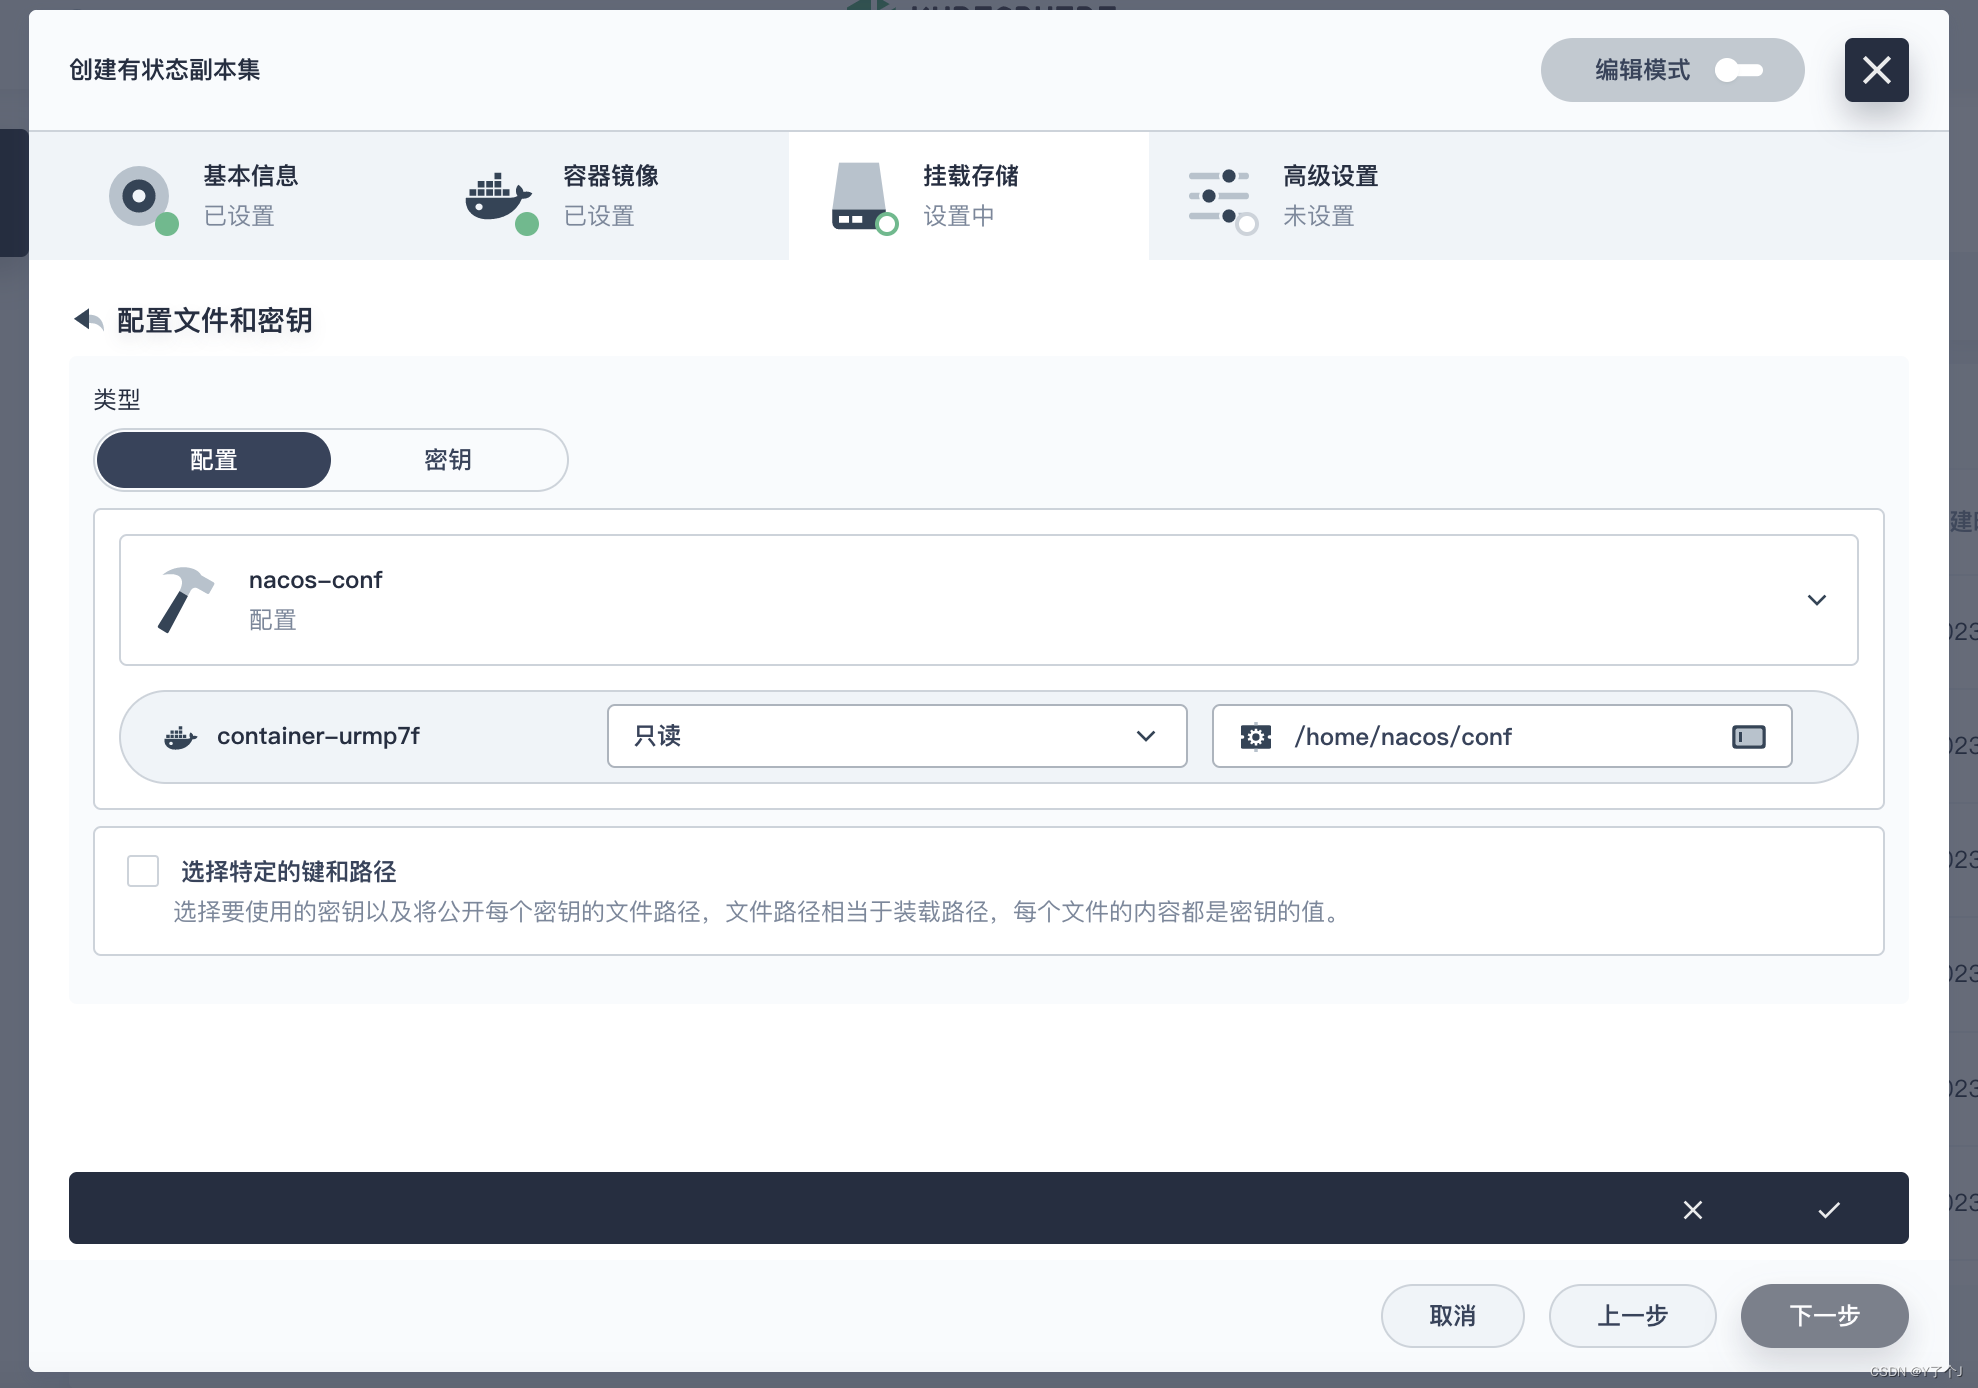 上面截图不对,挂载配置要以子路径的方式挂载,不然会覆盖掉conf下面其他配置。
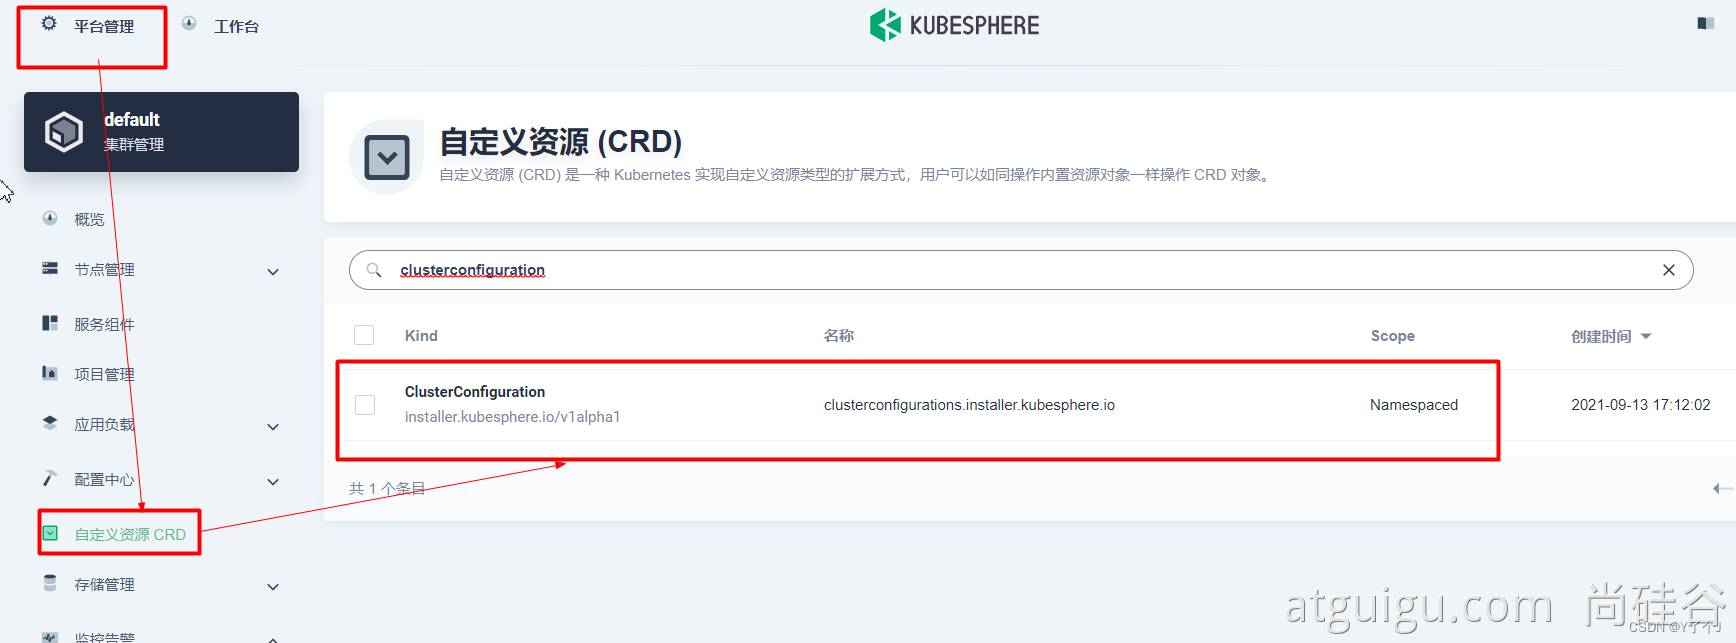
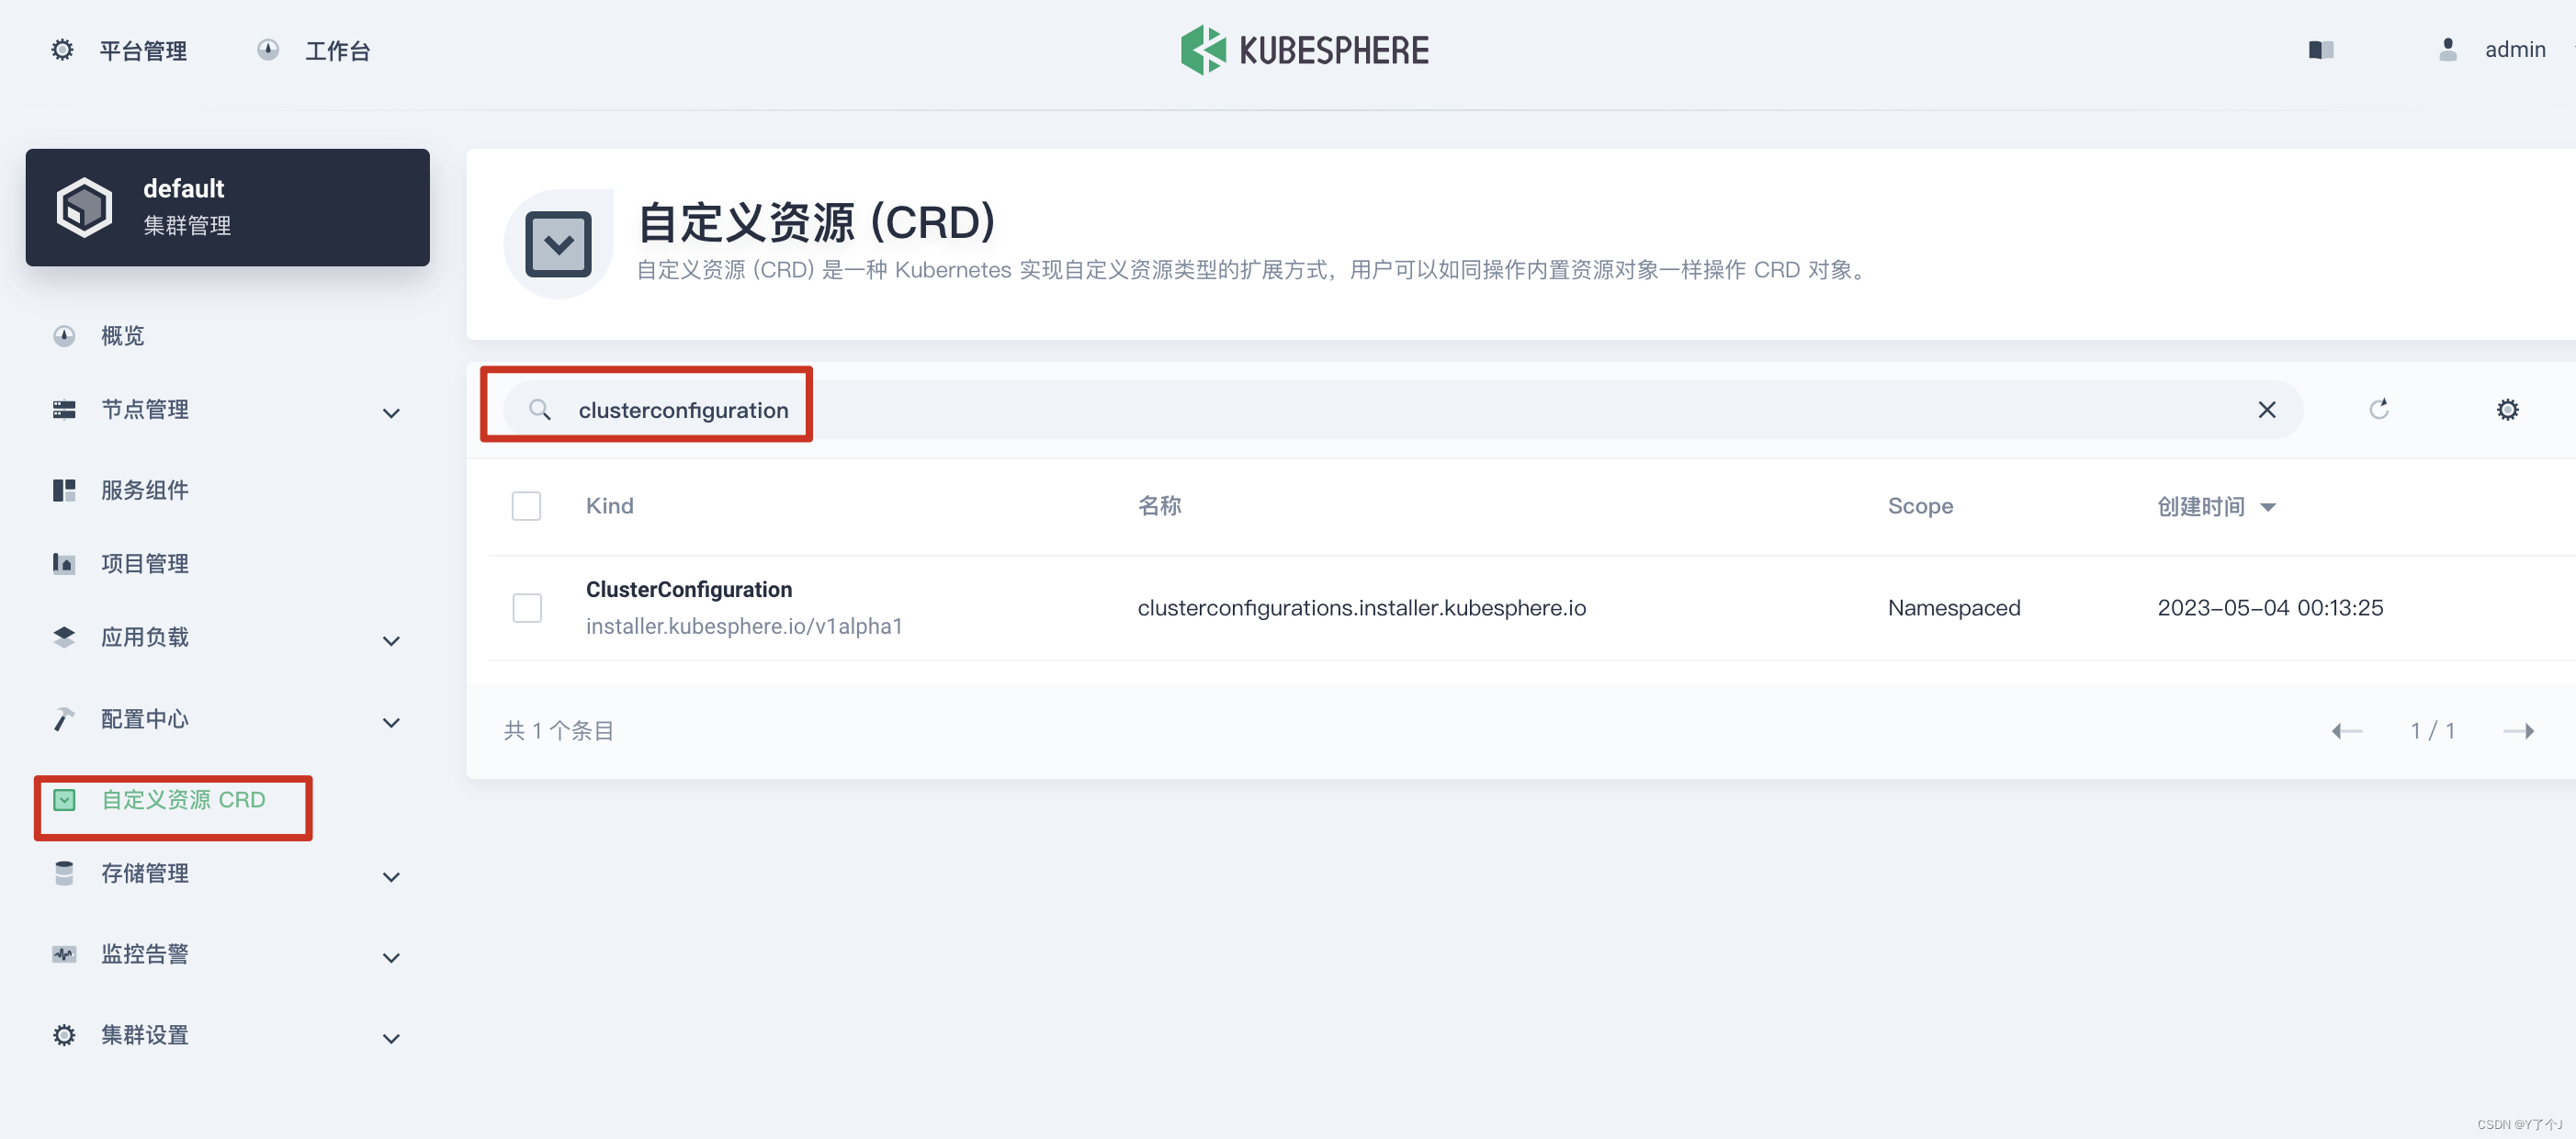 点击定制资源定义,在搜索栏中输入 clusterconfiguration,点击结果查看其详细页面。
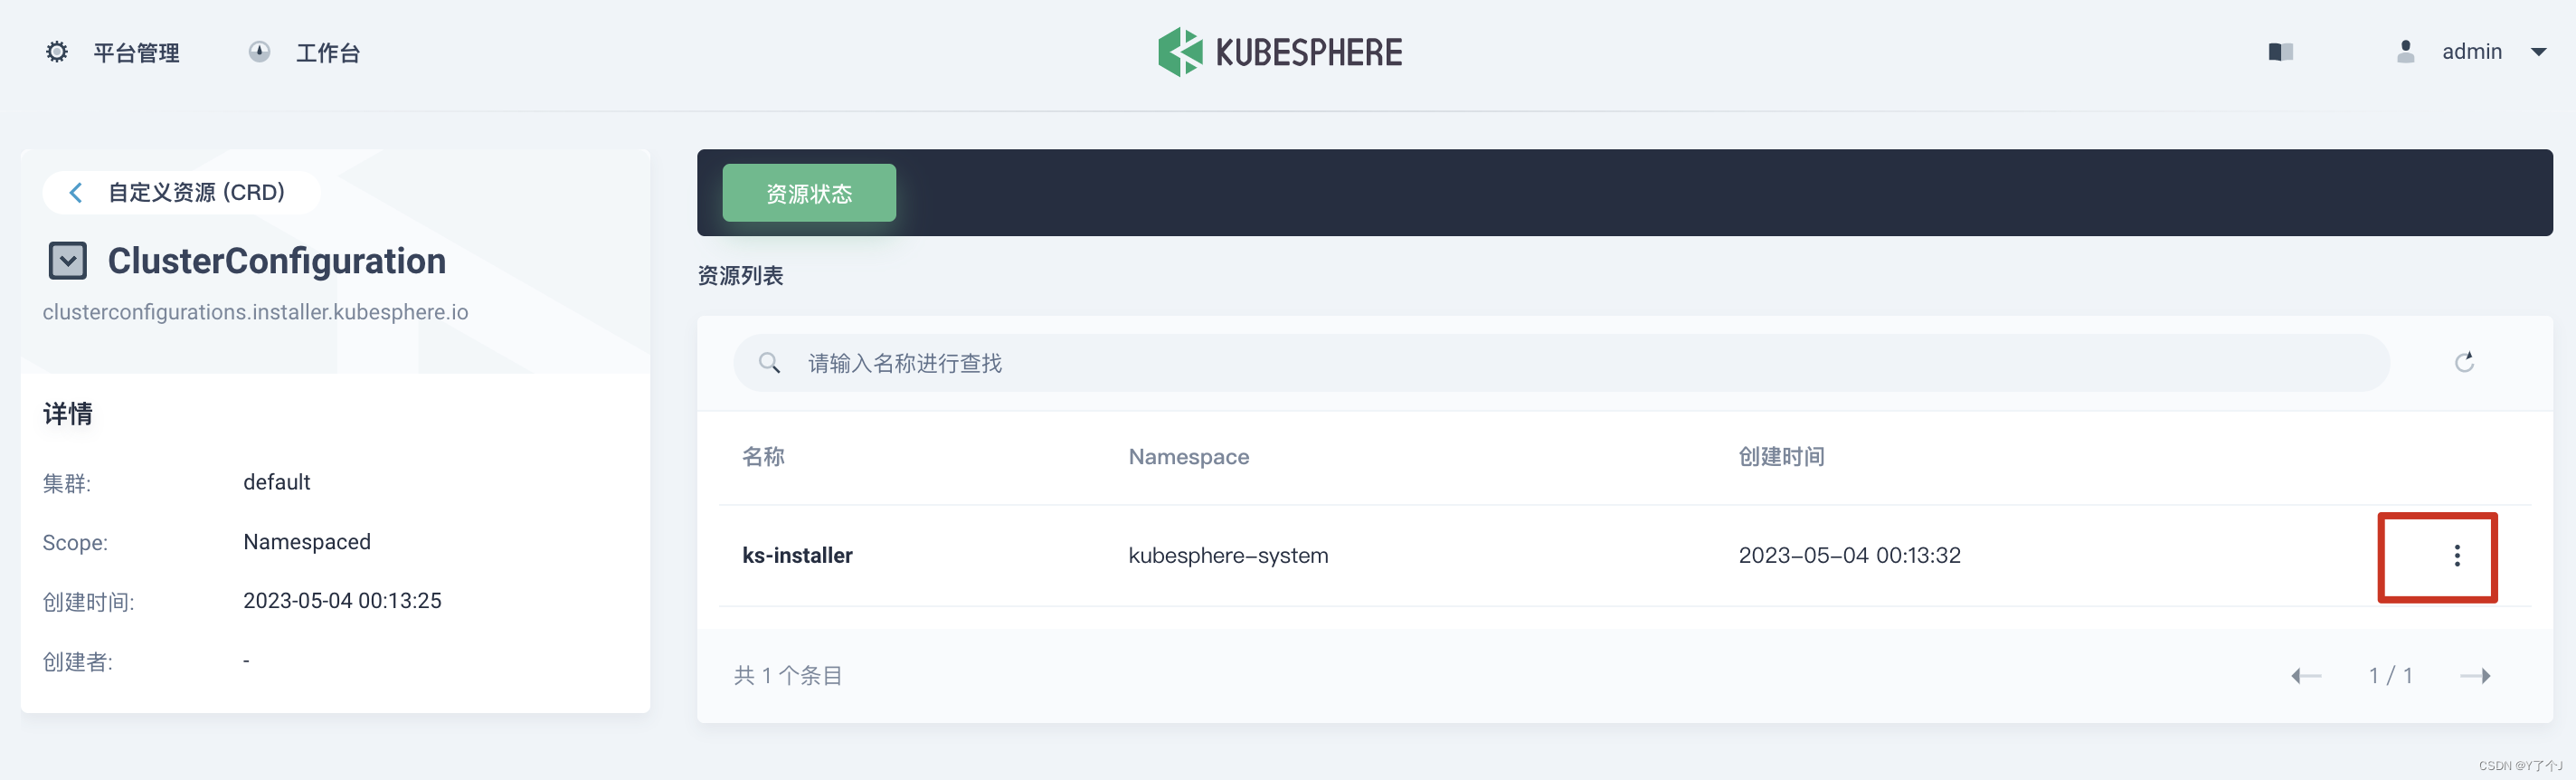
【本文地址】