| Android连接MySQL数据库(Android Studio环境下运行) | 您所在的位置:网站首页 › iis怎么连接本地数据库里的远程事例 › Android连接MySQL数据库(Android Studio环境下运行) |
Android连接MySQL数据库(Android Studio环境下运行)
|
1.环境配置:
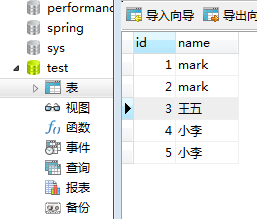
(1)Android Studio软件(附带可以运行正常测试) (2)Mysql软件 (3)Mysql对应的jar包. 2.详细步骤(1)MySQL数据:如下图
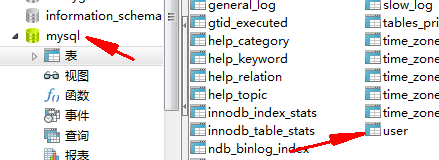
MySQL库下面默认有个user用户表,创建一个新的用户(为了权限的使用))
MySQL中创建一个用户并为其设置权限.
代码使用本机的IP地址连接数据库,不能使用localhost进行
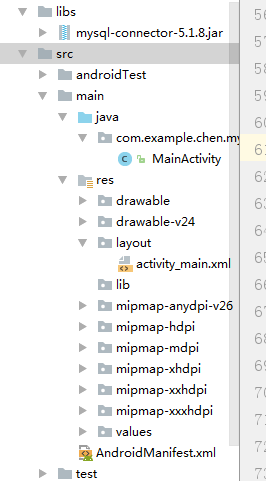
(1)创建工程(简单操作) (2)为工程导入mysql.jar包,自行操作 项目结构就这样
代码实现: (1)AndroidManifest.xml文件 注意增加了新的配置 数据库的时候用着两个
(2)布局文件,差个图片,自己导入就行哦 (3)主函数 package com.example.chen.myapplication; import android.graphics.Bitmap; import android.graphics.Canvas; import android.graphics.Color; import android.os.Environment; import android.support.v7.app.AppCompatActivity; import android.os.Bundle; import android.util.Log; import android.view.View; import android.widget.Button; import android.widget.ImageView; import android.widget.RadioButton; import android.widget.TextView; import org.w3c.dom.Text; import java.io.File; import java.io.FileOutputStream; import java.sql.Connection; import java.sql.DriverManager; import java.sql.PreparedStatement; import java.sql.ResultSet; import java.sql.SQLException; import java.sql.Statement; import java.util.Calendar; public class MainActivity extends AppCompatActivity implements View.OnClickListener { private ImageView imageView; private TextView textView; private Button button; private RadioButton radioButton1; private RadioButton radioButton2; private RadioButton radioButton3; //连接数据库 private String url="jdbc:mysql://192.168.65.99:3306/test"; private String user="rootes"; private String password="123456"; PreparedStatement statement=null; Statement stat=null; Connection conn=null; @Override protected void onCreate(Bundle savedInstanceState) { super.onCreate(savedInstanceState); setContentView(R.layout.activity_main); imageView=(ImageView)findViewById(R.id.imageView); textView=(TextView)findViewById(R.id.textView); button=(Button)findViewById(R.id.button); button.setOnClickListener(this); radioButton1=(RadioButton)findViewById(R.id.radioButton1); radioButton2=(RadioButton)findViewById(R.id.radioButton2); radioButton3=(RadioButton)findViewById(R.id.radioButton3); radioButton1.setOnClickListener(this); radioButton2.setOnClickListener(this); radioButton3.setOnClickListener(this); //为按钮设置一个标记 button.setTag(0); radioButton1.setTag(1); radioButton2.setTag(2); radioButton3.setTag(3); } @Override public void onClick(View v) { Integer id=(Integer)v.getTag(); if(id==0) { new Thread(new Runnable() { @Override public void run() { try { Class.forName("com.mysql.jdbc.Driver"); java.sql.Connection cn= DriverManager.getConnection("jdbc:mysql://192.168.65.99/test","rootes","123456"); String sql="select name from test"; Statement st=(Statement)cn.createStatement(); ResultSet rs=st.executeQuery(sql); while(rs.next()){ String mybook=rs.getString("name"); System.out.println(mybook); Log.i("Mainactivity",mybook); } cn.close(); st.close(); rs.close(); System.out.println("连接数据库成功"); } catch (ClassNotFoundException e) { System.out.println("连接数据库失败"); e.printStackTrace(); } catch (SQLException e) { e.printStackTrace(); } } }).start(); //把imageView转换成Bitmap // Bitmap bitmap=loadBitmapFromView(imageView); //获取图像对应的RGB值.,并存入数据库中 //GetRGB(bitmap); // conn=getConnection(); //把bitmap转换成为一个文件 //InputPhoto(bitmap); //显示新的Bitmap图片 // imageView.setImageBitmap(bitmap); /// System.out.println("取像"); }else if(id==1){ System.out.println("价格"); }else if(id==2){ System.out.println("营养"); }else if(id==3){ System.out.println("品种"); } } ///获取图片的RGB值 private void GetRGB(Bitmap bitmap) { int w=bitmap.getWidth(); int h=bitmap.getHeight(); StringBuffer sql=new StringBuffer(); sql.append("insert into tb_rgb(x,y,r,g,b,rgb)values "); for(int i=1;i16)&0xff; int g =( argb>>8)&0xff; int b =argb&0xff; int a =(argb>>24)&0xff; int rgb =(a |


【本文地址】
公司简介
联系我们