| SpringMvc入坑系列(一) | 您所在的位置:网站首页 › idea找不到springmvc插件 › SpringMvc入坑系列(一) |
SpringMvc入坑系列(一)
|
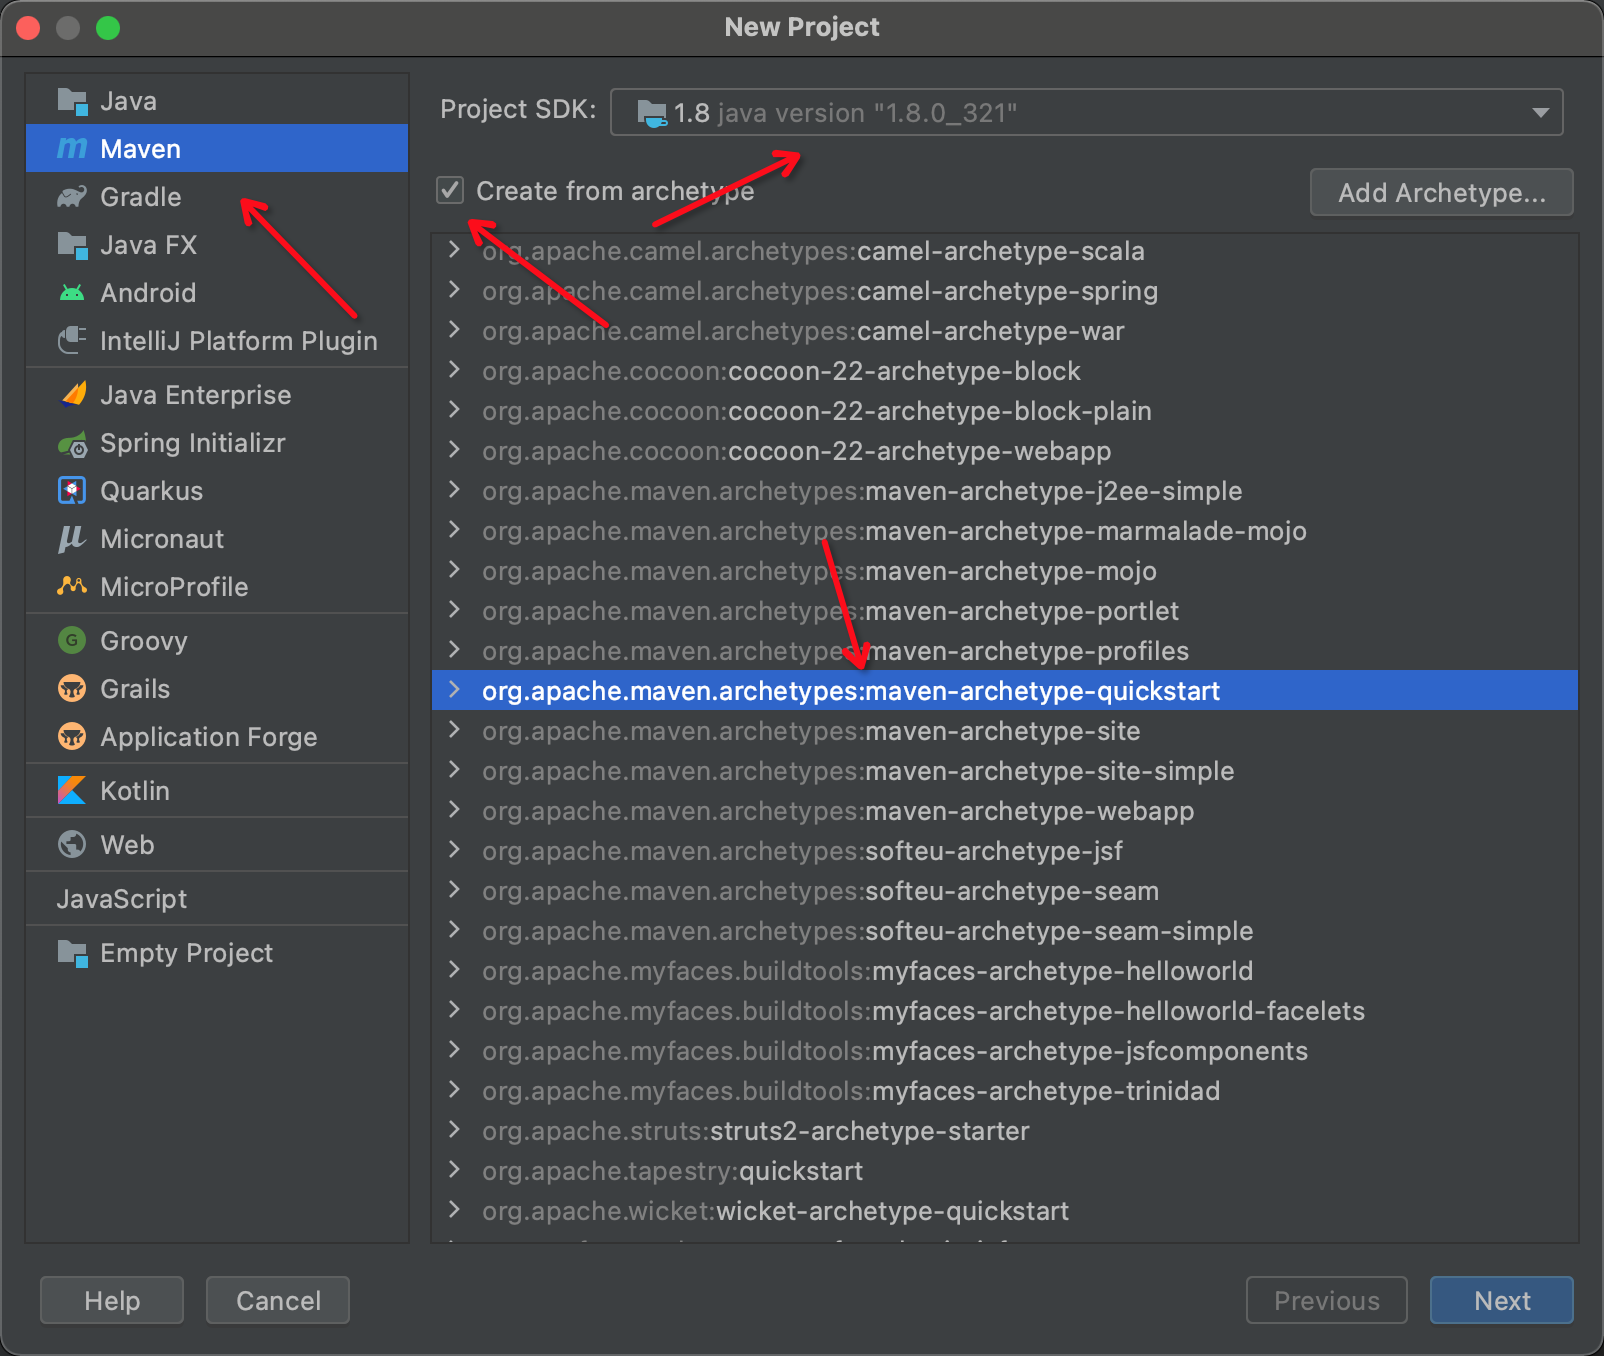
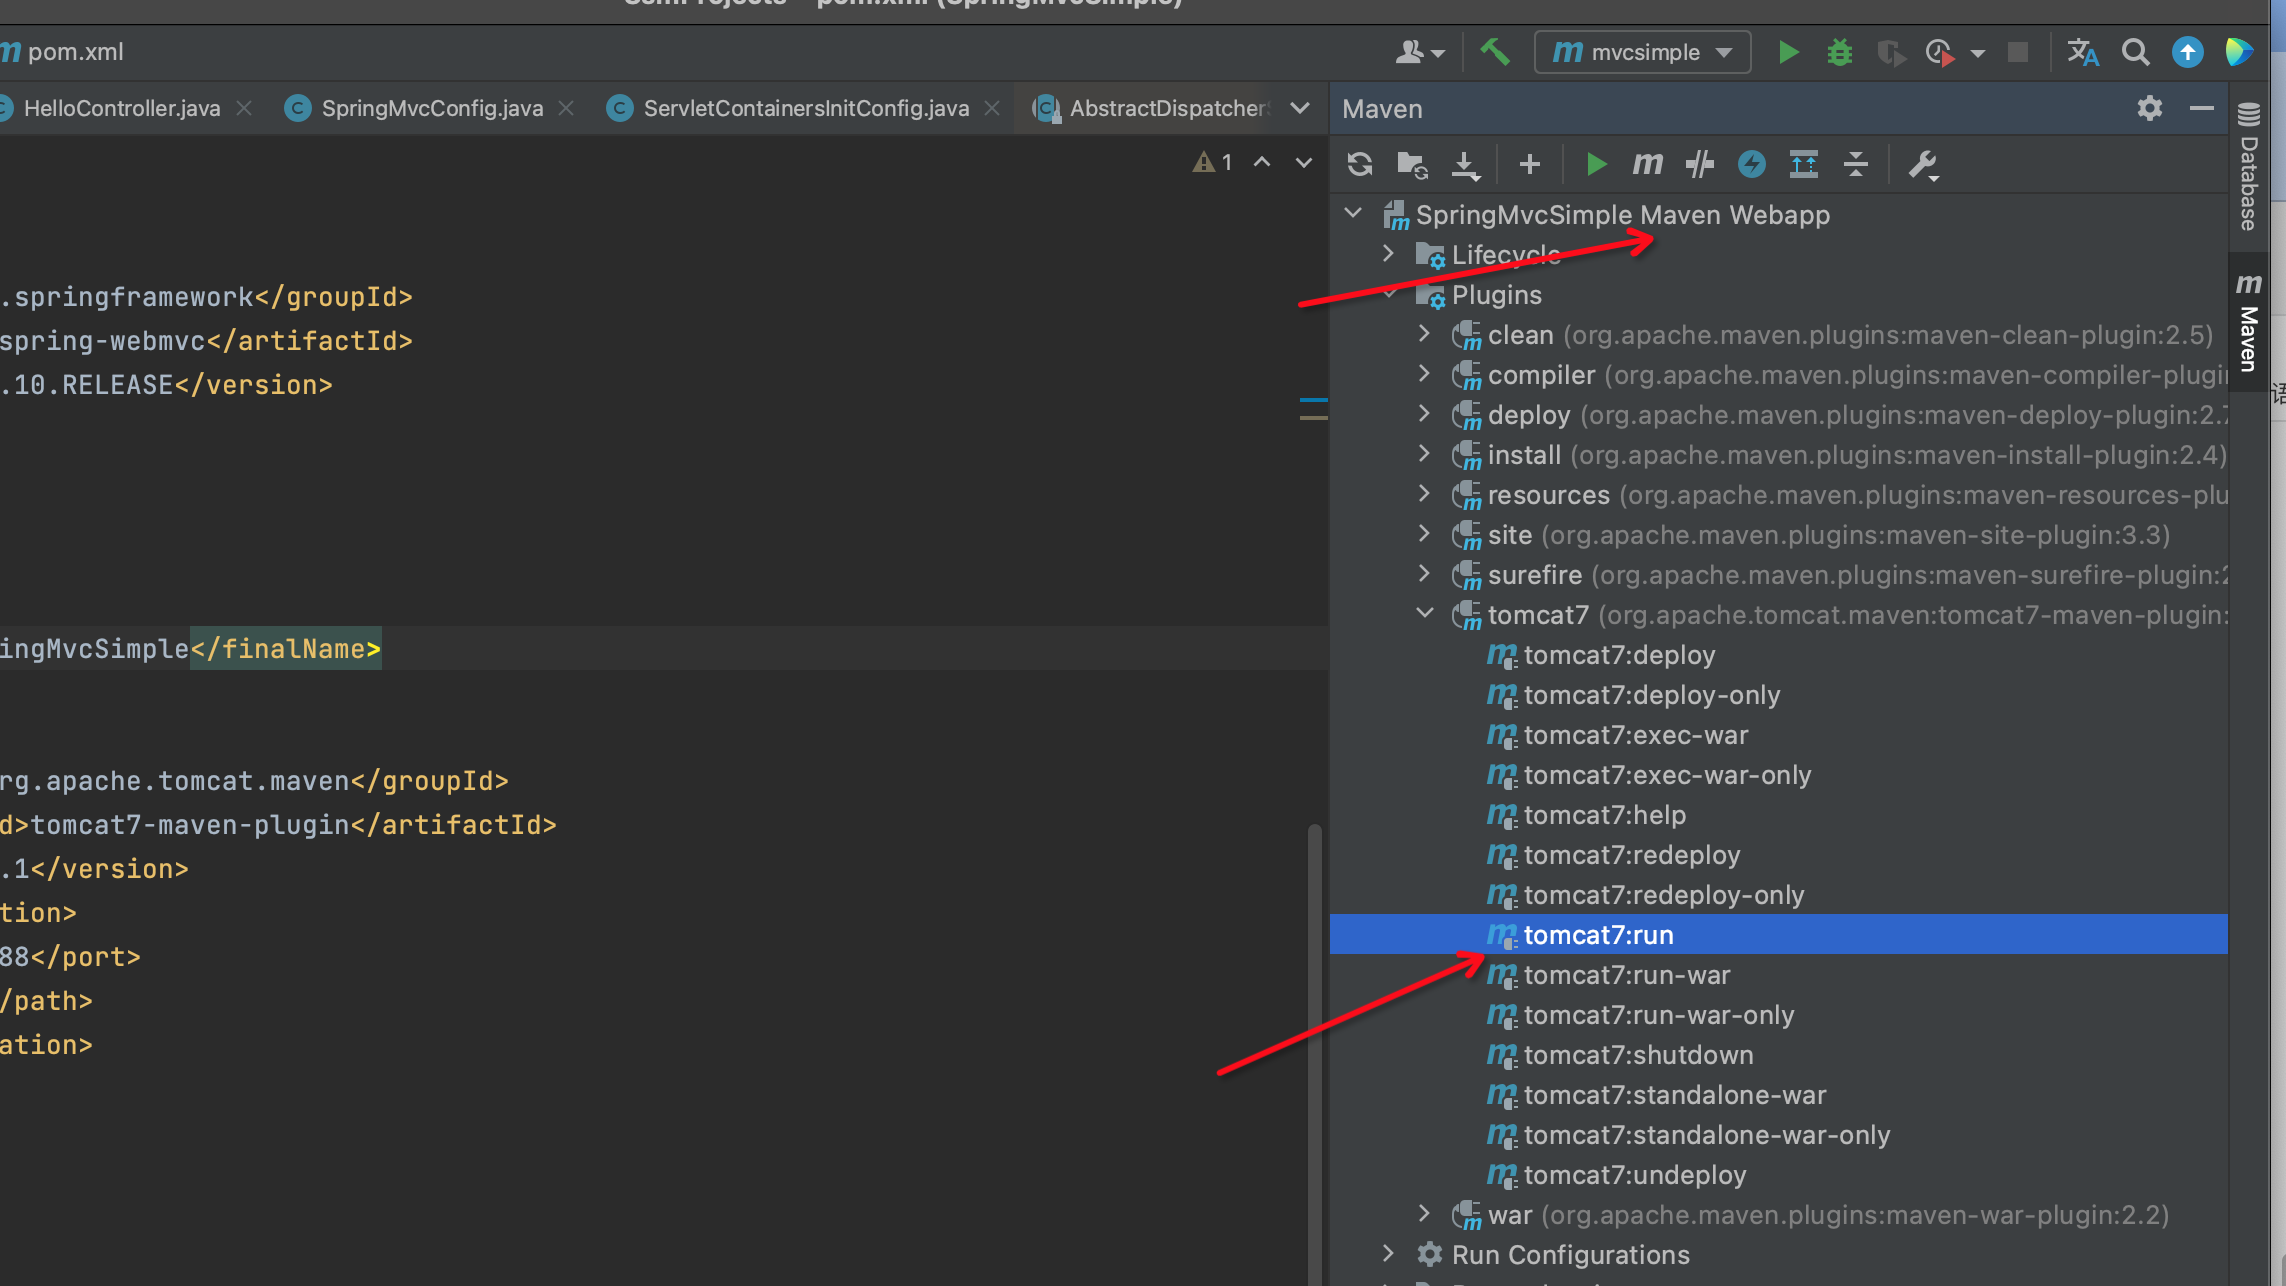
springboot傻瓜式教程用久了,回过来研究下SSM的工作流程,当然从Spring MVC开始,从傻瓜式入门处理请求和页面交互,再到后面深入源码分析。 本人写了一年多的后端和半年多的前端了。用的都是springbioot和vue,源码一直来不及时间看,就先从SSM开刀吧~ 一、SpringMvc入门之用tomcat插件使用MVCweb项目打印Hello World! 1、新建一个空项目File- New-Project -----选择Maven 然后SDK选择1.8 File- New - Module 1、servlet-api的依赖 这个一定要写 provided 不然tomcat启动失败 2、既然mvc就要添加webmvc依赖 3、填写tomcat插件依赖 最后 记得刷新maven 4.0.0 org.example SpringMvcSimple 1.0-SNAPSHOT war SpringMvcSimple Maven Webapp http://www.example.com UTF-8 1.7 1.7 junit junit 4.11 test javax.servlet javax.servlet-api 3.1.0 provided org.springframework spring-webmvc 4.3.10.RELEASE SpringMvcSimple org.apache.tomcat.maven tomcat7-maven-plugin 2.1 8088 /4、配置tomcat容器 1、记得一定要配置工作目录 选择你要启动的项目目录 2、命令行 写 tomcat7:run 这个是会自己提示的,如果没有提示说明你的tomcat插件依赖有问题,记得刷新maven依赖 3、另外这个tomcat启动其实也可以直接从你项目的依赖下启动 即双击即可启动容器 这个主要用来配置mvc环境以及 将我们需要的配置注册进来。SpringMvcConfig被注册进来 public class ServletContainersInitConfig extends AbstractDispatcherServletInitializer { /** * 用于创建并配置DispatcherServlet应用程序上下文。 * @return */ @Override protected WebApplicationContext createServletApplicationContext() { AnnotationConfigWebApplicationContext ctx = new AnnotationConfigWebApplicationContext(); ctx.register(SpringMvcConfig.class); return ctx; } /** * 是一个抽象方法,返回DispatcherServlet映射路径的字符串数组。 * 哪些路径被mvc 管理 * @return */ @Override protected String[] getServletMappings() { return new String[]{"/"};//所有路径交给 mvc 管理 } @Override protected WebApplicationContext createRootApplicationContext() { return null; } }mvc配置 此时自动去扫描我们的com.item.controller包注入到容器中 @Configuration @ComponentScan({"com.item.controller"}) public class SpringMvcConfig { }接下来启动tomcat 访问 端口 http://localhost:8088/hello 即可将请求打到控制层 返回数据 hello world123 至此,一个简单的mvc web应用就启动了。 5、优化加载配置我们上面用的继承 AbstractDispatcherServletInitializer这个类然后加载我们的mvc配置进而初始化webmvc容器,接下来用 继承 AbstractAnnotationConfigDispatcherServletInitializer完成同样的工作。 public class ServletContainersInitConfig2 extends AbstractAnnotationConfigDispatcherServletInitializer { @Override protected Class[] getRootConfigClasses() { return new Class[0]; } @Override protected Class[] getServletConfigClasses() { return new Class[]{SpringMvcConfig.class}; } @Override protected String[] getServletMappings() { return new String[]{"/"}; } }这个也能完成初始化webmvc的配置 6、处理乱码问题 post请求乱码post请求处理乱码(注意是post请求!!!) 添加一个中文编码的过滤器即可 在 刚才写的 AbstractAnnotationConfigDispatcherServletInitializer继承此类 ,实现其 getServletFilters 即可 @Override protected Filter[] getServletFilters() { CharacterEncodingFilter filter=new CharacterEncodingFilter(); filter.setEncoding(Charset.defaultCharset().name()); return new Filter[]{filter}; }然后使用 curl命令发送post请求 curl 'http://localhost:8088/chinese' -d 'name=你好' -d 'address=哈哈'控制台打印未出现乱码. get请求乱码这个是发送请求是 参数不在请求体中,直接在url后面。这个可以在tomcat插件配置中增加 UTF-8解决。 发送get请求 curl 'http://localhost:8088/chinese?name=你好&address=123' 发现控制台就不乱码了 7、页面交互处理静态资源 1、报错过程分析在webapp目录下创建 views/books.html DOCTYPE html> Title 欢迎来到书籍页面接下来浏览器输入 http://localhost:8088/views/books.html 报错 : HTTP Status 404 - type Status report message description The requested resource is not available. Apache Tomcat/7.0.37很显然,404找不到资源了。说明mvc不知道如何处理这个资源。它实际上是把这个views/books.html当成请求去controler层匹配请求了。但是我们这个是静态页面,实际就是去访问静态资源而已。那么接下来就是这么让容器知道这个是静态资源?不把它当成请求处理呢? 2、springMVC放行静态资源交给tomcat容器处理造成的原因: 显然在 ServletContainersInitConfig2 类中 我们springMvc拦截了所有的请求。 @Override protected String[] getServletMappings() { return new String[]{"/"}; }解决办法:(有很多种,此处是 继承 WebMvcConfigurationSupport类 然后实现其 添加资源方法 进行放行静态资源。同时记得 此类需要加载到 mvc环境中,具体看下面步骤) 1、配置类过滤静态资源在 com.item.config 包下 编写 SpringMvcSupport 去实现过滤静态资源 一、注意加上@Configuration 这个是为了 SpringMvcConfig 去扫描这个包时,把它注入到mvc环境中 二、重写 addResourceHandlers 方法 这个就是处理映射请求的。 @Configuration public class SpringMvcSupport extends WebMvcConfigurationSupport { /** * 资源处理 * @param registry */ @Override protected void addResourceHandlers(ResourceHandlerRegistry registry) { registry //当访问 /views/** 这个路径 我们让它 访问资源路径 /views/ .addResourceHandler("/views/**") .addResourceLocations("/views/") ; super.addResourceHandlers(registry); } } 2、注入到Mvc环境中一、我们新加了 com.item.config 这个包 就是让他去扫描这个包 注入Mvc中的 @Configuration @ComponentScan({"com.item.controller","com.item.config"}) public class SpringMvcConfig { } 最后启动tomcat容器,访问 http://localhost:8088/views/books.html 可以看到页面 欢迎来到书籍页面 即成功。 |
 下一步 - 创建项目的名称
 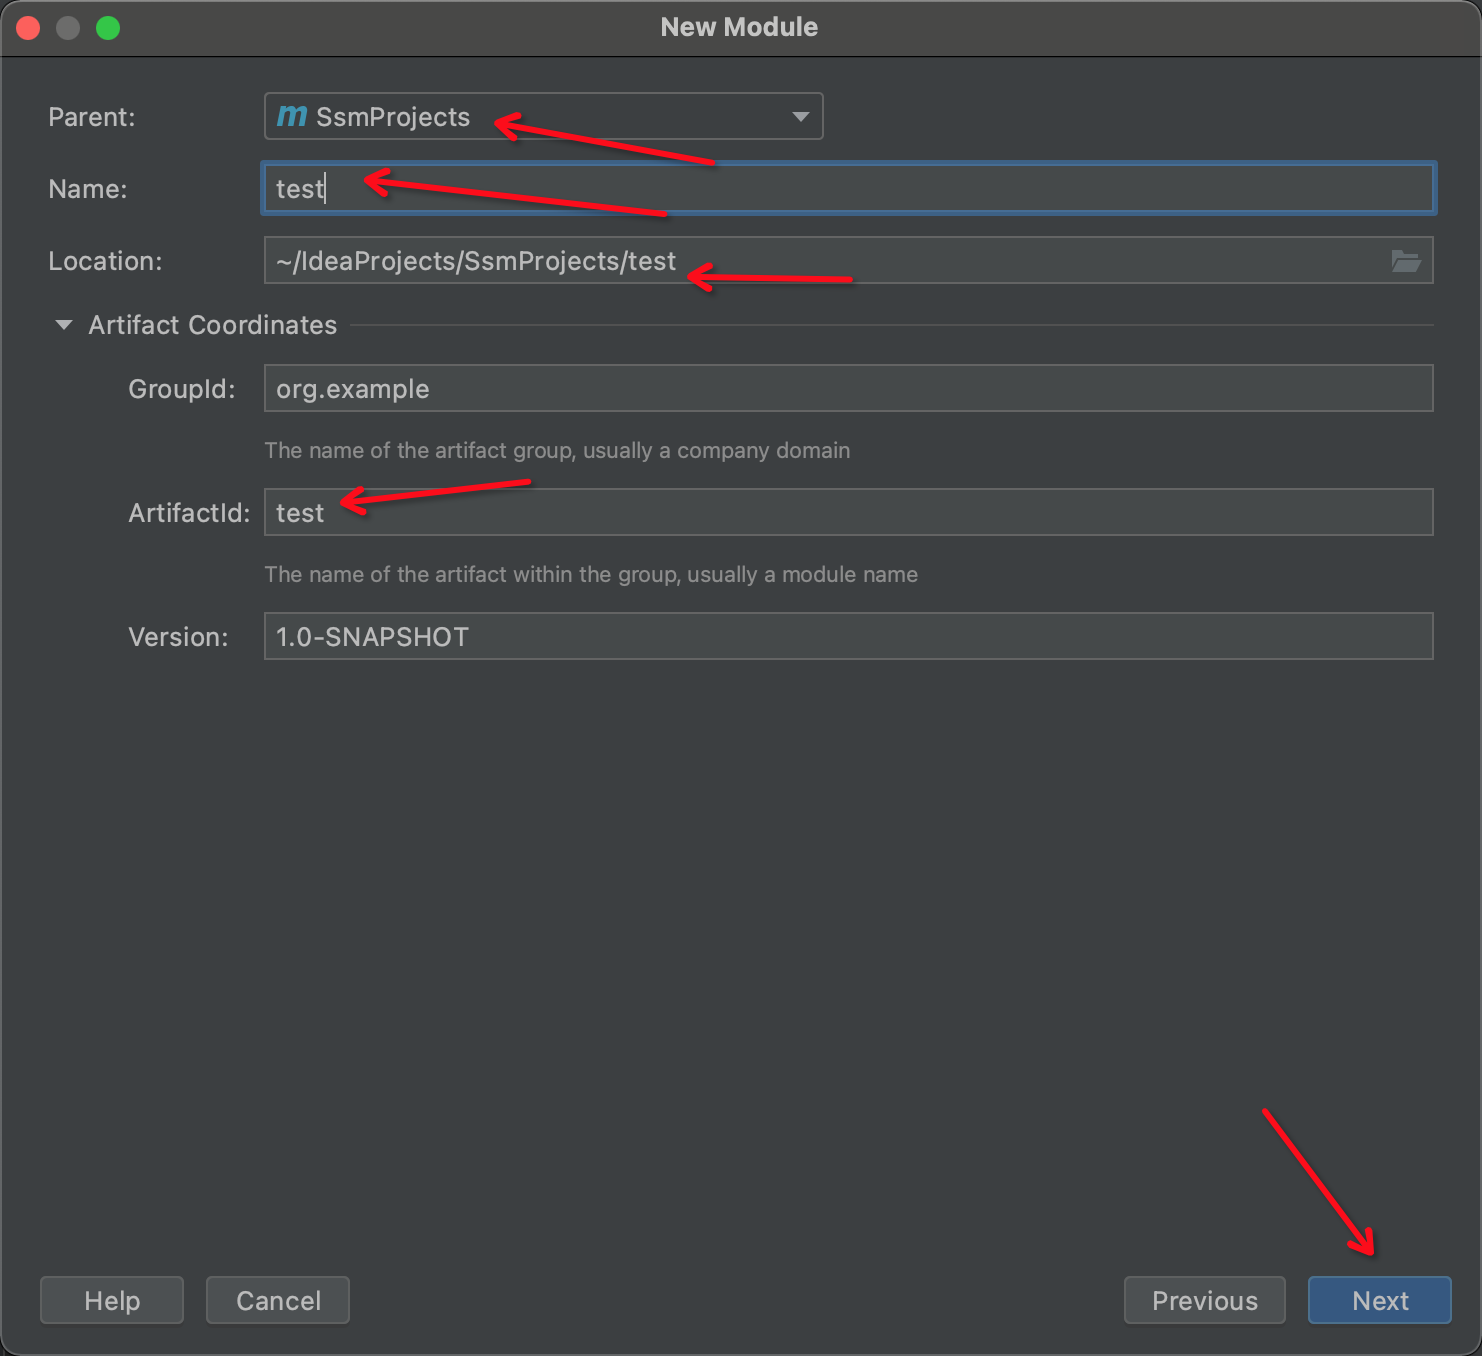 然后填写自己的maven坐标,即可完成模块的创建。
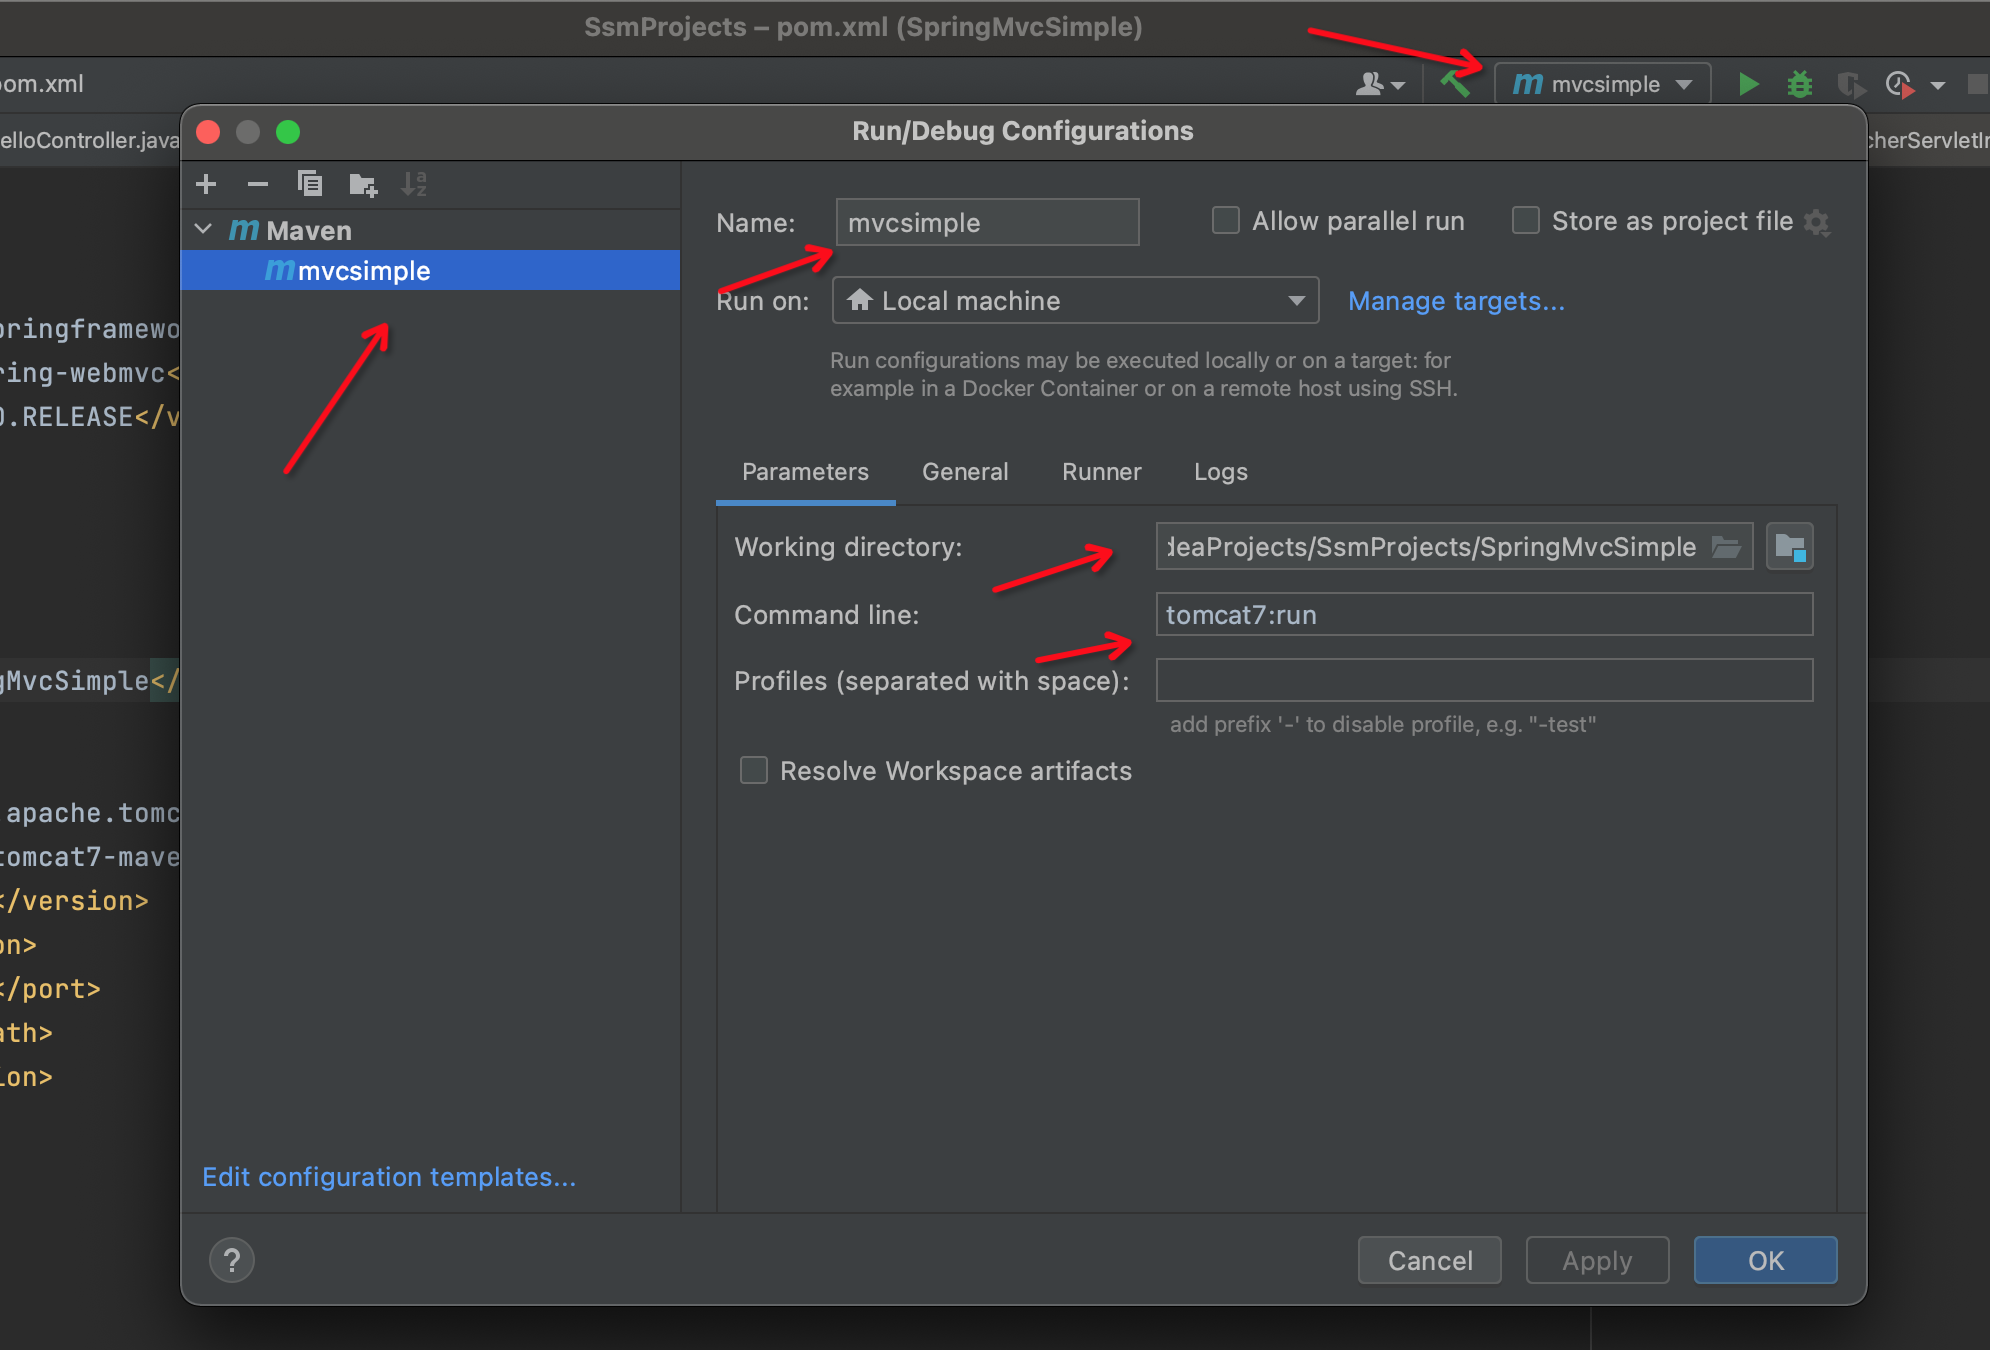
【本文地址】