| HTML+CSS+JS做出图片自动切换效果 | 您所在的位置:网站首页 › html页面切换动画效果 › HTML+CSS+JS做出图片自动切换效果 |
HTML+CSS+JS做出图片自动切换效果
|
HTML+CSS+JS,图片自动切换、鼠标移动触发切换效果(onmouseover获得当前元素id方法)
大学新手一枚,乱七八糟学了好多又忘了好多,以后要慢慢一点点记下来。 ================================================================ 效果图
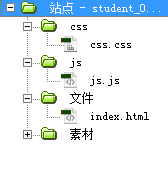
切换的图片我是设置了五张,长宽都一样,不放上来了。 index.html:

 css.css:
.center_photo{
width:100%;
margin:0;
padding:0;
height::1600px;
background:#c8d5b9;
}
.center_photo img{width:100%;height:100%;}
.point{
height:50px;
position:relative;
top:-60px;
width:240px;
margin:0 auto;
left:0px;
z-index:999;
text-align:center;
}
.point ul li{
width:20px;
height:20px;
margin:0 5px;
float:left;
list-style:none;
}
.point ul li img{width:20px;height:20px;}
.point ul li img:hover{cursor:pointer;}
js.js:
var min=1, max=5;
//设置切换的图片
var imgList = new Array();
imgList[0]="../素材/photo01.jpg";
imgList[1]="../素材/photo02.jpg";
imgList[2]="../素材/photo03.jpg";
imgList[3]="../素材/photo04.jpg";
imgList[4]="../素材/photo05.jpg";
//自动变化“小圆点”
var li_imgList = new Array();
li_imgList[0]="i1";
li_imgList[1]="i2";
li_imgList[2]="i3";
li_imgList[3]="i4";
li_imgList[4]="i5";
//鼠标触碰修改(这里感觉重复了,懒得改了。。)
var liList = new Array();
liList[0]="p1";
liList[1]="p2";
liList[2]="p3";
liList[3]="p4";
liList[4]="p5";
//自动循环
var int=self.setInterval("loop()",2000);
function loop(){
var str=document.getElementById("img").src;
for(var i=0; i
css.css:
.center_photo{
width:100%;
margin:0;
padding:0;
height::1600px;
background:#c8d5b9;
}
.center_photo img{width:100%;height:100%;}
.point{
height:50px;
position:relative;
top:-60px;
width:240px;
margin:0 auto;
left:0px;
z-index:999;
text-align:center;
}
.point ul li{
width:20px;
height:20px;
margin:0 5px;
float:left;
list-style:none;
}
.point ul li img{width:20px;height:20px;}
.point ul li img:hover{cursor:pointer;}
js.js:
var min=1, max=5;
//设置切换的图片
var imgList = new Array();
imgList[0]="../素材/photo01.jpg";
imgList[1]="../素材/photo02.jpg";
imgList[2]="../素材/photo03.jpg";
imgList[3]="../素材/photo04.jpg";
imgList[4]="../素材/photo05.jpg";
//自动变化“小圆点”
var li_imgList = new Array();
li_imgList[0]="i1";
li_imgList[1]="i2";
li_imgList[2]="i3";
li_imgList[3]="i4";
li_imgList[4]="i5";
//鼠标触碰修改(这里感觉重复了,懒得改了。。)
var liList = new Array();
liList[0]="p1";
liList[1]="p2";
liList[2]="p3";
liList[3]="p4";
liList[4]="p5";
//自动循环
var int=self.setInterval("loop()",2000);
function loop(){
var str=document.getElementById("img").src;
for(var i=0; i |


 素材文件夹里面都是所需的图片 鼠标触碰切换按钮图片,长宽都P成20px(我知道很丑,是随便找的图啦。。):

【本文地址】
公司简介
联系我们