| 前后端分离,后端flask,前端vue,nginx小示例 | 您所在的位置:网站首页 › flask配置mysql › 前后端分离,后端flask,前端vue,nginx小示例 |
前后端分离,后端flask,前端vue,nginx小示例
|
后端: flask 后端一定要注意flask配置 跨域支持事项,否则获取不了数据信息 1.跨域支持的配置 from flask_cors import CORS, cross_origin #跨域支持的配合 from flask import jsonify,render_template app=Flask(__name__) CORS(app, supports_credentials=True) #跨域支持 配置这些就是可以了,全局设置2.后端全部代码:“/api/books” from flask import Flask from flask_cors import CORS, cross_origin from flask import jsonify,render_template #跨域支持的配合 import sqlite3 app=Flask(__name__) CORS(app, supports_credentials=True) #跨域支持 # sqlite3 row_factory ,python推出了Cursor.Row对象。其实就是列名和值做了个映射,可以通过字符索引来获取值。很方便 # conn.row_factory = sqlite3.Row @app.route("/api/books") def books(): conn=sqlite3.connect("books.db") conn.row_factory=sqlite3.Row #把数据库的字段和查询的信息放在一起 cur=conn.cursor() sql="select * from books" rows=cur.execute(sql).fetchall() rowsdics=[dict(row) for row in rows] return jsonify(rowsdics) @app.route("/") def home(): return render_template("index.html",title="ht API") if __name__ == '__main__': app.run()api接口数据信息 :
前端vue2.x 步骤如下: 前提系统安装有node,配置淘宝源【提升下载速度】 1.配置步骤: ====================================== ==========默认创建文件的方式============================ 1.创建项目 #安装命令脚手架 C:\>npm install -g @vue/cli 2.创建项目 执行 vue create 项目名,然后选择vue2选项 注意点:选择你要存放项目的文件夹E:\htcode\vue>【我的项目文件夹】 E:\htcode\vue>vue create pmvuelab 3.选择配置文件,可以选择默认或者手动修改,等待下载包过程,最终按照提示进入项目并且运行即可 4.运行项目 进入项目文件夹 执行npm run serve 运行项目 npm run serve 5.访问验证 http://127.0.0.1:8080/ 到此搭建完成 ============= 1.下面把文件夹拖放到vscode中进行编辑 2. ui安装 npm i element-ui -S 3.安装axios 4.打包文件: npm run build 生成dist文件夹以及下面文件2.重要参数展示 main.js import Vue from 'vue' import App from './App.vue' import ElementUI from 'element-ui' import 'element-ui/lib/theme-chalk/index.css' Vue.use(ElementUI) Vue.config.productionTip = false new Vue({ render: h => h(App), }).$mount('#app')3.App.vue import axios from 'axios'; export default { data() { return { books:[] } }, mounted() { this.fetchData(); }, methods:{ //#######################vue-axios方式########################### //axios的调取方式 fetchData() { axios.get("http://127.0.0.1:5000/api/books") .then(respose=>(this.books=respose.data)) .catch(function (error) { console.log(error) }) } } }4.主要安装的版本内容 : "dependencies": { "axios": "^0.27.2", "core-js": "^3.8.3", "element-ui": "^2.15.8", "vue": "^2.6.14" },
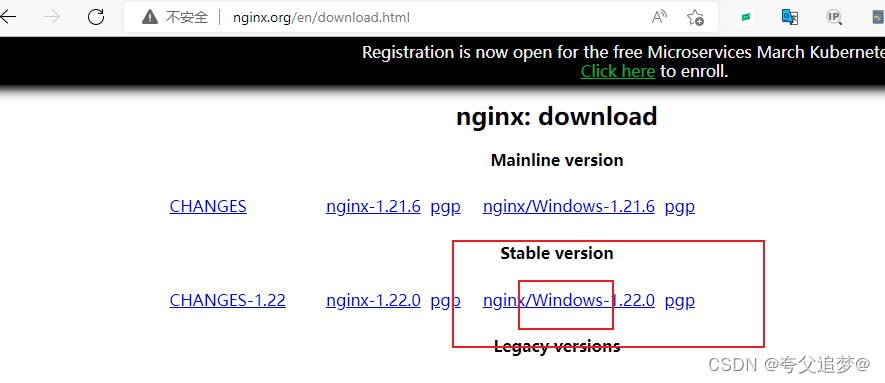
三.nginx配置信息: 下载地址“nginx: download nginx: download
3.1解压后放到不包含中文目录的盘符下
3.2修改配置文件,复制一份conf下的 “nginx.conf”为“ht.conf”
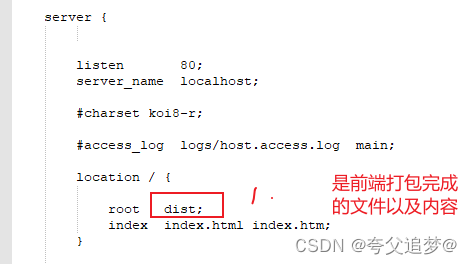
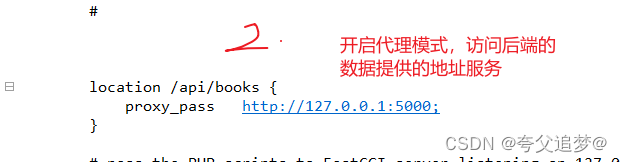
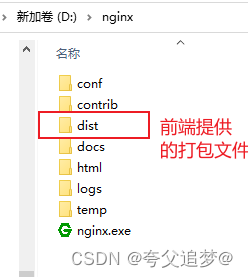
3.3需要修改的地方: 其他的不需要修改: 可以参考下我的配置文件内容如下: #user nobody; worker_processes 1; #error_log logs/error.log; #error_log logs/error.log notice; #error_log logs/error.log info; #pid logs/nginx.pid; events { worker_connections 1024; } http { #add_header 'Access-Control-Allow-Origin' '*'; #add_header 'Access-Control-Allow-Methods' 'GET,POST,OPTIONS'; #add_header 'Access-Control-Allow-Headers' 'Origin,X-Requested-With,Content-Type,Accept,Authorization'; include mime.types; default_type application/octet-stream; #log_format main '$remote_addr - $remote_user [$time_local] "$request" ' # '$status $body_bytes_sent "$http_referer" ' # '"$http_user_agent" "$http_x_forwarded_for"'; #access_log logs/access.log main; sendfile on; #tcp_nopush on; #keepalive_timeout 0; keepalive_timeout 65; #gzip on; server { listen 80; server_name localhost; #charset koi8-r; #access_log logs/host.access.log main; location / { root dist; index index.html index.htm; } #error_page 404 /404.html; # redirect server error pages to the static page /50x.html # error_page 500 502 503 504 /50x.html; location = /50x.html { root html; } # proxy the PHP scripts to Apache listening on 127.0.0.1:80 # location /api/books { proxy_pass http://127.0.0.1:5000; } # pass the PHP scripts to FastCGI server listening on 127.0.0.1:9000 # #location ~ \.php$ { # root html; # fastcgi_pass 127.0.0.1:9000; # fastcgi_index index.php; # fastcgi_param SCRIPT_FILENAME /scripts$fastcgi_script_name; # include fastcgi_params; #} # deny access to .htaccess files, if Apache's document root # concurs with nginx's one # #location ~ /\.ht { # deny all; #} } # another virtual host using mix of IP-, name-, and port-based configuration # #server { # listen 8000; # listen somename:8080; # server_name somename alias another.alias; # location / { # root html; # index index.html index.htm; # } #} # HTTPS server # #server { # listen 443 ssl; # server_name localhost; # ssl_certificate cert.pem; # ssl_certificate_key cert.key; # ssl_session_cache shared:SSL:1m; # ssl_session_timeout 5m; # ssl_ciphers HIGH:!aNULL:!MD5; # ssl_prefer_server_ciphers on; # location / { # root html; # index index.html index.htm; # } #} }3.5运行nginx服务:[运行前把vue打包的文件生成的dist文件夹以及文件放在nginx的目录下] 指定配置文件的运行,配置文件为ht.conf D:\nginx>nginx.exe -c .\conf\ht.conf
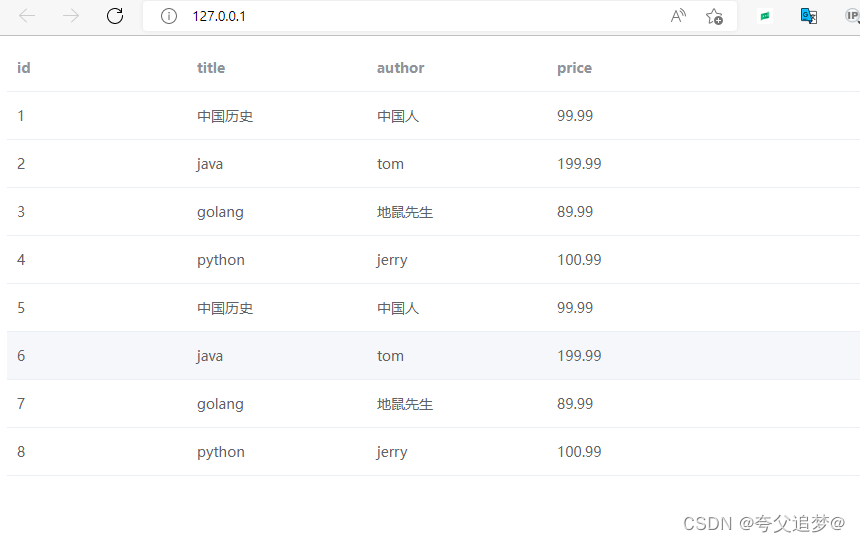
3.6运行以及展示文件内容:
3.7总结: 在这个过程中,跨域的问题研究了很久,最终通过flask的,cors解决了这个问题: from flask_cors import CORS, cross_origin #跨域支持的配合 from flask import jsonify,render_template import sqlite3 app=Flask(__name__) CORS(app, supports_credentials=True) #跨域支持 |


【本文地址】
公司简介
联系我们