| vue canvas 基础入门 | 您所在的位置:网站首页 › canvas画海报 › vue canvas 基础入门 |
vue canvas 基础入门
|
vue canvas 基础入门
vue canvas 基础入门canvasCanvas Apicanvas Init 初始化canvas 绘制鼠标事件监听canvas initcanvas 绘制
增加功能
vue canvas 基础入门
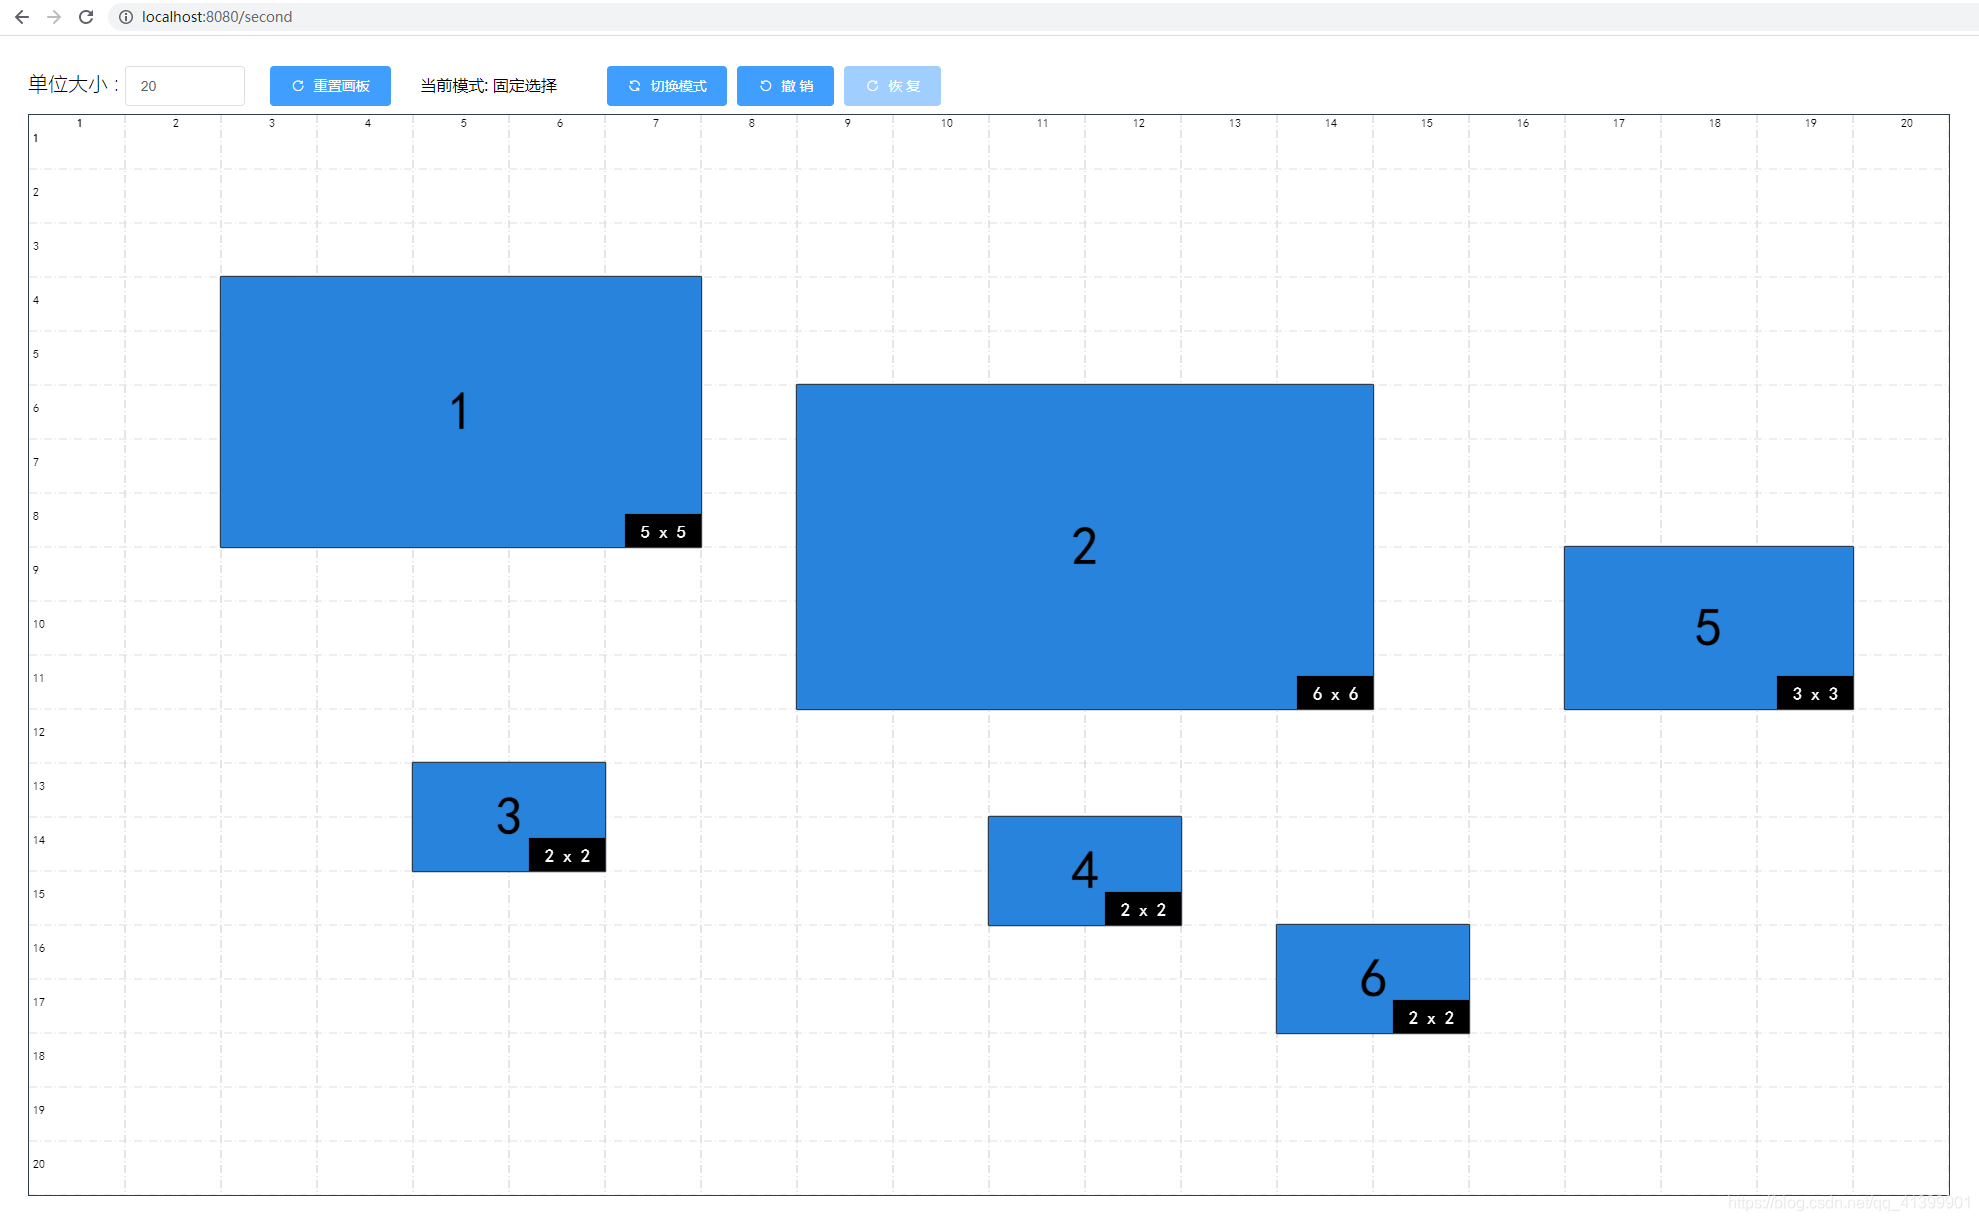
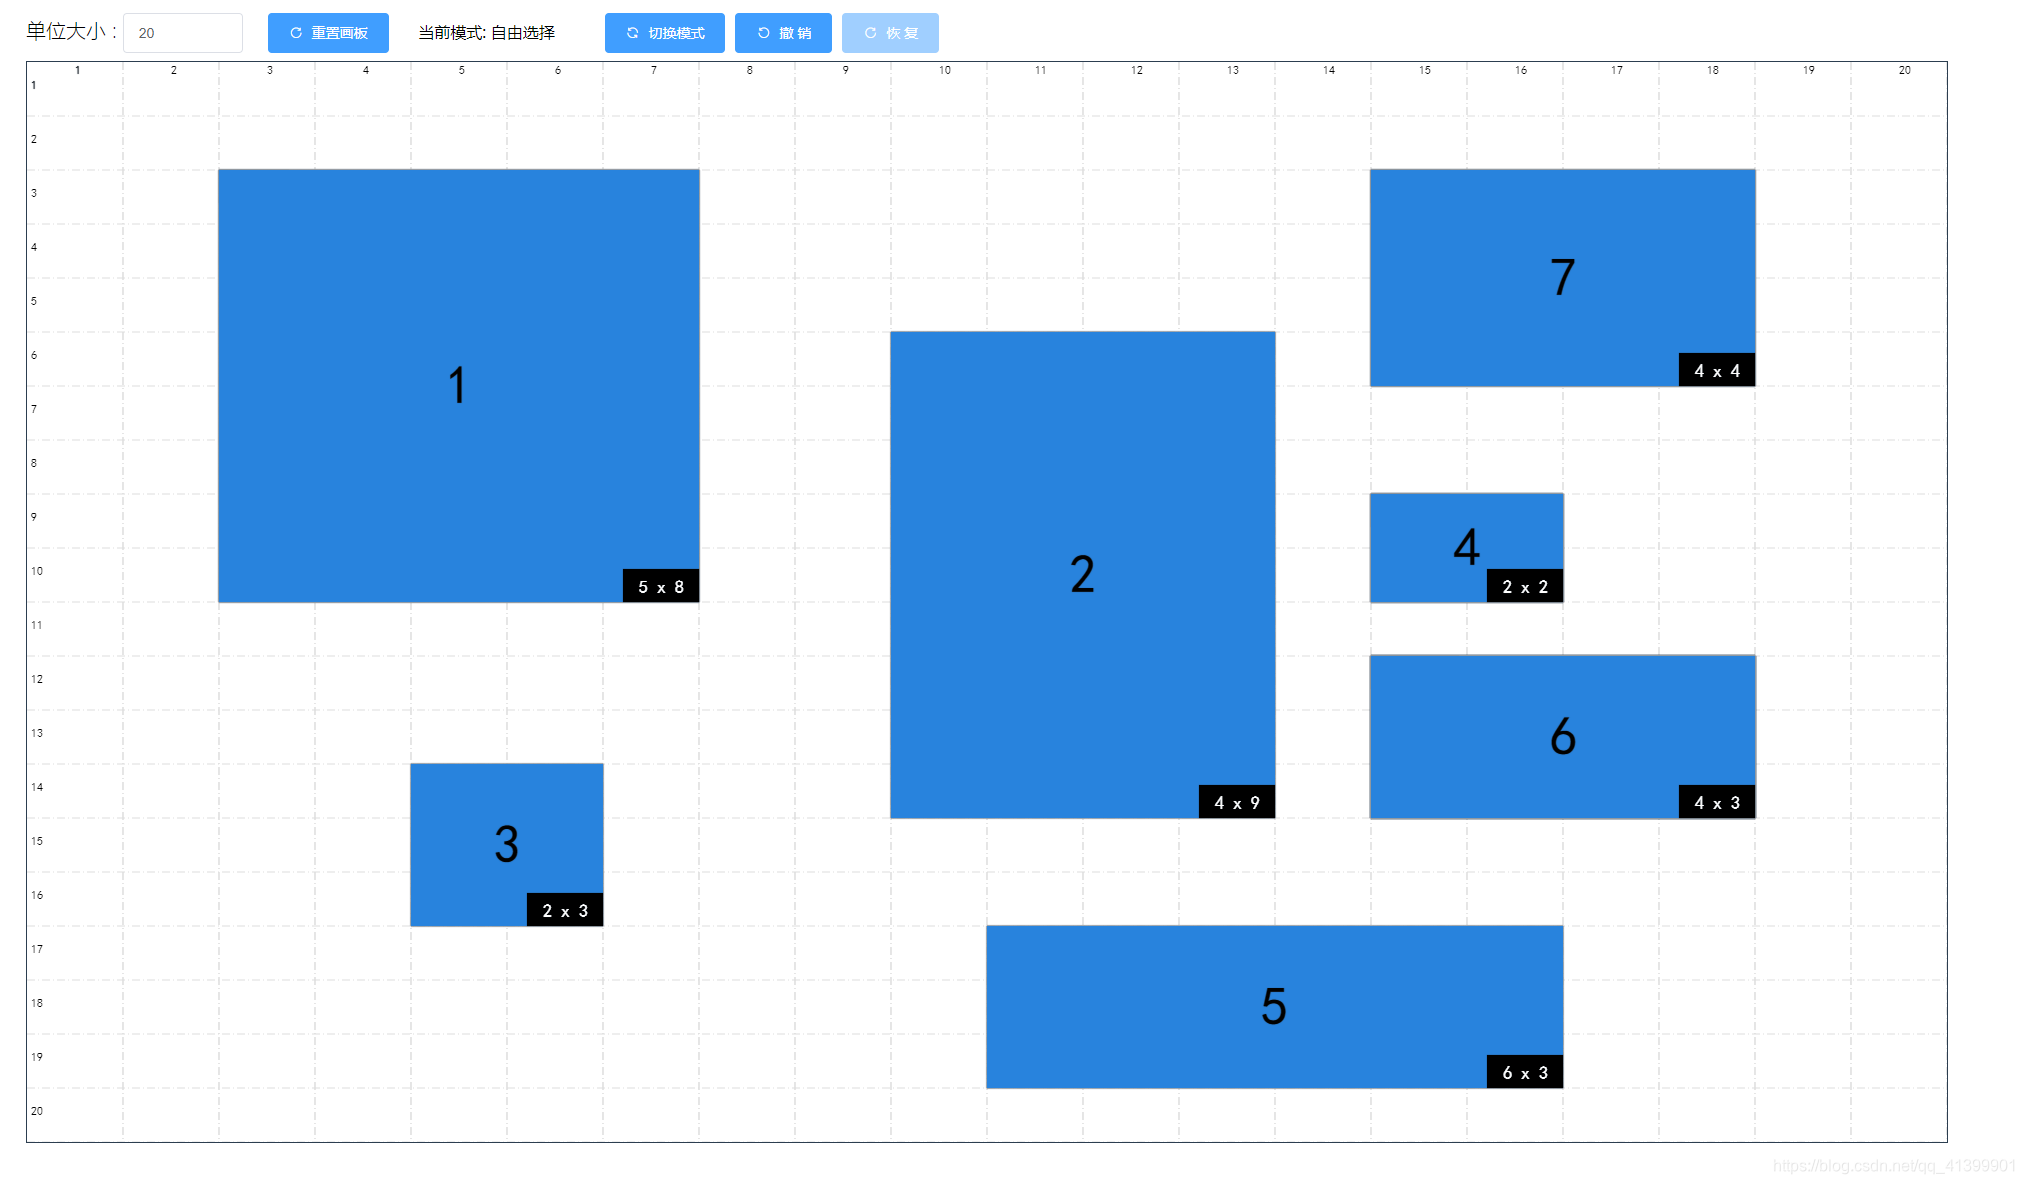
完整版的代码地址: https://github.com/LuciferDarkstone/vue-canvas canvas先看下成品效果 话不多说、先了解下canas 的api https://www.canvasapi.cn/ 首先了解下入口函数: getContext() 由于我们使用的是 vue ,所以要最大程度利用vue 自身特性来结合canvas canvas绘制之初,首先需要用到获取canvas 的元素, const canvas = document.querySelector('#canvas')这里直接用 document.querySelector 根据id来获取canvas 元素 第二步就是利用刚才提到的入口函数来获取 context 即canvas的 “上下文” 由于我们用的是vue ,可以将context 放到 data 里面 data() { return { context: {}, }, mount() { const canvas = document.querySelector('#canvas') this.context = canvas.getContext('2d') } canvas 绘制就像把大象放进冰箱里,canvas绘制的也是简单的三个步骤, context.beginPath(开始)、context.xxx(绘制)、 context.closePath(结束) 绘制的是最重要的一步,从api 来看,都是简单的小学几何画图 这里只简单介绍下一会会用到的 api beginPath closePath 就是绘制开始,结束时调用的函数,比如每次画线时, 都要用到,注意记得 closePath 关闭图案绘制 this.context.strokeRect(0, 0, this.canvasWidth, this.canvasHeight) this.context.clearRect(0, 0, this.canvasWidth, this.canvasHeight) this.context.fillRect(0, 0, this.canvasWidth, this.canvasHeight)我的画板的核心是绘制矩形, 一般情况下这三个绘制函数已经足够了 鼠标事件监听绘制时候需要监听鼠标移动的事件,来决定绘制的图像的形状 获取鼠标点击时初始点位置,即图像的原点获取鼠标点击时移动的距离,即图像的大小获取鼠标松开时的位置,即图像的最终大小首先在 template 中定义canvas 的监听事件 同时在methods 中定义对应函数 canvasDown(e) {} canvasMove(e) {} canvasUp(e) {} canvas init此时的画板是空白的,各项的指数都是默认值, 也可以定义一个 reset 的函数,来重置画板 resetCanvas() { // 清空画布 this.context.fillStyle = '#fff' this.context.clearRect(0, 0, this.canvasWidth, this.canvasHeight) this.context.fillRect(0, 0, this.canvasWidth, this.canvasHeight) this.context.fillStyle = '#000' }, canvas 绘制绘制的过程是在 canvasDown canvasMove canvasUp 中的 canvasDown(e) { // reset this.moving = true // 是否是在绘制 this.moveStep = 0 this.boxNumber++ const { target } = e // 获取鼠标初始位置 const canvasX = e.clientX - target.offsetLeft const canvasY = e.clientY - target.offsetTop // 初始位置赋值给全局 this.rectPos.x = canvasX this.rectPos.y = canvasY this.context.beginPath() this.context.moveTo(canvasX, canvasY) this.tempImgData = this.context.getImageData(0, 0, this.canvasWidth, this.canvasHeight) // 记录暂时图像 }, canvasMove(e) { if (this.moving) { const { target } = e // 获取鼠标位置 const canvasX = e.clientX - target.offsetLeft const canvasY = e.clientY - target.offsetTop // 获取初始位置 const { x, y } = this.rectPos this.context.fillStyle = '#2883dd' this.context.strokeRect(x, y, canvasX - x, canvasY - y) this.context.fillStyle = '#000' } }, canvasUp(e) { const { target } = e // 获取鼠标结束位置 const canvasX = e.clientX - target.offsetLeft const canvasY = e.clientY - target.offsetTop // 获取初始位置 const { x, y } = this.rectPos if (this.moving) { this.context.fillStyle = '#2883dd' this.context.strokeRect(x, y, canvasX - x, canvasY - y) this.context.fillStyle = '#000' this.context.fillRect(x, y, canvasX - x, canvasY - y) } this.context.closePath() this.moving = false },现在实现的效果类似会是这样 在每次记录鼠标点击时,记录初始未开始本次绘制时的图像数据 canvasDown(e) { // xxxxxxxxxx // xxxxxxxxxxxx this.tempImgData = this.context.getImageData(0, 0, this.canvasWidth, this.canvasHeight) },首先要记录mouseMove 中的鼠标移动距离(绘制的图型大小) canvasMove(e) { if (this.moving) { const { target } = e // 获取鼠标位置 const canvasX = e.clientX - target.offsetLeft const canvasY = e.clientY - target.offsetTop // 获取初始位置 const { x, y } = this.rectPos this.moveX = canvasX - x this.moveY = canvasY - y this.context.fillStyle = '#2883dd' this.context.strokeRect(x, y, canvasX - x, canvasY - y) this.context.fillStyle = '#000' } }, watch: { moveX(newV, oldV) { if (newV - oldV) { // mouseOver rect选择效果 this.context.putImageData(this.tempImgData, 0, 0) } }, moveY(newV, oldV) { if (newV - oldV) { // mouseOver rect选择效果 this.context.putImageData(this.tempImgData, 0, 0) } } },这样即可简单实现效果 增加功能现在实现的仅仅是一个能绘制矩形的画板,可以向其中按照需求增加功能, 如: 增加角标 完整版代码地址: https://github.com/LuciferDarkstone/vue-canvas |
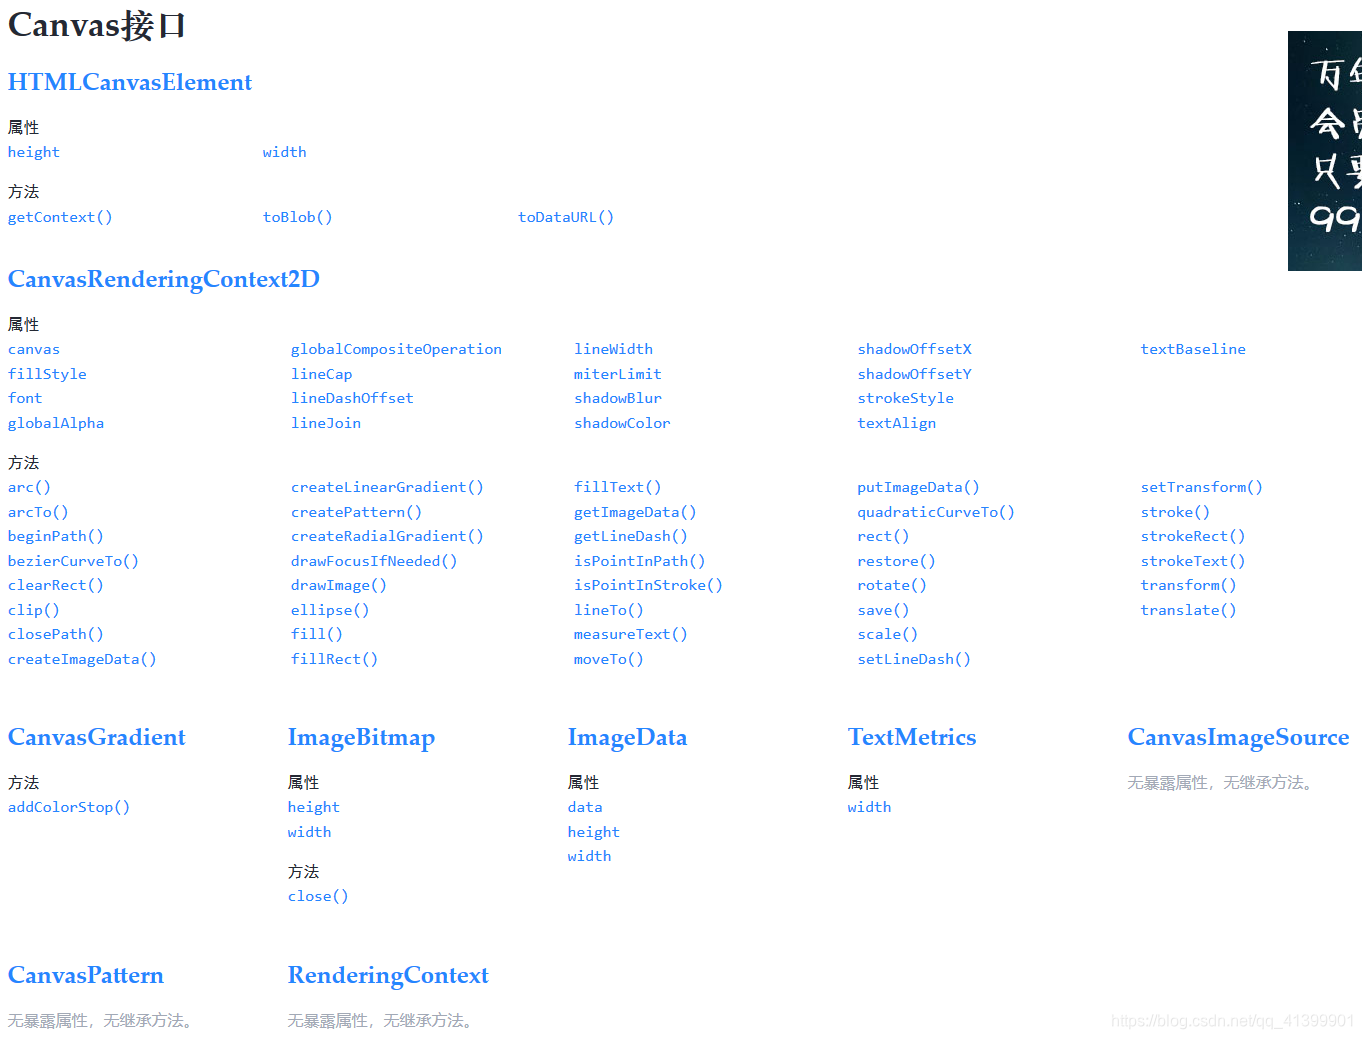 可以看出,canvas 的api 还不是很复杂
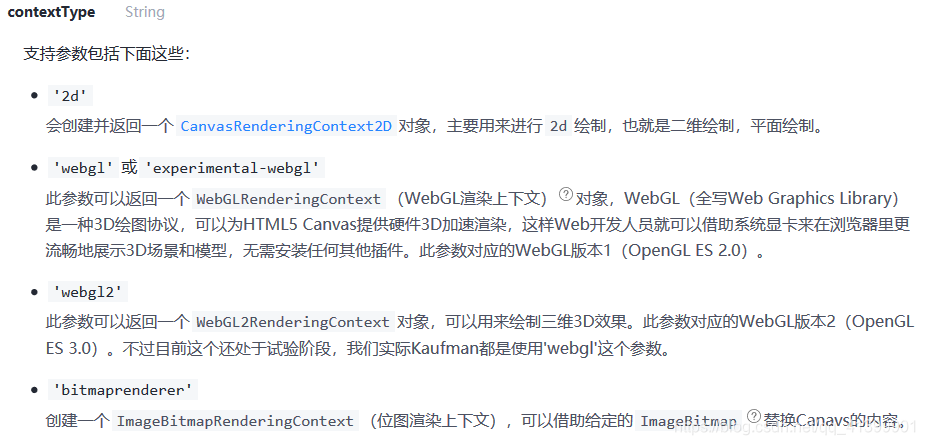 getContext 的参数有四种类型 2d | webgl | webgl2 | bitmaprenderer 由于是入门教程,这里只举例最简单的2d
 通过api 命名,我们可以大致推断出api 的作用,具体的详细功能同学们可以去自己去查看 https://www.canvasapi.cn/
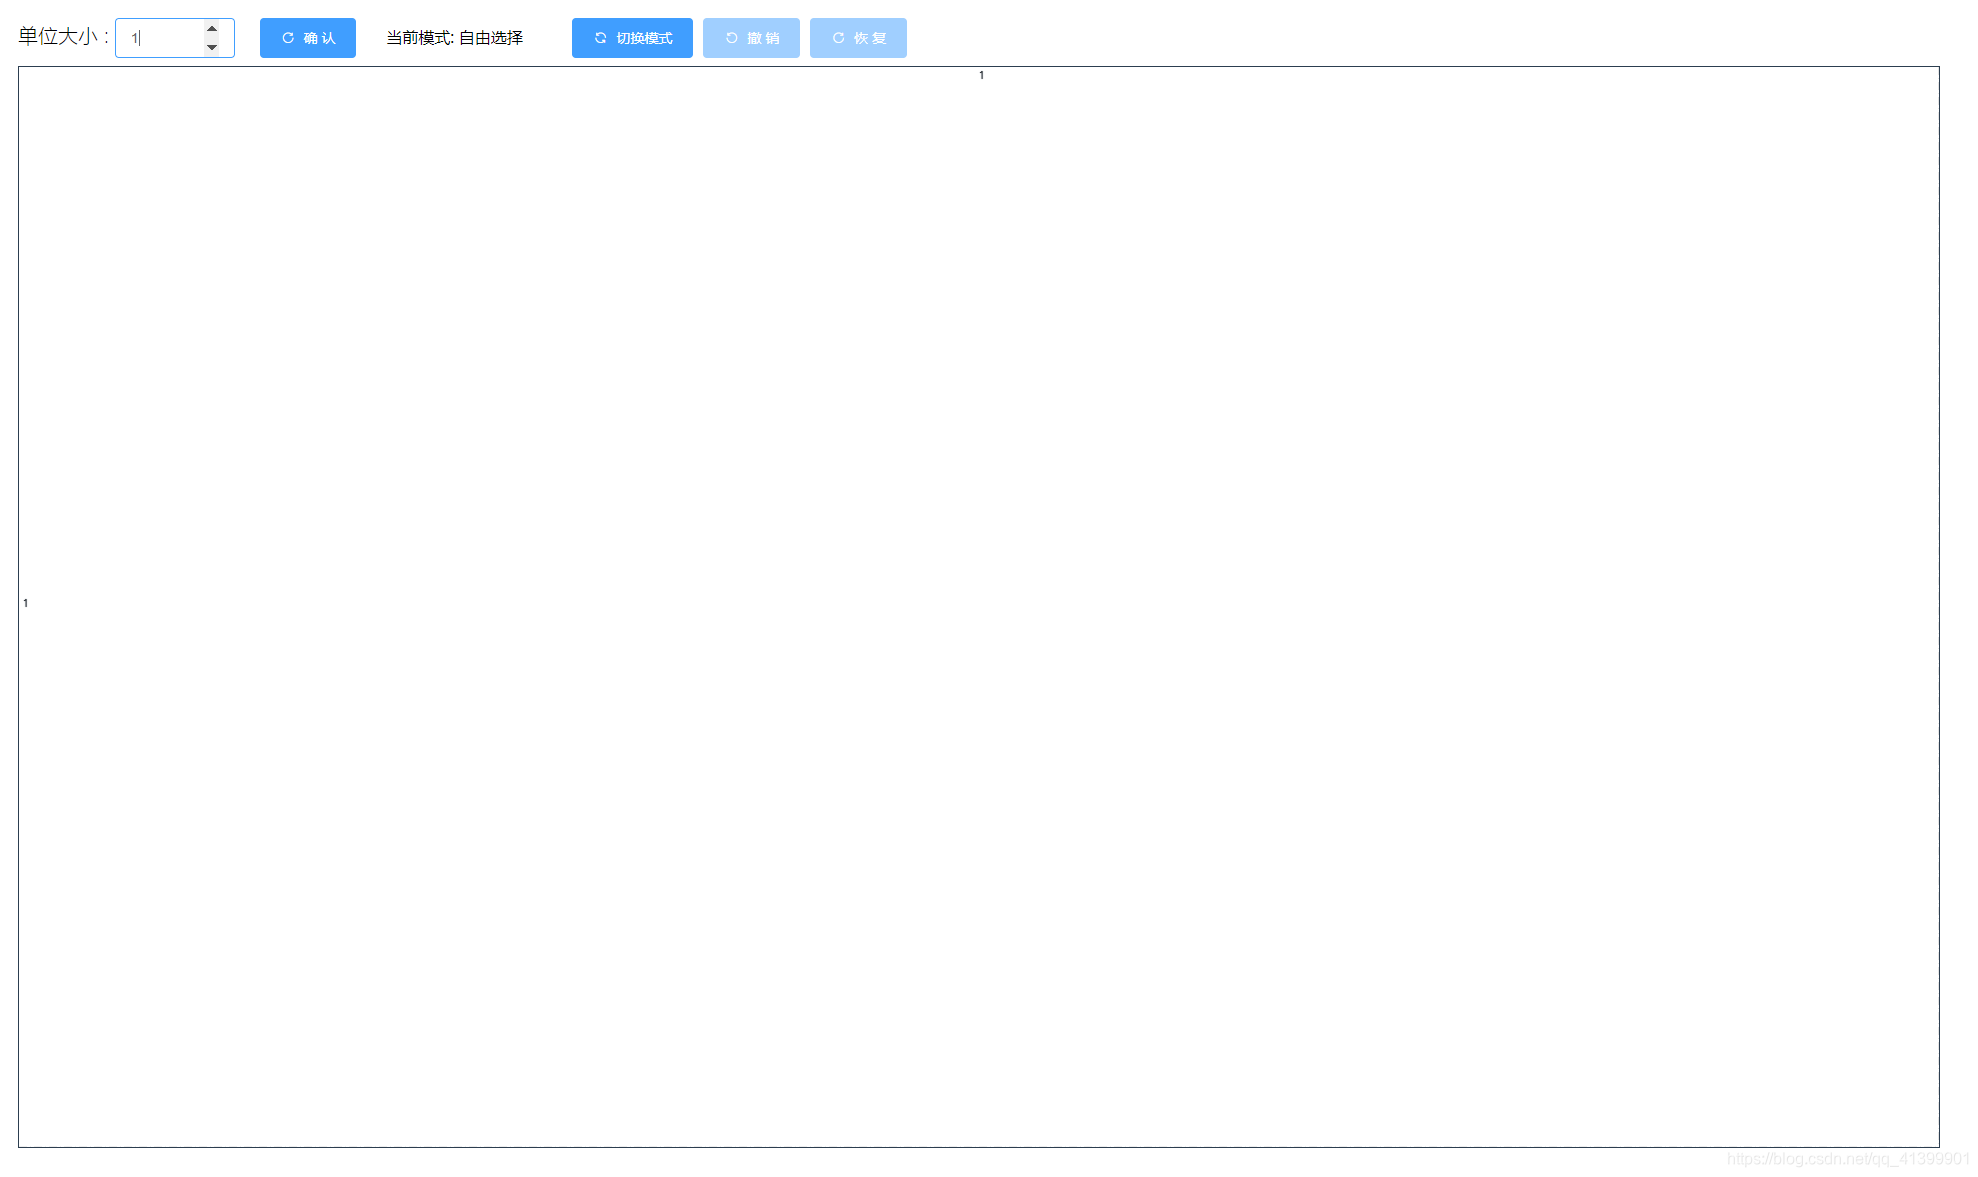 可以在mounted() 中定义canvas 绘制的各个参数
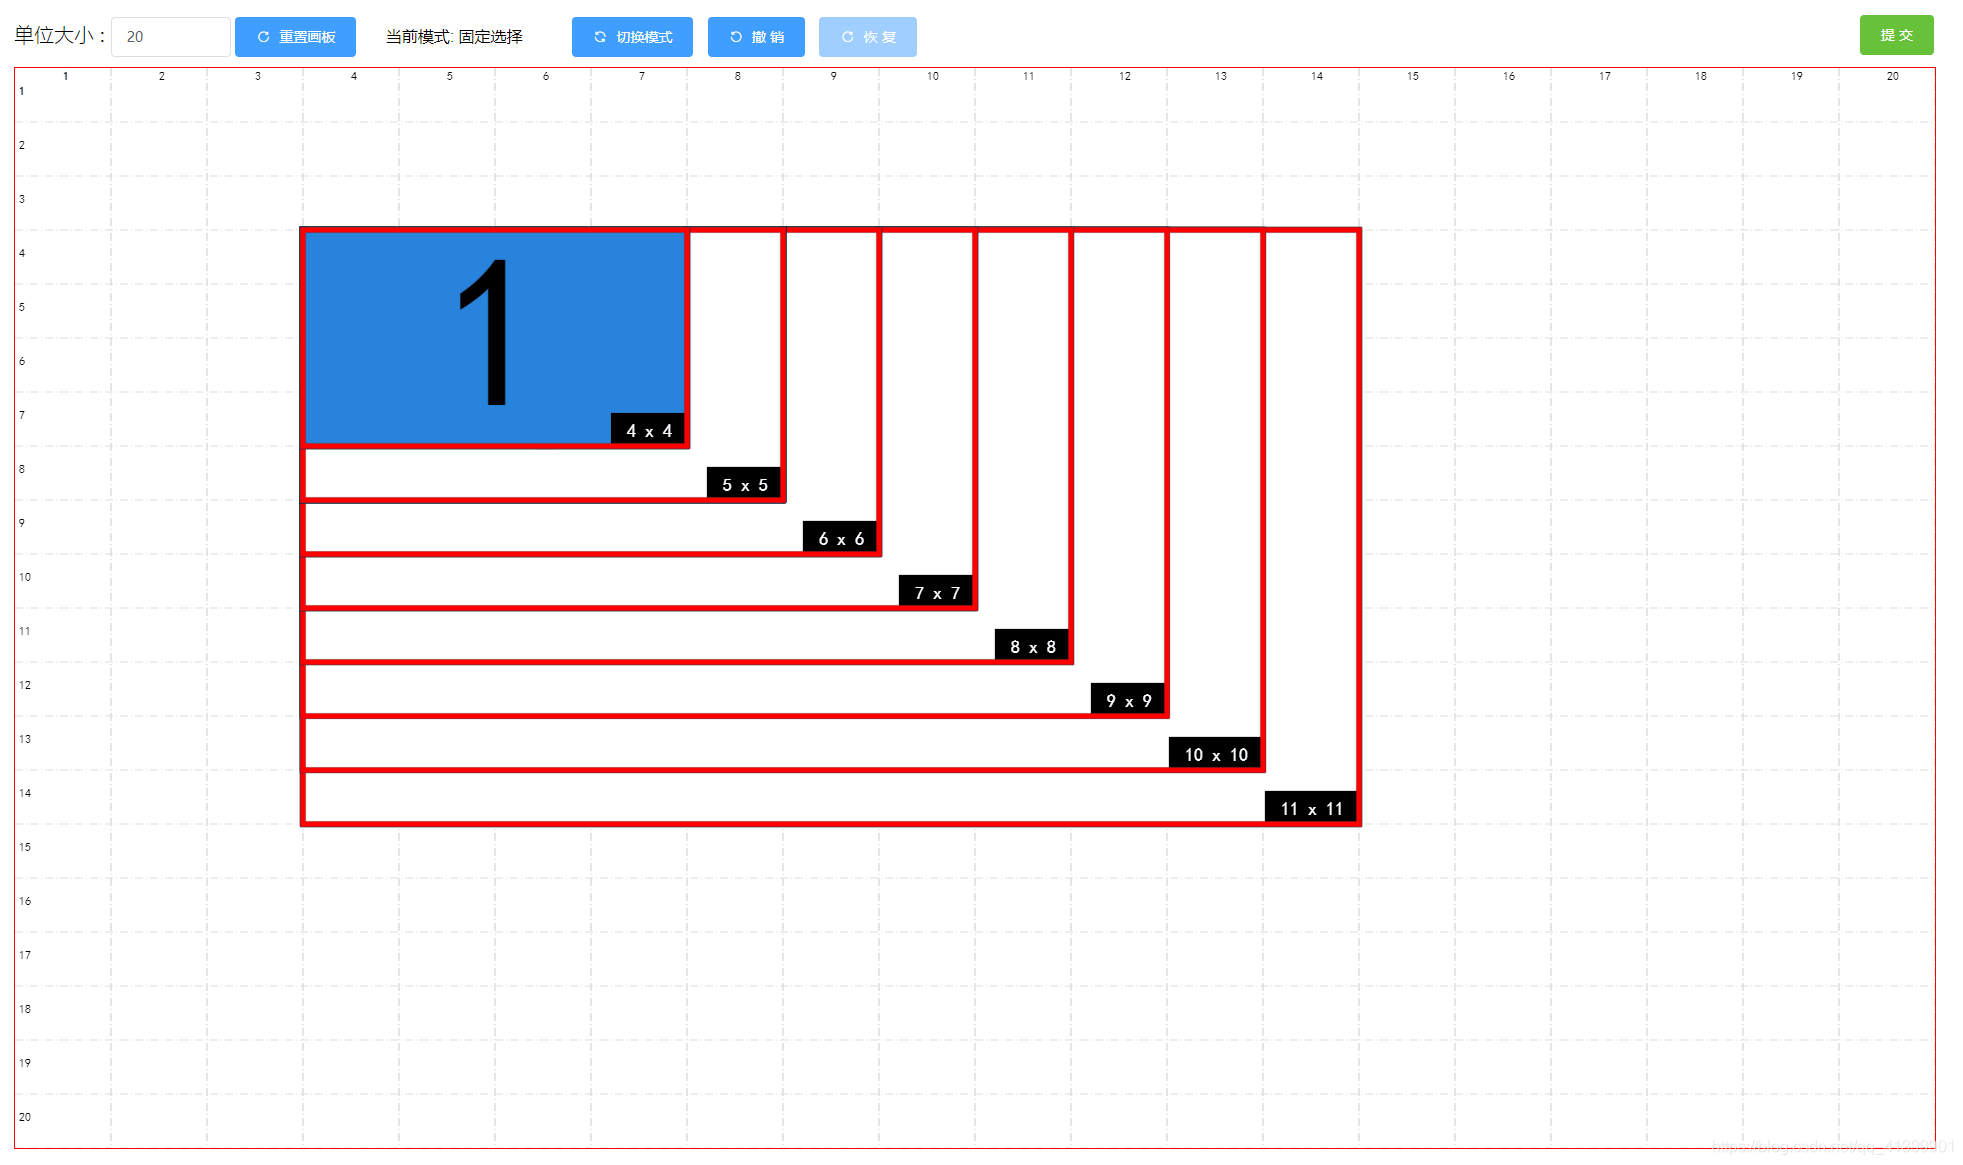 为了实现在鼠标移动时能够有过度效果,可以结合vue 的watch 来监听移动时间来实现
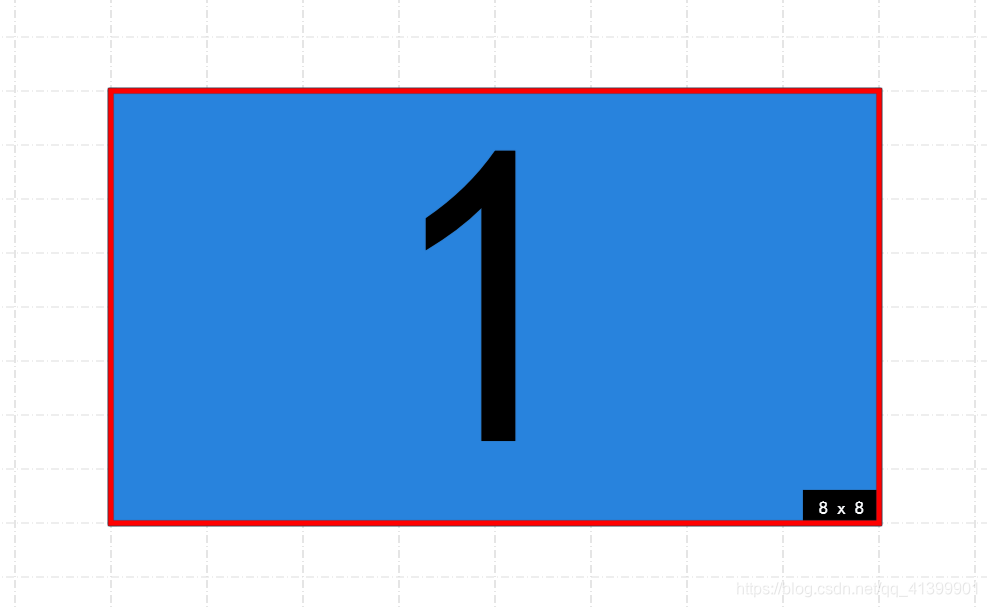 记录初始位置
 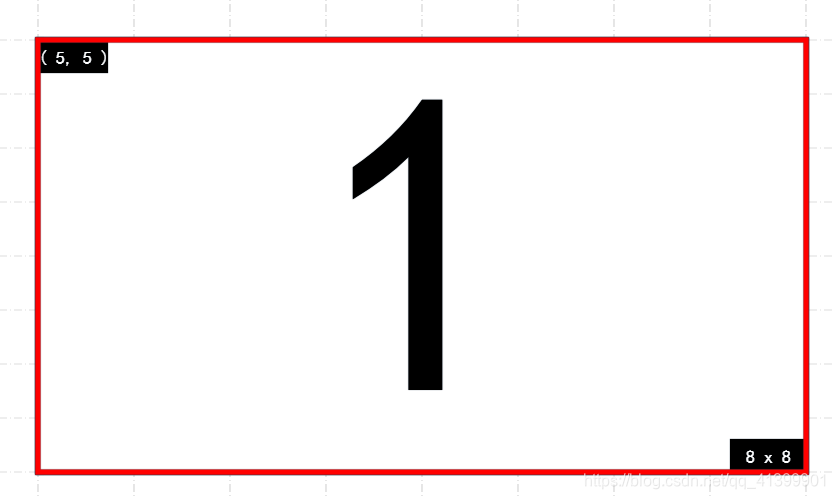 同理也可绘制 直线、圆等奇怪图形,不做介绍
【本文地址】