| esp01s、esp01篇 | 您所在的位置:网站首页 › blinker和arduino怎么连接 › esp01s、esp01篇 |
esp01s、esp01篇
|
1、单个模块,esp01
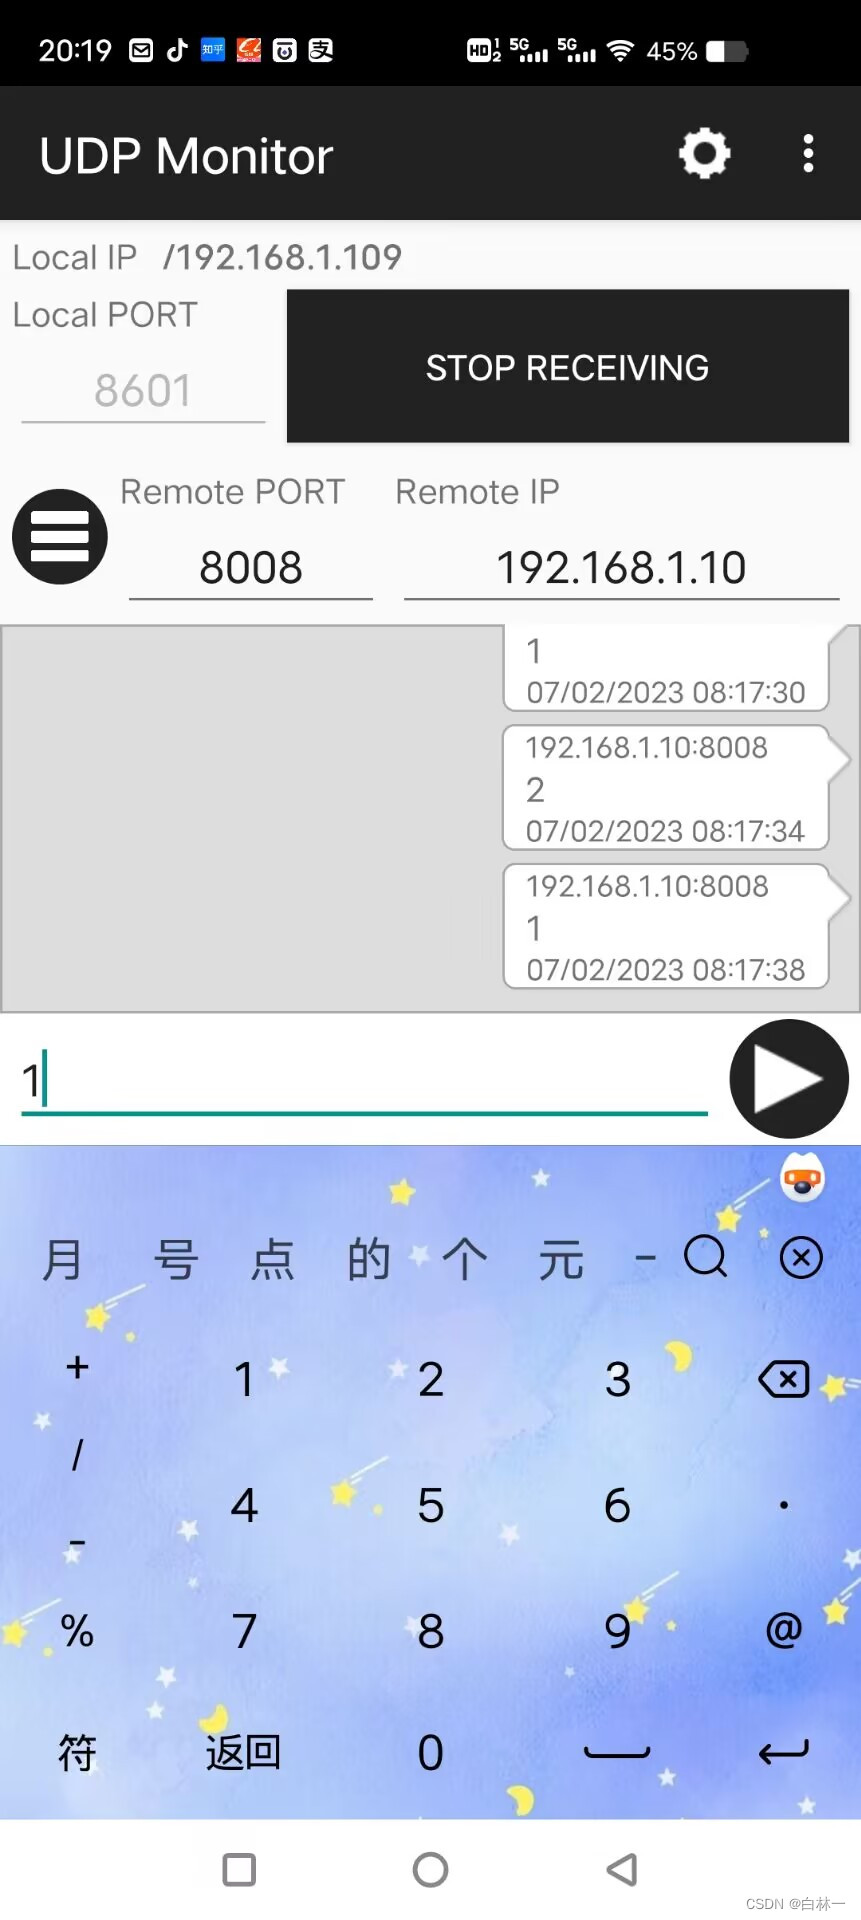
手机连接esp01,esp01用杜邦线连接arduion uno 先烧录代码到esp01中 #include #include const char* ssid = "zhuche"; // 网络名称---就是wifi的名字 const char* password = "12345678"; // 网络密码---就是wifi密码 WiFiUDP udp; // 创建UDP实例 IPAddress remoteIP(192, 168, 1, 3); // esp2号地址 int remotePort = 8009; // esp2号监听端口 void setup() { Serial.begin(115200); WiFi.mode(WIFI_AP); // 设置为AP模式热点模式,发出WiFi IPAddress local_ip(192, 168, 1, 10); // 静态IP地址,手机软件上输入的地址 IPAddress gateway(192, 168, 1, 1); // 网关IP地址 IPAddress subnet(255, 255, 255, 0); // 子网掩码 WiFi.softAPConfig(local_ip, gateway, subnet); // 设置静态IP地址 WiFi.softAP(ssid, password); // 开启AP模式 IPAddress IP1 = WiFi.softAPIP(); // 获取本机IP地址 Serial.print("本机IP地址: "); Serial.println(IP1); // 打印本机IP地址 udp.begin(8008); // 开始监听端口---这个是自己wifi的端口号 while (WiFi.softAPgetStationNum() < 1) { // 如果没有客户端连接,输出提示信息 Serial.println("无设备连接"); delay(1000); } Serial.println("有设备连接该网络"); sendCommandToSlave("on"); } void loop() { int packetSize = udp.parsePacket(); // 检测是否有数据包 if (packetSize) { // 如果有数据包 while (udp.available()) { // 如果有数据可读取 String command = udp.readStringUntil('\n'); // 读取数据 command.trim(); // 去除首尾空格 Serial.println(command); //打印发送去缓冲区 sendCommandToSlave(command); //发送2号ESP udp.endPacket(); // 结束发送数据包 } } } void sendCommandToSlave(String command) { udp.beginPacket(remoteIP, remotePort); // 开始发送数据包到2号 udp.println(command); // 发送指令 udp.endPacket(); // 结束发送数据包 }后烧录代码到arduino uno中 #include #include void setup() { pinMode(3,OUTPUT); Serial.begin(115200); Serial3.begin(115200); } void loop() { //digitalWrite(3, HIGH); if (Serial3.available() > 0) { String brightness = Serial3.readStringUntil('\n'); Serial.println(brightness); brightness.trim(); if (brightness == "1") { digitalWrite(3, HIGH); } else if (brightness == "3") { digitalWrite(3, LOW); } } }手机上udp是这样子设置的
前面是单方面的连接,就是手机给esp01发信息,然后arduino uno或者mega2560接收到信息打印到串口显示器上。 2、接下来是两个esp01互相连接发信息。这个是主机的代码,主机作为wifi,从机就连接它。 #include #include const char* ssid = "zhuche"; // 网络名称 const char* password = "12345678"; // 网络密码 WiFiUDP udp; // 创建UDP实例 IPAddress remoteIP(192, 168, 1, 3); // esp2号地址 int remotePort = 8602; // esp2号监听端口 void setup() { Serial.begin(115200); WiFi.mode(WIFI_AP); // 设置为AP模式 IPAddress local_ip(192, 168, 1, 2); // 静态IP地址 IPAddress gateway(192, 168, 1, 1); // 网关IP地址 IPAddress subnet(255, 255, 255, 0); // 子网掩码 WiFi.softAPConfig(local_ip, gateway, subnet); // 设置静态IP地址 WiFi.softAP(ssid, password); // 开启AP模式 IPAddress IP1 = WiFi.softAPIP(); // 获取本机IP地址 Serial.print("本机IP地址: "); Serial.println(IP1); // 打印本机IP地址 udp.begin(8601); // 开始监听端口 while (WiFi.softAPgetStationNum() < 1) { // 如果没有客户端连接,输出提示信息 Serial.println("无设备连接"); delay(1000); } Serial.println("有设备连接该网络"); } void loop() { int packetSize = udp.parsePacket(); // 检测是否有数据包 if (packetSize) { // 如果有数据包 while (udp.available()) { // 如果有数据可读取 String command = udp.readStringUntil('\n'); // 读取数据 command.trim(); // 去除首尾空格 Serial.println(command); //打印发送去缓冲区 sendCommandToSlave(command); //发送2号ESP udp.endPacket(); // 结束发送数据包 } } if(Serial.available()>0){ String val = Serial.readStringUntil('\n'); // 串口读取数据 val.trim(); // 去除首尾空格 //Serial.println(val); //打印发送去缓冲区 sendCommandToSlave(val); //发送2号ESP udp.endPacket(); // 结束发送数据包 } } void sendCommandToSlave(String command) { udp.beginPacket(remoteIP, remotePort); // 开始发送数据包到2号 udp.println(command); // 发送指令 udp.endPacket(); // 结束发送数据包 }这是从机的代码 #include #include const char* ssid = "zhuche"; // 网络名称 const char* password = "12345678"; // 网络密码 WiFiUDP udp; // 创建UDP实例 void setup() { Serial.begin(115200); WiFi.mode(WIFI_STA); //设置为STA模式 IPAddress local_ip(192, 168, 1, 3); // 静态IP地址 IPAddress gateway(192, 168, 1, 1); // 网关IP地址 IPAddress subnet(255, 255, 255, 0); // 子网掩码 WiFi.config(local_ip, gateway, subnet); // 设置静态IP地址 WiFi.begin(ssid, password); // 连接WiFi网络 while (WiFi.status() != WL_CONNECTED) { delay(500); } Serial.println("本机IP地址: " + WiFi.localIP().toString()); // 打印本地IP地址 udp.begin(8602); // 开始监听端口 } void loop() { int packetSize = udp.parsePacket(); // 检测是否有数据包 if (packetSize) { // 如果有数据包 while (udp.available()) { // 如果有数据可读取 String command = udp.readStringUntil('\n'); // 读取数据 command.trim(); // 去除首尾空格 Serial.println(command); } udp.endPacket(); // 结束发送数据包 } }然后它们就可以相互发信息了,用两块arduino uno或者mega2560来进行信息的接收。打印到串口监视器上。 |
【本文地址】
公司简介
联系我们
| 今日新闻 |
| 推荐新闻 |
| 专题文章 |