Python基于OpenCV的实时视频流车牌识别(源码&教程) |
您所在的位置:网站首页 › 车辆牌照识别的关键 › Python基于OpenCV的实时视频流车牌识别(源码&教程) |
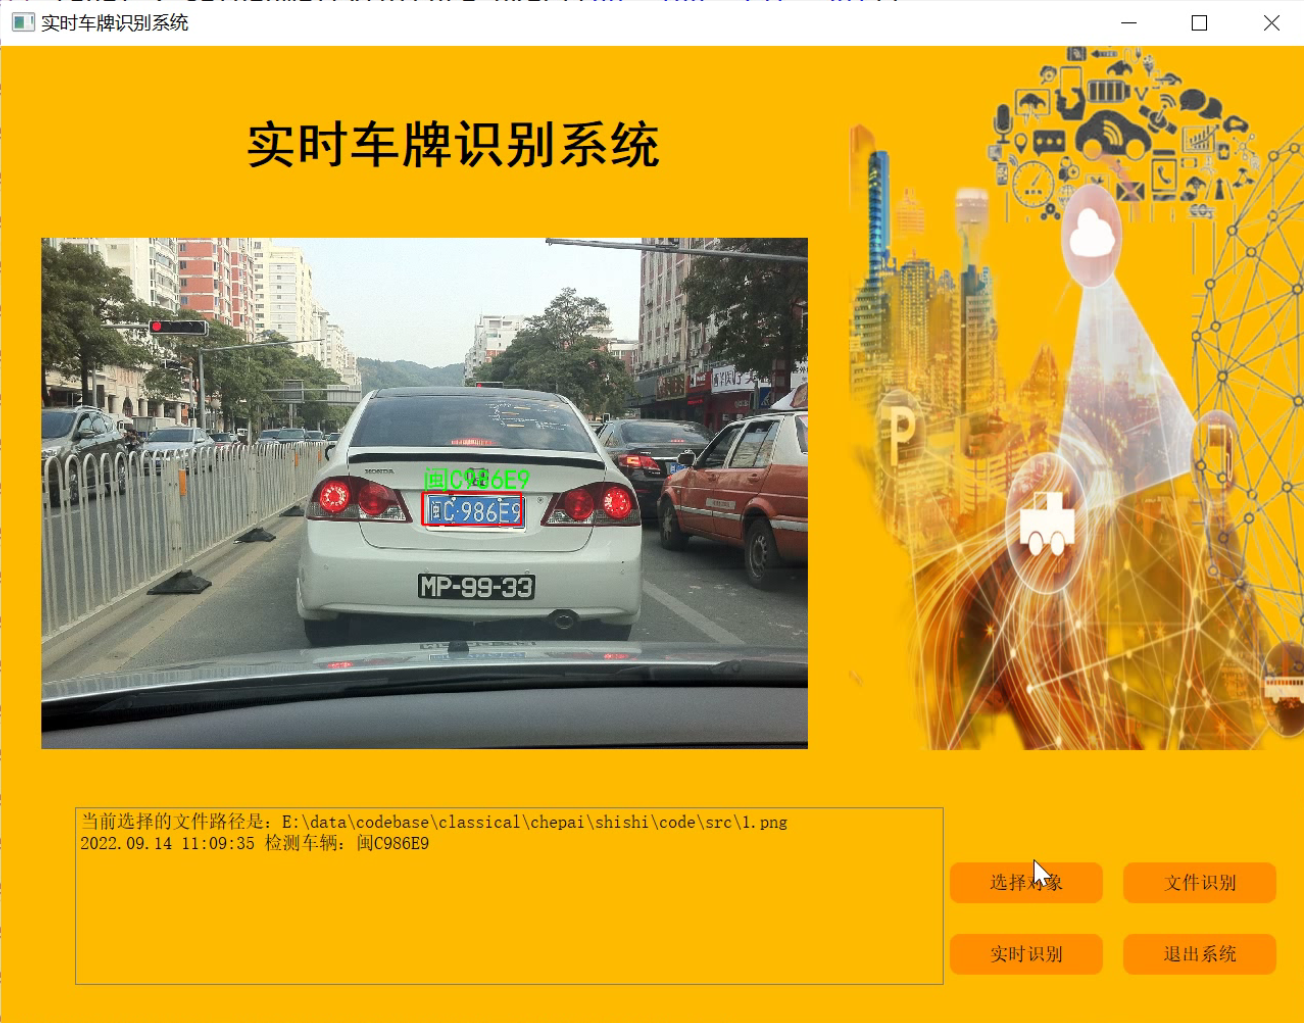
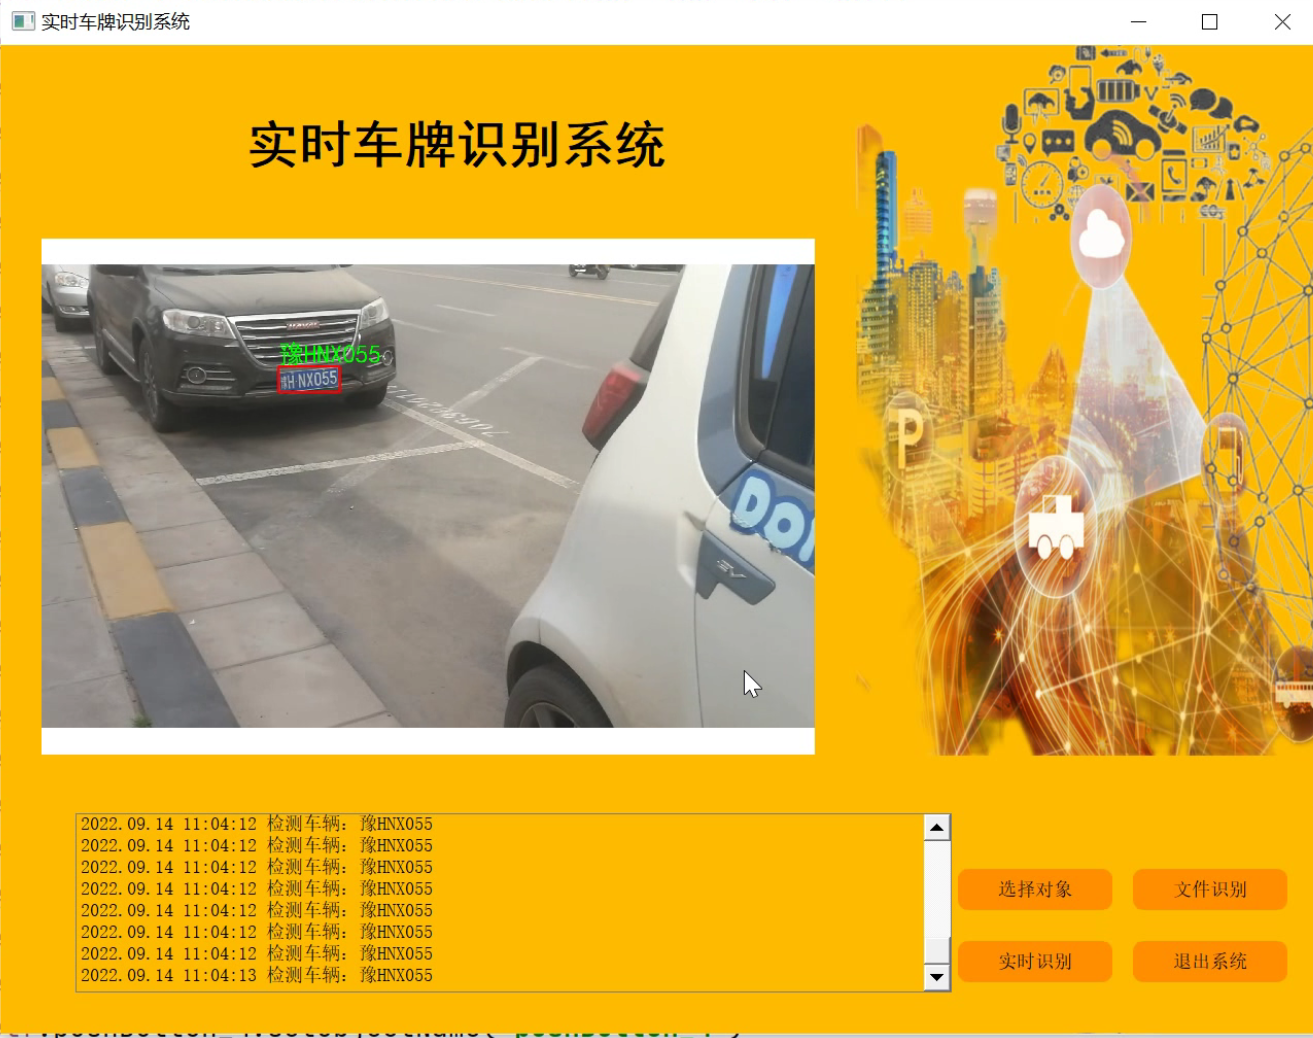
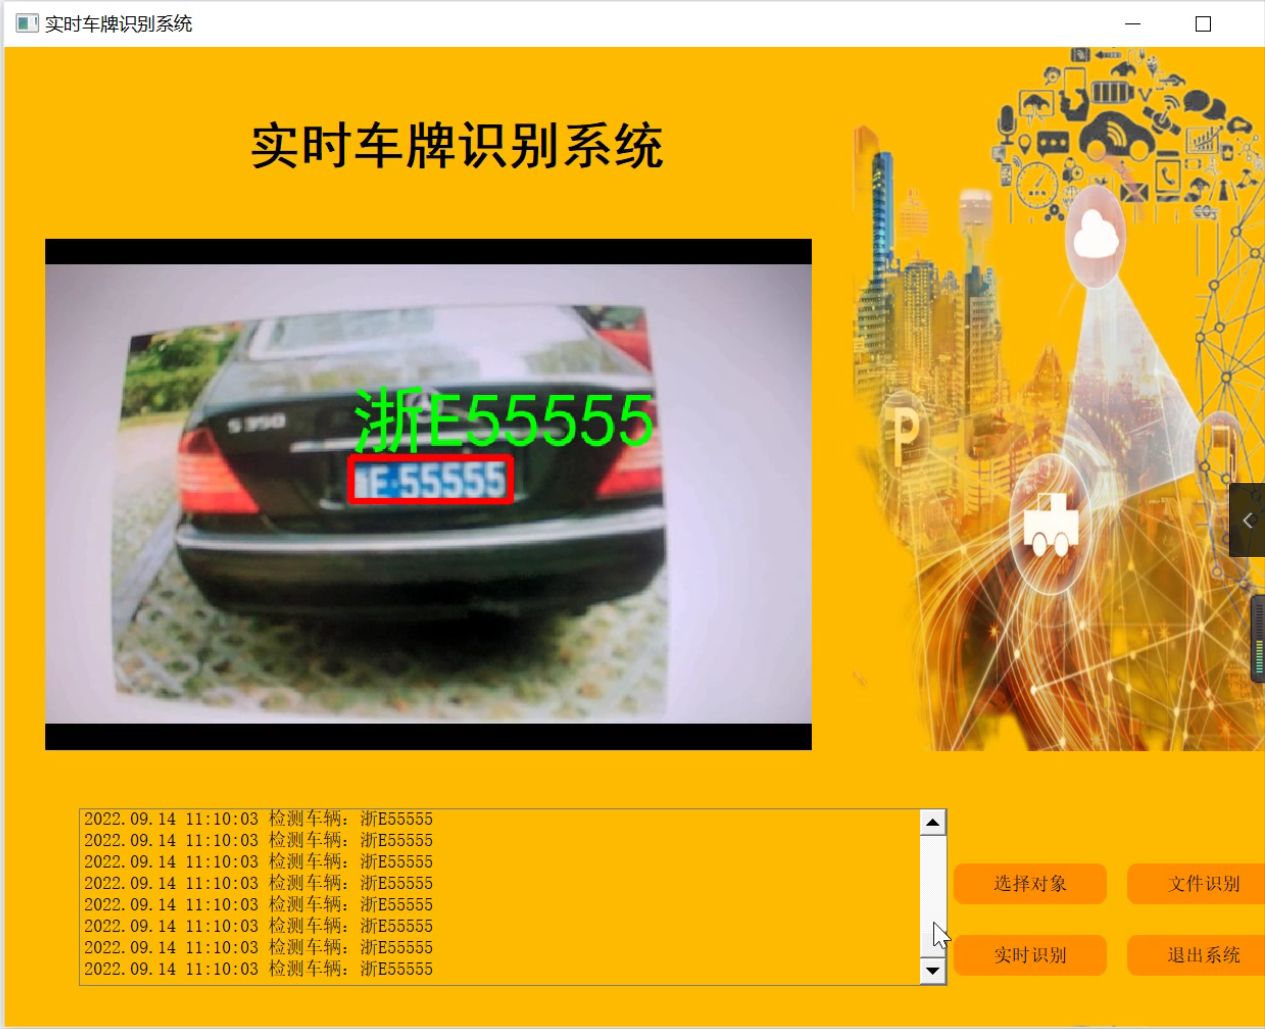
Python基于OpenCV的实时视频流车牌识别(源码&教程)
|
1.研究背景
近年来,智能交通系统(ITS)在我国应用日益广泛。作为ITS重要组成部分的自动车牌识别系统在交通流量检测、交通诱导控制、违章车辆监控等方面有着广泛的应用,是确保道路安全畅通的重要手段,也为统计有关资料,为管理者决策提供有效数字依据的重要途径。由于一般的识别系统单幅图像的检测时间较长,达不到实时的要求,从而限制了这种系统在某些方面的应用,比如不停车监控、收费等。而且,即使在固定的地方使用,也必须埋设地感线圈等触发装置,施工及维护都有一定的困难。因此,发展基于视频图像的快速准确的车牌识别系统,具有广阔的发展前景和巨大的经济价值。 2.支持图片识别:
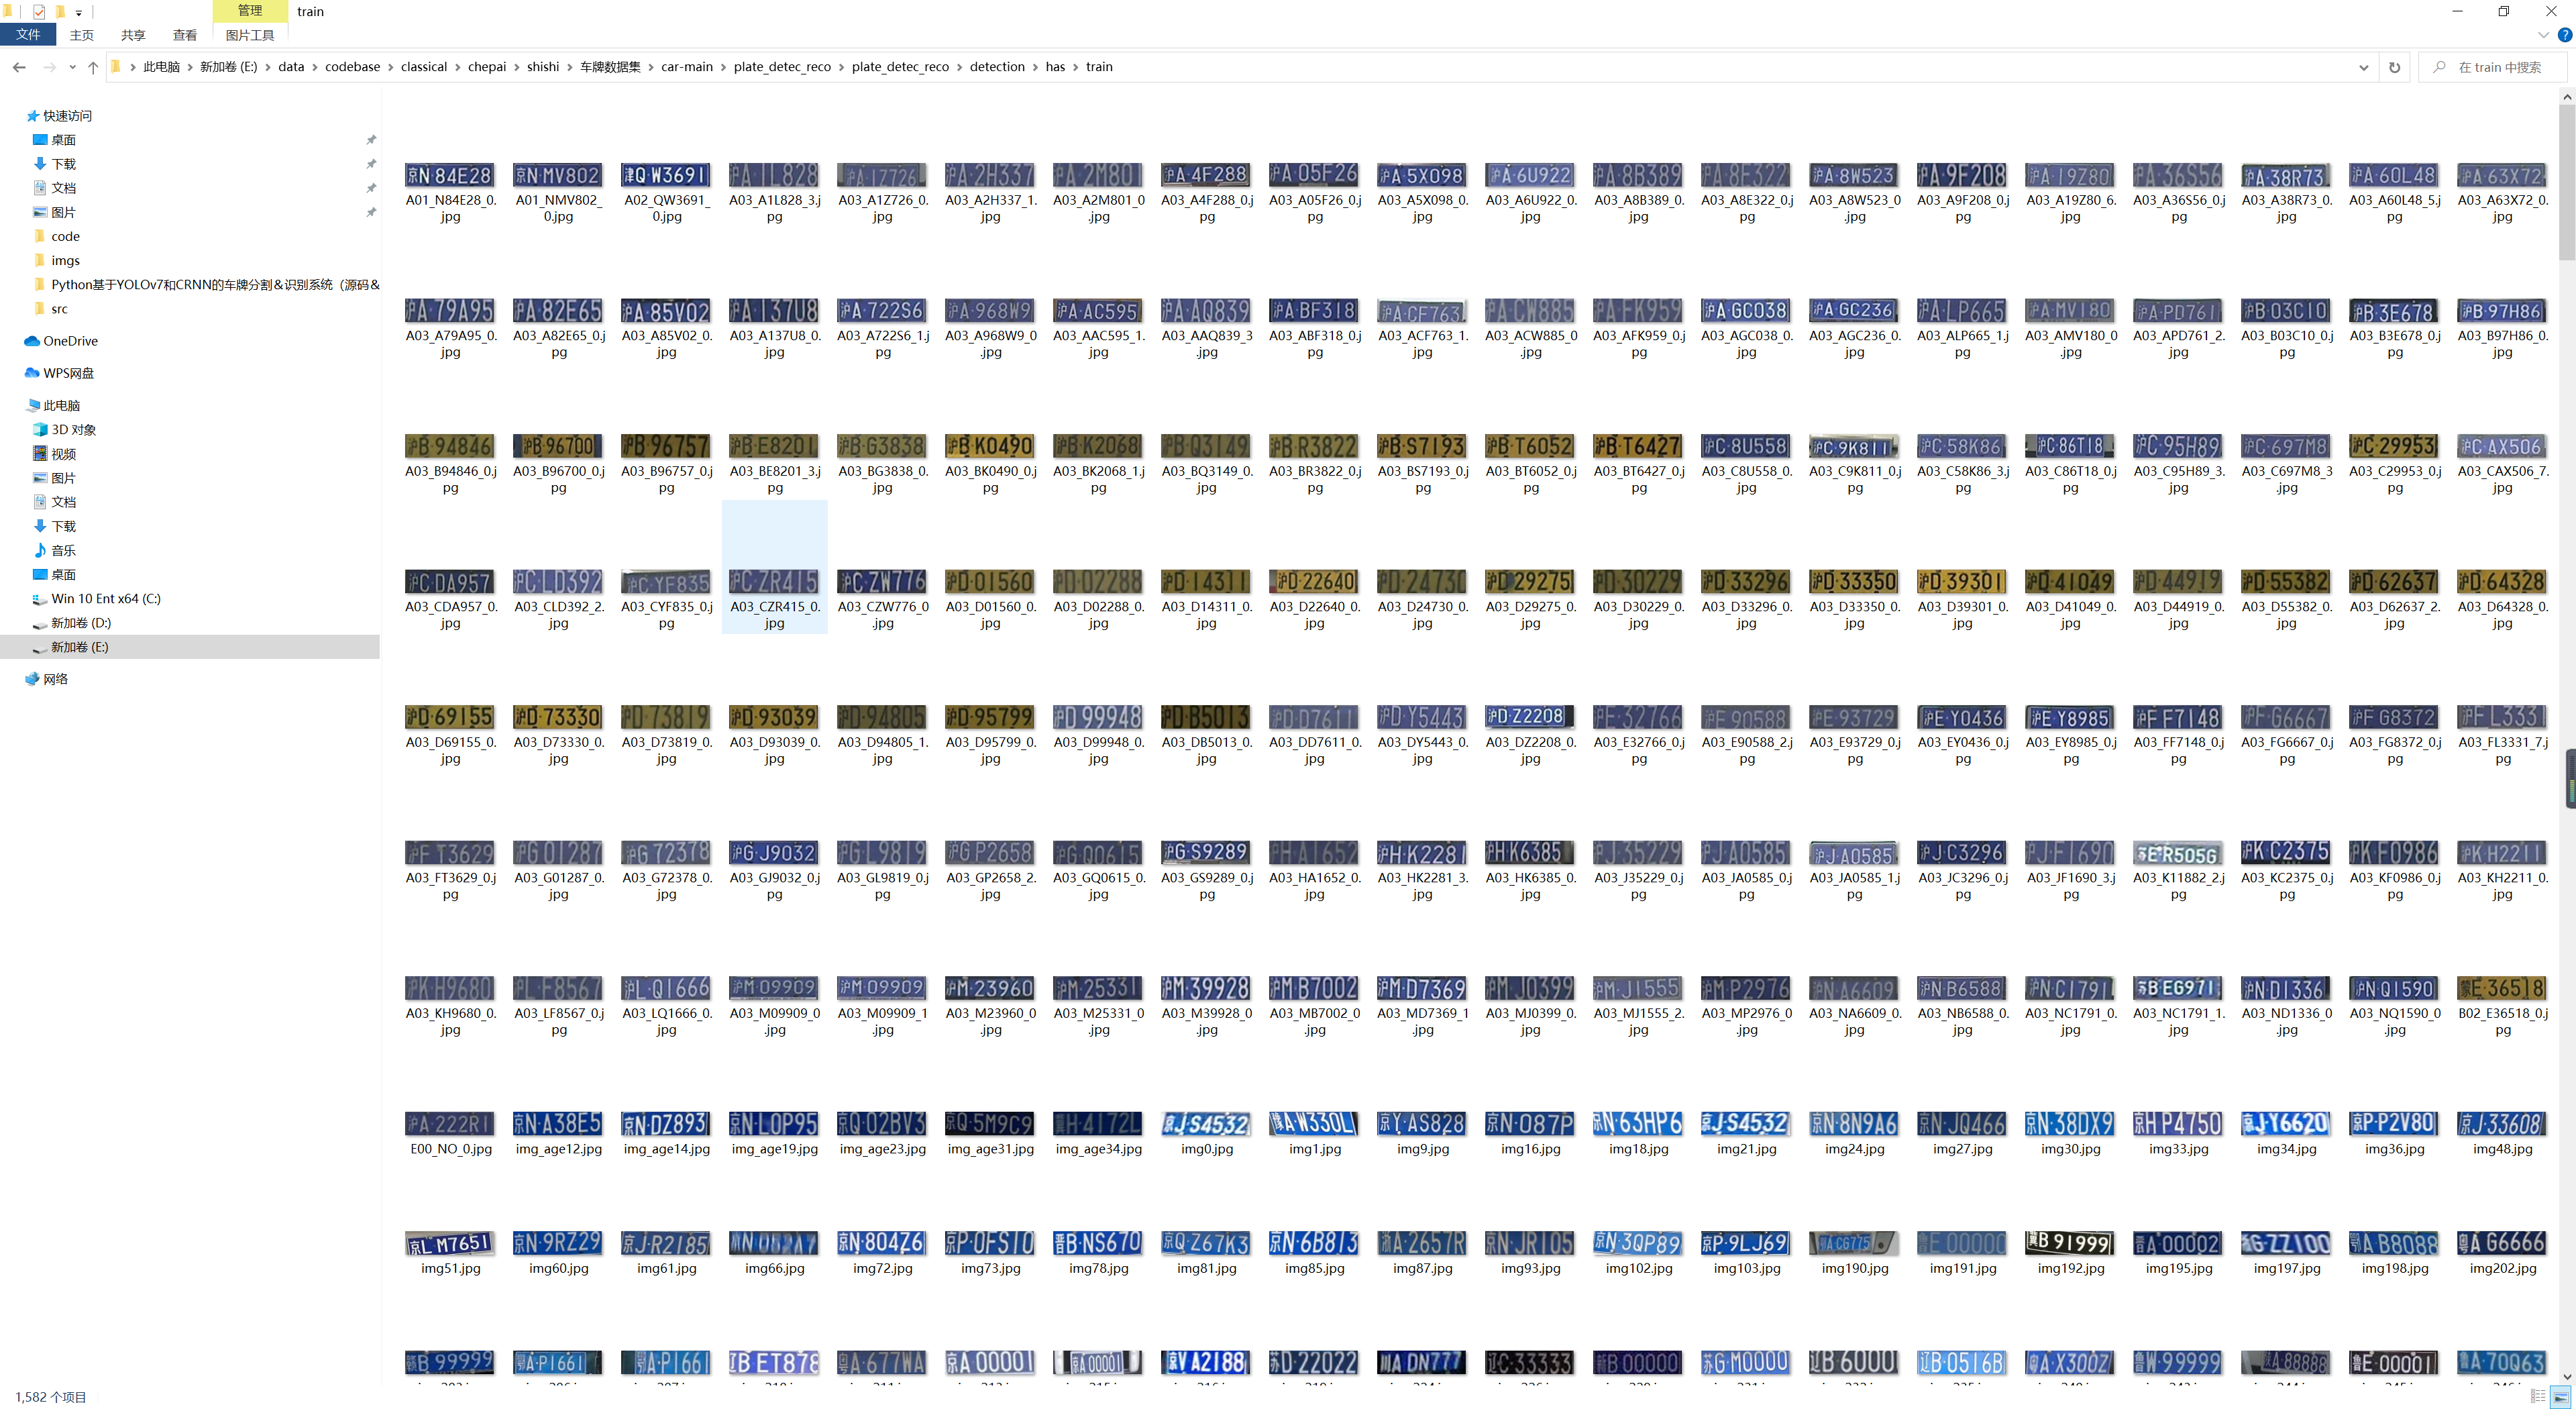
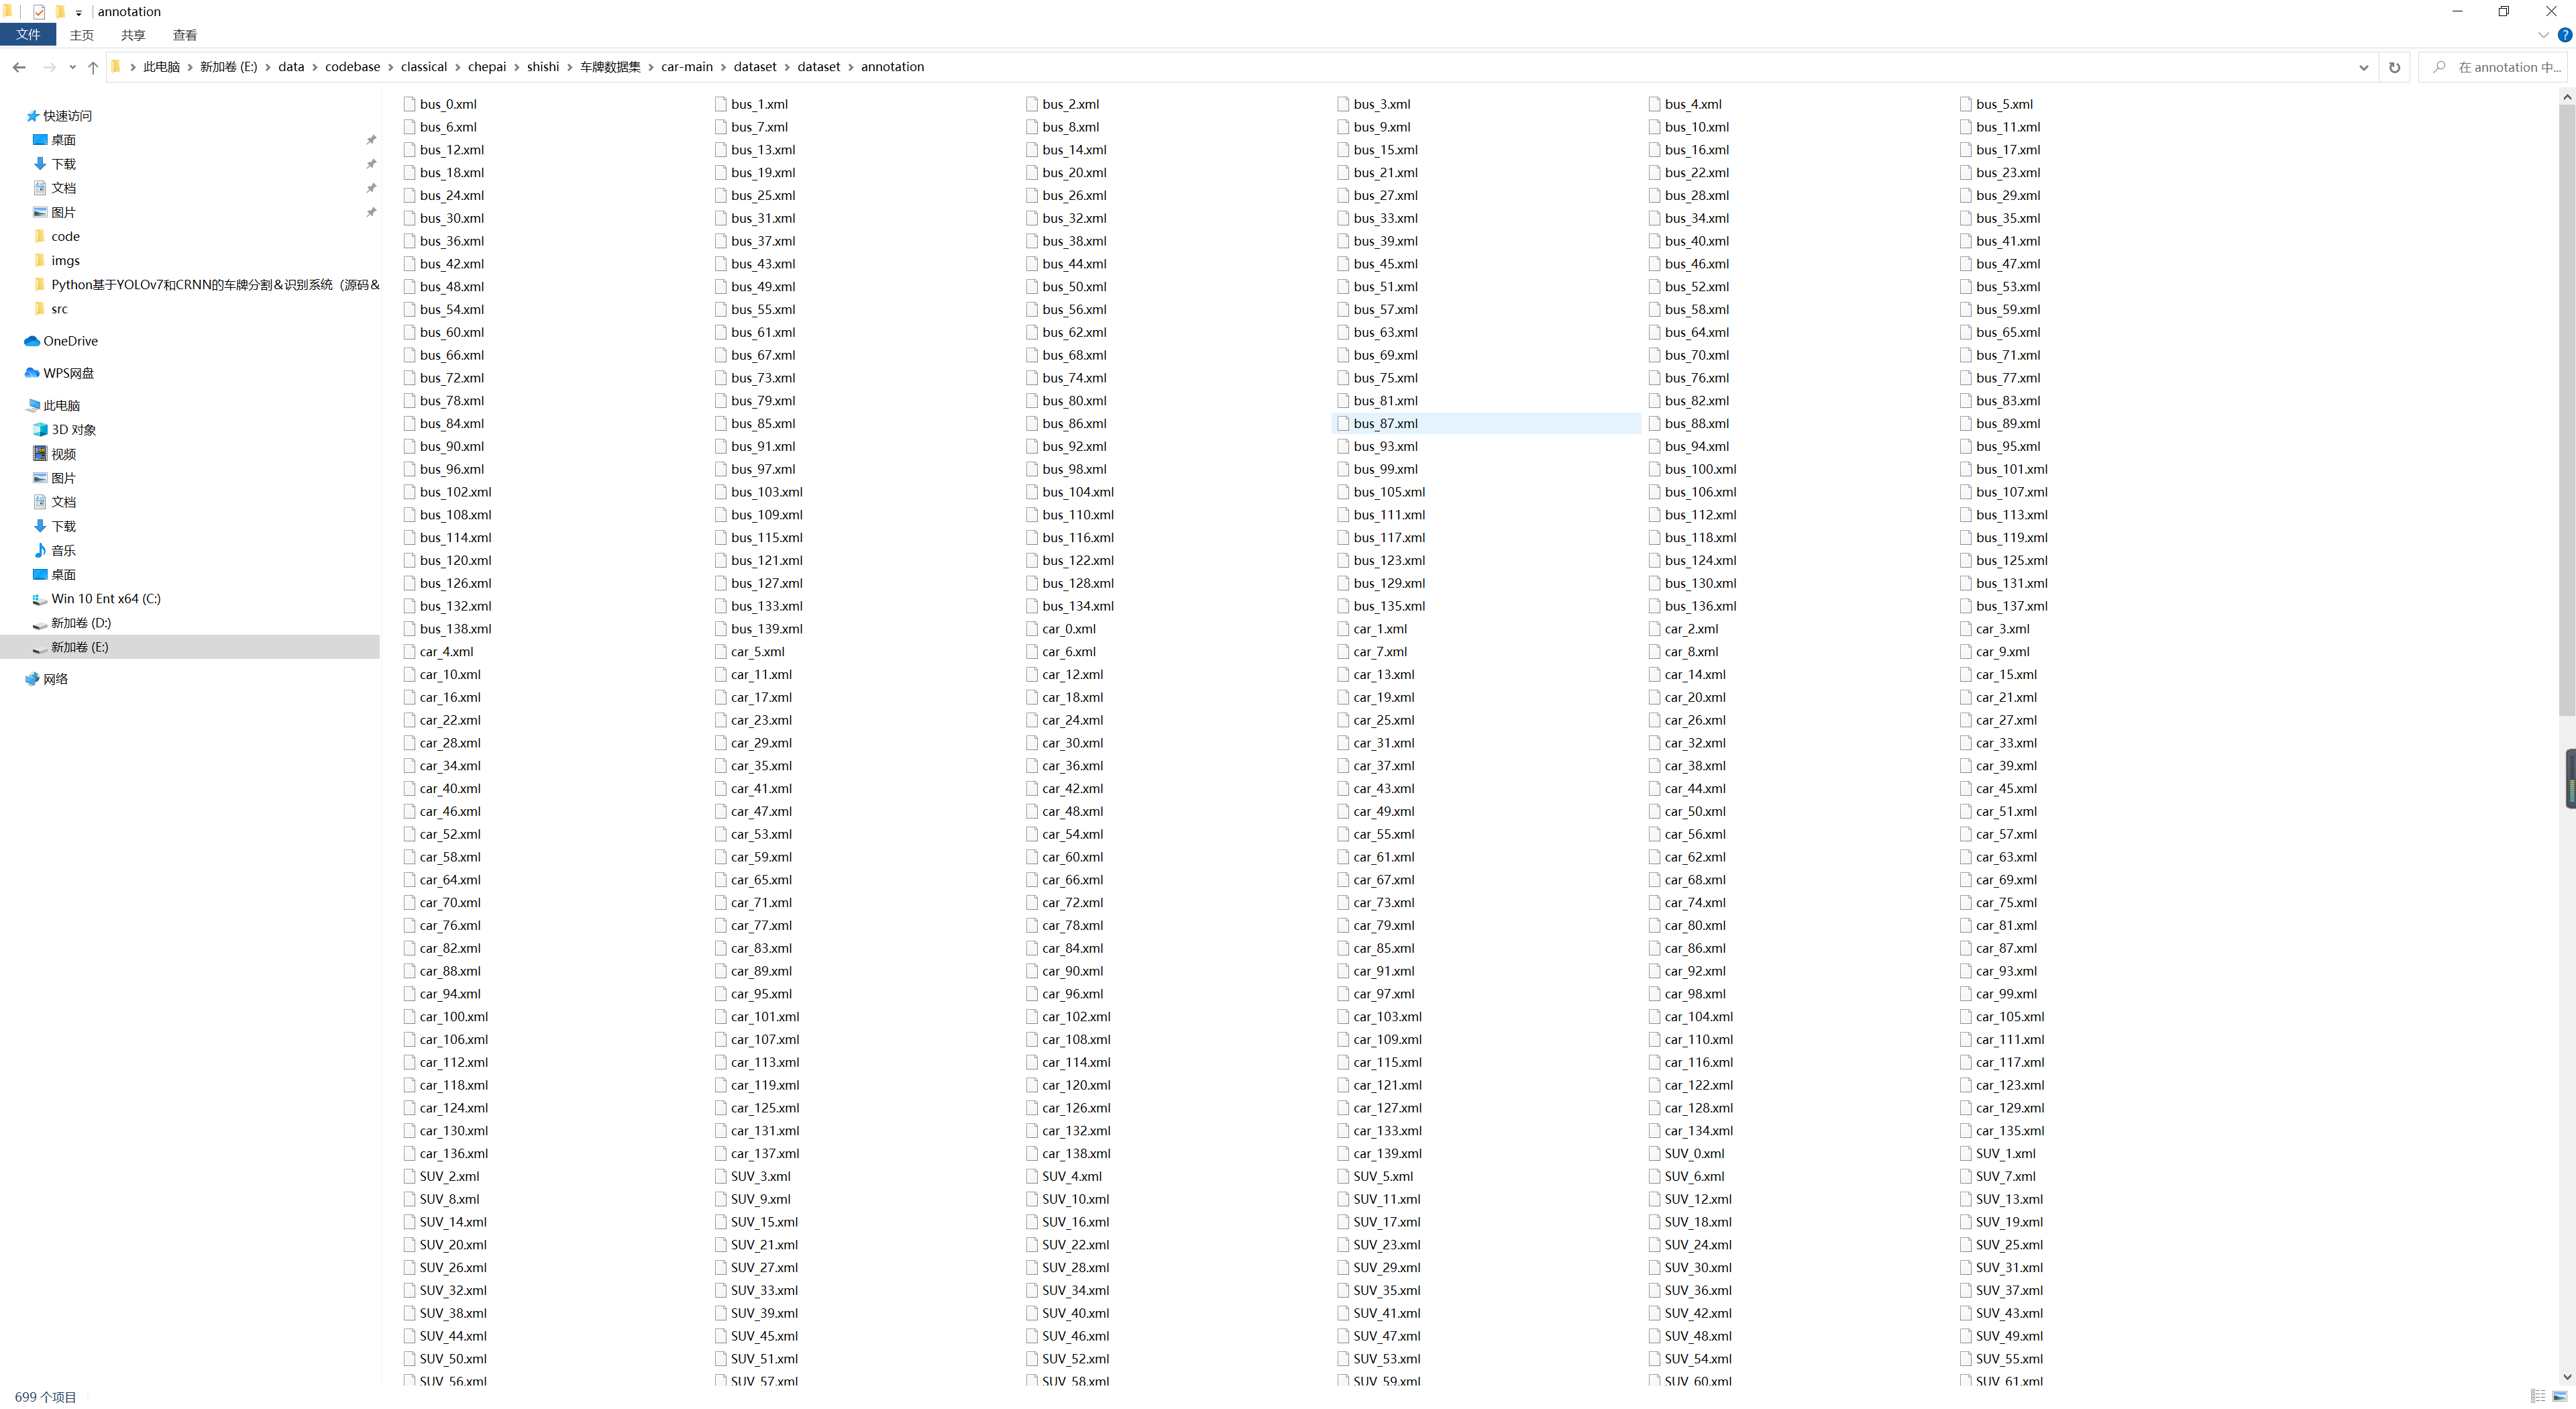
Python基于OpenCV的视频车牌识别(源码&教程)上半篇_哔哩哔哩_bilibili 实时视频流车牌识别(源码)下半篇_哔哩哔哩_bilibili 6.实现原理:入口文件 demo.py(部分): import HyperLPRLite as pr import cv2 import numpy as np grr = cv2.imread("images_rec/2_.jpg") model = pr.LPR("model/cascade.xml","model/model12.h5","model/ocr_plate_all_gru.h5") for pstr,confidence,rect in model.SimpleRecognizePlateByE2E(grr): if confidence>0.7: image = drawRectBox(grr, rect, pstr+" "+str(round(confidence,3))) print "plate_str:" print pstr print "plate_confidence" print confidence cv2.imshow("image",image) cv2.waitKey(0)(1) opencv2的imread函数导入图片, 返回的是Mat类型。 (2) HyperLPRLiite.py中的LPR类构造函数导入model, 参数就是训练好的三个模型文件,名字分别是: model/cascade.xmlmodel/model12.h5model/ocr_plate_all_gru.h5 HyperLPRLite.py: class LPR(): def __init__(self,model_detection,model_finemapping,model_seq_rec): self.watch_cascade = cv2.CascadeClassifier(model_detection) self.modelFineMapping = self.model_finemapping() self.modelFineMapping.load_weights(model_finemapping) self.modelSeqRec = self.model_seq_rec(model_seq_rec)(3)参数 model_detection 就是文件 model/cascade.xml 用到了 opencv2的CascadeClassifier()函数 cv2.CascadeClassifier() 参数输入.xml或者.yaml文件,表示加载模型 一种基于Haar特征的级联分类器用于物体检测的模型 model.SImpleRecognizePlateByE2E()函数: for pstr,confidence,rect in model.SimpleRecognizePlateByE2E(grr): if confidence>0.7: image = drawRectBox(grr, rect, pstr+" "+str(round(confidence,3))) print "plate_str:" print pstr print "plate_confidence" print confidence输入为一个Mat类型的图片 输出为识别的车牌字符串,以及confidence可信度, 定义在 HyperLPRLite.py: def SimpleRecognizePlateByE2E(self,image): images = self.detectPlateRough(image,image.shape[0],top_bottom_padding_rate=0.1) res_set = [] for j,plate in enumerate(images): plate, rect =plate image_rgb,rect_refine = self.finemappingVertical(plate,rect) res,confidence = self.recognizeOne(image_rgb) res_set.append([res,confidence,rect_refine]) return res_set其中又用到detectPlateRough()函数 下面有详细说明detectPlateRough函数(5)是返回图像中所有车牌的边框在图片中的bbox 返回的是一个表示车牌区域坐标边框的list for循环中,对于每个识别出来的车牌用到filemappingVertical()函数 detectPlateRough函数 def detectPlateRough(self,image_gray,resize_h = 720,en_scale =1.08 ,top_bottom_padding_rate = 0.05): if top_bottom_padding_rate>0.2: print("error:top_bottom_padding_rate > 0.2:",top_bottom_padding_rate) exit(1) height = image_gray.shape[0] padding = int(height*top_bottom_padding_rate) scale = image_gray.shape[1]/float(image_gray.shape[0]) image = cv2.resize(image_gray, (int(scale*resize_h), resize_h)) image_color_cropped = image[padding:resize_h-padding,0:image_gray.shape[1]] image_gray = cv2.cvtColor(image_color_cropped,cv2.COLOR_RGB2GRAY) watches = self.watch_cascade.detectMultiScale(image_gray, en_scale, 2, minSize=(36, 9),maxSize=(36*40, 9*40)) cropped_images = [] for (x, y, w, h) in watches: x -= w * 0.14 w += w * 0.28 y -= h * 0.15 h += h * 0.3 cropped = self.cropImage(image_color_cropped, (int(x), int(y), int(w), int(h))) cropped_images.append([cropped,[x, y+padding, w, h]]) return cropped_images输入参数: image_gray: 一个rgb图像,Mat类型 resize_h: 重新设定的图像大小 top_bottom_padding_rate: 表示要裁剪掉图片的上下部占比 这个函数实现的处理: 1.resize图像大小,cv2.resize函数,按照原来图像比例 2.裁剪图片,根据输入的top_bottom_padding_rate如果是0.1,那么上面裁剪掉0.1height,下面也裁剪掉0.1height 3.将图像从rgb转化为灰度 cv2.cvtColor函数,cv2.COLOR_RGB2GRAY 4.根据前面的cv2.CascadeClassifier()物体检测模型(3),输入image_gray灰度图像,边框可识别的最小size,最大size,输出得到车牌在图像中的offset,也就是边框左上角坐标( x, y )以及边框高度( h )和宽度( w ) 5.对得到的车牌边框的bbox进行扩大,也就是宽度左右各扩大0.14倍,高度上下各扩大0.15倍。 6.返回图片中所有识别出来的车牌边框bbox,这个list作为返回结果。 filemappingVertical函数 def finemappingVertical(self,image,rect): resized = cv2.resize(image,(66,16)) resized = resized.astype(np.float)/255 res_raw= (np.array([resized]))[0] res =res_raw*image.shape[1] res = res.astype(np.int) H,T = res H-=3 if H= image.shape[1]-1: T= image.shape[1]-1 rect[2] -= rect[2]*(1-res_raw[1] + res_raw[0]) rect[0]+=res[0] image = image[:,H:T+2] image = cv2.resize(image, (int(136), int(36))) return image,rect输入参数: 裁剪的车牌区域图像(Mat类型),rect也是裁剪的车牌部分的图像(Mat类型) 实现处理: 1.将原来车牌图像resize大小:66163 2.将原来灰度图颜色通道[0, 255]转化为float类型[0,1] 3.将输入66*16(float),输入进模型进行测试self.modelFineMapping.predict modelFineMapping模型 class LPR(): def __init__(self,model_detection,model_finemapping,model_seq_rec): self.watch_cascade = cv2.CascadeClassifier(model_detection) self.modelFineMapping = self.model_finemapping() self.modelFineMapping.load_weights(model_finemapping) self.modelSeqRec = self.model_seq_rec(model_seq_rec) model_finemapping()函数 def model_finemapping(self): input = Input(shape=[16, 66, 3]) # change this shape to [None,None,3] to enable arbitraty shape input x = Conv2D(10, (3, 3), strides=1, padding='valid', name='conv1')(input) x = Activation("relu", name='relu1')(x) x = MaxPool2D(pool_size=2)(x) x = Conv2D(16, (3, 3), strides=1, padding='valid', name='conv2')(x) x = Activation("relu", name='relu2')(x) x = Conv2D(32, (3, 3), strides=1, padding='valid', name='conv3')(x) x = Activation("relu", name='relu3')(x) x = Flatten()(x) output = Dense(2,name = "dense")(x) output = Activation("relu", name='relu4')(output) model = Model([input], [output]) return modelkeras网络模型:对车牌的左右边界进行回归 通过modelFineMapping.loadweights()函数加载模型文件 通过modelFineMapping.predict输出网络结果 输入:16663 tensor 输出:长度为2的tensor recognizeOne函数对于每个车牌区域的for循环中,经过fineMappingVertical处理后输入到recognizeOne函数,进行识别 for j,plate in enumerate(images): plate, rect =plate image_rgb,rect_refine = self.finemappingVertical(plate,rect) res,confidence = self.recognizeOne(image_rgb) res_set.append([res,confidence,rect_refine]) recognizeOne() def recognizeOne(self,src): x_tempx = src x_temp = cv2.resize(x_tempx,( 164,48)) x_temp = x_temp.transpose(1, 0, 2) y_pred = self.modelSeqRec.predict(np.array([x_temp])) y_pred = y_pred[:,2:,:] return self.fastdecode(y_pred)1.将前面的(136, 36)图像resize成(164, 48) 2.将图像转置,输入 model_sec_rec函数 def model_seq_rec(self,model_path): width, height, n_len, n_class = 164, 48, 7, len(chars)+ 1 rnn_size = 256 input_tensor = Input((164, 48, 3)) x = input_tensor base_conv = 32 for i in range(3): x = Conv2D(base_conv * (2 ** (i)), (3, 3))(x) x = BatchNormalization()(x) x = Activation('relu')(x) x = MaxPooling2D(pool_size=(2, 2))(x) conv_shape = x.get_shape() x = Reshape(target_shape=(int(conv_shape[1]), int(conv_shape[2] * conv_shape[3])))(x) x = Dense(32)(x) x = BatchNormalization()(x) x = Activation('relu')(x) gru_1 = GRU(rnn_size, return_sequences=True, kernel_initializer='he_normal', name='gru1')(x) gru_1b = GRU(rnn_size, return_sequences=True, go_backwards=True, kernel_initializer='he_normal', name='gru1_b')(x) gru1_merged = add([gru_1, gru_1b]) gru_2 = GRU(rnn_size, return_sequences=True, kernel_initializer='he_normal', name='gru2')(gru1_merged) gru_2b = GRU(rnn_size, return_sequences=True, go_backwards=True, kernel_initializer='he_normal', name='gru2_b')(gru1_merged) x = concatenate([gru_2, gru_2b]) x = Dropout(0.25)(x) x = Dense(n_class, kernel_initializer='he_normal', activation='softmax')(x) base_model = Model(inputs=input_tensor, outputs=x) base_model.load_weights(model_path) return base_modelmodel_path为模型weights文件路径 ocr部分的网络模型(keras模型) 输入层:164483的tensor 输出层:长度为7 的tensor,类别有len(chars)+1种 chars: chars = [u"京", u"沪", u"津", u"渝", u"冀", u"晋", u"蒙", u"辽", u"吉", u"黑", u"苏", u"浙", u"皖", u"闽", u"赣", u"鲁", u"豫", u"鄂", u"湘", u"粤", u"桂", u"琼", u"川", u"贵", u"云", u"藏", u"陕", u"甘", u"青", u"宁", u"新", u"0", u"1", u"2", u"3", u"4", u"5", u"6", u"7", u"8", u"9", u"A", u"B", u"C", u"D", u"E", u"F", u"G", u"H", u"J", u"K", u"L", u"M", u"N", u"P", u"Q", u"R", u"S", u"T", u"U", u"V", u"W", u"X", u"Y", u"Z",u"港",u"学",u"使",u"警",u"澳",u"挂",u"军",u"北",u"南",u"广",u"沈",u"兰",u"成",u"济",u"海",u"民",u"航",u"空" ]网络结构是三层卷积神经网络(CNN),以及四层内控循环单元(GRU)组成 7.标注好的车牌数据集(文末链接提供下载):
下图源码&环境部署视频教程&数据集&自定义UI界面 |
 参考博客《Python基于OpenCV的实时视频流车牌识别(源码&教程)》
【本文地址】
今日新闻 |
点击排行 |
|
推荐新闻 |
图片新闻 |
|
专题文章 |