保姆级 |
您所在的位置:网站首页 › 虚拟机编译指令怎么用的啊 › 保姆级 |
保姆级
|
0x00 前言
Nginx 是一个 HTTP 和反向代理服务器, 邮件代理服务器, 和通用 TCP/UDP 代理服务器, 最初由伊戈尔·西索耶夫(Igor Sysoev)撰写。采用编译安装可以根据自身需要自定义配置,让服务器有更高的安全性和稳定性。
0x01 环境说明 HECS(云耀云服务器)Ubuntu 22.04Nginx 1.22.1GCC 11.3.0Make 4.3PCRE 8.39OpenSSL 3.0.2zlib 1.2.11GD 2.3.0
0x02 准备工作 在 Nginx 编译安装之前,我们先要提前做一些准备工作。需要安装 GCC 、 Make 、 PCRE 、 OpenSSL 、 zlib 、 GD 环境依赖项。
Ⅰ更新镜像源。
Ⅱ安装 GCC 库。
Ⅲ安装 make 库。
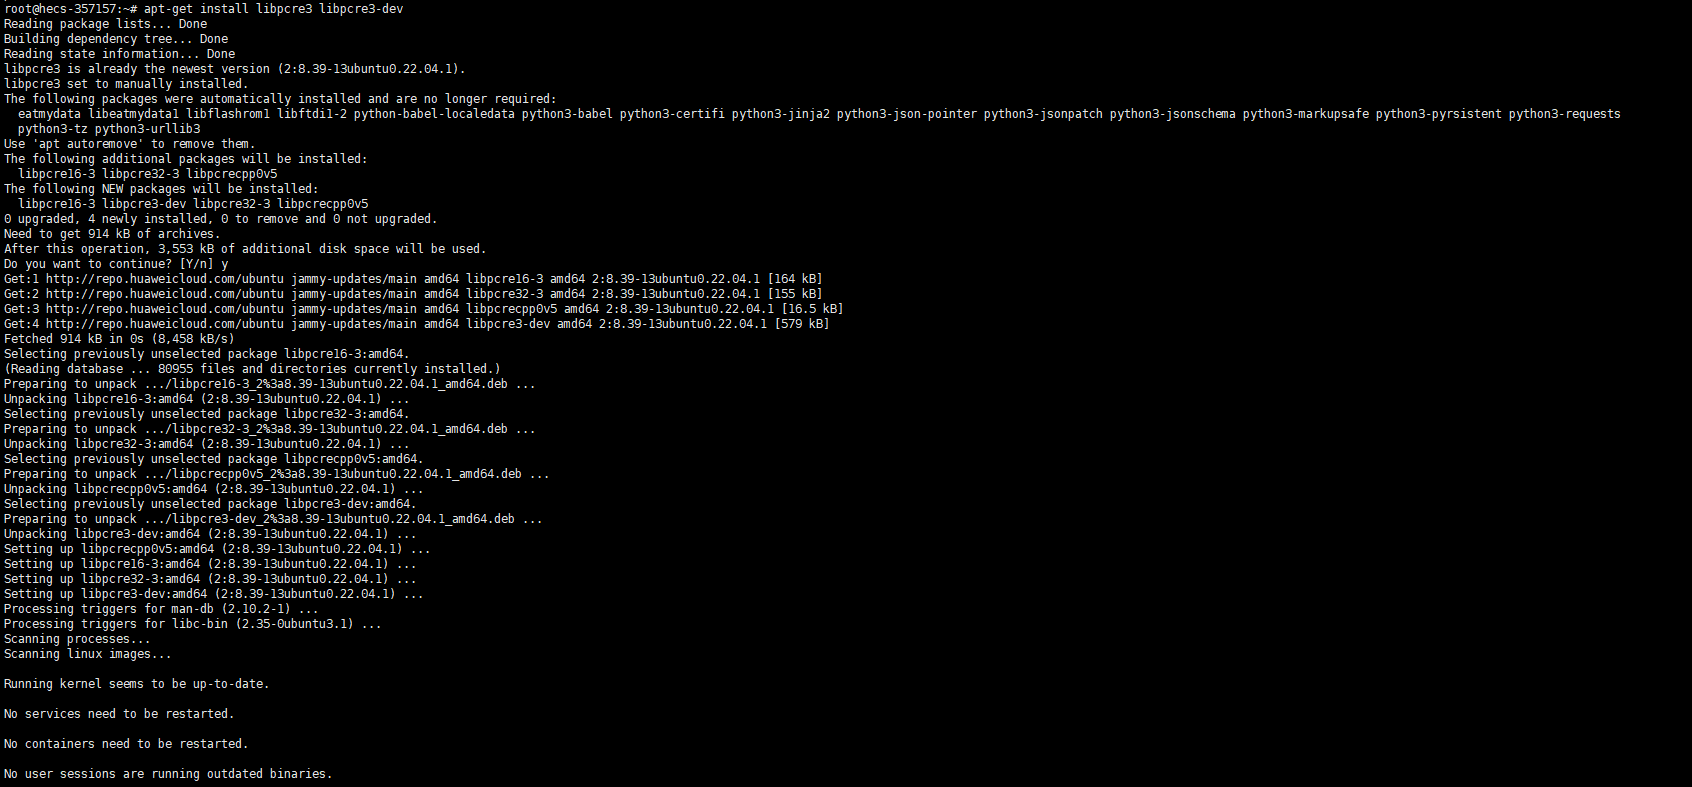
Ⅳ安装 PCRE 库。
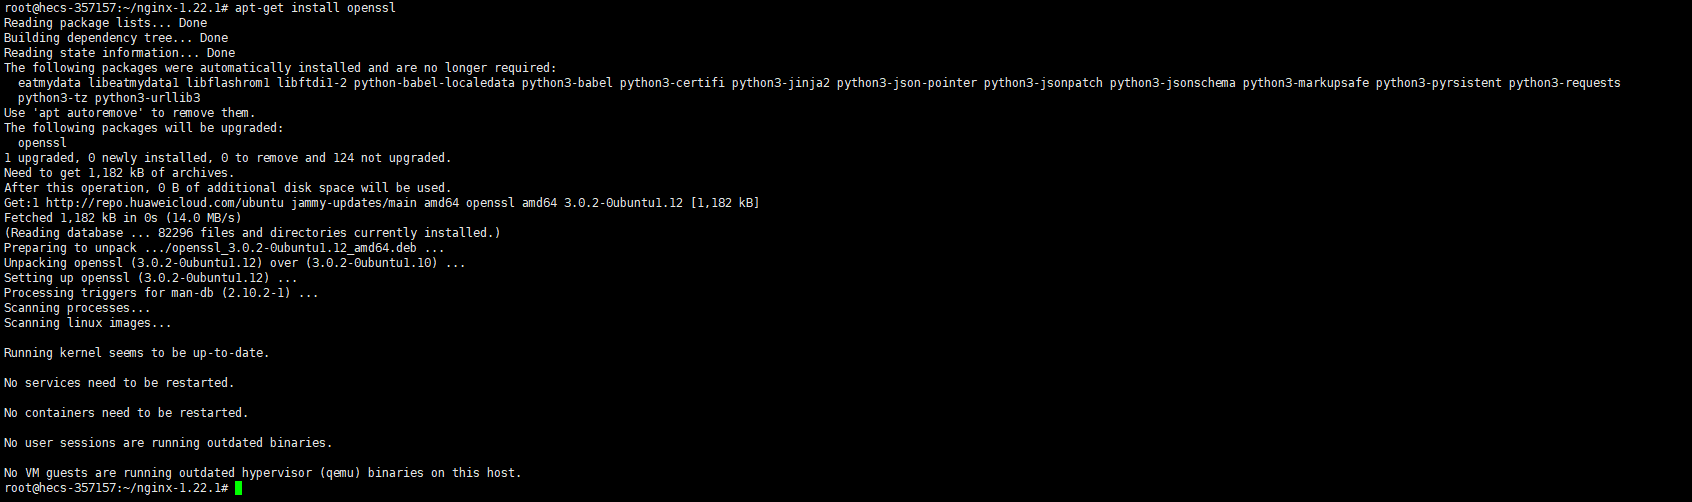
Ⅴ安装 OpenSSL 库。
Ⅵ安装 zlib 库。
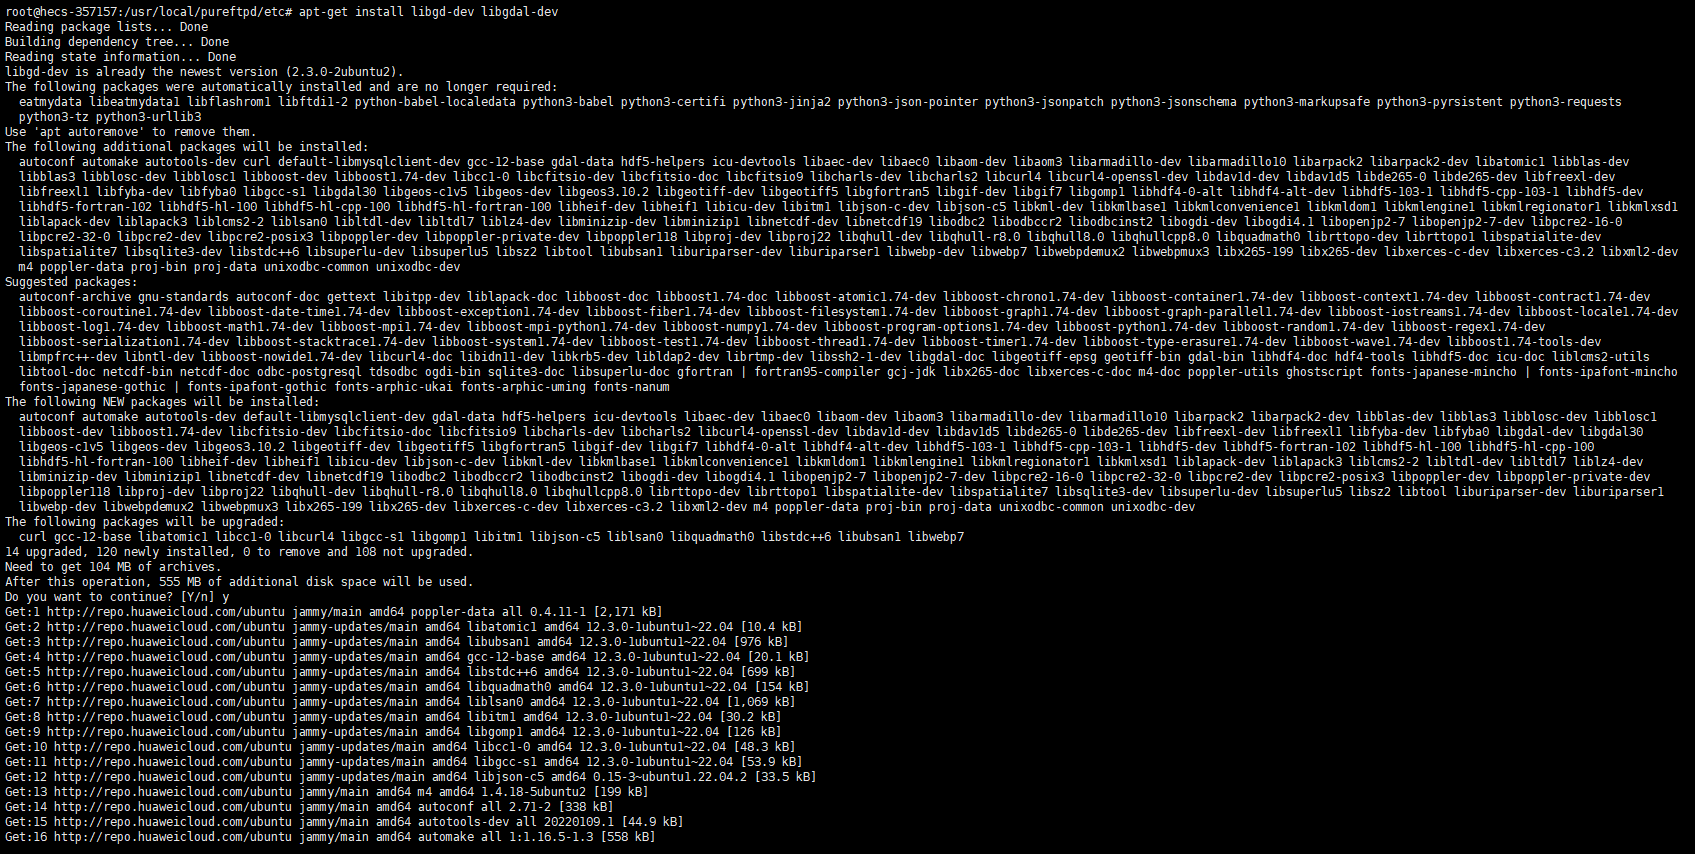
Ⅶ安装 GD 库。
0x03 Nginx下载 需要注意的是,使用编译安装时间会比较久。但是编译安装更适合生产环境,所以我个人更倾向于使用编译安装。
Ⅰ在开始之前我们需要先创建 nginx 用户,之所以这么做主要是为了降低服务器风险,让 nginx 以最小的权限运行。
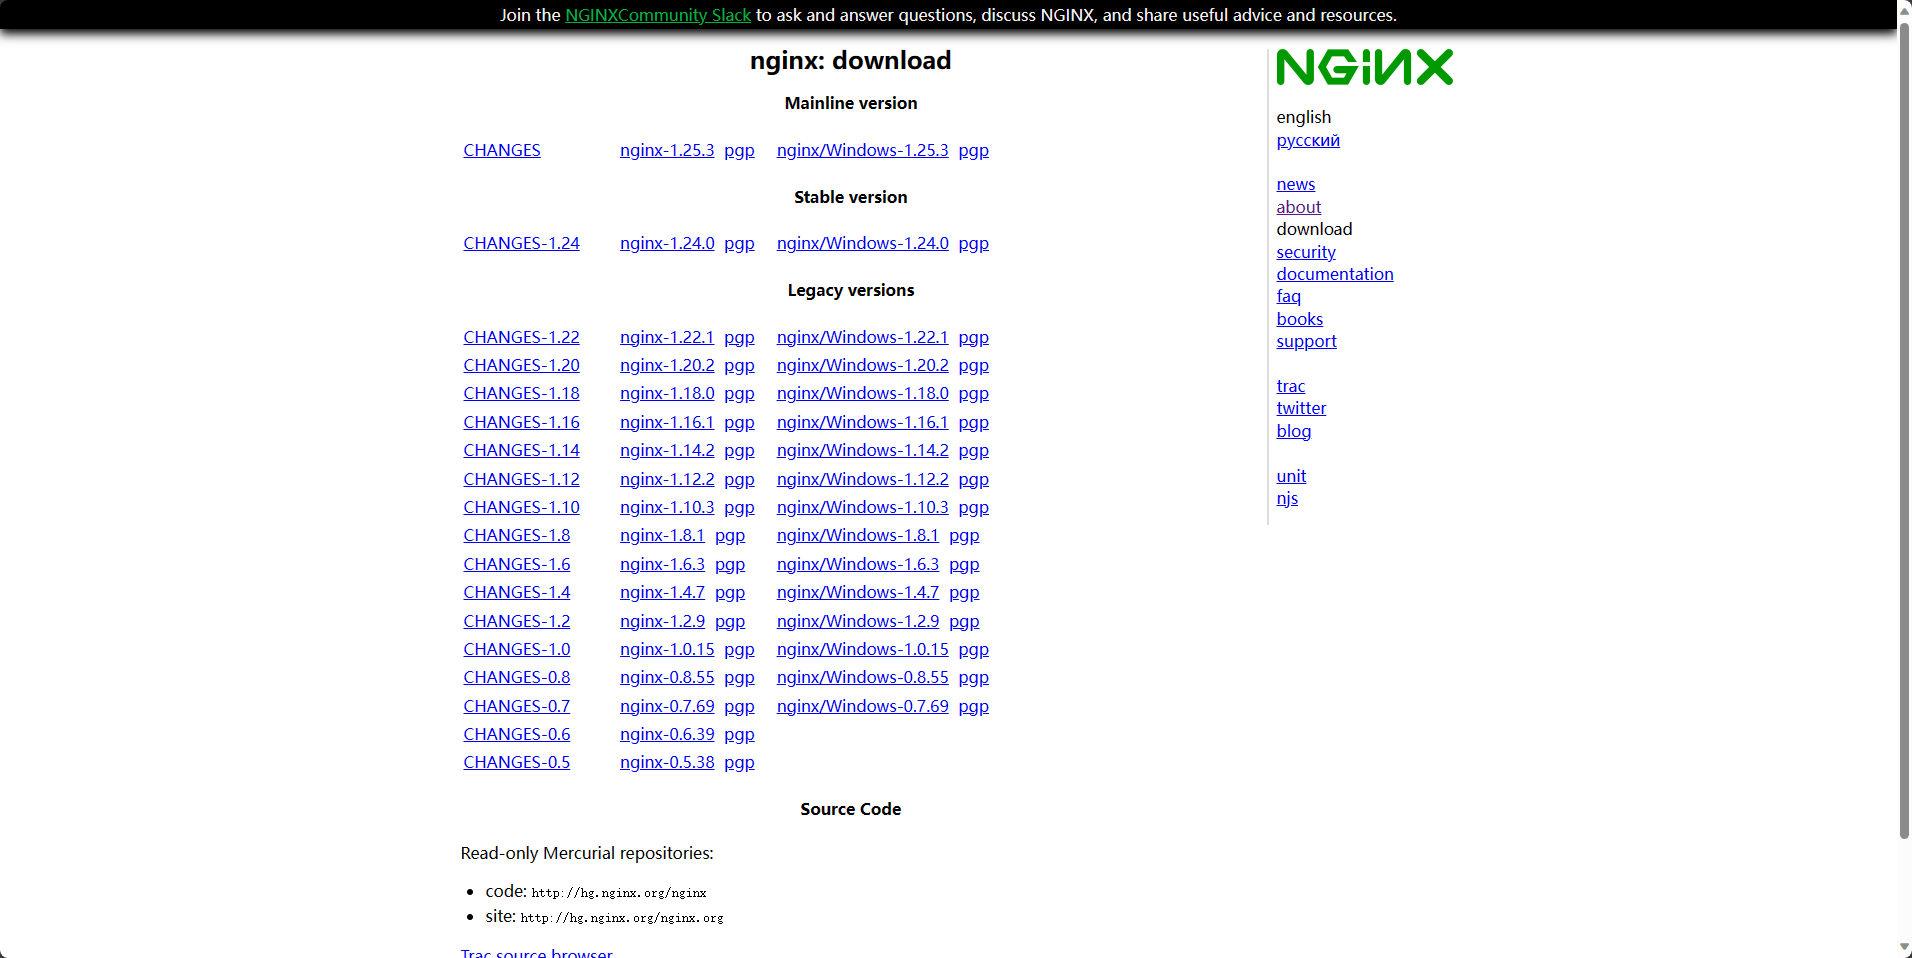
Ⅱ访问 nginx 官网。
Ⅲ下载 Nginx1.22.1 。
Ⅳ解压 Nginx1.22.1 。
0x04 运行配置脚本 Ⅰ打开解压缩后的 nginx-1.22.1 文件。
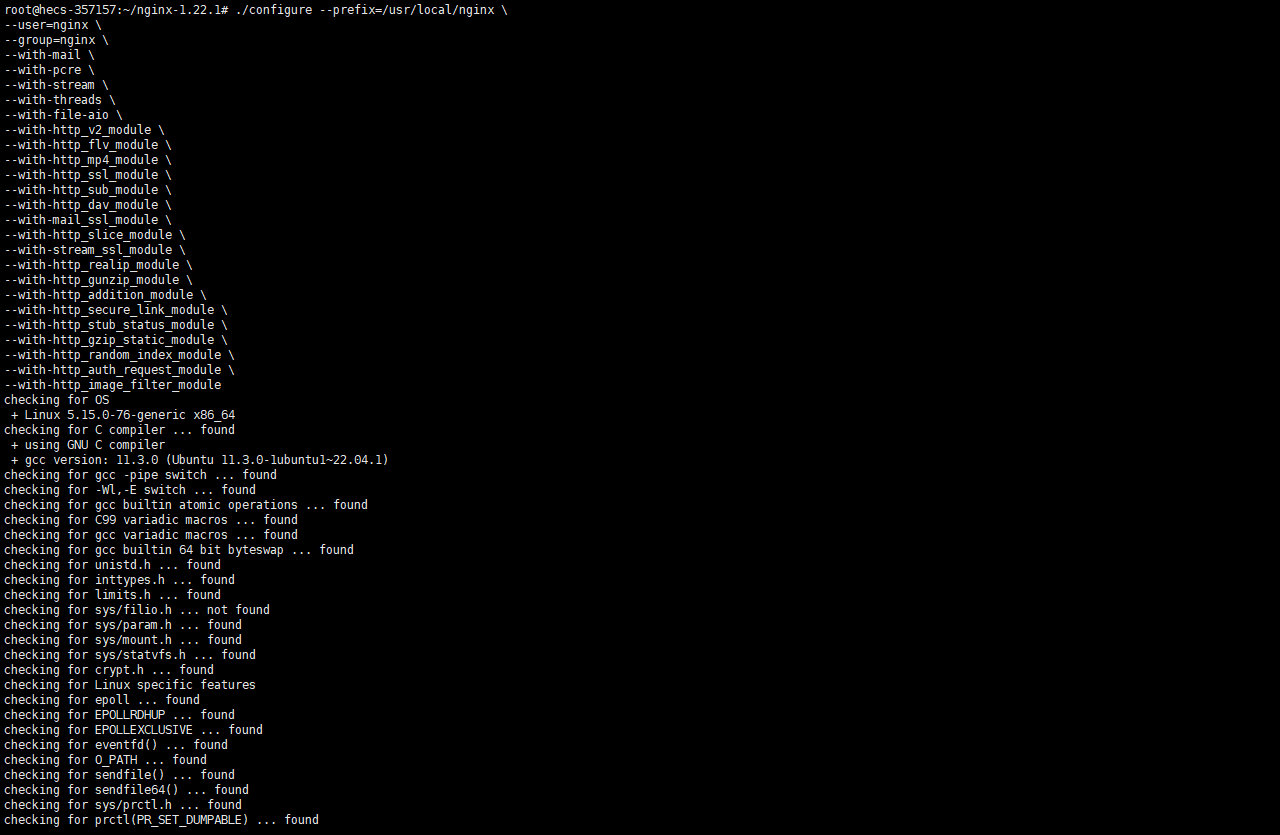
Ⅱ运行 ./configure 配置脚本,这个脚本主要用来检查 nginx-1.22.1 环境所需的依赖项并配置编译选项。
关于配置命令的使用说明: 命令说明--prefix=/usr/local/nginx指定安装目录为/usr/local/nginx。--user=nginx指定运行Nginx的用户为nginx。--group=nginx指定运行Nginx的用户组为nginx。--with-mail启用邮件模块,用于处理邮件代理。--with-pcre启用PCRE模块,用于支持正则表达式。--with-stream启用Stream模块,用于支持TCP和UDP代理。--with-threads启用Threads模块,用于支持多线程操作。--with-file-aio启用File AIO模块,用于支持异步文件IO。--with-http_v2_module启用HTTP/2模块,用于支持HTTP/2协议。--with-http_flv_module启用FLV模块,用于支持FLV流媒体。--with-http_mp4_module启用MP4模块,用于支持MP4流媒体。--with-http_ssl_module启用SSL模块,用于支持HTTPS。--with-http_sub_module启用Substitution模块,用于支持内容替换。--with-http_dav_module启用DAV模块,用于支持WebDAV。--with-mail_ssl_module启用Mail SSL模块,用于支持安全邮件传输。--with-http_slice_module启用Slice模块,用于支持分片上传。--with-stream_ssl_module启用Stream SSL模块,用于支持安全TCP和UDP代理。--with-http_realip_module启用Real IP模块,用于获取真实的客户端IP地址。--with-http_gunzip_module启用Gzip模块,用于支持压缩和解压缩。--with-http_addition_module启用Addition模块,用于支持响应内容的追加。--with-http_secure_link_module启用Secure Link模块,用于生成和验证安全链接。--with-http_stub_status_module启用Stub Status模块,用于获取Nginx的运行状态。--with-http_gzip_static_module启用Gzip Static模块,用于支持静态文件的压缩。--with-http_random_index_module启用Random Index模块,用于随机选择索引文件。--with-http_auth_request_module启用Auth Request模块,用于验证用户授权请求。--with-http_image_filter_module启用Image Filter模块,用于处理图像。
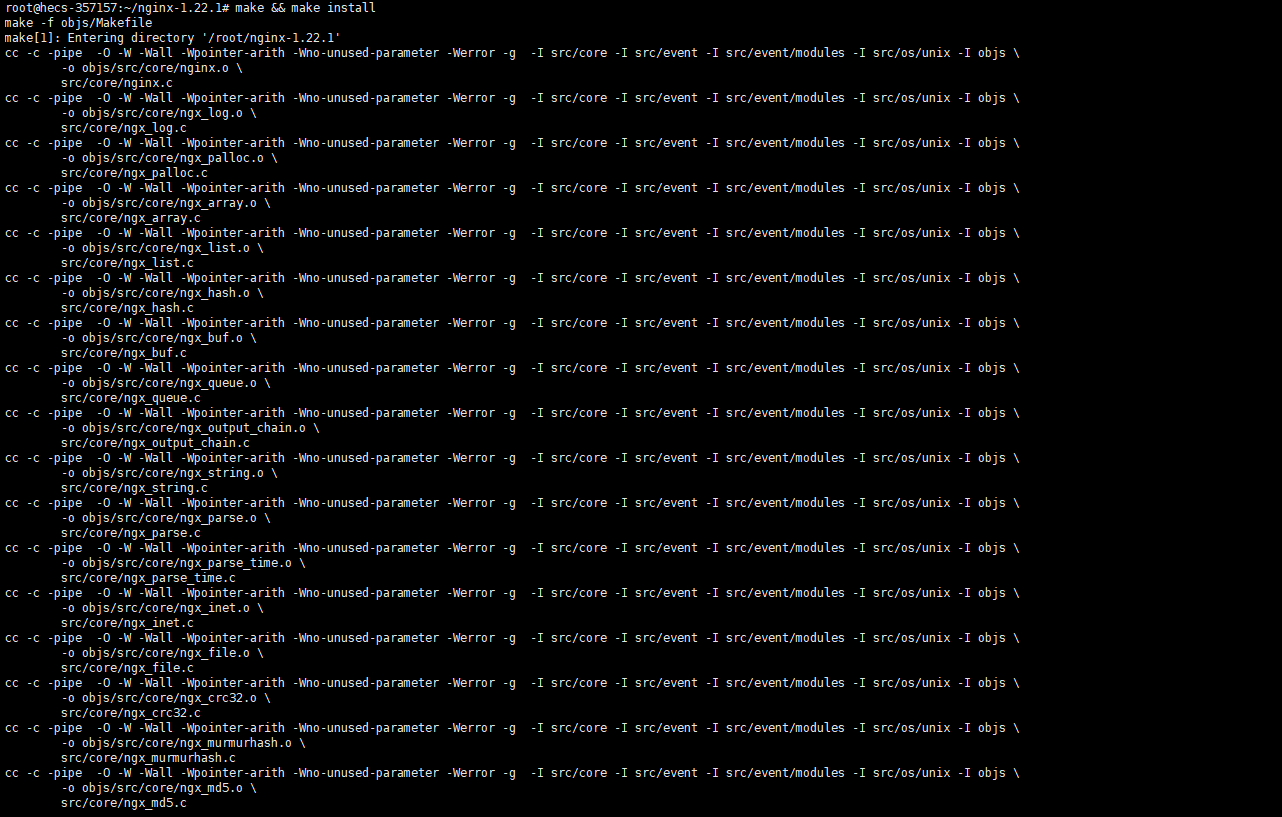
0x05 Nginx编译安装 Ⅰ编译安装 Nginx1.22.1 。
0x06 Nginx验证启动 Ⅰ访问 Nginx1.22.1 的启动文件夹。
Ⅱ启动 Nginx1.22.1 。
Ⅲ验证 Nginx1.22.1 文件。
Ⅳ查看 Nginx1.22.1 启动状态。
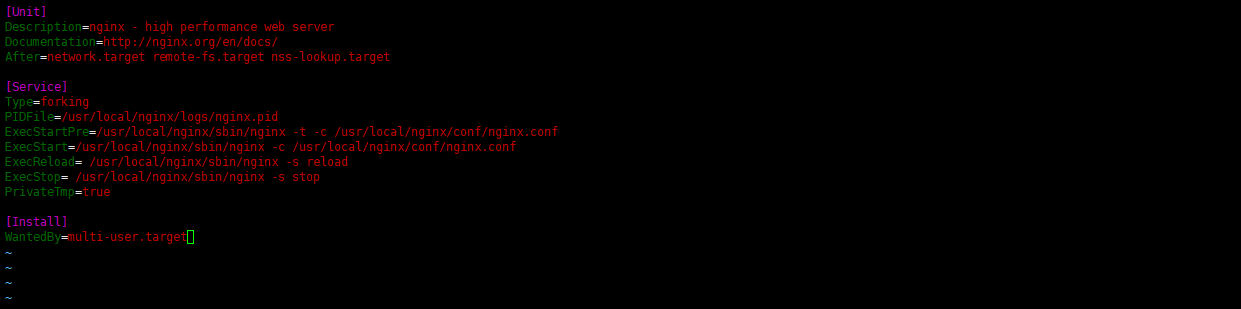
0x07 Nginx服务配置 Ⅰ创建 Nginx1.22.1 配置文件。
Ⅱ编辑 Nginx1.22.1 运行配置文件,保存并退出。 注意:在写入配置文件时,最好将中文注释去除。
Ⅲ给刚刚创建好的 Nginx1.22.1 运行配置文件添加权限。
Ⅳ打开 Nginx1.22.1 配置文件。
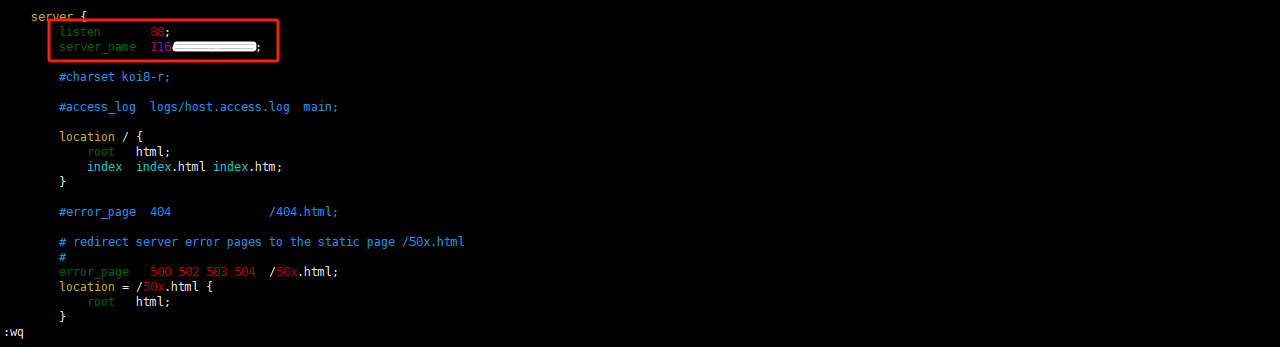
Ⅴ编辑 Nginx1.22.1 配置文件。这里修改端口为 88 端口号,并设置主机名建立连接,保存并退出。注意需要在服务器中开放 88 端口号。
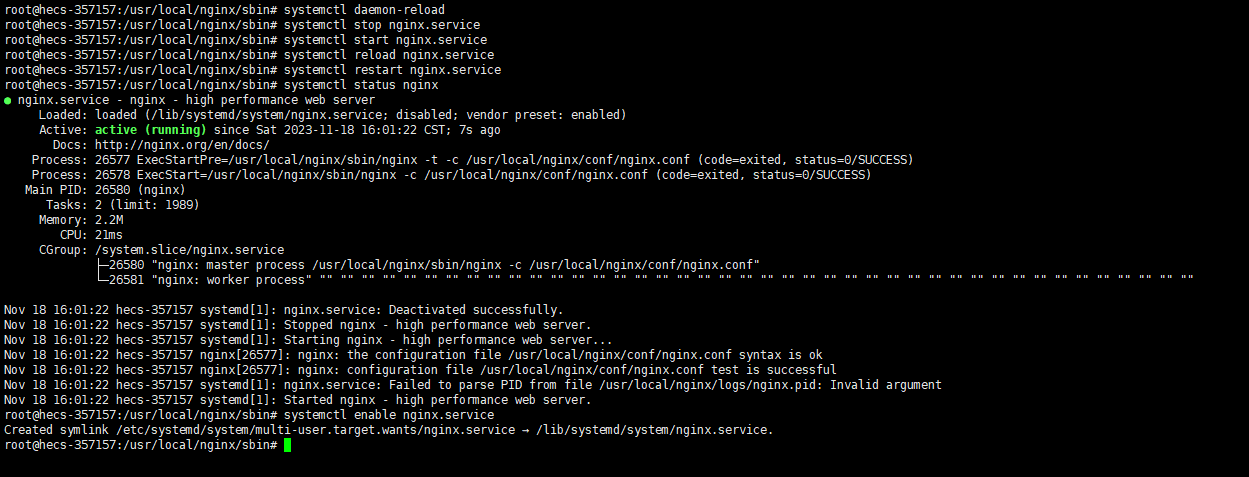
0x08 Nginx重载访问 Ⅰ重载 Nginx1.22.1 服务,并设置开机自启动。 注意:请严格按照步骤执行。
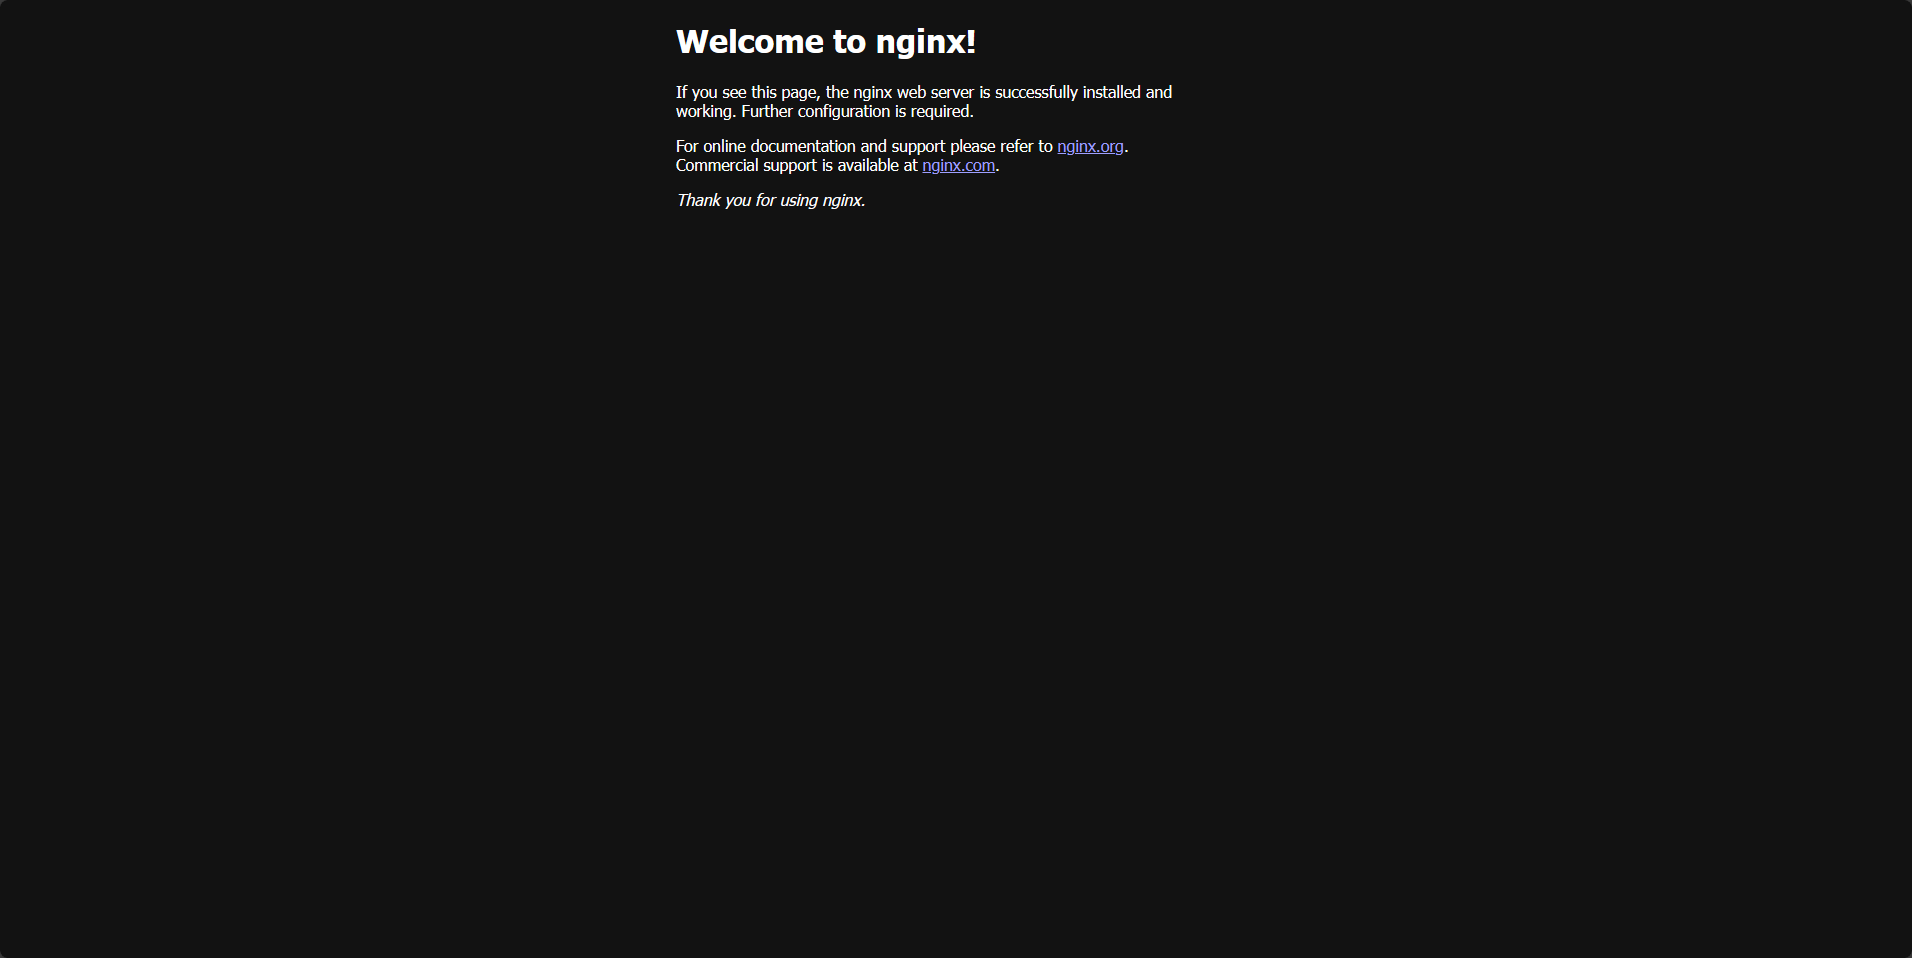
Ⅱ访问 Welcome to nginx! 页面。
0x09 参考文献 [1].帽子先生. nginx入门之----编译安装[EB/OL]. [2023-11-18]. https://zhuanlan.zhihu.com/p/128579141.
0x10 总结 至此Nginx编译安装完成。由于作者水平有限,文中若有错误与不足欢迎留言,便于及时更正。 |


【本文地址】
今日新闻 |
点击排行 |
|
推荐新闻 |
图片新闻 |
|
专题文章 |