微软官方版镜像软件,全程傻瓜式操作,利用U盘安装win10系统。最强懒人包,只要你有一个大于8G的U盘,你就可以省下重装系统的钱,用它买吃的不香么?而且,通过官方软件安装比其他软件安装更加安全可靠,可以防止系统安装时被乘机动手脚,系统功能被阉割,影响后续使用。
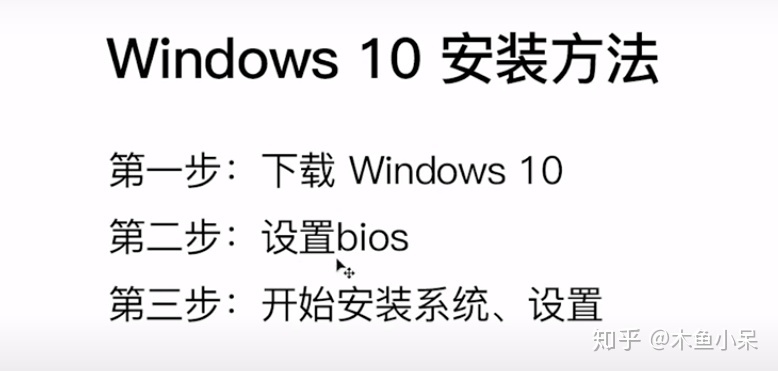
![](https://img-blog.csdnimg.cn/img_convert/d01a4fcd959243081b4b41acde5cdfa7.png)
![](https://img-blog.csdnimg.cn/img_convert/97cb8e0e0d836ef263dd01b7a8cc3e9b.png)
一、准备工作:
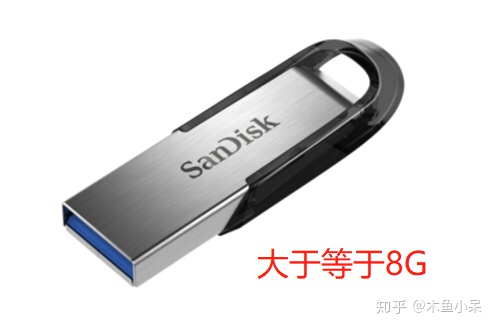
准备一个不小于8G的U盘,备份好里面重要东西,然后格式化微软官网win10系统镜像工具MediaCreationTool2004保持网络连接,为微软官方制作启动盘做准备
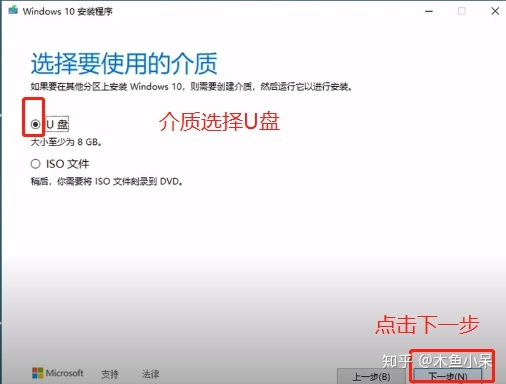
二、利用微软官方工具制作U盘启动盘
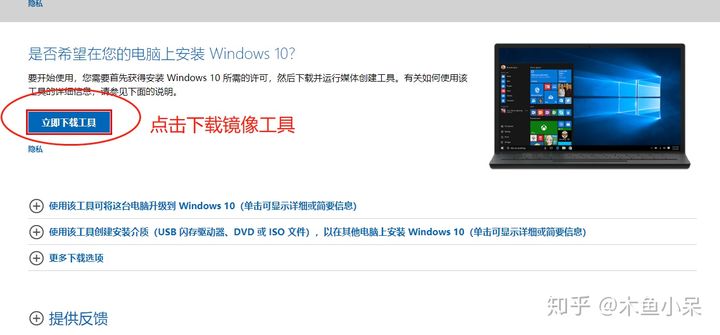
1.下载微软官方镜像软件MediaCreationTool2004 ,官网:https://www.microsoft.com/zh-cn/software-download/windows10
![](https://img-blog.csdnimg.cn/img_convert/de354835ac034ce611462f57c9691133.png)
![](https://img-blog.csdnimg.cn/img_convert/8fabc43ae2759ee69ed67473b2bbb66b.png)
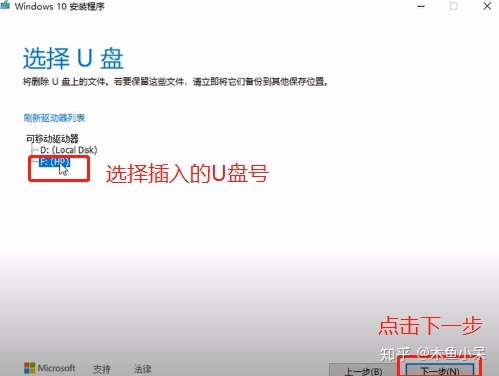
2.利用U盘(必须大于等于8G,系统盘制作完成大概4.02G的样子),制作启动盘。使用U盘时,盘内有用文件请提前拷贝走,因为在制作启动盘时会被格式化,届时你的资料全部丢失。我这里用的是一个32G的U盘。
![](https://img-blog.csdnimg.cn/img_convert/3aeaeff5ed55976c565935dfd47a7ffb.png)
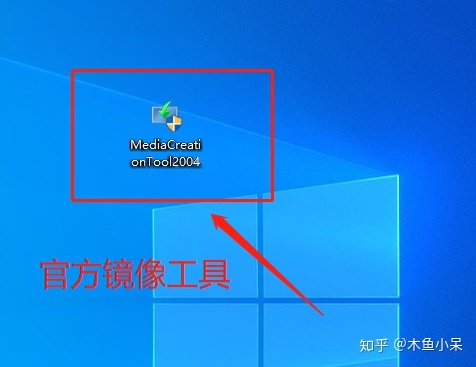
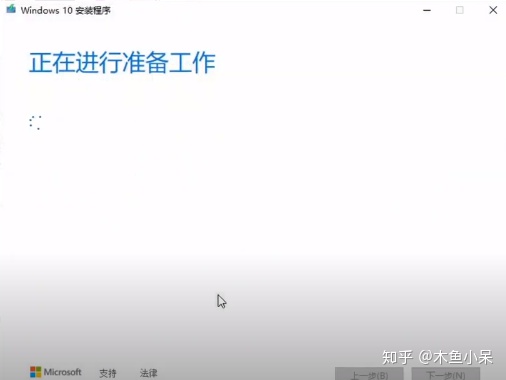
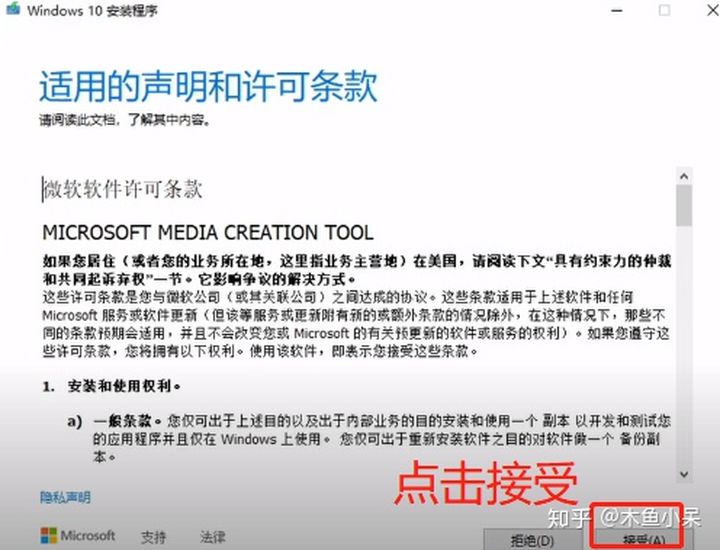
3. 将准备好的u盘插到电脑上,拷走里面的有用文件,完成之后进行格式化,双击运行刚刚下载好的MediaCreationTool2004工具。
![](https://img-blog.csdnimg.cn/img_convert/577ae964b755622722559410a3bcc7d0.png)
![](https://img-blog.csdnimg.cn/img_convert/667e69f5bb7fdd4f3ef2c13c2df3f2aa.png)
![](https://img-blog.csdnimg.cn/img_convert/bfbe966d15d63842a6640e583467f7eb.png)
![](https://img-blog.csdnimg.cn/img_convert/5a253c58488222196806a43a3a806f01.png)
![](https://img-blog.csdnimg.cn/img_convert/cba2dc0f05e00a5d4cc21fc091b79b8e.png)
![](https://img-blog.csdnimg.cn/img_convert/229e49341bb9826660cba818a2495a29.png)
![](https://img-blog.csdnimg.cn/img_convert/274fd58dd2e98e8fc9b89d3b5b995b98.png)
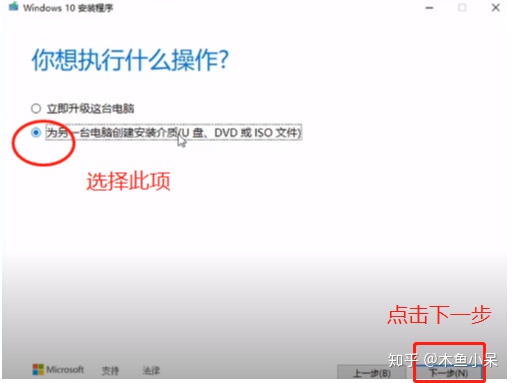
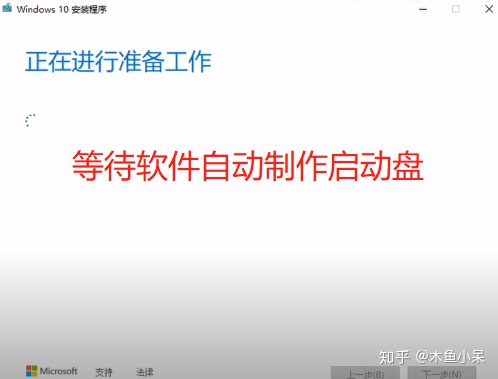
4. 制作过程根据各自网速条件时间不等,我大概花了30分钟不到。制作完成之后可以长期用来当作重装win10系统的启动盘。到此,官方提供的U盘镜像软件制作完成。
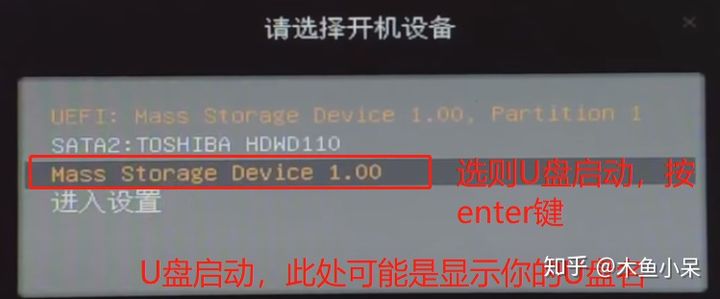
5. 准备好U盘启动盘之后,将U盘拿到要装Win10系统的电脑上。步骤为:先关掉电脑,插入U盘,然后按启动按钮。快启动的时候,反复按电脑启动热键,每个电脑的启动热键不一样。快启动时电脑屏幕上面底部位置会有提示,我的联想电脑启动热键是F12,有些电脑的是delete键,有的是F8。这个只需在电脑快启动时注意屏幕上的提示就好。
![](https://img-blog.csdnimg.cn/img_convert/c492190c36111e77a3d531755bbf175f.png)
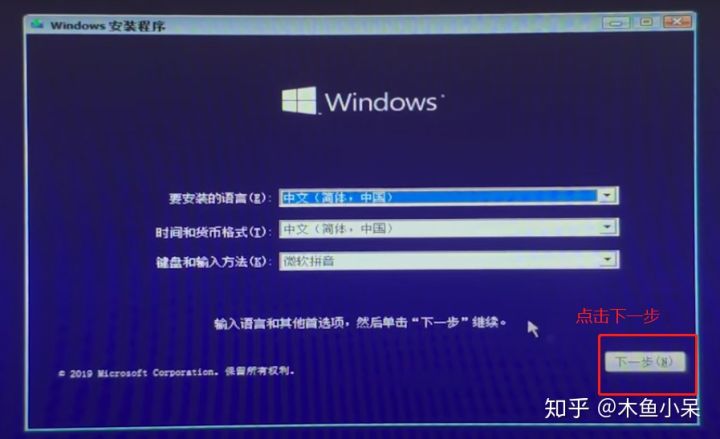
6. 出现下面win10的图标就证明快启动成功了。
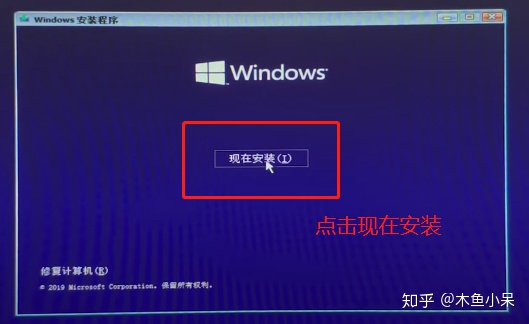
![](https://img-blog.csdnimg.cn/img_convert/7fb1d65720058efa57e0546a016837e0.png)
7. 等待一段时间,进入下一步操作。
![](https://img-blog.csdnimg.cn/img_convert/6e62b5daecc30b2ac5b89e2cd19c3bf1.png)
![](https://img-blog.csdnimg.cn/img_convert/b98b95432a2cea3552ee6d30a2d0ca9c.png)
![](https://img-blog.csdnimg.cn/img_convert/c6be1ec0ed85d4b39886f475712c3195.png)
![](https://img-blog.csdnimg.cn/img_convert/d9d6674259a1bc739973e701acc9c20b.png)
![](https://img-blog.csdnimg.cn/img_convert/96f1d0913275ff92c81a87e7b39055bb.png)
![](https://img-blog.csdnimg.cn/img_convert/c0dae86e859823ffc92b311089c2d704.png)
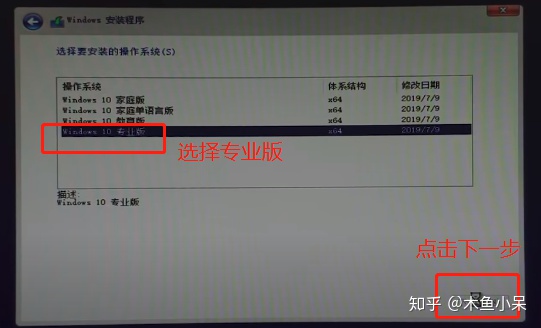
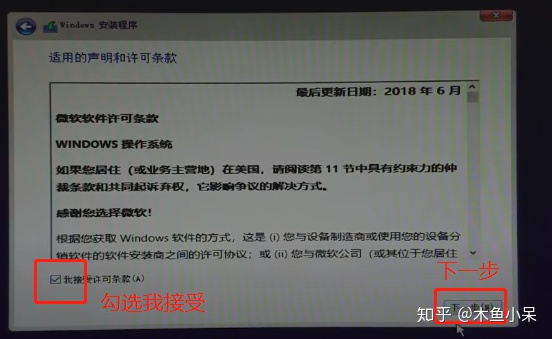
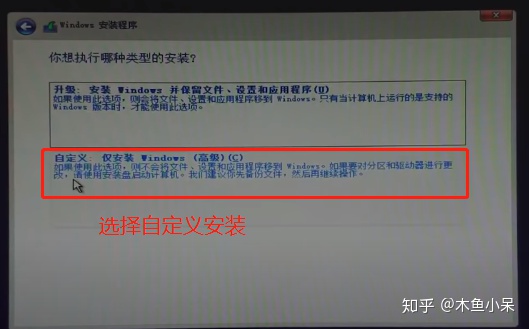
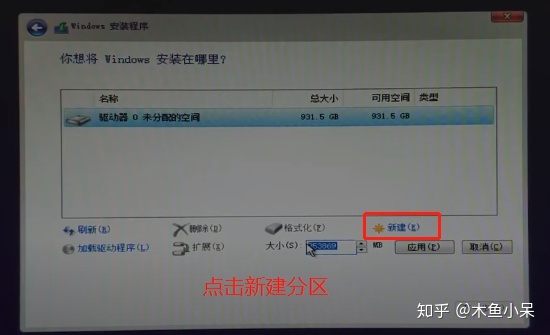
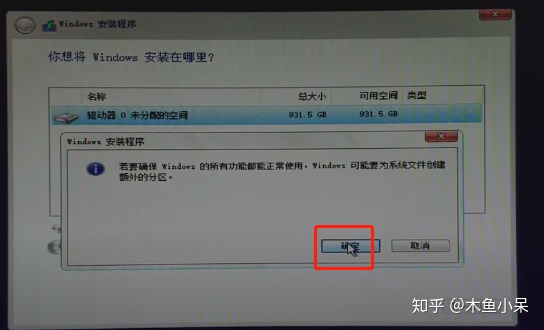
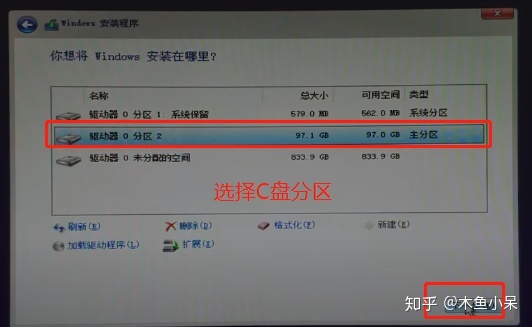
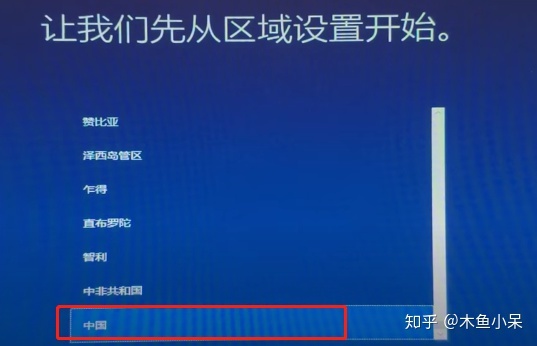
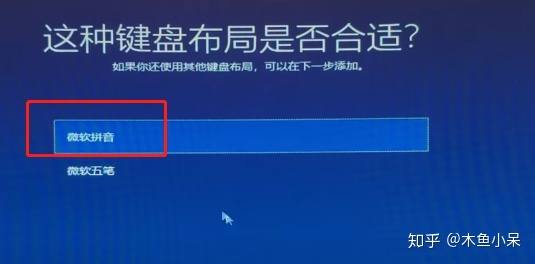
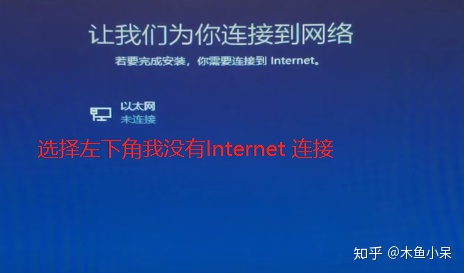
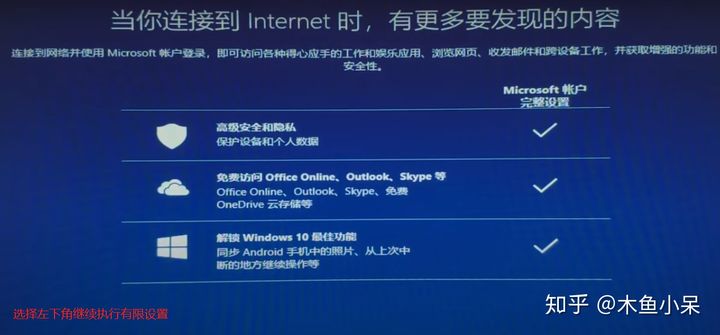
8. 对系统进行分区,根据需要自行分区:分几个区,每个区多少G。
![](https://img-blog.csdnimg.cn/img_convert/4f535be294d528dd475bb5d15f85c7dc.png)
![](https://img-blog.csdnimg.cn/img_convert/eac824044a50eb3f8e87a535fe690cc0.png)
![](https://img-blog.csdnimg.cn/img_convert/b6fabde543e2cc0843b324fe15324aa1.png)
![](https://img-blog.csdnimg.cn/img_convert/8fb8004be6b855d2fc750e9167c3dea9.png)
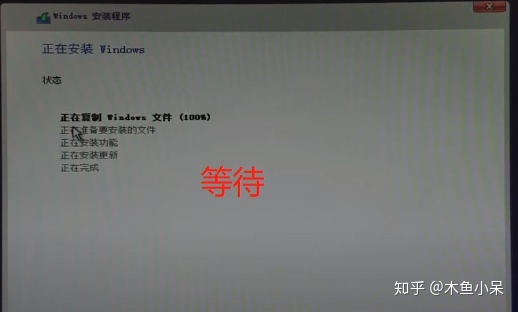
9. 之后就是等待时间,其中电脑会重启一次,重启之后,需要把U盘拔掉。
![](https://img-blog.csdnimg.cn/img_convert/e2b32897ca8bb45972d88fd308217ba0.png)
10. 等段一段时间后就正常配置安装系统了,期间会自动重启几次。
![](https://img-blog.csdnimg.cn/img_convert/8b0639e5f2133950cd57c93c66d41c04.png)
![](https://img-blog.csdnimg.cn/img_convert/33df88878c55f6a1a6504f93e7599460.png)
![](https://img-blog.csdnimg.cn/img_convert/3f9503125a617ac3f73269e174ac245e.png)
![](https://img-blog.csdnimg.cn/img_convert/10e31394daa6ae12942fc73a9682e8d6.png)
![](https://img-blog.csdnimg.cn/img_convert/b94e3d8a95ecb698e3adb6146aaa00e6.png)
![](https://img-blog.csdnimg.cn/img_convert/f6d9be05d3183b47212449b59f27af55.png)
![](https://img-blog.csdnimg.cn/img_convert/a459f6ae6b8688e4549bcaa4e23c91a7.png)
![](https://img-blog.csdnimg.cn/img_convert/008b97f6e788dbe346af586001d06220.png)
![](https://img-blog.csdnimg.cn/img_convert/6e8a5de28eaeccde04440ac03bd2d8c6.png)
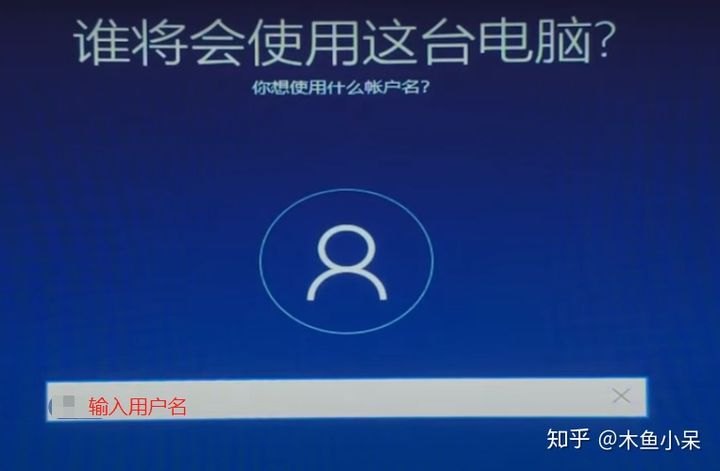
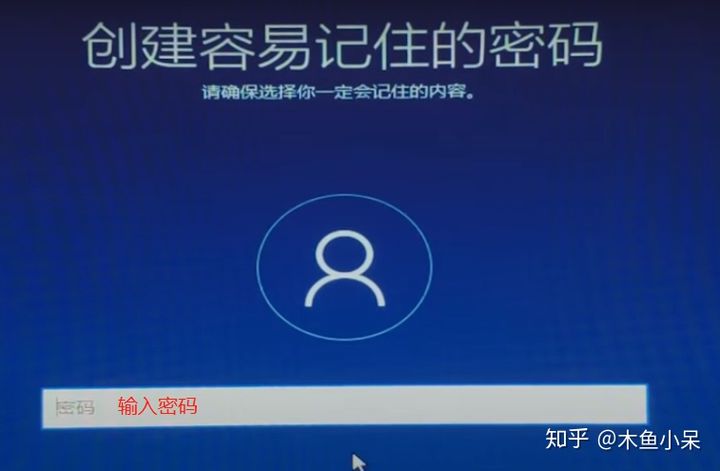
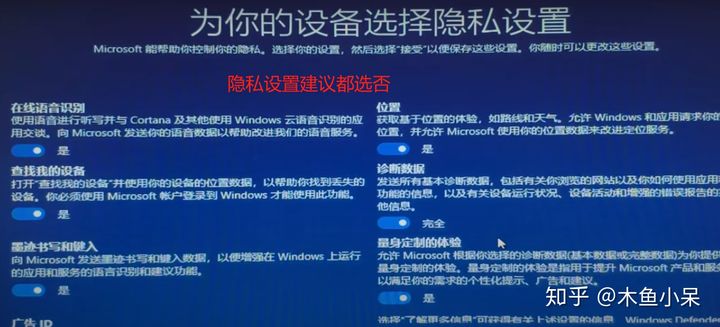
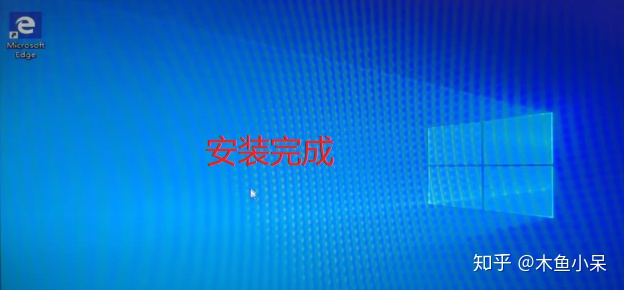
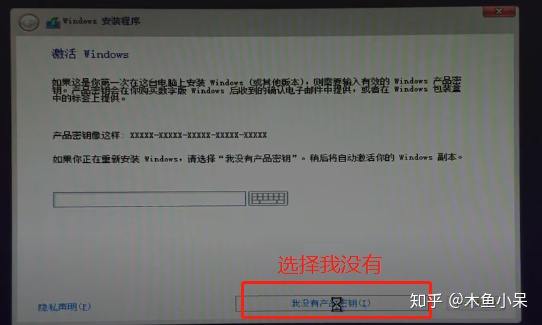
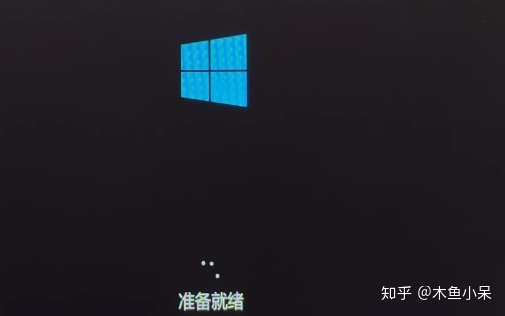
11. 至此,系统安装完成。注意事项:安装完成的系统未激活,相应激活办法,优先推荐正版激活方式(土豪),其他方式激活网上很多教程参考安装等待时间根据电脑的配置不同而不同,我花了大概30分钟
|