| 【小米手环7】使用 Zeus + 表盘自定义工具 为小米手环7开发和安装小程序 | 您所在的位置:网站首页 › 小米手环表盘自定义图片怎么切换 › 【小米手环7】使用 Zeus + 表盘自定义工具 为小米手环7开发和安装小程序 |
【小米手环7】使用 Zeus + 表盘自定义工具 为小米手环7开发和安装小程序
|
有关 Zepp OS
Zepp OS 是华米开发的一个 RTOS,运行在手表、手环等设备上。 最新发布的小米手环7 / 7NFC 搭载的就是由华米研发的 Zepp OS。相比与之前小米手环搭载的 RTOS,Zepp OS 提供了更多的功能,同时支持 安装应用程序 。 为 Zepp OS 编写应用程序为小米手环7编写程序,本质上就是为 Zepp OS 编写应用程序。 实际上,华米官方提供了 Zepp OS 应用程序的 开发文档 ,但是因为某些原因,在 搭载Zepp OS设备的列表 中,并没有看见小米手环7的身影,这将为后续的开发带来一些阻碍,但是作者会在下文给出解决办法。 配置开发环境华米为 Zepp OS 开发的开发工具称为 Zeus ,可以在Zepp OS 的 Zeus CLI 文档 中找到并下载。 按照官方给定的操作下载并配置完成后,在终端输入 zeus 将输出这样的内容: $ zeus Usage: zeus [args?] Commands: main.js init Init a new project in current directory. main.js create Named the project and add to the current directory. main.js login Login to your account. main.js logout Sign out of your account. main.js dev Run this project in development mode. main.js preview Preview this project in your device. main.js build Build this project for production. main.js status View information such as login and emulator connection status. main.js bridge Connect the online App or Simulator for development and debugging. main.js config Operation config value. e.g. set = [= ...] get [ ...] delete [ ...] list [--json] Base Options -h, --help Display help information. [boolean] -v, --version Display version number. [boolean] For more information, see https://docs.zepp.com/ A command is required. Pass --help to see all available commands and options. 安装 VSCode 插件 (可选)安装 VS Code 插件的好处在于可以方便地在编辑器内进行调试操作。 想要调试编写的小程序有两种办法,一种是直接安装在手表/手环上运行,另一种是在开发设备上运行 Zepp OS 模拟器进行调试,显然后者是更为方便的选择。 按照 官方文档 安装配置完成 simulator 之后,打开模拟器将出现如下界面: 配置完开发环境和模拟器之后,就可以着手开发程序了。由于篇幅有限,本文就不讲有关小程序设计的内容了,具体的开发文档可以查阅 Zepp OS 官方文档 ,本部分重点聊如何调试程序。 这里只讲作者自己的程序调试方式,还有很多便利的调试方式等大家探索。 进行调试之前,首先将模拟器打开,选择下载好的 Zepp OS 映像,单击 Simulator Zepp OS 仿真程序。 接下来是设置 Zeus 调试器: Zeus 提供了一个类似 watchdog 的调试机制,当以 $ zeus dev的方式运行 zeus 之后,将会进入到 zeus 的侦察调试模式(这名是作者自己取的): $ zeus dev ╭──────────────────────────────────────────────────────╮ │ │ │ New version available! │ │ Changelog: https://api.huami.com/t/zeus-cli-doc │ │ Run `npm install @zeppos/zeus-cli -g` to update! │ │ │ ╰──────────────────────────────────────────────────────╯ ? simulator host (127.0.0.1): (127.0.0.1)这里将询问调试的 IP 地址,一般直接选择默认即可(按下回车键即可)。接下来 zeus 将检查项目目录,搜索是否有多个构建目标,若有,则会进行下面的提示,使用方向键选择构建目标,按下回车进行下一步操作,若只有一个构建目标,则不会进行下面的提示。 zeus 使用如下命令进行应用程序: zeus build前面提到,zeus 将根据构建配置文件来构建应用程序 (虽然使用如 GTR 3 Pro 的配置文件构建出来的程序可以在小米手环上运行,但是会出现一些兼容性问题) ,而官方并未公布小米手环7相关的构建配置,因此我们需要自己寻找。 小米手环7 应用程序结构为了铺垫下面的内容,这里简单插入讲一下小米手环7的应用程序结构。 首先,无论是表盘还是应用程序,在 Zepp OS 中都具有相似的结构。当我们拿到一个表盘或应用程序的文件的时候,可以发现其一般以 bin 作为后缀,实际上这是一个压缩文件,可以用类似 winrar, unzip 这样的工具解压。 例如,某个官方的表盘文件解压后得到如下的目录结构: . ├── app.bin ├── app.js ├── app.json ├── assets │ ├── 1.png │ ├── 10.png │ ├── 11.png │ ├── 12.png │ ├── 13.png (...) │ ├── 88.png │ ├── 89.png │ ├── 9.png │ └── 90.png └── watchface └── smart-band-7 ├── index.bin └── index.js如下是某个小程序解压之后的目录结构: │ app.bin │ app.json │ ├─assets │ icon.png │ └─page detail.bin index.bin其中 app.json 内包含了应用程序的配置文件,一般是这样的: { "configVersion": "v2", "app": { "appId": 25394, "appName": "课程表", "appType": "app", "version": { "code": 1, "name": "1.0.1" }, "icon": "icon.png", "vender": "Laomo", "description": "schedule for college students" }, "permissions": [], "runtime": { "apiVersion": { "compatible": "1.0.0", "target": "1.0.1", "minVersion": "1.0.0" } }, "targets": { "480x480-gtr-3-pro": { "module": { "page": { "pages": [ "page/index", ] } }, "platforms": [ { "name": "gtr3-pro", "deviceSource": 229 }, { "name": "gtr3-pro-w", "deviceSource": 230 } ], "designWidth": 480 } }, "i18n": { "zh_CN": { "appName": "课程表" } }, "defaultLanguage": "zh_CN" }这个文件在执行 zeus create 的时候就被创建出来了,里面的大部分内容如 appName , description 都可以按需更改。而我们所要更改的构建配置文件则在 "targets" 中: "targets": { "480x480-gtr-3-pro": { "module": { "page": { "pages": [ "page/index", ] } }, "platforms": [ { "name": "gtr3-pro", "deviceSource": 229 }, { "name": "gtr3-pro-w", "deviceSource": 230 } ], "designWidth": 480 } },我们需要在这里填入小米手环7的 target 配置。在对官方表盘的解包中,我们得到了这样的配置: "platforms": [ { "name": "smart-band-7", "deviceSource": 260 }, { "name": "smart-band-7", "deviceSource": 261 }, { "name": "smart-band-7", "deviceSource": 262 }, { "name": "smart-band-7", "deviceSource": 263 }, { "name": "smart-band-7", "deviceSource": 264 }, { "name": "smart-band-7", "deviceSource": 265 }, { "name": "smart-band-7", "deviceSource": 266 } ],这段配置文件是来自构建后的bin文件的,构建过程中,zeus 对 app.json 文件进行了修改,因此若需要将这段配置应用到我们的 app.json ,需要进行更改,更改后得到下面的内容: "smart-band-7": { "module": { "page": { "pages": [ "page/index", ] } }, "platforms": [ { "name": "smart-band-7", "deviceSource": 260 }, { "name": "smart-band-7", "deviceSource": 261 }, { "name": "smart-band-7", "deviceSource": 262 }, { "name": "smart-band-7", "deviceSource": 263 }, { "name": "smart-band-7", "deviceSource": 264 }, { "name": "smart-band-7", "deviceSource": 265 }, { "name": "smart-band-7", "deviceSource": 266 } ], "designWidth": 192 }将这段配置文件加入到 app.json 中,得到下面的文件: { "configVersion": "v2", "app": { "appId": 25394, "appName": "课程表", "appType": "app", "version": { "code": 1, "name": "1.0.1" }, "icon": "icon.png", "vender": "Laomo", "description": "schedule for college students" }, "permissions": [], "runtime": { "apiVersion": { "compatible": "1.0.0", "target": "1.0.1", "minVersion": "1.0.0" } }, "targets": { "480x480-gtr-3-pro": { "module": { "page": { "pages": [ "page/index", ] } }, "platforms": [ { "name": "gtr3-pro", "deviceSource": 229 }, { "name": "gtr3-pro-w", "deviceSource": 230 } ], "designWidth": 480 }, "smart-band-7": { "module": { "page": { "pages": [ "page/index", ] } }, "platforms": [ { "name": "smart-band-7", "deviceSource": 260 }, { "name": "smart-band-7", "deviceSource": 261 }, { "name": "smart-band-7", "deviceSource": 262 }, { "name": "smart-band-7", "deviceSource": 263 }, { "name": "smart-band-7", "deviceSource": 264 }, { "name": "smart-band-7", "deviceSource": 265 }, { "name": "smart-band-7", "deviceSource": 266 } ], "designWidth": 192 } }, "i18n": { "zh_CN": { "appName": "课程表" } }, "defaultLanguage": "zh_CN" }至此,我们在进行 zeus build 的时候,选择 smart-band-7 就可以构建了。 但是! 这样构建会出现图标丢失的问题,原因在于我们选择了smart-band-7 这个 target,而我们的 assets/ 文件夹中并不存在属于 smart-band-7 的文件夹,只需要在 assets 文件夹中添加 smart-band-7 文件夹,并将制作好的 icon.png 放入此文件夹中即可。 安装小程序 得到小程序文件经过 zeus build 构建出来的文件存放在 dist/ 文件夹中,其中的 .zab 文件是 Zepp OS 应用程序的发布包,这个包包含了除主程序之外的其他内容,如小米手环7不支持的伴生服务。为了得到我们需要的应用程序文件,我们需要对此 .zab 进行解压,可以发现有 manifest.json 文件和一个 zpk 后缀的文件: 在得到我们的 device.zip 之后,就可以进行安装了。我们使用来自 米坛社区 的 表盘自定义工具 进行应用程序安装。 以上就是小米手环7应用程序开发和安装的过程了。相信在小米手环使用了 Zepp OS 之后,会有越来越多有趣的应用程序出现,让小米手环的功能愈发强大。 |
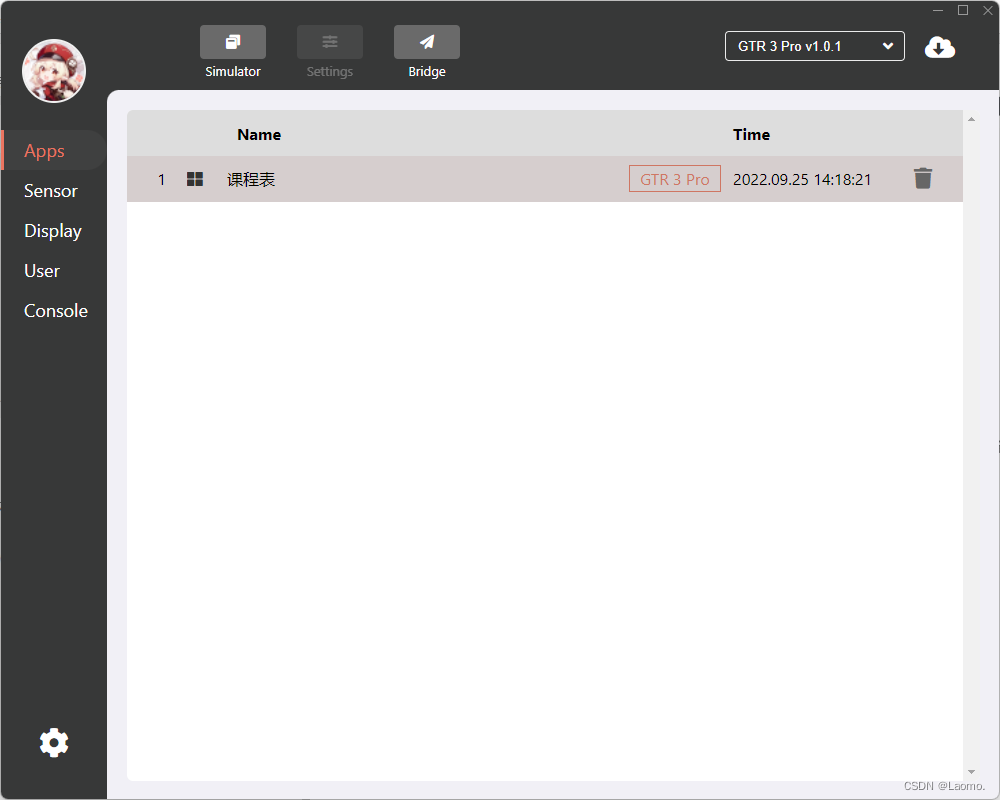 第一次安装模拟器需要安装 Zepp OS 映像:
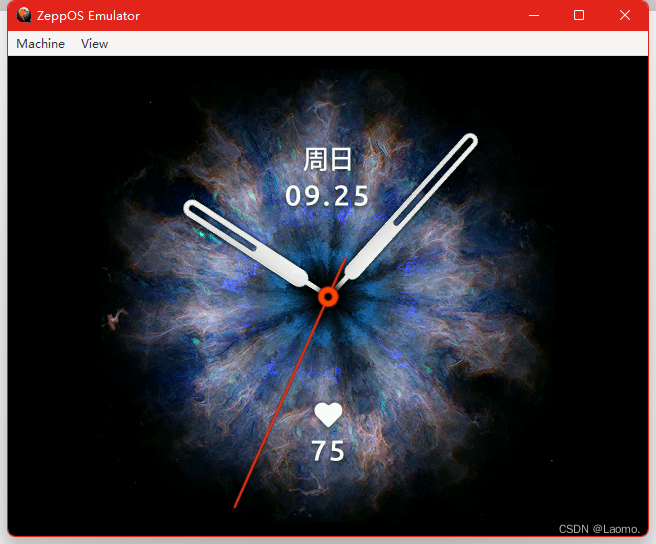
 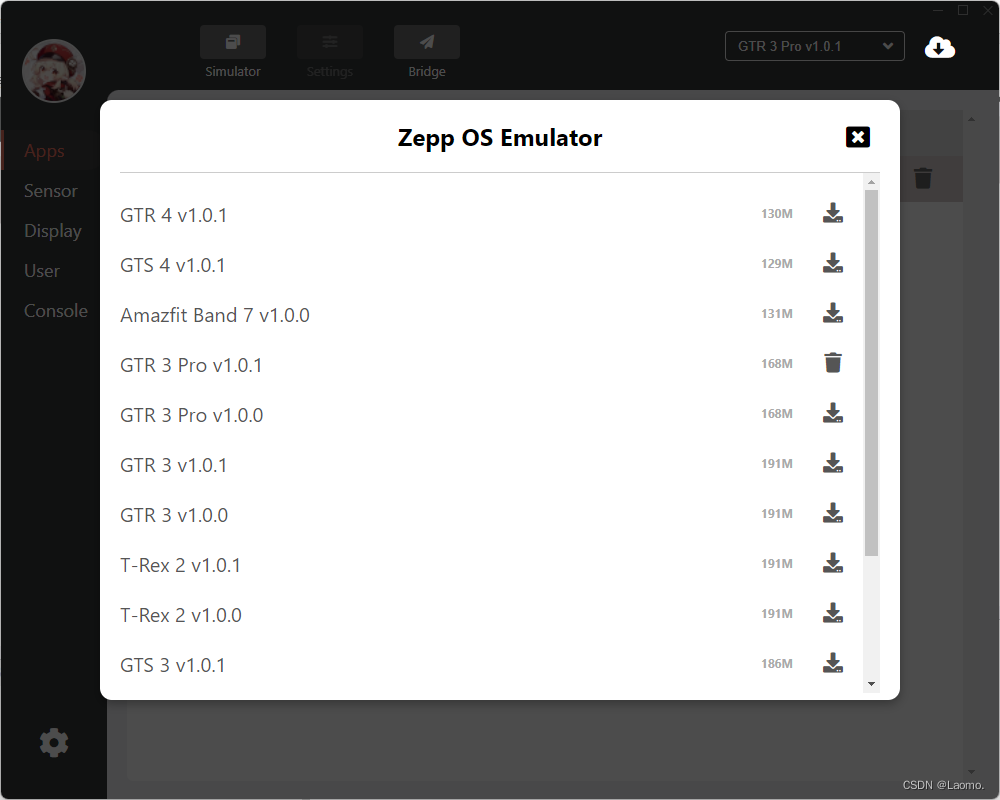 可以发现并没有找到小米手环7的设备名 Smart Band 7 ,看起来官方并没有打算让用户为小米手环7开发应用程序。这里我们可以选择 GTR 3 Pro v1.0.0 作为临时调试系统使用,等到构建项目的时候再使用小米手环7的构建配置。
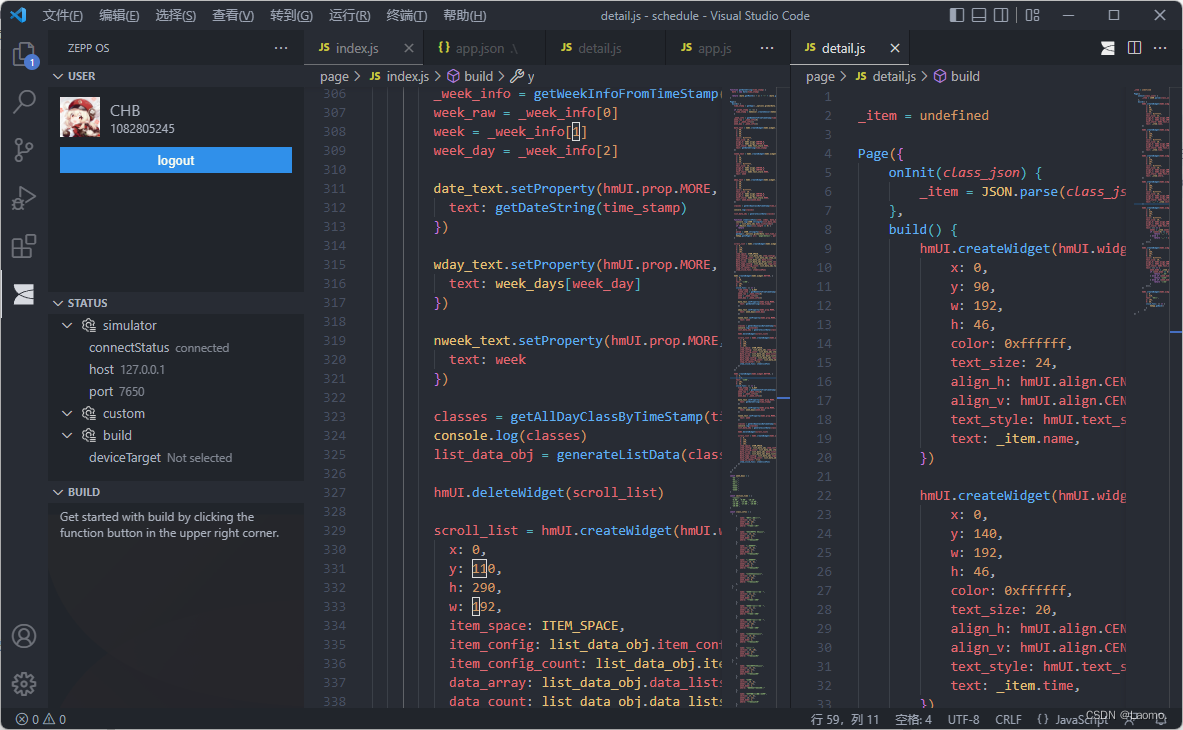
 当完成选择之后,就可以进行侦察调试了。
 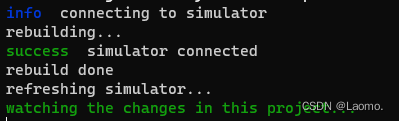 所谓侦察调试,就是 zeus 将监视整个开发目录,当项目内的文件发生改动,则会重新构建项目,并刷新仿真器,重新运行程序:
 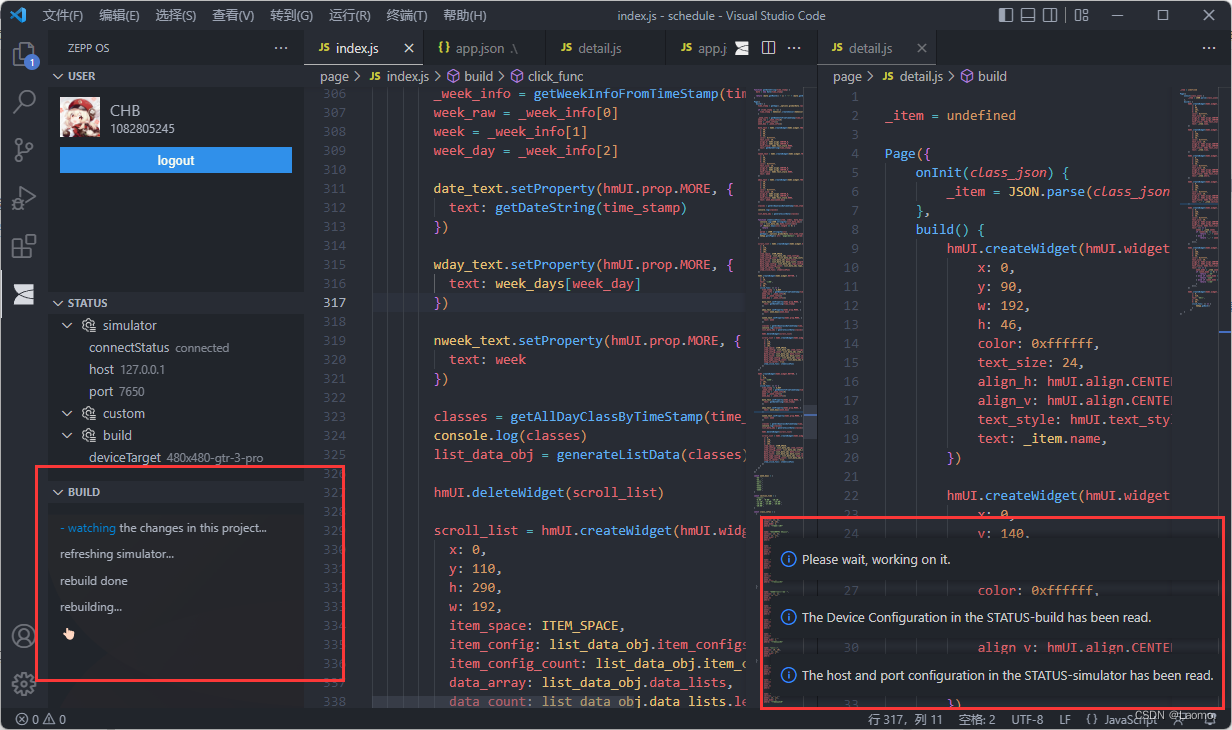 (在 vscode 中开启侦察调试模式)
 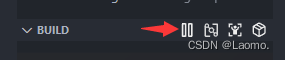 (开启/停停止侦察调试模式的按钮)
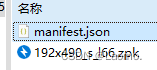 进一步解压 zpk 文件,得到下面两个文件:
 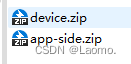 其中的 device.zip 就是我们需要的文件了。我们可以将其后缀改成 bin ,也可以不改(改的话可能更有逼格点吧)。
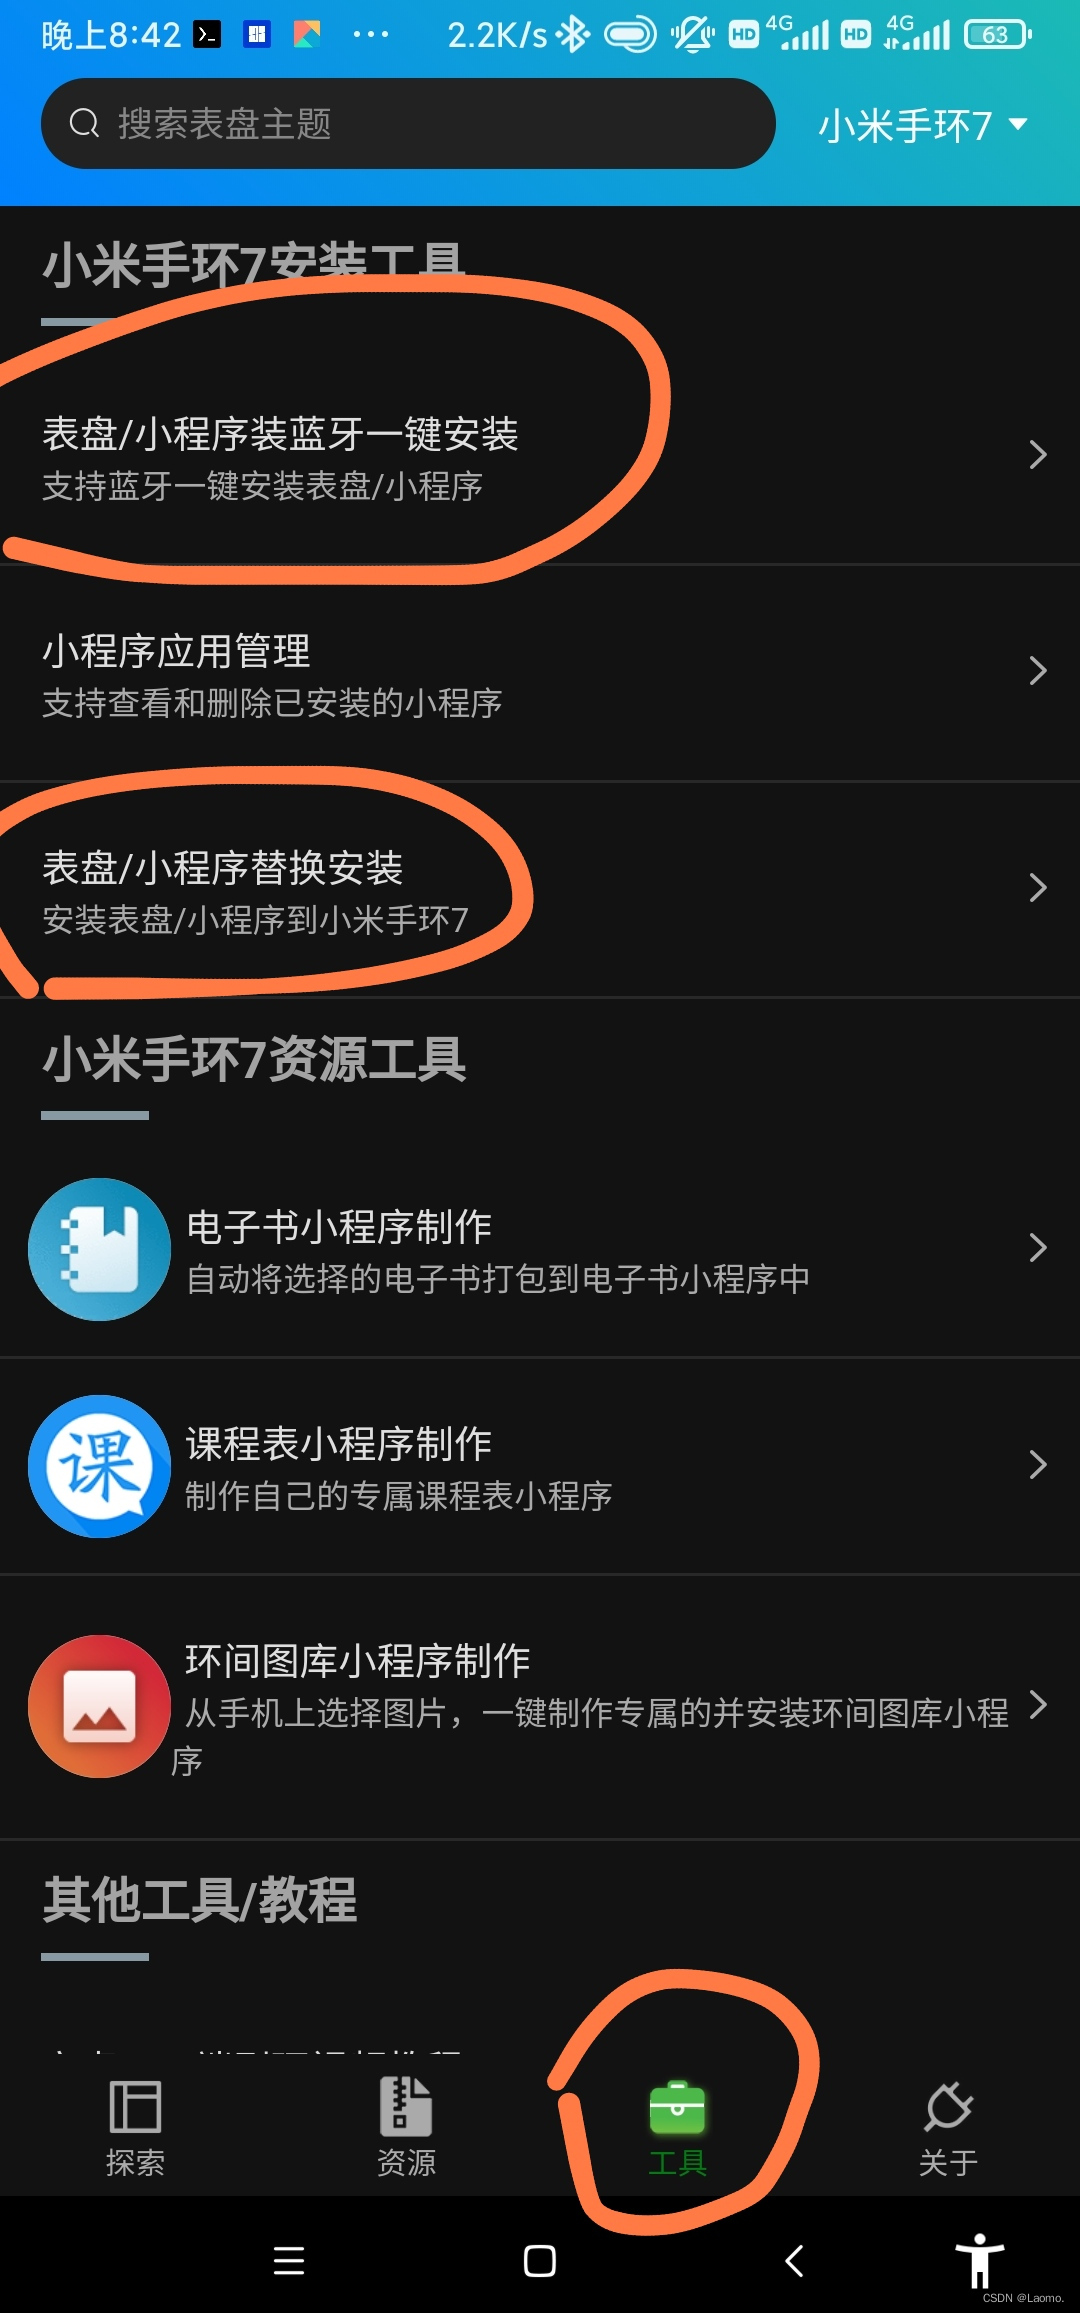 可以通过蓝牙安装和替换表盘安装,以上两种安装方式在应用内部已经写清楚,这里就不多阐述了,
【本文地址】
| 今日新闻 |
| 推荐新闻 |
| 专题文章 |