| 图像的几何变换 | 您所在的位置:网站首页 › 函数的平移变换和伸缩变换一样吗 › 图像的几何变换 |
图像的几何变换
|
目录
一、平移1.调用函数(平移矩阵)2.像素操作(遍历赋值)
二、旋转1.调用函数(旋转矩阵)2.像素操作(反向映射)
三、镜像1.调用函数(镜像矩阵)2.像素操作(反向映射)
四、缩放1.缩小(八邻域均值)2.放大(双线性插值)
五、剪切索引切片
一、平移
1.调用函数(平移矩阵)
图像平移后的坐标: [ x ′ y ′ 1 ] = [ 1 0 Δ x 0 1 Δ y 0 0 1 ] ⋅ [ x y 1 ] \begin{bmatrix} x' \\ y' \\ 1 \end{bmatrix} =\begin{bmatrix} 1&0&\Delta x \\ 0&1&\Delta y \\ 0&0&1 \end{bmatrix} \cdot \begin{bmatrix} x \\ y \\ 1 \end{bmatrix} ⎣ ⎡x′y′1⎦ ⎤=⎣ ⎡100010ΔxΔy1⎦ ⎤⋅⎣ ⎡xy1⎦ ⎤ { x ′ = x + Δ x y ′ = y + Δ y \begin{cases} x' =x + \Delta x \\ y' =y + \Delta y \end{cases} {x′=x+Δxy′=y+Δy warpAffine函数用法参考这里:warpAffine函数 程序实现及运行结果: import cv2 import matplotlib.pyplot as plt import numpy as np # 读取图像 img1 = cv2.imread("flower.jpeg") # 图像平移 h, w = img1.shape[:2] M = np.float32([[1, 0, 100], [0, 1, 50]]) # 平移矩阵,y方向向下平移50,x方向向右平移100 dst = cv2.warpAffine(img1, M, (w, h)) # 图像显示 fig, axes = plt.subplots(1, 2, figsize=(10, 8), dpi=100) axes[0].imshow(img1[:, :, ::-1]) axes[0].set_title("original") axes[1].imshow(dst[:, :, ::-1]) axes[1].set_title("after translation") plt.show()
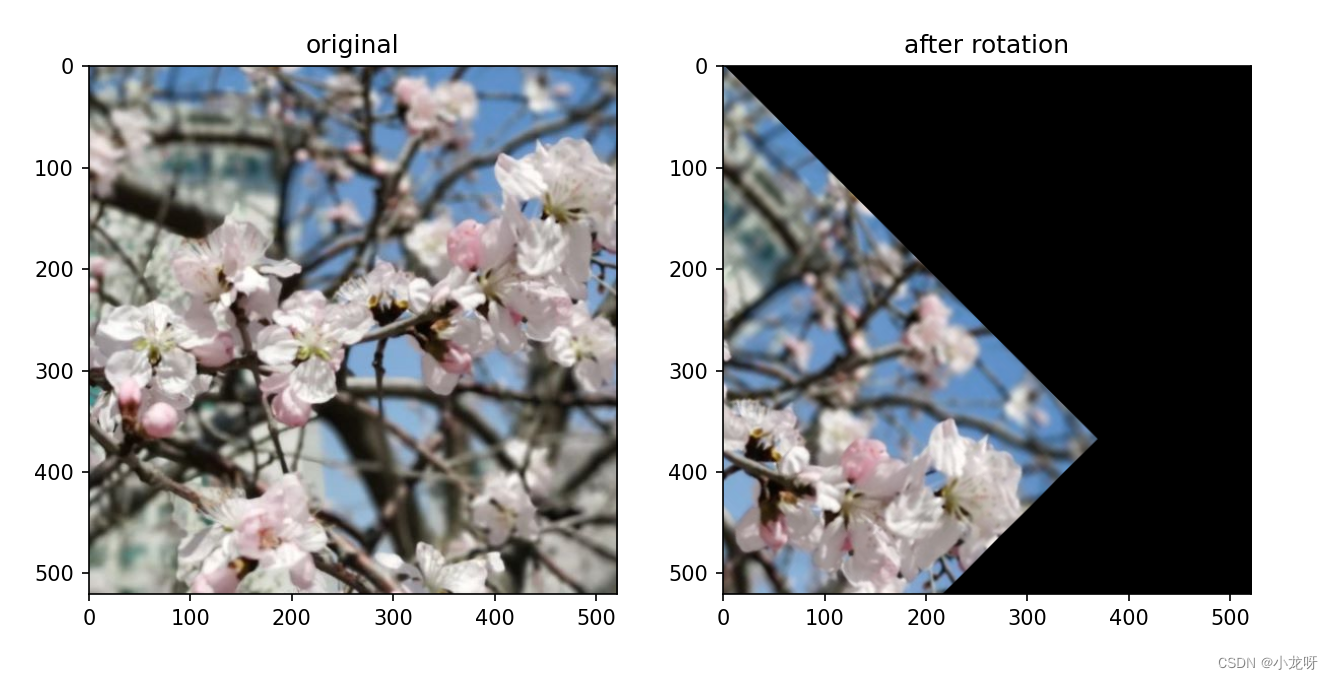
算法思想很简单,首先将所有像素点沿x方向向右平移100,一行一行的进行处理,将(0,100)处的彩色值赋值给(0,0)处,(0,101)处的彩色值赋值给(0,1)处,然后把第0行所有列(521列)处理完。之后再处理下一行。同理沿着y方向向下平移50也是差不多这个思想。 至于这个从520到0也是有讲究的,因为我们为了避免移动过程发生覆盖而数据丢失,所以需要倒序处理。打个比方,第0行,假如我们从0列到520列,那么100列之后的值就会被覆盖,这样我们就不能正确将原来100列之后的初始值进行移动(赋值),而我们从第520列处理就可以完美的避免这个问题。 程序实现及运行结果: import cv2 import matplotlib.pyplot as plt img1 = cv2.imread('flower.jpeg') img2 = img1.copy() # x方向向右平移100 for j in range(521): for i in range(520,-1,-1): if ix′=x⋅cosθ−y⋅sinθy′=x⋅sinθ+y⋅cosθ程序实现及运行结果: import cv2 import matplotlib.pyplot as plt import numpy as np import math # 读取图像 img1 = cv2.imread("blossom.jpeg") # 图像旋转 h, w = img1.shape[:2] M = np.float32([[math.cos(math.pi/4), -math.sin(math.pi/4), 0], [math.sin(math.pi/4), math.cos(math.pi/4), 0]]) # 顺时针旋转45° dst = cv2.warpAffine(img1, M, (w, h)) # 图像显示 fig, axes = plt.subplots(1, 2, figsize=(10, 8), dpi=100) axes[0].imshow(img1[:, :, ::-1]) axes[0].set_title("original") axes[1].imshow(dst[:, :, ::-1]) axes[1].set_title("after rotation") plt.show()
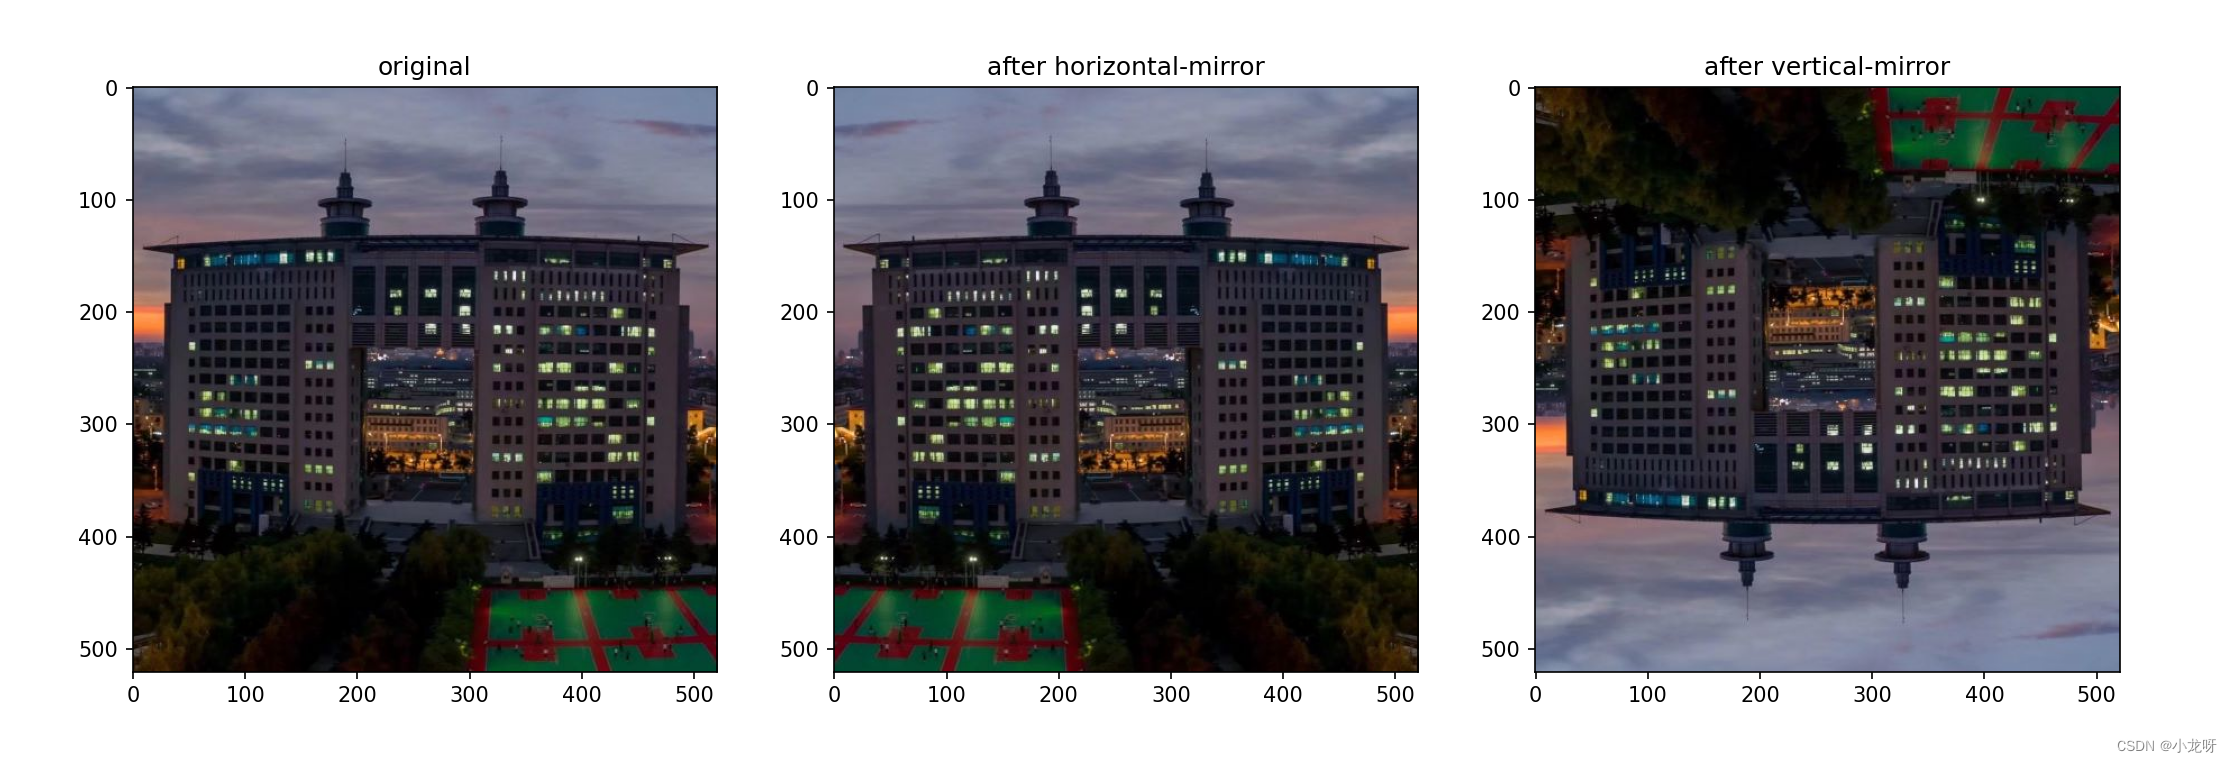
此程序运用了一种反向映射的思想,这样可以确保旋转后的位置坐标都有彩色值,我们根据旋转矩阵的逆,可以找到旋转后的图像坐标所对应原图像的彩色值,从而对其进行赋值即可。 其中我们需要注意两个问题,一是我们旋转后的坐标位置所对应原图像的坐标可能是越界的(找不到坐标与其对应);二是我们求的坐标向量可能是负数,需要舍去。 程序实现及运行结果: import cv2 import matplotlib.pyplot as plt import numpy as np import math # 读取图像 img1 = cv2.imread("blossom.jpeg") img2 = img1.copy() # 图像旋转(反向映射) RM1 = np.float32([[math.cos(math.pi/4), math.sin(math.pi/4), 0], [-math.sin(math.pi/4), math.cos(math.pi/4), 0], [0, 0, 1]]) # 计算出的旋转矩阵 RM2 = np.linalg.inv(RM1) # 求解旋转矩阵的逆 for i in range(521): for j in range(521): D = np.dot(RM2, [[i], [j], [1]]) # 旋转后的图像坐标位置 相对应的 原图像坐标位置 if int(D[0])>=521 or int(D[1])>=521: # 旋转后的图像坐标 相对应的 原图像坐标位置 越界 img2[i, j] = 0 elif int(D[0]) x′=xy′=height−1−y [ x ′ y ′ 1 ] = [ 1 0 0 0 − 1 h e i g h t − 1 0 0 1 ] ⋅ [ x y 1 ] \begin{bmatrix} x' \\ y' \\ 1 \end{bmatrix} =\begin{bmatrix} 1&0&0 \\ 0&-1&height-1 \\ 0&0&1 \end{bmatrix} \cdot \begin{bmatrix} x \\ y \\ 1 \end{bmatrix} ⎣ ⎡x′y′1⎦ ⎤=⎣ ⎡1000−100height−11⎦ ⎤⋅⎣ ⎡xy1⎦ ⎤ 1.调用函数(镜像矩阵) import cv2 import matplotlib.pyplot as plt import numpy as np # 读取图像 img1 = cv2.imread("technology building.jpeg") # 图像水平镜像 h, w = img1.shape[:2] M = np.float32([[-1, 0, 520], [0, 1, 0]]) dst1 = cv2.warpAffine(img1, M, (w, h)) # 图像垂直镜像 h, w = img1.shape[:2] M = np.float32([[1, 0, 0], [0, -1, 520]]) dst2 = cv2.warpAffine(img1, M, (w, h)) # 图像显示 fig, axes = plt.subplots(1, 3, figsize=(80, 10), dpi=100) axes[0].imshow(img1[:, :, ::-1]) axes[0].set_title("original") axes[1].imshow(dst1[:, :, ::-1]) axes[1].set_title("after horizontal-mirror") axes[2].imshow(dst2[:, :, ::-1]) axes[2].set_title("after vertical-mirror") plt.show()
|

【本文地址】