| 【最全最详细】微信第三方平台开发 | 您所在的位置:网站首页 › 三网服务公众号 › 【最全最详细】微信第三方平台开发 |
【最全最详细】微信第三方平台开发
|
文章目录
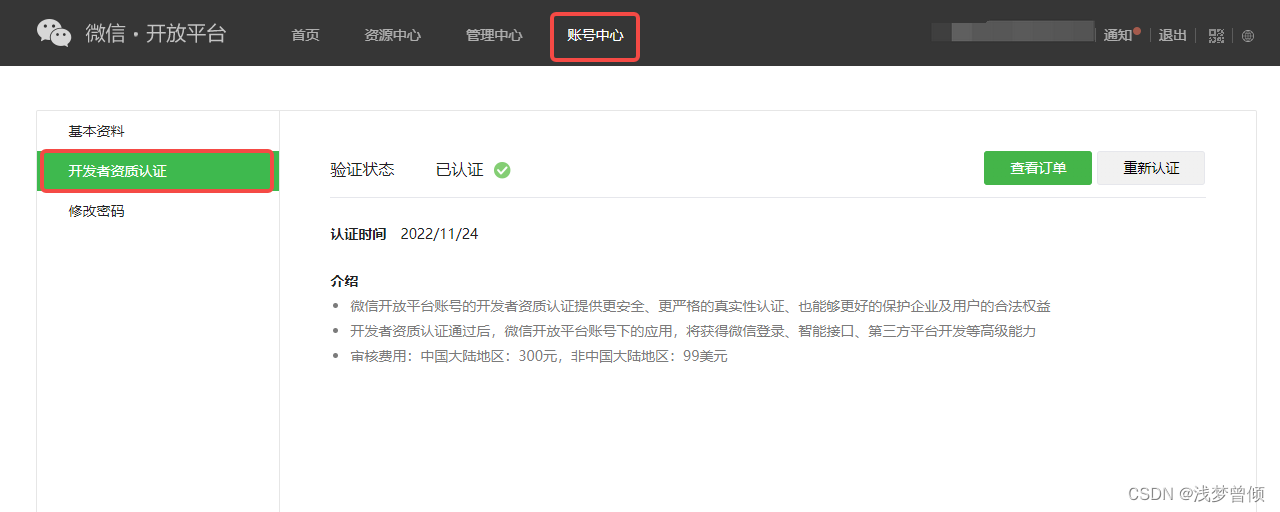
1. 整体流程2. 成为服务商2.1. 首先打开微信开放平台,注册并登录你的账号2.2. 进行开发者资质认证2.3. 创建第三方平台并提交审核
3. 搭建第三方平台后端服务3.1. 管理员设置 和 权限集设置3.2. 开发资料设置3.3. 进行商家授权操作3.3.0. 加密解密操作3.3.1. 获取第三方平台发送至服务器的ticket3.3.2. 获取第三方平台的token令牌3.3.3. 获取预授权码3.3.4. 生成授权链3.3.4.0. 下面的3.3.4.* 的子项,对业务影响不大,只是你可能会用到,但是我只获取事件没怎么用到3.3.4.1. 授权回调3.3.4.2. 通过授权码获取授权信息3.3.4.3. 通过授权公众号的access_token获取授权信息3.3.4.4. 去维护刷新这个公众号的access_token ,每两个小时或者一个半小时刷新一次
3.3.5. 客户扫码授权
3.4. 服务器接收公众号事件/消息
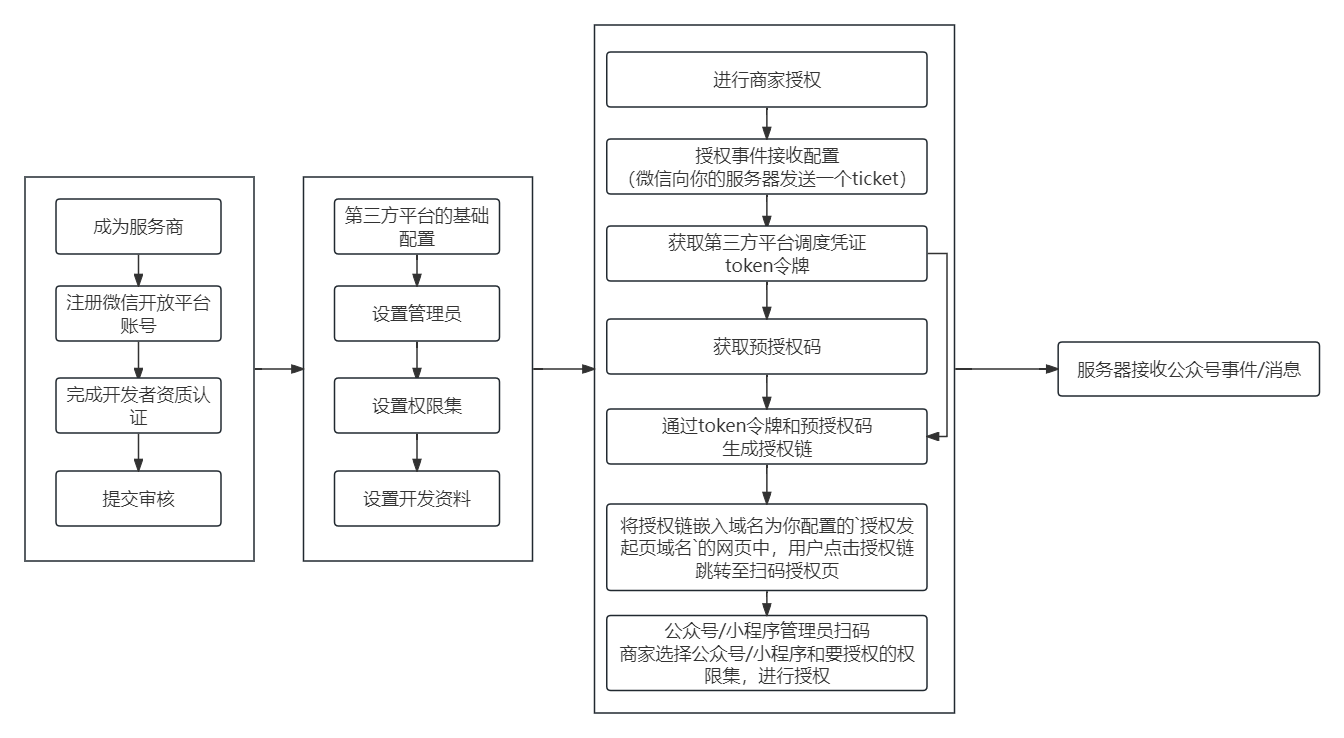
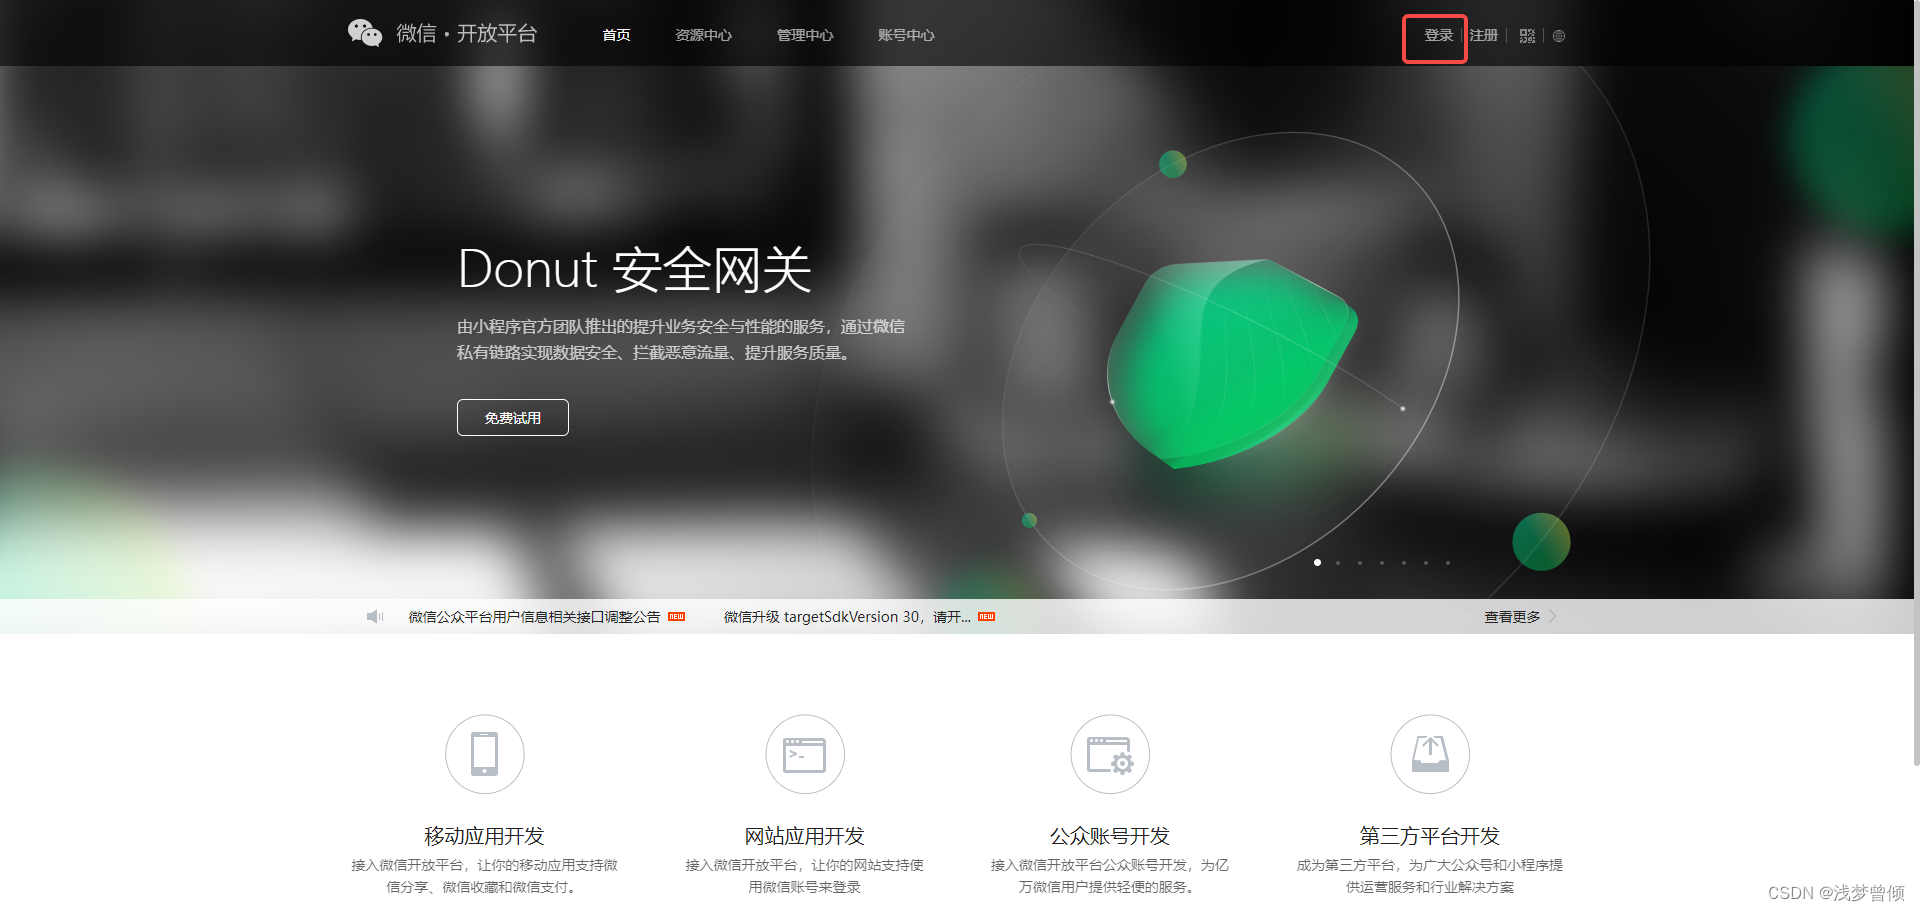
1. 整体流程
微信开放平台地址:https://open.weixin.qq.com/ 需要花300开这个认证。 (1)创建第三方平台
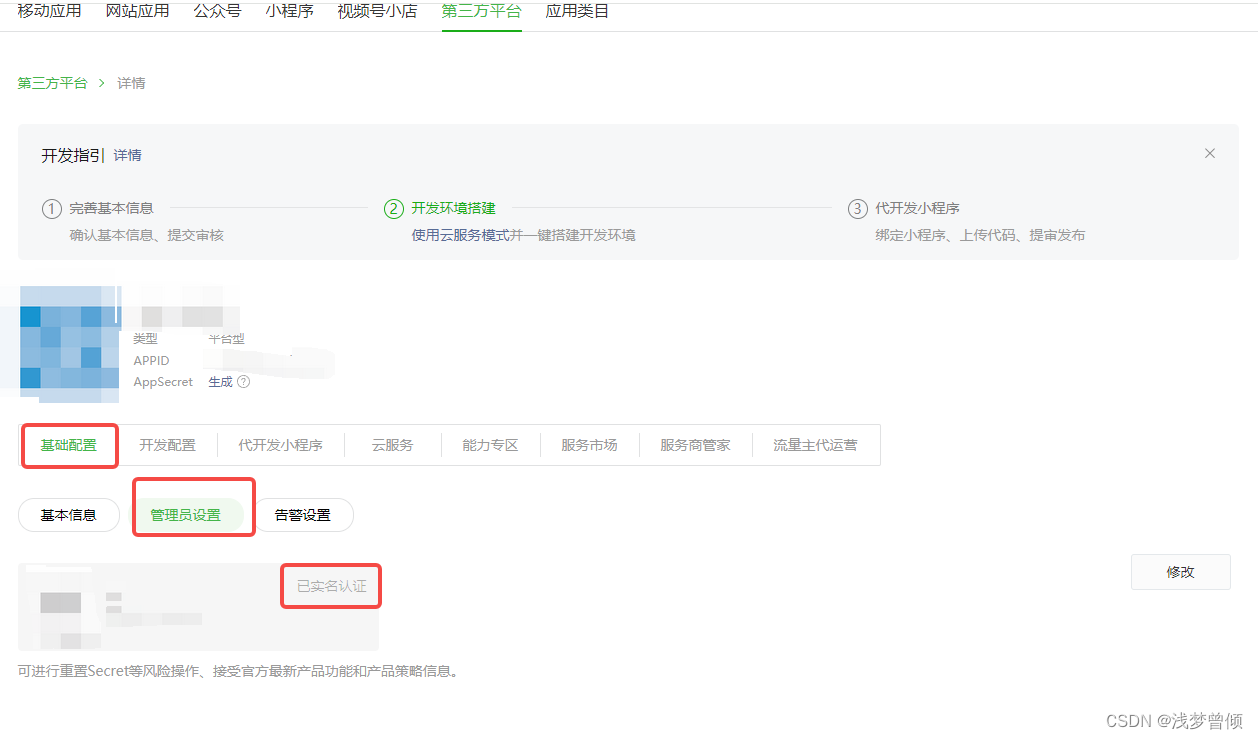
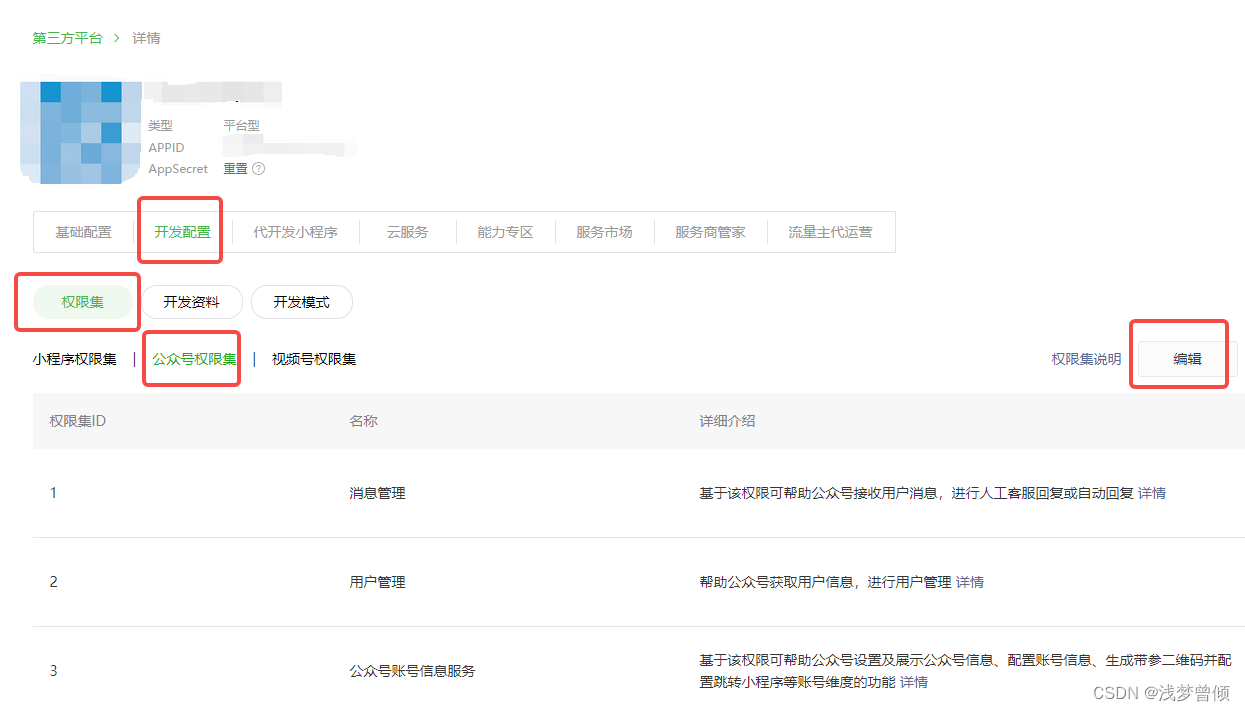
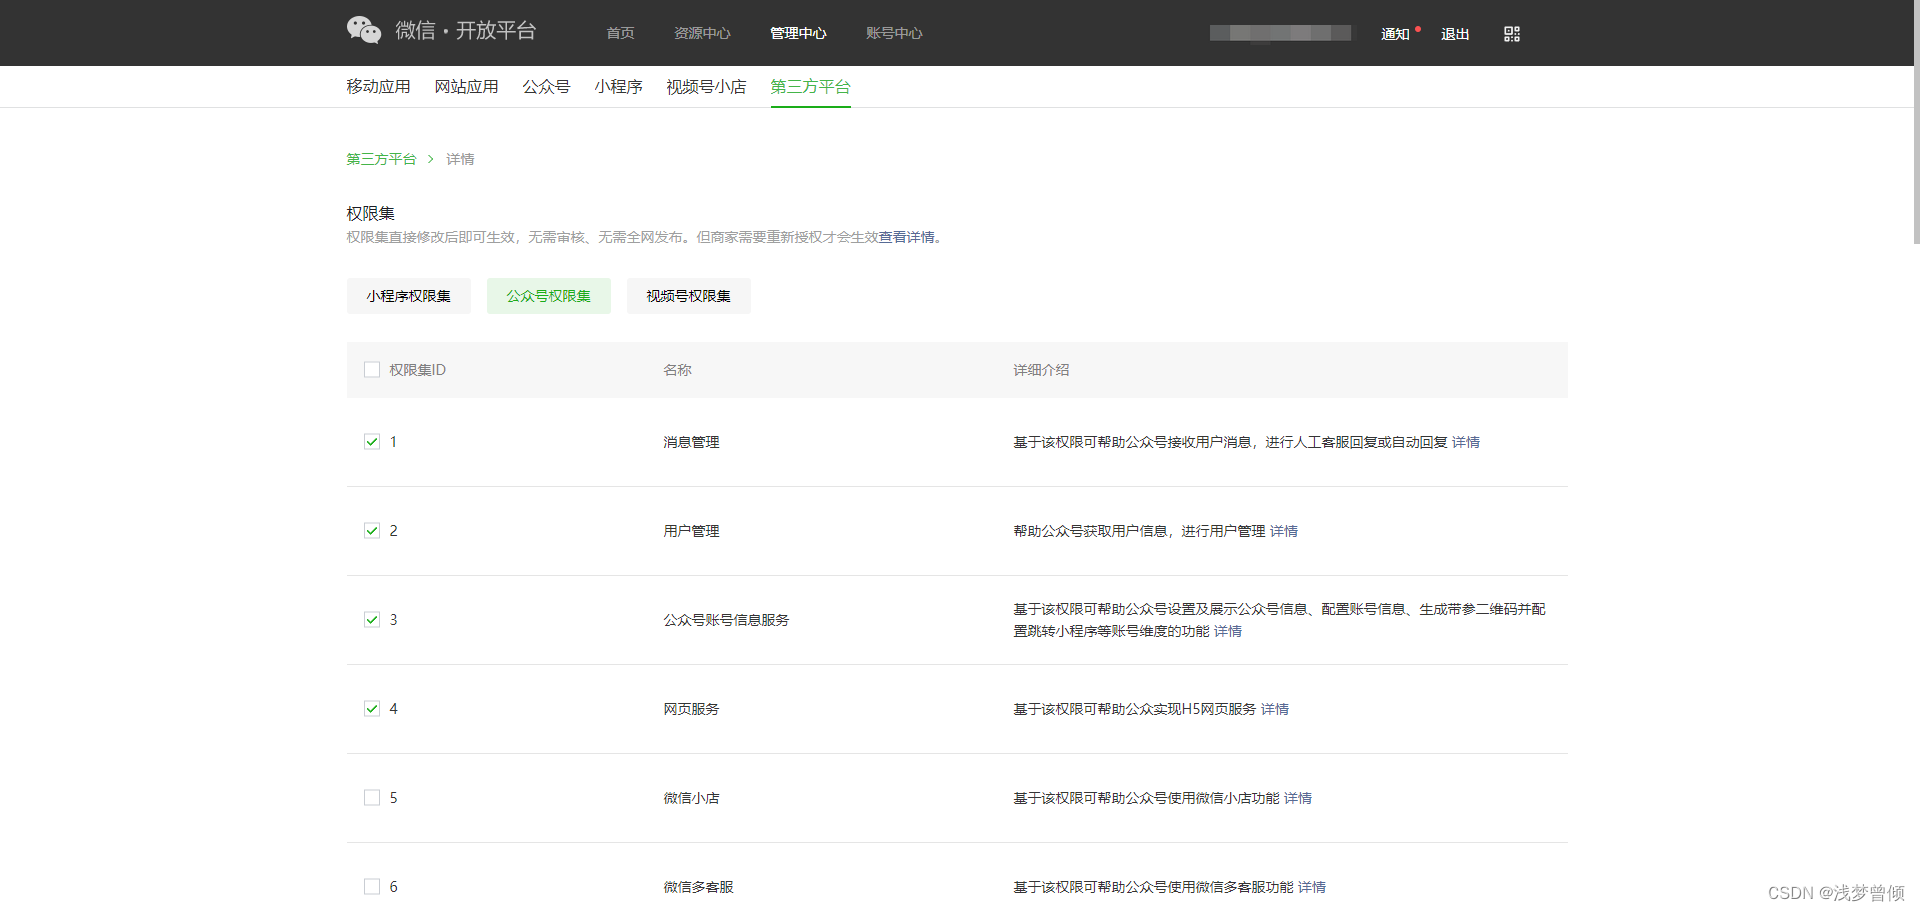
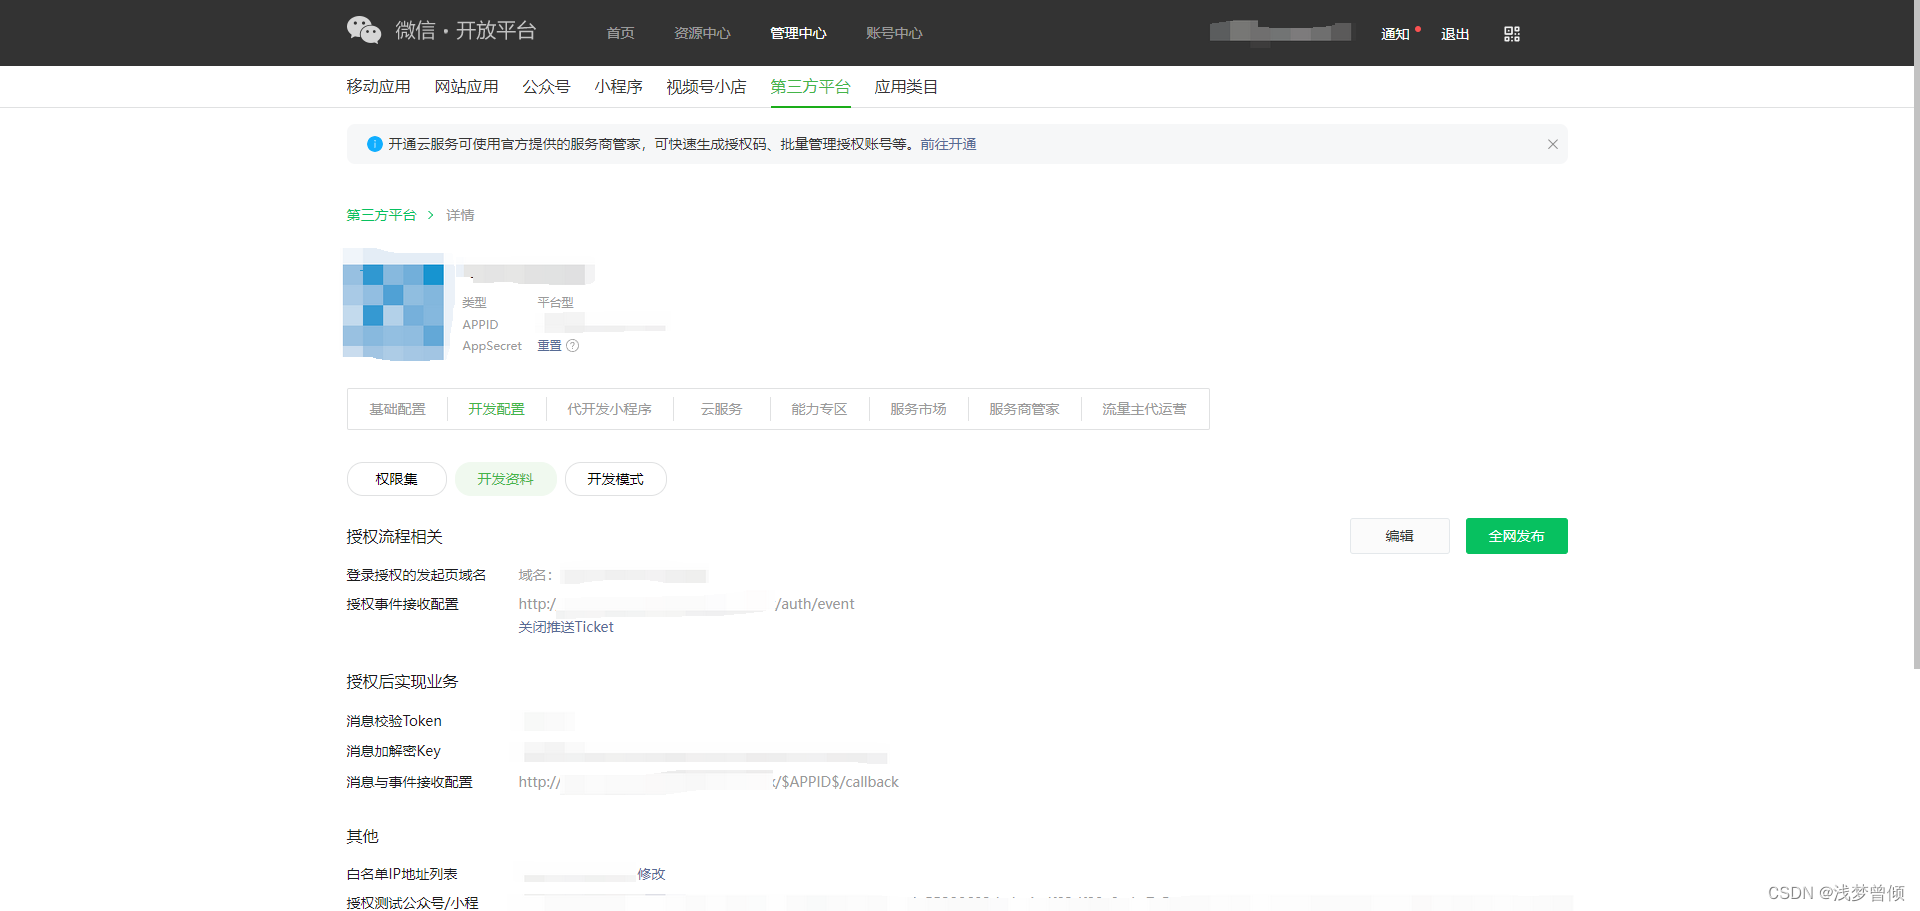
可以在提审期间,设置一下平台管理员和权限集 首先设置一下平台管理员:记得实名认证一下 设置一下权限集:你可以全选所有权限,或者用到什么功能选什么功能 这里有几点要注意: 授权事件接收配置、消息与事件接收配置、授权发起页面域名,这三项的 一级域名 必须相同消息与事件接收配置的路径中必须有$APPID$授权发起页面域名不写http/https(除此外这里如果你测试的时候可以配置局域网ip,暂时按下不表,后文细说)白名单IP无所谓,随便写写就行,没有影响消息加密token 和 消息加解密key 按照长度要求自己生成就行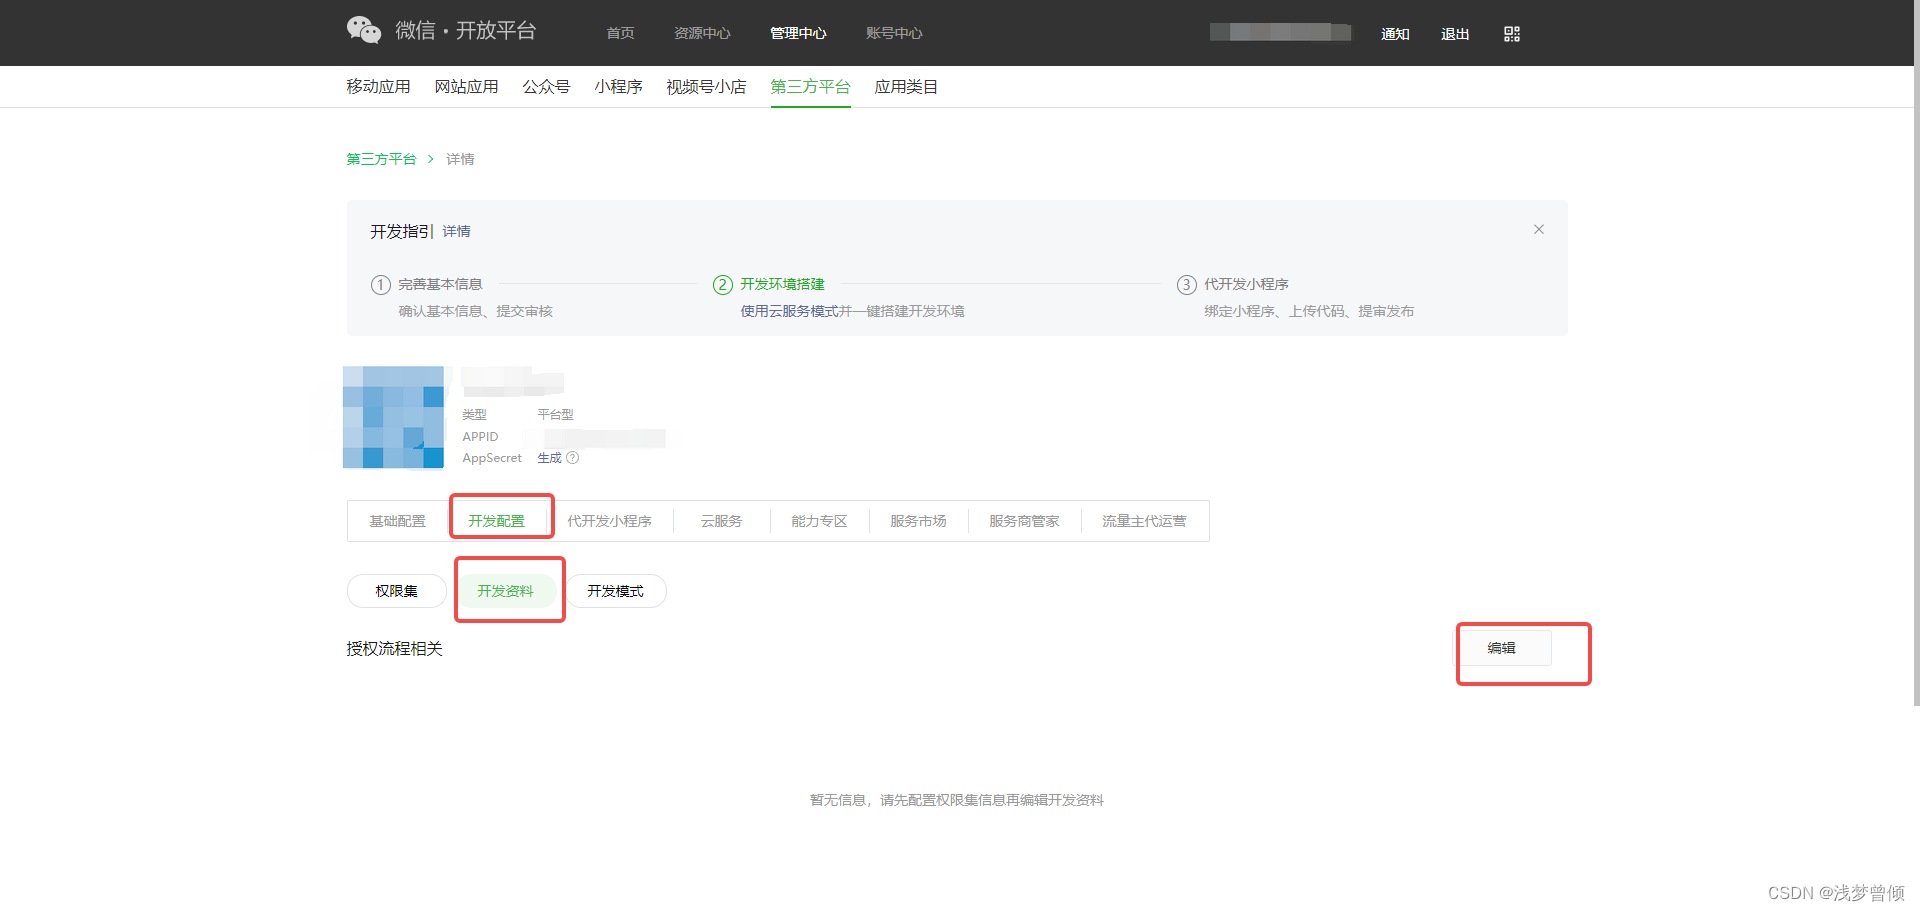 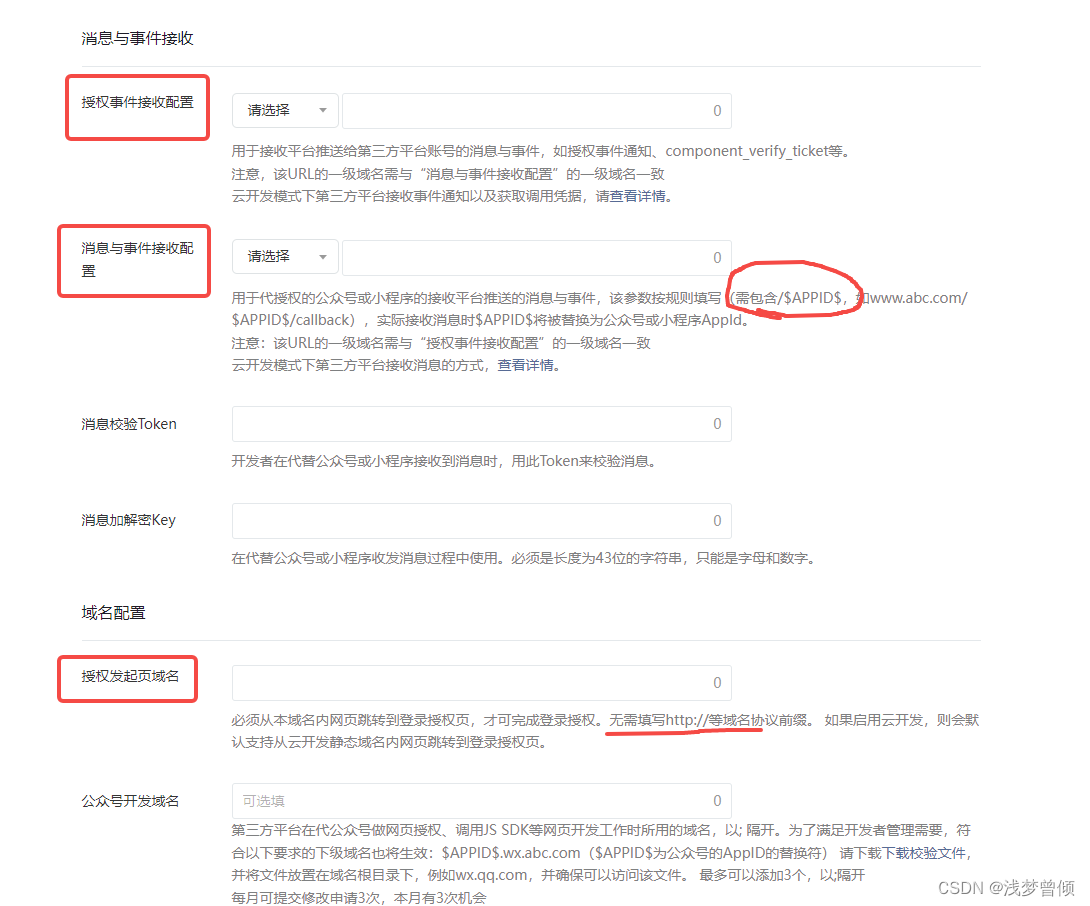 然后点击生成一下AppSecret: 然后点击生成一下AppSecret: 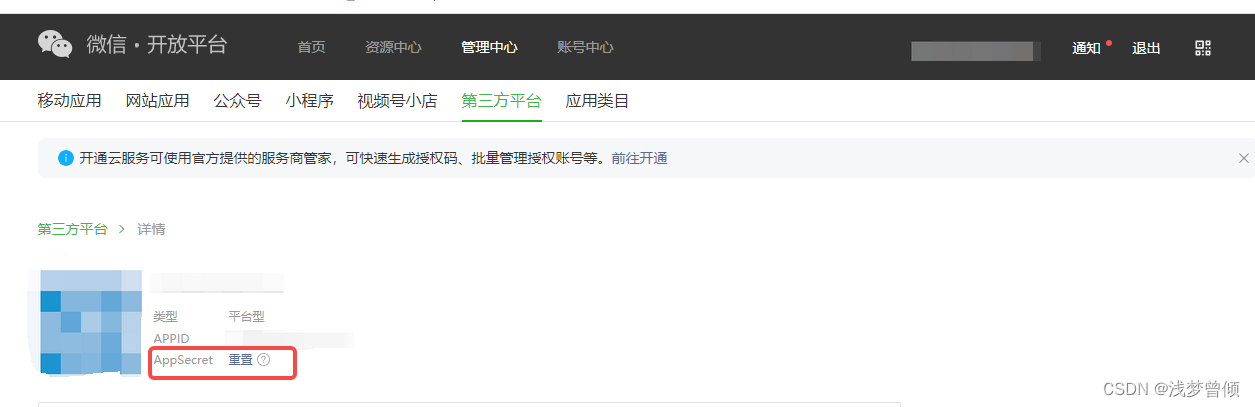 3.3. 进行商家授权操作
总体的流程即: 首先接收到第三方平台发给你服务器的ticket(授权事件接收配置的接口)拿着ticket发送请求去获取第三方平台调度凭证token拿着token去获取预授权码拿着预授权码、token、授权回调接口url去生成一条授权链 这里的授权回调接口对接收事件/消息没有多少影响,只是你可以通过整个接口来获取到授权的公众号的相关信息 商家点击嵌在 授权发起页域名 下的网页中的授权链,跳转到扫码授权页商家扫码授权 3.3.0. 加密解密操作这是获取的前置条件,ticket的获取,事件/消息的获取,接收到的都是加密的数据,你需要将其进行解密操作。 官方文档:https://developers.weixin.qq.com/doc/oplatform/Third-party_Platforms/2.0/api/Before_Develop/Technical_Plan.html 首先要下载相关的加密解密工具类:
还有就是一个常量类: public interface VXConstants { //---------------- Redis Key ------------------------ // 票据ticket String COMPONENT_VERIFY_TICKET = "vx:component:ticket"; // 第三方token令牌 String COMPONENT_ACCESS_TOKEN = "vx:component:token"; // 第三方pre_auth_code String COMPONENT_PRE_AUTH_CODE = "vx:component:preAuthCode"; // 公众号授权信息 String GZH_AUTH_MSG = "gzh:msg:"; //---------------- URL ------------------------ // 获取第三方平台接口的调用凭据(令牌)url String API_COMPONENT_TOKEN_URL = "https://api.weixin.qq.com/cgi-bin/component/api_component_token"; // 获取预授权码url String API_CREATE_PRE_AUTH_CODE_URL = "https://api.weixin.qq.com/cgi-bin/component/api_create_preauthcode?component_access_token="; // 使用授权码获取授权信息url String API_QUERY_AUTH_URL = "https://api.weixin.qq.com/cgi-bin/component/api_query_auth?component_access_token="; // 获取授权账号信息url String API_GET_AUTHORIZER_INFO_URL = "https://api.weixin.qq.com/cgi-bin/component/api_get_authorizer_info?component_access_token="; // 获取/刷新接口调用令牌url String API_AUTHORIZER_TOKEN_URL = "https://api.weixin.qq.com/cgi-bin/component/api_authorizer_token?component_access_token="; // 授权回调url String AUTH_CALLBACK_URL = "http://192.168.20.217:29999/admin/vx/auth/callback"; } 3.3.1. 获取第三方平台发送至服务器的ticket官方文档链接:https://developers.weixin.qq.com/doc/oplatform/Third-party_Platforms/2.0/api/Before_Develop/component_verify_ticket.html 就是你在下图整个位置配置的接口: 详情请看代码和注释 代码如下: controller层 @PostMapping("/auth/event") public String componentVerifyTicket(HttpServletRequest req, HttpServletResponse resp) { log.info("接收到验证票据请求"); return vxService.getComponentVerifyTicket(req, resp); }service层 // 存储开放平台appid对应的ticket public static final Map COMPONENT_VETIFY_TICKET_MAP = new HashMap(); @Resource private StringRedisTemplate redisTemplate; @Override public String getComponentVerifyTicket(HttpServletRequest request, HttpServletResponse response) { log.info("接收微信服务器发送的Ticket"); try { request.setCharacterEncoding("UTF-8"); response.setCharacterEncoding("UTF-8"); // 微信加密签名 String signature = request.getParameter("msg_signature"); // 时间戳 String timestamp = request.getParameter("timestamp"); // 随机数 String nonce = request.getParameter("nonce"); // 从请求中读取整个post数据 这个工具类在下文写了 Map xmlMap = MessageUtil.xmlToMap(request); log.info("加密签名msg_signature:{} 时间戳timestamp:{} 随机数nonce:{}", signature, timestamp, nonce); log.info("从request中获取xml信息:{}", xmlMap); //解密处理 String encrypt = (String) xmlMap.get("Encrypt"); log.info("Encrypt:{}", encrypt); String msg = decryptMsg(timestamp, nonce, signature, encrypt); log.info("msg:{}", msg); //将XML格式字符串转为Map类型 使用的是hutool工具包,记得引入一下 Map msgMap = XmlUtil.xmlToMap(msg); String infoType = msgMap.get("InfoType").toString(); log.info("类型:{}", infoType); switch (infoType) { //验证票据 case "component_verify_ticket": //查询库中的第三方信息,并且准备存储ticket String componentVerifyTicket = msgMap.get("ComponentVerifyTicket").toString(); log.info("用户授权component_verify_ticket:{}", componentVerifyTicket); COMPONENT_VETIFY_TICKET_MAP.put(componentAppId, componentVerifyTicket); //使用StringRedisTemplate将票据值写入Redis缓存中 存不存,怎么存看你自己 redisTemplate.opsForValue().set(VXConstants.COMPONENT_VERIFY_TICKET, componentVerifyTicket); redisTemplate.expire(VXConstants.COMPONENT_VERIFY_TICKET, 2, TimeUnit.HOURS); break; case "unauthorized"://用户取消授权 log.info("用户取消授权"); break; } } catch (Exception e) { log.error("获取Ticket失败:", e); } return "success"; }util工具类,你可以只把用到的方法复制过去: import org.dom4j.Document; import org.dom4j.DocumentException; import org.dom4j.Element; import org.dom4j.io.SAXReader; import javax.servlet.ServletInputStream; import javax.servlet.http.HttpServletRequest; import java.io.IOException; import java.util.Date; import java.util.HashMap; import java.util.List; import java.util.Map; public class MessageUtil { // + MsgType 消息类型,文本为 text public static final String MESSAGE_TEXT = "text"; // + MsgType 消息类型,图片为 image public static final String MESSAGE_IMAGE = "image"; // + MsgType 语音为 voice public static final String MESSAGE_VOICE = "voice"; // + MsgType 视频为 video public static final String MESSAGE_VIDEO = "video"; // + MsgType 小视频为 shortvideo public static final String MESSAGE_SHORTVIDEO = "shortvideo"; // + MsgType 消息类型,地理位置为 location public static final String MESSAGE_LOCATION = "location"; // + MsgType 消息类型,链接为 link public static final String MESSAGE_LINK = "link"; // + MsgType 消息类型,event public static final String MESSAGE_EVENT = "event"; // > Event 事件类型,subscribe(订阅)、unsubscribe(取消订阅) //Event 事件类型,SCAN //Event 事件类型,LOCATION //Event 事件类型,CLICK //Event 事件类型,VIEW public static final String MESSAGE_SUBSCRIBE_EVENT = "subscribe"; public static final String MESSAGE_UNSUBSCRIBE_EVENT = "unsubscribe"; public static final String MESSAGE_SCAN_EVENT = "SCAN"; public static final String MESSAGE_LOCATION_EVENT = "LOCATION"; public static final String MESSAGE_CLICK_EVENT = "CLICK"; public static final String MESSAGE_VIEW_EVENT = "VIEW"; /** * xml 转集合。 * * @param request * @return * @throws IOException * @throws DocumentException */ public static Map xmlToMap(HttpServletRequest request) throws IOException, DocumentException { Map map = new HashMap(); SAXReader saxReader = new SAXReader(); // 从 request 中获取输入流。 ServletInputStream inputStream = request.getInputStream(); Document document = saxReader.read(inputStream); // 获取 xml 根元素。 Element rootElement = document.getRootElement(); // 每一元素放入 list 中。 List list = rootElement.elements(); for (Element element : list) { map.put(element.getName(), element.getText()); } inputStream.close(); return map; } } 3.3.2. 获取第三方平台的token令牌这一步只是一个获取token令牌的java方法,获取后用于其他操作 官方文档:https://developers.weixin.qq.com/doc/oplatform/Third-party_Platforms/2.0/api/ThirdParty/token/component_access_token.html 下文中用到的componentAppId, componentAppSecret,即你在第三方平台配置的数据: 这一步同样只是一个获取预授权码的java方法,获取后用于其他操作,这一步需要用到3.3.2. 生成的token作为参数传入 官方文档:https://developers.weixin.qq.com/doc/oplatform/Third-party_Platforms/2.0/api/ThirdParty/token/pre_auth_code.html // 第三方平台的预授权码 public static String COMPONENT_PRE_AUTH_CODE; // 获取预授权码url private static final String API_CREATE_PRE_AUTH_CODE_URL = "https://api.weixin.qq.com/cgi-bin/component/api_create_preauthcode?component_access_token="; //获取预授权码 public String getApiCreatePreAuthCode(String componentAccessToken) { try { // 先查预授权码 String preAuthCode = redisTemplate.opsForValue().get(VXConstants.COMPONENT_PRE_AUTH_CODE); if (StringUtils.isNotBlank(preAuthCode)) { COMPONENT_PRE_AUTH_CODE = preAuthCode; return preAuthCode; } if (StringUtils.isAnyBlank(componentAccessToken, componentAppId)) { log.info("参数为空:{} {}", componentAccessToken, componentAppId); return null; } //这个路径我也写在常量中了了,你可以去上面直接找这个路径 String url = VXConstants.API_CREATE_PRE_AUTH_CODE_URL + componentAccessToken; HashMap paramMap = new HashMap(); paramMap.put("component_appid", componentAppId); String post = HttpUtil.post(url, gson.toJson(paramMap)); log.info("获取预授权码:{}", post); Map tokenMap = gson.fromJson(post, new TypeToken() { }.getType()); //token preAuthCode = String.valueOf(tokenMap.get("pre_auth_code")); //有效期 Double expiresIn = (Double) tokenMap.get("expires_in"); if (StringUtils.isNotBlank(preAuthCode)) {//存入redis COMPONENT_PRE_AUTH_CODE = preAuthCode; redisTemplate.opsForValue().set(VXConstants.COMPONENT_PRE_AUTH_CODE, preAuthCode); redisTemplate.expire(VXConstants.COMPONENT_PRE_AUTH_CODE, expiresIn.intValue(), TimeUnit.SECONDS); return preAuthCode; } } catch (Exception e) { log.error("获取预授权码失败:", e); } return null; } 3.3.4. 生成授权链这一步是生成的,在你授权发起页域名下的网站中嵌入,可以嵌入到一个标签中,然后点击跳转到一个有授权二维码的页面,交给公众号管理员扫码授权 官方文档:https://developers.weixin.qq.com/doc/oplatform/Third-party_Platforms/2.0/api/Before_Develop/Authorization_Process_Technical_Description.html 注:授权发起页域名你可以临时改成你本地测试/局域网测试的ip或域名,如192.168.20.212来进行唤起测试,当然,只是测试,改的时候,建议 参数授权回调链接、授权发起页域名、授权事件接收配置、消息接收与发送配置都改成相同的。 controller层 //实际上这个是你自己的网站中的前端调用的,随便写,只要能拿到授权链就行 @PostMapping("/auth/buildChainUrl") public R buildAuthChainUrl() { log.info("获取授权链"); return R.ok(vxService.buildAuthChainUrl()); }这一步用到了3.3.2生成的token 和3.3.3生成的预授权码 service层 @Override public String buildAuthChainUrl() { // token String apiComponentToken = getApiComponentToken(); log.info("apiComponentToken:{}", apiComponentToken); // 预授权码 String apiCreatePreAuthCode = getApiCreatePreAuthCode(apiComponentToken); log.info("apiCreatePreAuthCode:{}", apiCreatePreAuthCode); //VXConstants.AUTH_CALLBACK_URL 即你自定义的授权回调地址,见下文 String url = "https://mp.weixin.qq.com/cgi-bin/componentloginpage?component_appid=" + componentAppId + "&pre_auth_code=" + apiCreatePreAuthCode + "&redirect_uri=" + VXConstants.AUTH_CALLBACK_URL + "&auth_type=3"; return url; } 3.3.4.0. 下面的3.3.4.* 的子项,对业务影响不大,只是你可能会用到,但是我只获取事件没怎么用到 3.3.4.1. 授权回调如果商家扫码授权,那么就会给这个回调发送请求。如果到了这一步,那么就意味着授权操作已经结束了,这是授权结束后的操作。 如果你需要进行其他的操作,可以通过这个回调来获取到商家公众号的相关信息,如公众号token、公众号refresh_token、公众号appid等 但是对我们来说,如果只是需要获取关注取关事件、获取到消息,那么接收到的数据也可以不存 controller层 @GetMapping("/auth/callback") public void authCallBack(HttpServletRequest request, HttpServletResponse response) { log.info("接收到授权回调请求"); vxService.authCallBack(request, response); }service层 // 授权回调 @Override public void authCallBack(HttpServletRequest request, HttpServletResponse response) { //授权回调 try { //授权码 String authorizationCode = request.getParameter("auth_code"); Integer expiresIn = Integer.valueOf(request.getParameter("expires_in")); //三方AccessToken 见3.3.2 String apiComponentToken = getApiComponentToken(); //根据授权码获取授权信息 这个方法见下文3.3.4.2 Map authorizationInformation = getAuthorizationInformation(apiComponentToken, authorizationCode); } catch (Exception e) { log.error("授权回调出现错误:", e); } } 3.3.4.2. 通过授权码获取授权信息当然你可以通过 3.3.4.1. 回调中拿到的auth_code授权码,来获取公众号的授权信息的操作 官方文档:https://developers.weixin.qq.com/doc/oplatform/Third-party_Platforms/2.0/api/ThirdParty/token/authorization_info.html service层 //根据授权码获取授权信息 private static final String API_QUERY_AUTH_URL = "https://api.weixin.qq.com/cgi-bin/component/api_query_auth?component_access_token="; // 授权信息 public Map getAuthorizationInformation(String componentAccessToken, String authorizationCode) { log.info("根据授权码获取授权信息"); try { if (StringUtils.isAnyBlank(componentAccessToken, componentAppId, authorizationCode)) { return null; } //我存入常量中了,路径看上文API_QUERY_AUTH_URL String url = VXConstants.API_QUERY_AUTH_URL + componentAccessToken; HashMap paramMap = new HashMap(); paramMap.put("component_access_token", componentAccessToken); paramMap.put("component_appid", componentAppId); paramMap.put("authorization_code", authorizationCode); String post = HttpUtil.post(url, gson.toJson(paramMap)); log.info("授权信息:{}", post); Map informationMap = gson.fromJson(post, new TypeToken() { }.getType()); Map authorizationInfo = (Map) informationMap.get("authorization_info"); if (authorizationInfo == null) { return null; } String authorizerAppid = (String) authorizationInfo.get("authorizer_appid"); String authorizerAccessToken = (String) authorizationInfo.get("authorizer_access_token"); Double expiresIn = (Double) authorizationInfo.get("expires_in"); String authorizerRefreshToken = (String) authorizationInfo.get("authorizer_refresh_token"); //将授权信息存入redis String gzhAuthMsgKey = VXConstants.GZH_AUTH_MSG + authorizerAppid; redisTemplate.opsForValue().set(gzhAuthMsgKey, post); redisTemplate.expire(gzhAuthMsgKey, expiresIn.intValue(), TimeUnit.SECONDS); log.info("authorizationInfo:{}", authorizationInfo); return authorizationInfo; } catch (Exception e) { log.error("根据授权码获取授权信息失败", e); } return null; } 3.3.4.3. 通过授权公众号的access_token获取授权信息也可以通过拿到的公众号的access_token来获取授权信息 官方文档:https://developers.weixin.qq.com/doc/oplatform/openApi/OpenApiDoc/authorization-management/getAuthorizerInfo.html // 获取授权账号信息url private static final String API_GET_AUTHORIZER_INFO_URL = "https://api.weixin.qq.com/cgi-bin/component/api_get_authorizer_info?component_access_token="; public Map getAuthorizerInfo(String componentAccessToken, String authorizerAppid) { log.info("获取授权账号详情"); if (StringUtils.isAnyBlank(componentAccessToken, componentAppId, authorizerAppid)) { return null; } //我存入常量中了,路径看上文API_GET_AUTHORIZER_INFO_URL String url = VXConstants.API_GET_AUTHORIZER_INFO_URL + componentAccessToken; HashMap paramMap = new HashMap(); paramMap.put("component_appid", componentAppId); paramMap.put("authorizer_appid", authorizerAppid); String post = HttpUtil.post(url, gson.toJson(paramMap)); log.info("授权账号信息:{}", post); Map authorizerInfoMap = gson.fromJson(post, new TypeToken() { }.getType()); //授权信息 Map authorizationInfo = (Map) authorizerInfoMap.get("authorization_info"); //公众号信息 Map authorizerInfo = (Map) authorizerInfoMap.get("authorizer_info"); return authorizerInfoMap; } 3.3.4.4. 去维护刷新这个公众号的access_token ,每两个小时或者一个半小时刷新一次怎么存怎么刷新怎么维护都是你自己去想的了 官方文档:https://developers.weixin.qq.com/doc/oplatform/Third-party_Platforms/2.0/api/ThirdParty/token/api_authorizer_token.html // 获取/刷新接口调用令牌url private static String API_AUTHORIZER_TOKEN_URL = "https://api.weixin.qq.com/cgi-bin/component/api_authorizer_token?component_access_token="; //获取/刷新token public void getAndRefreshAuthorizerToken(String componentAccessToken, String authorizerAppid, String authorizerRefreshToken) { log.info("执行刷新token逻辑"); if (StringUtils.isAnyBlank(componentAccessToken, componentAppId, authorizerAppid, authorizerRefreshToken)) { return; } String url = VXConstants.API_AUTHORIZER_TOKEN_URL + componentAccessToken; HashMap paramMap = new HashMap(); paramMap.put("component_appid", componentAppId); paramMap.put("authorizer_appid", authorizerAppid); paramMap.put("authorizer_refresh_token", authorizerRefreshToken); String post = HttpUtil.post(url, gson.toJson(paramMap)); log.info("刷新token结果:{}", post); Map resultMap = gson.fromJson(post, new TypeToken() { }.getType()); String accessToken = (String) resultMap.get("authorizer_access_token"); Double expiresIn = (Double) resultMap.get("expires_in"); String refreshToken = (String) resultMap.get("authorizer_refresh_token"); //todo 存在哪里,怎么存怎么刷新 } 3.3.5. 客户扫码授权首先你有一个授权链了,如:https://mp.weixin.qq.com/cgi-bin/componentloginpage?component_appid=wxc6b9ff60a342422352992&pre_auth_code=preauthcode@@@x8QAAAAAIvQt8AA18S42IFNJf7A_7iIbAXbrglC8Ov8f2rUaaAaAAaaaaw&redirect_uri=http://192.168.20.222:9999/admin/vx/auth/callback&auth_type=3 有一个取巧的方法,你打开http://192.168.20.222这个网站,然后随便找一个a标签,然后F12打开调试,去将这个a标签的属性改一下,即,回车确定后,去点这个a标签,即可打开授权页 如: 接收路径配置即途中的授权后实现业务 controller层 /** * 第三方平台接收公众号事件 */ @RequestMapping("/{APPID}/callback") @Inner(value = false) @SaasNoCheck public void eventCallBack(@PathVariable("APPID") String appId, HttpServletRequest req, HttpServletResponse resp) { vxService.eventCallBack(appId, req, resp); }service层 // 接收事件 @Override public void eventCallBack(String appId, HttpServletRequest req, HttpServletResponse resp) { PrintWriter out = null; try { req.setCharacterEncoding("utf-8"); resp.setCharacterEncoding("utf-8"); String signature = req.getParameter("msg_signature"); log.info("事件回调 appId:{} signature:{}" , appId, signature); if (!StringUtils.isNotBlank(signature)) { log.error("signature中无消息"); return;//微信推送给第三方开放平台的消息一定是加过密的,无消息加密无法解密消息 } //时间戳 String timestamp = req.getParameter("timestamp"); // 随机数 String nonce = req.getParameter("nonce"); Map xmlMap = null; out = resp.getWriter(); xmlMap = MessageUtil.xmlToMap(req); String resultMsg = null; if (StringUtils.isEmpty(signature)) { //不加密处理 log.info("接收的微信推送消息为:{}", xmlMap.toString()); } else { // 从请求中读取整个post数据 log.info("加密签名msg_signature:{} 时间戳timestamp:{} 随机数nonce:{}", signature, timestamp, nonce); log.info("从request中获取xml信息:{}", xmlMap); //解密处理 String encrypt = (String) xmlMap.get("Encrypt"); resultMsg = decryptMsg(timestamp, nonce, signature, encrypt); log.info("接收的微信推送消息为:{}", resultMsg); } //处理接收到的信息 out.println(handleEventMsg(appId, resultMsg)); } catch (Exception e) { log.error(e.getLocalizedMessage(), e); if (out != null) { out.println("success"); } } finally { if (out != null) { out.close(); } out = null; } } public String handleEventMsg(String appId, String resultMsg){ String message = "success"; try { //hutool工具包 Map map = XmlUtil.xmlToMap(resultMsg); String toUserName = (String) map.get("ToUserName"); String fromUserName = (String) map.get("FromUserName"); String createTime = (String) map.get("CreateTime"); String msgType = (String) map.get("MsgType"); String content = (String) map.get("Content"); String msgId = (String) map.get("MsgId"); String eventType = (String) map.get("Event"); log.info("toUserName:{} fromUserName:{} createTime:{} msgType:{} content:{} msgId:{} event:{}", toUserName, fromUserName, createTime, msgType, content, msgId, eventType); // 普通消息:文本消息。 if (MessageUtil.MESSAGE_TEXT.equals(msgType)) { //message = MessageUtil.initText(toUserName, fromUserName, "你发送的消息是:" + content); // log.info("普通消息:{}", message); message = "success"; } else if (MessageUtil.MESSAGE_EVENT.equals(msgType)) { // 关注 // 下面是我存入数据库的操作 LambdaQueryWrapper fenWrapper = new LambdaQueryWrapper().eq(SysGzhFens::getGzhOpenId, fromUserName) .in(SysGzhFens::getDelFlag, Arrays.asList(0, 1)).orderByDesc(SysGzhFens::getCreateTime).last(" limit 1"); SysGzhFens fens = gzhFensService.getOne(fenWrapper); if (MessageUtil.MESSAGE_SUBSCRIBE_EVENT.equals(eventType)) { log.info("关注"); // message = MessageUtil.initText(toUserName, fromUserName, "感谢关注"); if (fens != null) { fens.setDelFlag(0); gzhFensService.updateById(fens); } else { SysGzhFensAddDTO sysGzhFensAddDTO = new SysGzhFensAddDTO(); sysGzhFensAddDTO.setGzhOpenId(fromUserName); sysGzhFensAddDTO.setTenantId(SecurityUtils.getTenantId()); gzhFensService.save(sysGzhFensAddDTO); } message = "success"; } else if (MessageUtil.MESSAGE_UNSUBSCRIBE_EVENT.equals(eventType)) { log.info("取关"); // message = MessageUtil.initText(toUserName, fromUserName, "取关成功"); if (fens != null) { fens.setDelFlag(1); boolean remove = gzhFensService.updateById(fens); log.info("取关情况:{}", remove); } message = "success"; } } log.info("消息:{}", message); } catch (Exception e) { log.error("处理微信公众号事件失败:", e); } return message; } |
 (2)按照要求填写相关信息 我这里用自己的服务器,开发模式选择传统模式
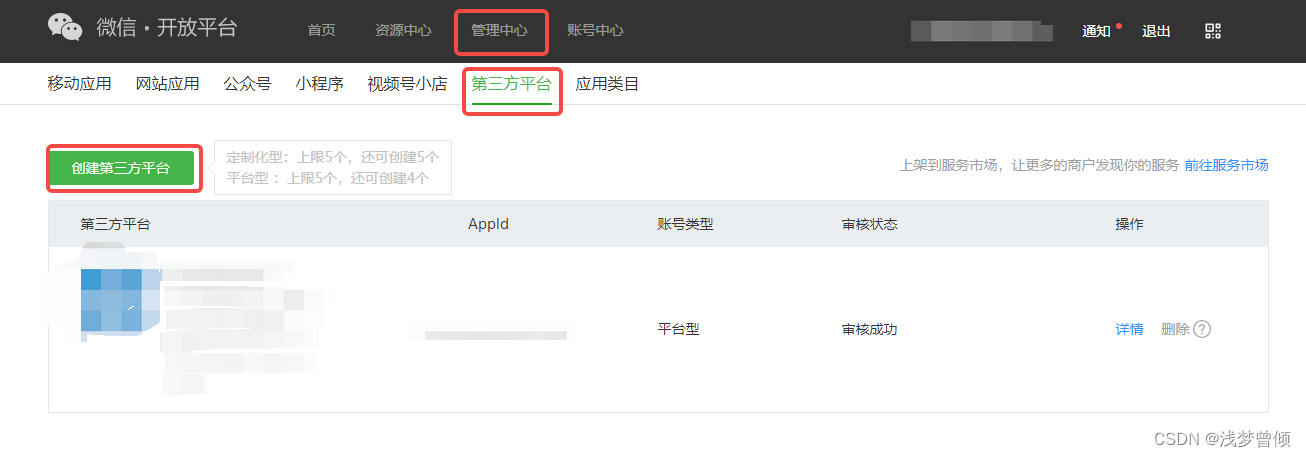
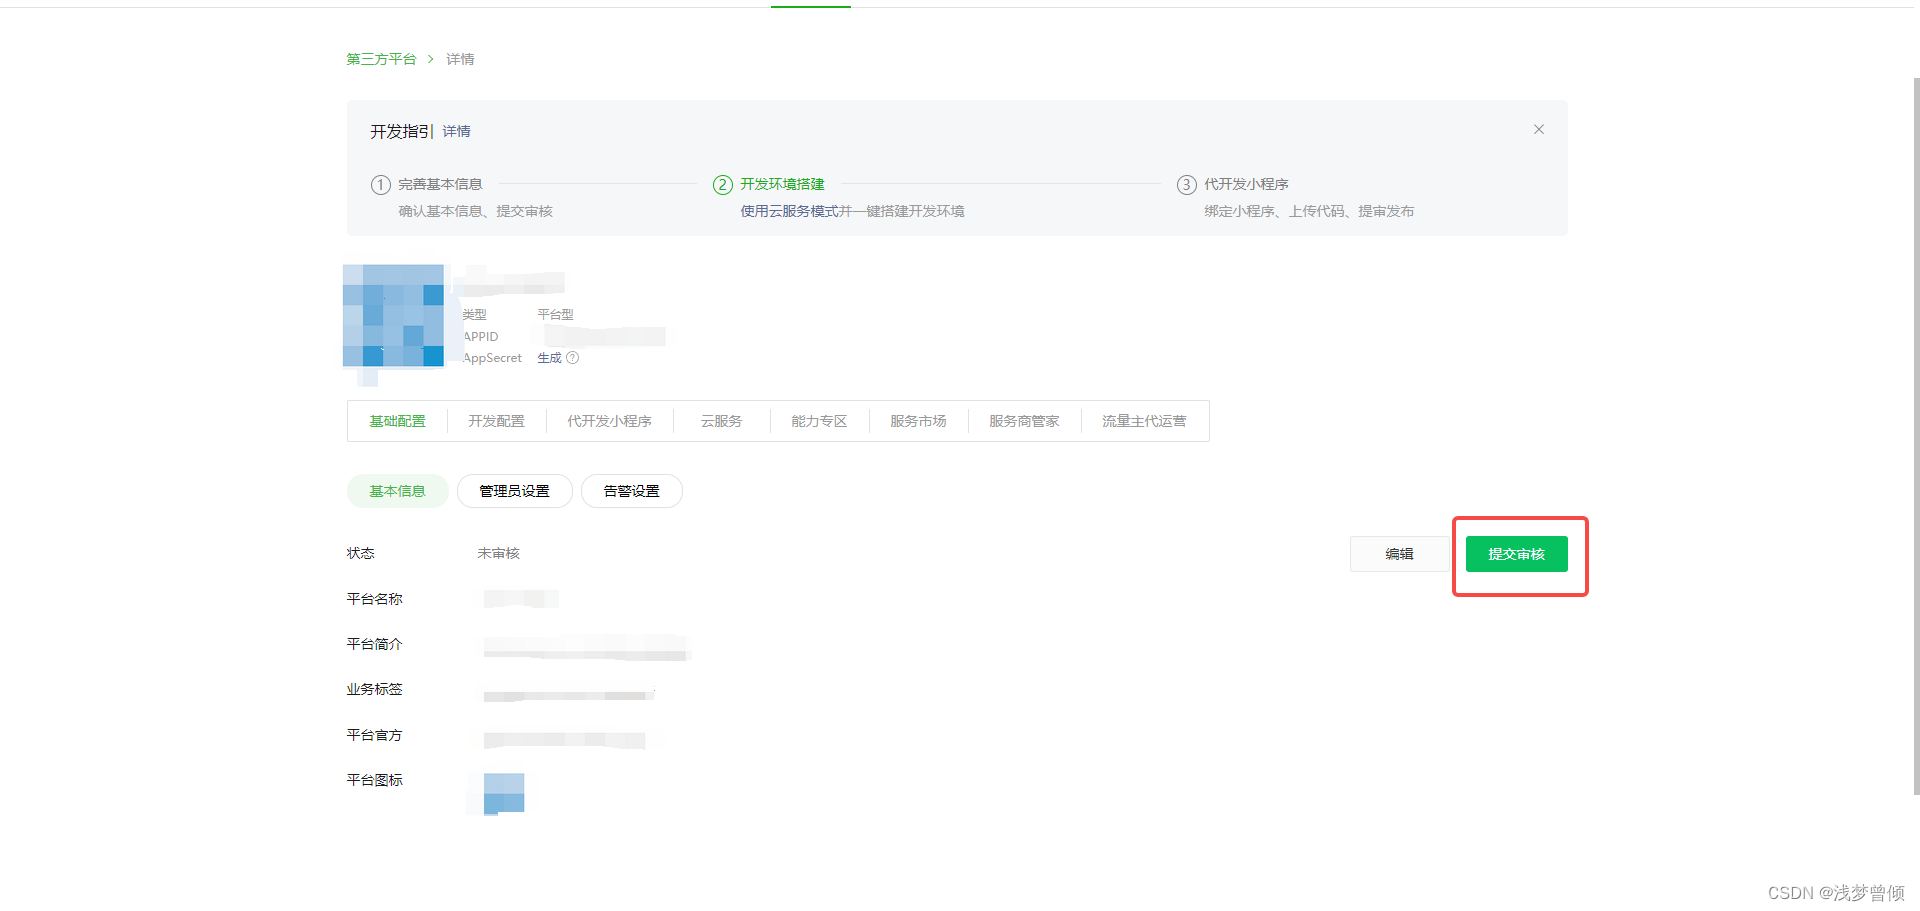
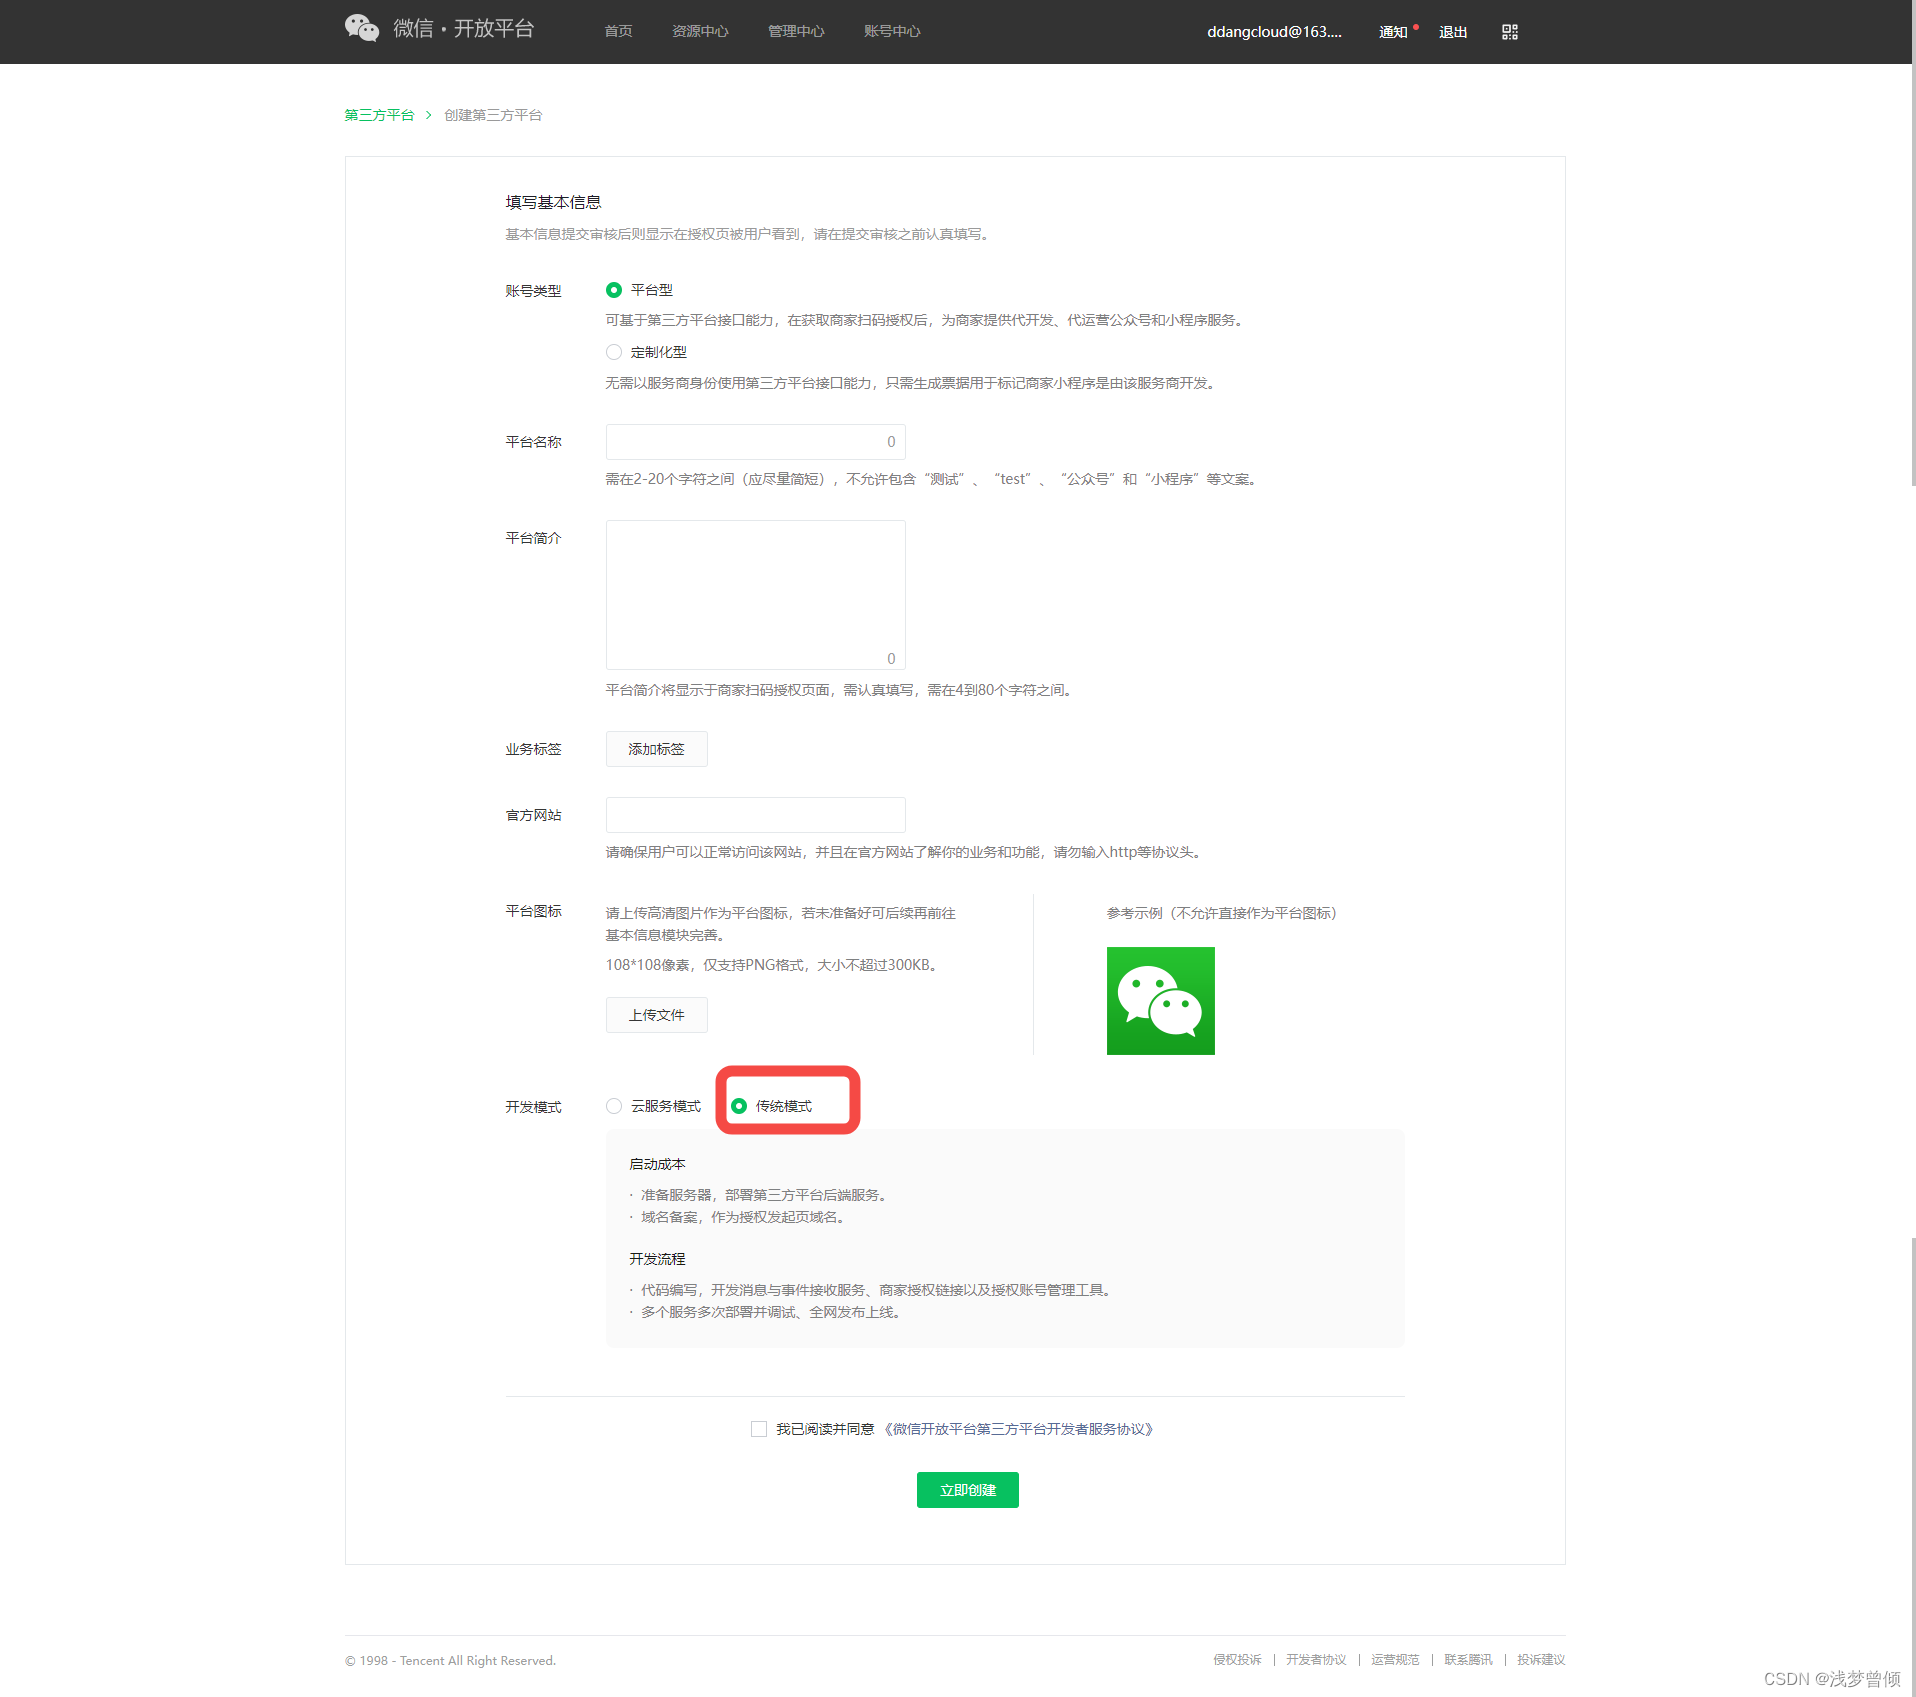 (3)提交审核 回到 管理中心 - 第三方平台,可以看到你创建的第三方平台处于未审核状态 点击详情,检查下信息有没有问题,直接提审就行
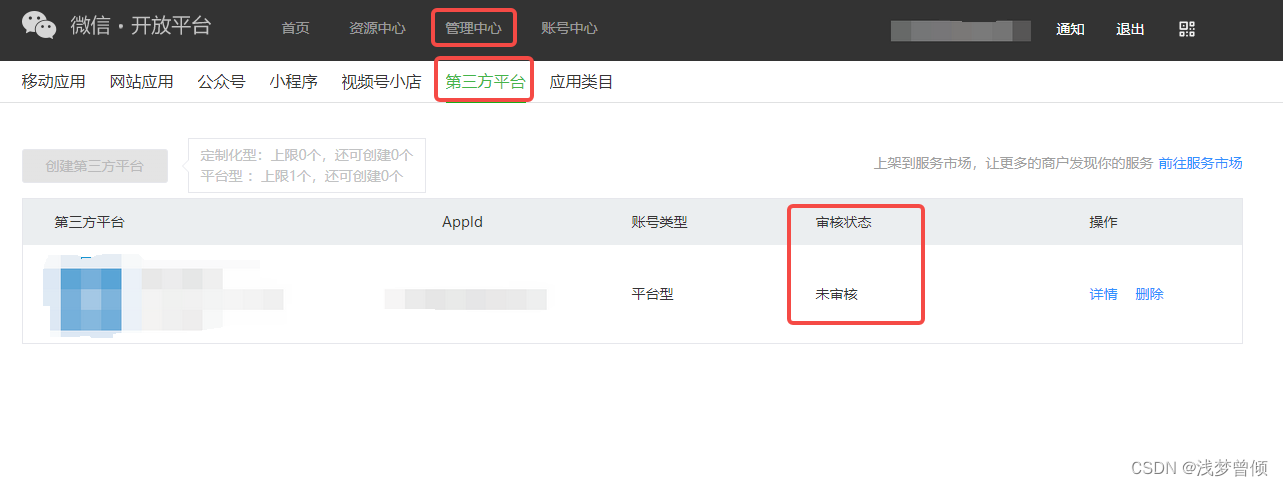
 解压后,你可以先看看他文件中引用的jar包,去mvn仓库找依赖引入,然后把他的所有工具都复制粘贴到你的目录中:
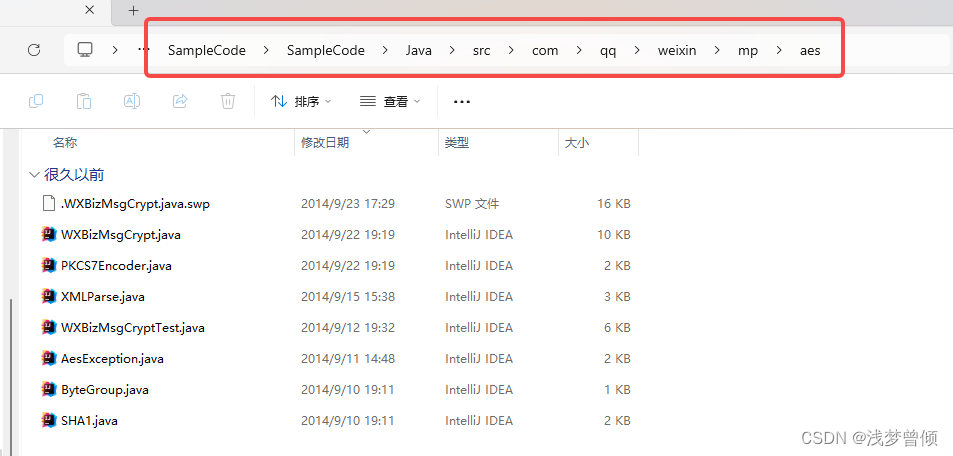 加密解密的方法如下:其中需要的参数,除了你平台上固定的配置外,就是平台发送请求中获取到的参数,不用着急,下文中有使用讲解:
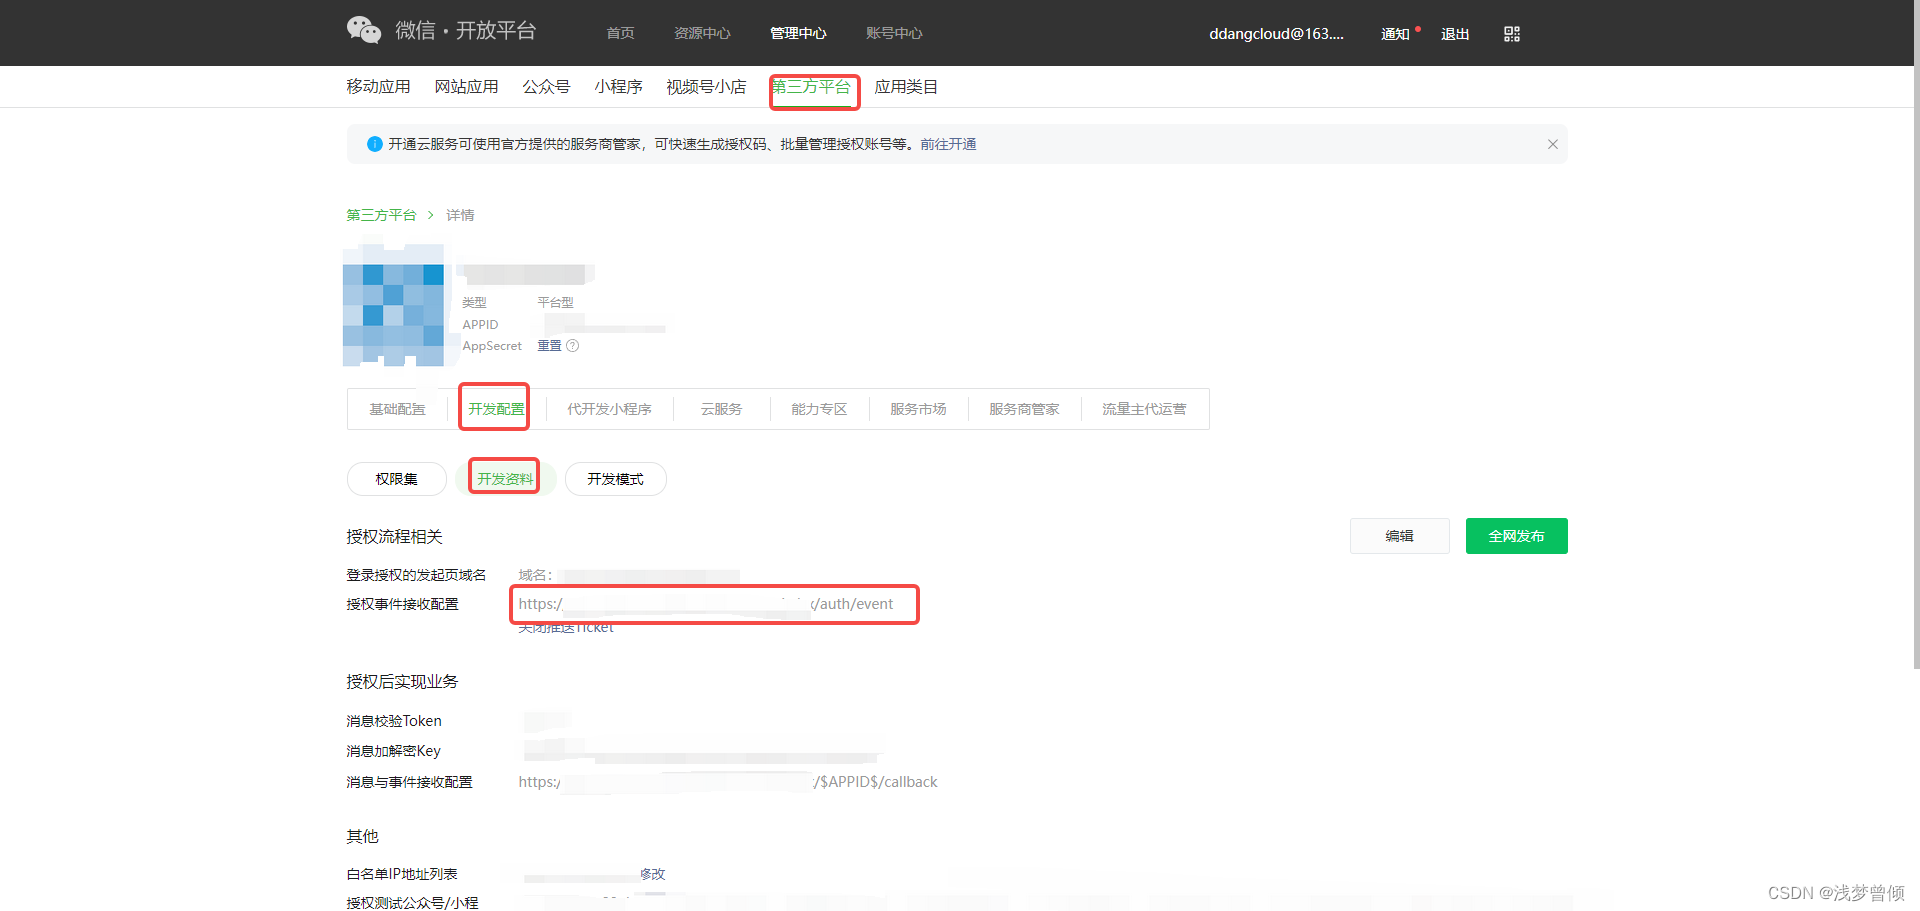 在第三方平台创建审核通过后,微信服务器会向其 ”授权事件接收URL” 每隔 10 分钟以 POST 的方式推送 component_verify_ticket,有效期12小时。 要注意一点,这个请求的参数是 加!密!的! 所以就需要加密解密操作。
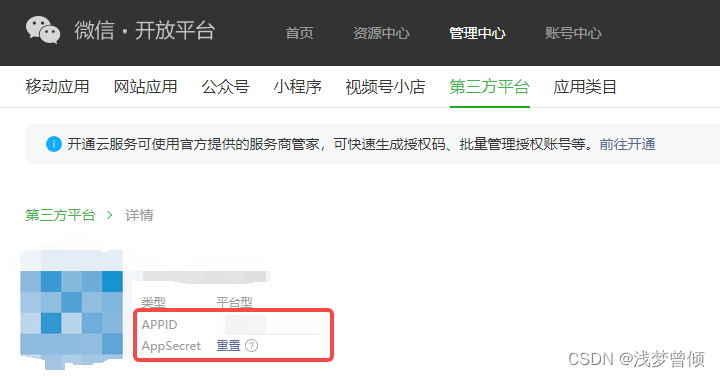
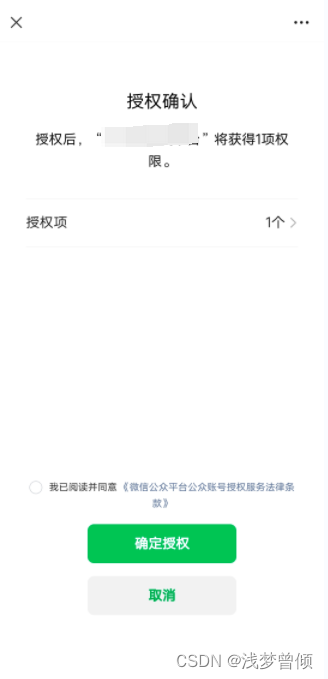
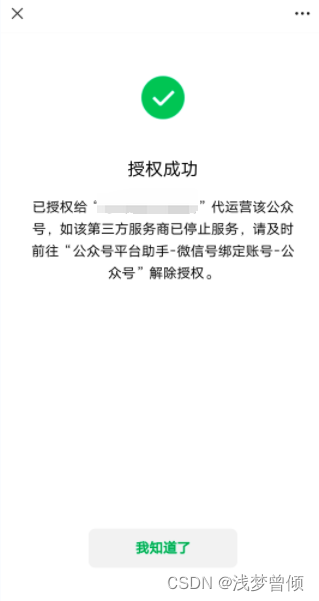
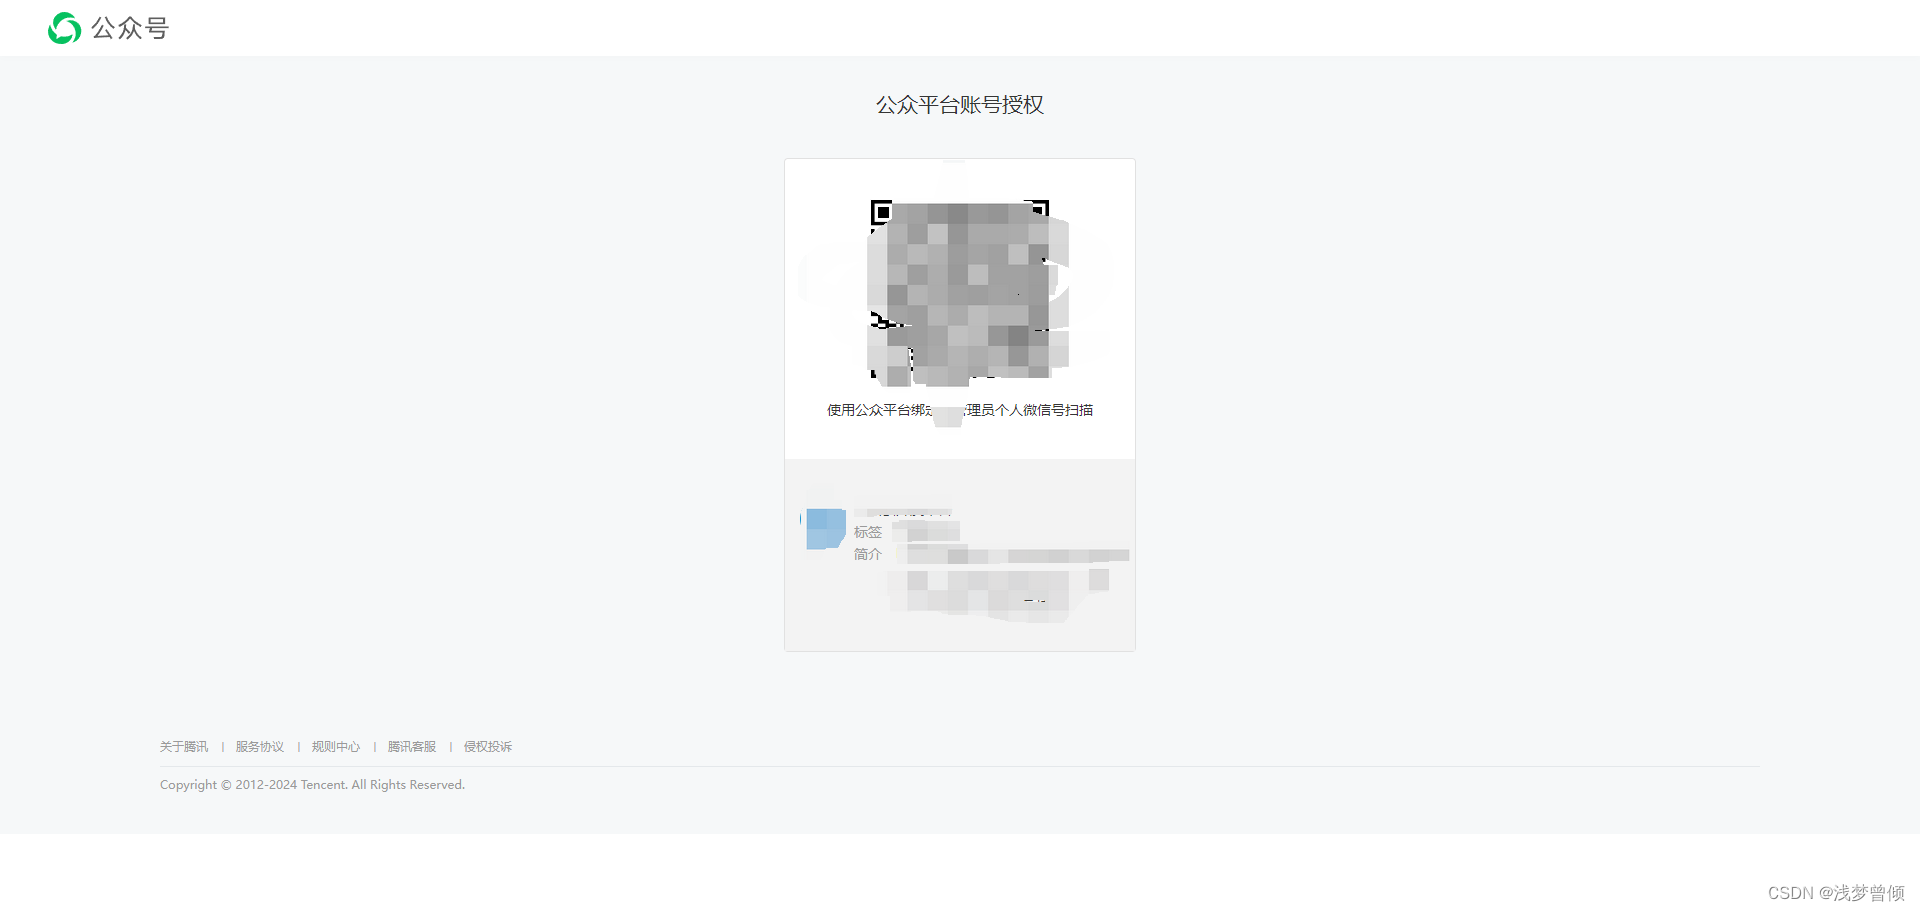 扫码之后:
扫码之后: 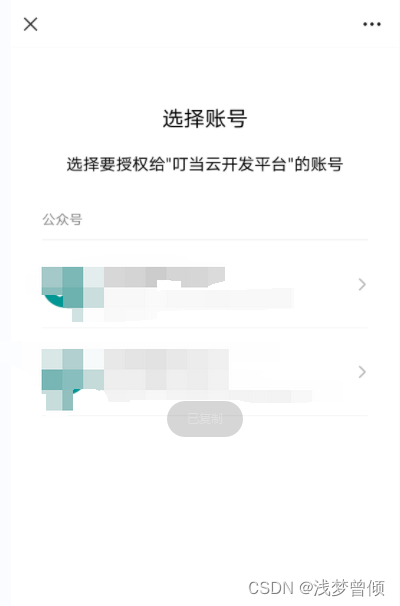
 注意:
注意:【本文地址】