| 使用webpack5,手动搭建vue开发环境 | 您所在的位置:网站首页 › vue的开发必须使用webpack作为脚手架吗 › 使用webpack5,手动搭建vue开发环境 |
使用webpack5,手动搭建vue开发环境
|
使用webpack5搭建vue开发环境
前言
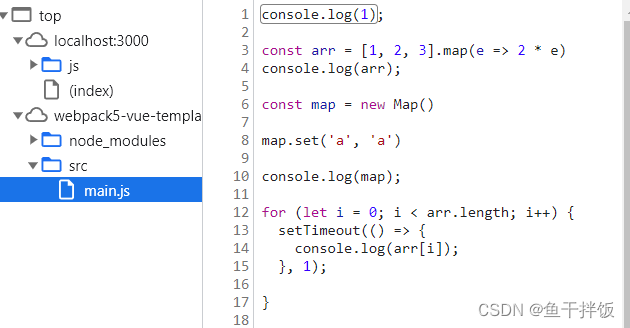
我们平时开发一个vue项目的时候,通常会根据vue官网推荐,直接执行以下命令创建一个项目: npm init vue@latest 这一指令将会安装并执行 create-vue,它是 Vue 官方的项目脚手架工具。 但是,这不是这篇文章的主题。本篇文章将会记录使用 Webpack 5.0 配置 Vue 开发环境的过程,进一步了解 Vue CLI 在创建项目的过程中做了什么工作。 准备webpack概念介绍 如果之前使用过webpack4配置过vue开发环境,那么可以看从webpack4迁移到webpack5 环境配置 初始化项目新建项目根目录文件夹,文件夹命名为项目名称。进入文件夹,执行下列命令: npm init -y根目录下会生成package.json文件,修改如下: { "name": "webpack5-vue-template", "version": "1.0.0", "description": "", "main": "index.js", "scripts": {}, "keywords": [], "author": "ricky", "license": "ISC" } 安装webpack执行命令: npm i webpack webpack-cli -Dpackage.json 中会出现: { "name": "webpack5-vue-template", ... "devDependencies": { "webpack": "^5.86.0", "webpack-cli": "^5.1.4" } } 配置打包环境项目根路径下新建 build目录,并在其中新建三个js文件: webpack.common.js 公共环境配置webpack.dev.js 开发环境配置webpack.prod.js 生产环境配置修改 package.json 的 scripts 参数,在运行脚本时传入环境变量供脚本内判断使用: { ... "scripts": { "build:dev": "webpack --progress --config ./build/webpack.dev.js", "build": "webpack --progress --node-env production --config ./build/webpack.prod.js" }, ... }在根目录下,新建src文件夹——存放业务代码,在其中新建main.js 、assets。 assets 目录内新建 fonts 以及 img 目录 。 安装 webpack-merge安装这个依赖,用于合并公共配置与特定环境的配置。最终导出预期的配置文件 npm i webpack-merge -D webpack.common.js const path = require('path'); module.exports = { entry: { main: path.resolve(__dirname, '../src/main.js') }, output: { path: path.resolve(__dirname, '../dist') }, }配置resolve:省略部分经常用到的文件路径 ... module.exports = { entry: { ... }, resolve: { alias: { '@': path.resolve(__dirname, '../src'), '@img': path.resolve(__dirname, '../src/assets/img') }, extensions: ['.js', '.vue'] }, ... } webpack.dev.js const { merge } = require('webpack-merge') const commonConfig = require('./webpack.common') const mode = process.env.NODE_ENV === 'production' ? 'production' : 'development' const devConfig = { mode, output: { filename: 'js/[name].js', chunkFilename: 'js/[name].chunk.js' } } module.exports = merge(commonConfig, devConfig) webpack.prod.js const { merge } = require('webpack-merge') const commonConfig = require('./webpack.common') const mode = process.env.NODE_ENV === 'production' ? 'production' : 'development' const prodConfig = { mode, output: { filename: 'js/[name].[contenthash:8].js', chunkFilename: 'js/[name].[contenthash:8].chunk.js' } } module.exports = merge(commonConfig, prodConfig) dist目录下生成index.html在根目录下新建/public/index.html ,index.html : DOCTYPE html>安装html-webpack-plugin 插件依赖: npm i html-webpack-plugin -D在webpack.common.js中配置html模板: ... const HtmlWebpackPlugin = require('html-webpack-plugin') module.exports = { ... plugins: [ new HtmlWebpackPlugin({ template: path.resolve(__dirname, '../public/index.html'), title: 'This is a template' }) ], output: { ... } } 配置开发环境 DevServer 热更新安装server依赖,执行命令: npm i webpack-dev-server -D在webpack.dev.js中配置devServer属性: const path = require('path') ... const devConfig = { ... devServer: { static: path.resolve(__dirname, '../dist'), port: 3000, open: true, hot: true }, output: { ... } } ...在package.json 中配置 script 属性的执行指令: { ... "scripts": { "serve": "webpack-dev-server --progress --config ./build/webpack.dev.js", ... }, ... } Babel语言转换安装开发依赖: npm i babel-loader @babel/core @babel/preset-env -D安装生产依赖: npm i @babel/polyfill core-js在公共配置webpack.common.js中配置module.roules 对js文件的加载规则: ... module.exports = { ... module: { rules: [ { test: /\.js$/, exclude: /node_modules/, loader: 'babel-loader' } ] }, plugins: [ ... ], ... }在项目根目录下新建babel.config.js文件: module.exports = { presets: [ [ '@babel/preset-env', { useBuiltIns: 'usage', corejs: 3 } ] ] }使用babel之前
使用babel转换之后
也可以是scss 或者 less,这里示例使用的是stylus。先安装依赖: npm i css-loader style-loader postcss-loader autoprefixer stylus stylus-loader -Dcss样式转换是在打包的时候转换的,所以安装的是开发依赖。在webpack.dev.js中配置: ... const devConfig = { ... module: { rules: [ { test: /\.css$/, use: [ 'style-loader', { loader: 'css-loader', options: { importLoaders: 1 } }, 'postcss-loader' ] }, { test: /\.styl(us)$/, use: [ 'style-loader', { loader: 'css-loader', options: { //启用/禁用或者设置在 css-loader 前应用的 loader 数量 importLoaders: 2 } }, 'postcss-loader', 'stylus-loader' ] } ] }, output: { ... } } ...这里使用到了postcss,所以在根目录下新建其配置文件postcss.config.js: module.exports = { plugins: [ require('autoprefixer') // 属性根据浏览器不同,自动添加样式前缀 ] }根目录下新建.browserslistrc: > 1% last 2 versions not dead not ie 11优化: 在生产环境中,抽离成单独的css样式文件,并且压缩样式代码。开发环境不需要。 安装依赖: npm i mini-css-extract-plugin css-minimizer-webpack-plugin -Dwebpack插件链接: mini-css-extract-plugin css-minimizer-webpack-plugin 配置webpack.prod.js: ... const MiniCssExtractPlugin = require('mini-css-extract-plugin') const CssMinimizerPlugin = require('css-minimizer-webpack-plugin') ... const prodConfig = { ... module: { rules: [ { test: /\.css$/, use: [ // 压缩css文件,需配置的loader MiniCssExtractPlugin.loader, { loader: 'css-loader', options: { importLoaders: 1 } }, 'postcss-loader' ] }, { test: /\.styl(us)$/, use: [ // 压缩css文件,需配置的loader MiniCssExtractPlugin.loader, { loader: 'css-loader', options: { importLoaders: 2 } }, 'postcss-loader', 'stylus-loader' ] } ] }, optimization: { minimizer: [ // 在 webpack@5 中,你可以使用 `...` 语法来扩展现有的 minimizer(即 `terser-webpack-plugin`),将下一行取消注释 // `...`, new CssMinimizerPlugin(), // 这将仅在生产环境开启 CSS 优化。 // 如果还想在开发环境下启用 CSS 优化,请将 optimization.minimize 设置为 true: ] }, plugins: [ new MiniCssExtractPlugin({ // 决定输出的每个 CSS 文件的名称 filename: 'css/[name].[contenthash:8].css', // 决定非入口的 chunk 文件名称,仅在 webpack@5 下可用 chunkFilename: 'css/[name].[contenthash:8].chunk.css' }) ], output: { ... } } ... 对字体、图片、媒体等静态资源的打包配置webpack.common.js: ... const isProduction = process.env.NODE_ENV === 'production' module.exports = { ... module: { rules: [ ... { test: /\.(ttf|woff|woff2|eto|svg)$/, exclude: path.resolve(__dirname, '../src/assets/img'), type: 'asset', parser: { dataUrlCondition: { //如果一个模块源码大小小于 maxSize,那么模块会被作为一个 Base64 编码的字符串注入到包中, 否则模块文件会被生成到输出的目标目录中。 maxSize: 4 * 1024 // 4kb } }, generator: { filename: isProduction ? 'static/fonts/[name].[contenthash:8][ext]' : 'static/fonts/[name][ext]' } }, { test: /\.(jpe?g|png|gif|svg)$/, exclude: path.resolve(__dirname, '../src/assets/fonts'), type: 'asset', parser: { dataUrlCondition: { maxSize: 4 * 1024 } }, generator: { filename: isProduction ? 'static/img/[name].[contenthash:8][ext]' : 'static/img/[name][ext]' } }, { test: /\.(mp4|webm|ogg|mp3|wav|flac|aac)$/, type: 'asset/resource', generator: { filename: isProduction ? 'static/video/[name].[contenthash:8][ext]' : 'static/video/[name][ext]' } } ] }, ... }关于rules.Rule.type ,即资源模块的说明,详见官网说明 打包vue单文件的配置安装依赖: 安装视图框架vue:npm i vue安装加载器,编译器:npm i vue-loader @vue/compiler-sfc -D配置webpack.common.js: ... const { VueLoaderPlugin } = require('vue-loader') ... module.exports = { ... module: { rules: [ ... { test: /\.vue$/, loader: 'vue-loader' }, ... ] }, plugins: [ ... new VueLoaderPlugin() ], ... }至此,vue开发环境已经搭建完成! 集成vue生态圈功能 app入口在src目录下,新建App.vue: {{ msg }} export default { name: 'App', data () { return { msg: 'Hello world' } } } .app color: skyblue在src目录下,新建main.js: import { createApp } from 'vue' import App from './App' const app = createApp(App) app.mount('#app') 添加Vue Router 和 Vuex安装生产依赖: npm i vue-router vuex在src 目录下,分别新建router 和 store 目录,再依次新建index.js文件,具体使用方法可以参考vue官网。 编辑/router/index.js文件 : import { createRouter, createWebHistory } from 'vue-router' import Home from '@/views/Home' const routes = [ { path: '/', name: 'Home', component: Home }, { path: '/about', name: 'About', // 懒加载。webpackChunkName 指定chunkname为 about component: () => import(/* webpackChunkName: "about" */ '@/views/About') } ] const router = createRouter({ history: createWebHistory(), routes }) export default router注意: 这里使用了history 的路由模式,所以需在webpack.dev.js 开发环境中配置: ... const devConfig = { ... devServer: { ... // 配置history路由模式 historyApiFallback: true }, ... } ...编辑/store/index.js 文件: import { createStore } from 'vuex' const store = createStore({ state: { count: 1 }, actions: { add ({ commit }) { commit('add') } }, mutations: { add (state) { state.count++ } }, getters: { getCount (state) { return state.count } } }) export default store将router和store添加到main.js中: import { createApp } from 'vue' import App from './App' import router from './router' import store from './store' const app = createApp(App) app.use(router).use(store).mount('#app')Vue3中 vuex 替换为 pinia 超级链接 定义环境变量在vue3.x 项目中需要设置两个变量,以更好地进行 tree-shaking 修改webpack.common.js ... const webpack = require('webpack') ... module.exports = { ... plugins: [ ... new webpack.DefinePlugin({ __VUE_OPTIONS_API__: true, __VUE_PROD_DEVTOOLS__: false }) ], ... } 配置打包规范 打包时拷贝public文件安装依赖: npm i copy-webpack-plugin -D配置webpack.common.js ,打包时直接将public下的文件拷贝到dist目录 : ... const CopyPlugin = require('copy-webpack-plugin') ... module.exports = { ... plugins: [ ... new CopyPlugin({ patterns: [ { from: path.resolve(__dirname, '../public'), to: path.resolve(__dirname, '../dist'), filter: (resourcePath) => { if (resourcePath.includes('/public/index.html')) { return false } return true } } ] }) ], ... } ESLint代码规范安装依赖: npm i eslint eslint-webpack-plugin @babel/eslint-parser -D npm i eslint-config-standard eslint-plugin-promise eslint-plugin-import eslint-plugin-n -D npm i eslint-plugin-vue -D执行eslint: npx eslint --init执行命令后,根据提示选择好配置项。随后项目根目录下会生成配置文件.eslintrc.js ,修改文件: module.exports = { root: true, env: { browser: true, es2021: true }, extends: [ 'plugin:vue/vue3-essential', 'standard' ], parserOptions: { parser: '@babel/eslint-parser' }, plugins: [ 'vue' ], rules: { 'no-console': process.env.NODE_ENV === 'production' ? 'warn' : 'off', 'no-debugger': process.env.NODE_ENV === 'production' ? 'warn' : 'off', 'vue/multi-word-component-names': 0 } }在根目录下新建.eslintconfig 和 .eslintignore 文件 .editorconfig [*.{js,jsx,ts,tsx,vue}] indent_style = space indent_size = 2 trim_trailing_whitespace = true insert_final_newline = true.eslintignore /build/ /dist/webpack 中配置 eslint 插件 webpack.common.js 中: ... const ESLintPlugin = require('eslint-webpack-plugin') ... module.exports = { ... plugins: [ ... new ESLintPlugin({ extensions: ['js', 'jsx', 'ts', 'tsx', 'vue'] }) ], ... } 打包前清除上一次打包内容配置webpack.common.js : ... module.exports = { ... output: { ... clean: true } } SourceMap该配置一般只在开发环境中需要,所以在webpack.dev.js 中配置devtool: ... const devConfig = { mode, devtool: 'eval-cheap-module-source-map', ... } ... 打包分析webpack打包结果分析依赖安装:npm i webpack-bundle-analyzer -D 在package.json 中配置指令: { ... "scripts": { ... "analyze": "webpack --progress --analyze --node-env production --config ./build/webpack.prod.js" }, ... } 关闭一些提示在生产环境打包时,可能会出现一些大文件的性能提示,可以通过配置关闭: 修改webpack.prod.js : ... const prodConfig = { ... performance: false, output: { ... } } ... 其他一些配置git提交时,需要忽略一些文件,使之不被commit。配置:在跟目录下新建文件.gitignore : .DS_Store node_modules /dist # local env files .env.local .env.*.local # Log files npm-debug.log* yarn-debug.log* yarn-error.log* pnpm-debug.log* # Editor directories and files .idea .vscode *.suo *.ntvs* *.njsproj *.sln *.sw? 写在最后以上操作是webpack5搭建vue项目环境全过程了,在实际操作的过程中再次熟悉webpack的配置。 本文参考: Webpack 5.0 从零开始搭建 Vue 开发环境 手写webpack创建vue3项目的流程 |
![[外链图片转存失败,源站可能有防盗链机制,建议将图片保存下来直接上传(img-TS3fsheg-1686705628388)(C:\Users\liuqi\Documents\Study-code\assets\img\1686696819918.png)]](https://img-blog.csdnimg.cn/c17e10e1c33240cc92f0b64389463263.png)
【本文地址】