| SpringBoot + WebSocket+STOMP指定推送消息 | 您所在的位置:网站首页 › springboot向前端推送消息 › SpringBoot + WebSocket+STOMP指定推送消息 |
SpringBoot + WebSocket+STOMP指定推送消息
|
前些天发现了一个巨牛的人工智能学习网站,通俗易懂,风趣幽默,忍不住分享一下给大家。点击跳转到网站。 目录 一、前提条件1.2 环境要求1.3 依赖 二、相关工具类准备2.1 发送消息载体2.2 接收消息载体2.3 消息处理接口2.4 为 STOMP 消息传递配置 Spring 三、前端部分四、效果 一、前提条件本文将简单的描述SpringBoot + WebSocket+STOMP指定推送消息场景,不包含信息安全加密等,请勿用在生产环境。 1.2 环境要求JDK:11+ Maven: 3.5+ SpringBoot: 2.6+ [email protected] STOMP 是面向简单(或流式)文本的消息传递协议。 STOMP 提供可互操作的有线格式,以便 STOMP 客户端可以与任何 STOMP消息代理进行通信,从而在多种语言、平台和代理之间提供简单且广泛的消息互操作性。 1.3 依赖 org.springframework.boot spring-boot-starter-websocket 二、相关工具类准备 2.1 发送消息载体 @Data public class MessageOut{ //这里的内容按需求来写,我随便举几个 private String userId; private String name; private String message; private Integer status; } 2.2 接收消息载体 @Data public class MessageIn{ //这里的内容按需求来写,我随便举几个 private String content } 2.3 消息处理接口在 Spring 使用 STOMP 消息传递的方法中,STOMP 消息可以路由到@Controller类。基于这点我们写一个Controller类: @RestController public class MessageController { @Resource private SimpMessagingTemplate messagingTemplate; @MessageMapping("/message") @SendTo("/topic/messageTo") public MessageOut message(MessageIn message) { MessageOut m = new MessageOut(); m.setMessage("有内鬼,终止交易"); //在这里将推送地址改成 /topic/+要发送的id,即可实现点对点 messagingTemplate.convertAndSend("/topic/12345","收到,ol"); return m; } } 2.4 为 STOMP 消息传递配置 Spring配置类很简单,如下: @Configuration @EnableWebSocketMessageBroker public class WebSocketConfig implements WebSocketMessageBrokerConfigurer { @Override public void configureMessageBroker(MessageBrokerRegistry config) { //启用一个简单的基于内存的消息代理,将问候消息传送回前缀为/topic的目的地上的客户端 config.enableSimpleBroker("/topic"); //指定绑定/app到用 @MessageMapping 注释的方法的消息的前缀,该前缀将用于定义所有消息映射 config.setApplicationDestinationPrefixes("/app"); } @Override public void registerStompEndpoints(StompEndpointRegistry registry) { // 注册/pda-message-websocket连接的端点,并设置允许连接的原点 registry.addEndpoint("/pda-message-websocket").setAllowedOrigins("*"); } }到这里,后端部分编写完成~ 三、前端部分这部分就是一个验证而已,没啥技术含量,我们继续以往的前端风格,给一段代码自己体会: DOCTYPE html> Hello WebSocket 浏览器不支持Javascript!Websocket依赖于启用的Javascript,请启用Javascript并重新加载此页面! WebSocket 连接: 连接 断开 你叫什么? 发送 消息 const url = "ws://localhost:6060/pda-message-websocket"; const stompClient = new StompJs.Client({ brokerURL: url, connectHeaders: { // login: 'user', // passcode: 'password', }, debug: function (str) { console.log(str); }, //重连间隔 ms reconnectDelay: 5000, //发送心跳 ms heartbeatIncoming: 4000, //接收心跳 ms heartbeatOutgoing: 4000, logRawCommunication: false, }); //默认使用WebSockets,如果浏览器不支持,则回退到SockJS if (typeof WebSocket !== 'function') { // 对于SockJS,需要设置一个工厂来创建一个新的SockJS实例 // 用于每次(重新)连接 stompClient.webSocketFactory = function () { // 请注意,URL与WebSocket URL不同 return new SockJS('http://localhost:6060/notify'); }; } stompClient.onConnect = (frame) => { setConnected(true); console.log('Connected: ' + frame); //在这里将订阅改成 /topic/+自己的id,即可收到点对点发送的消息 stompClient.subscribe('/topic/notify', (greeting) => { showGreeting(JSON.parse(greeting.body)); }); }; stompClient.onWebSocketError = (error) => { console.error('Error with websocket', error); }; stompClient.onStompError = (frame) => { console.error('Broker reported error: ' + frame.headers['message']); console.error('Additional details: ' + frame.body); }; function setConnected(connected) { $("#connect").prop("disabled", connected); $("#disconnect").prop("disabled", !connected); if (connected) { $("#conversation").show(); } else { $("#conversation").hide(); } $("#greetings").html(""); } function connect() { stompClient.activate(); } function disconnect() { stompClient.deactivate(); setConnected(false); console.log("Disconnected"); } function sendName() { stompClient.publish({ destination: "/app/notify", body: JSON.stringify({'name': $("#name").val()}) }); } function showGreeting(message) { $("#greetings").append("" + message + ""); } $(function () { $("form").on('submit', (e) => e.preventDefault()); $( "#connect" ).click(() => connect()); $( "#disconnect" ).click(() => disconnect()); $( "#send" ).click(() => sendName()); }); 四、效果点击前端代码HTML,可以看到一下效果:
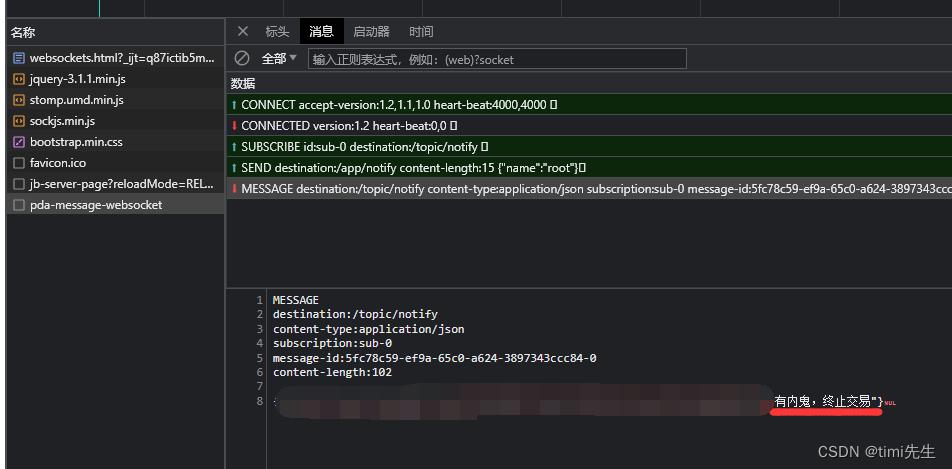
输入名称,点击发送可以看到: 我们再看看消息返回: |
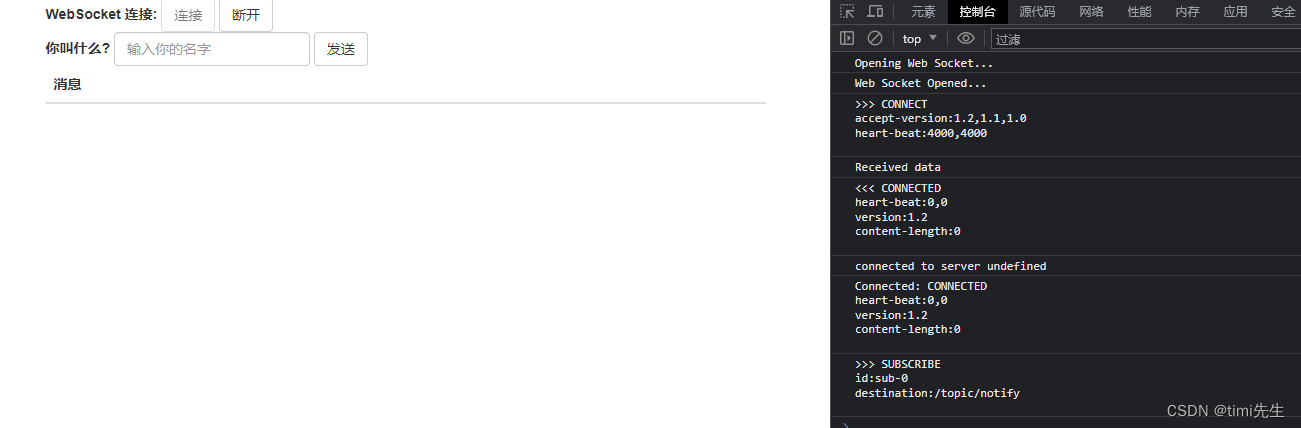 点击连接,我们可以看到控制台上打印的连接信息和订阅信息,表明我们已经成功连接到服务器。
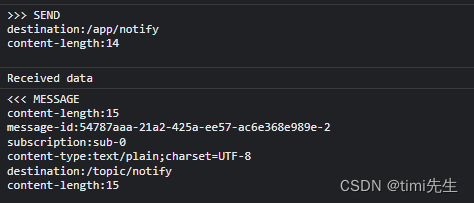
 点对点返回:
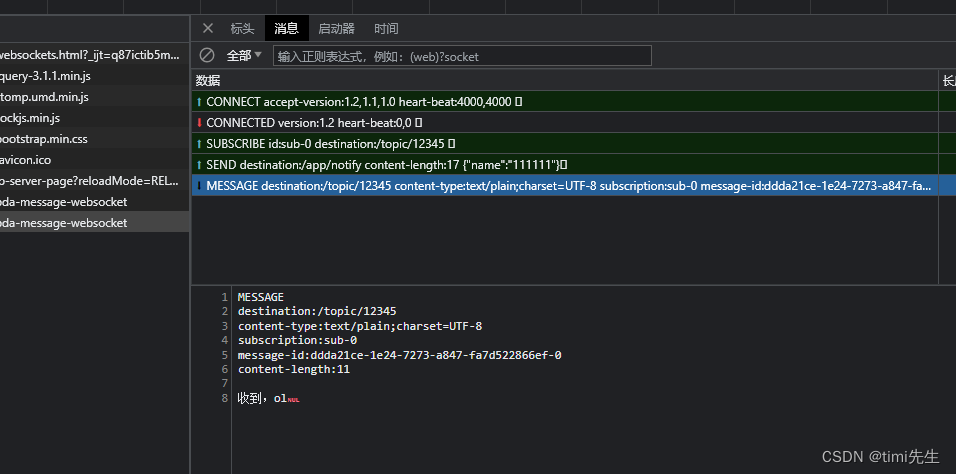
【本文地址】
公司简介
联系我们