| 如何使用 Docker Compose 轻松部署 Redis | 您所在的位置:网站首页 › redis安装客户端还是服务器 › 如何使用 Docker Compose 轻松部署 Redis |
如何使用 Docker Compose 轻松部署 Redis
|
公众号关注 「奇妙的 Linux 世界」 设为「星标」,每天带你玩转 Linux !
Redis(全称:Remote Dictionary Server,即远程字典服务器)是一个开源的高性能键值数据库和缓存系统。Redis 的数据结构支持字符串、哈希表、列表、集合和有序集合等类型。同时,Redis 还提供了丰富的操作指令,例如 GET/SET、INCR/DECR、HGET/HSET、LPUSH/RPUSH、SADD/SMEMBERS、ZADD/ZRANGE 等。除此之外,Redis 还支持事务、过期时间、发布/订阅等特性,能够方便地实现各种高效的数据存储和读取方案。
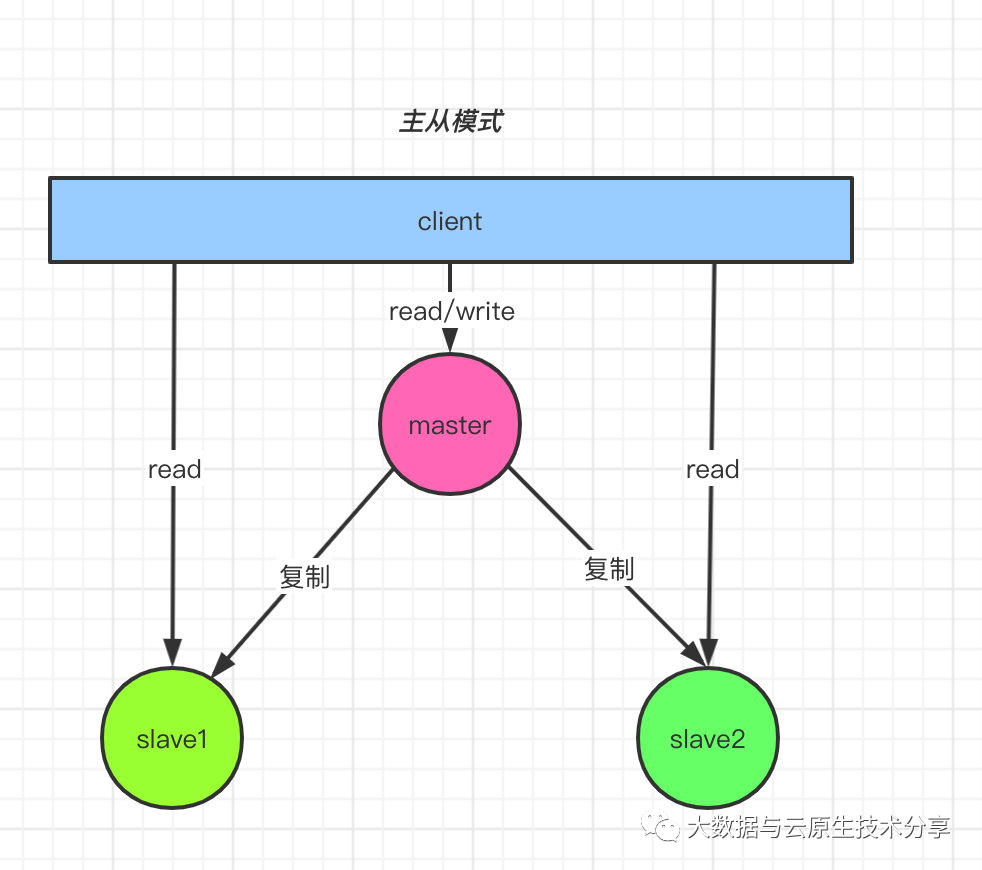
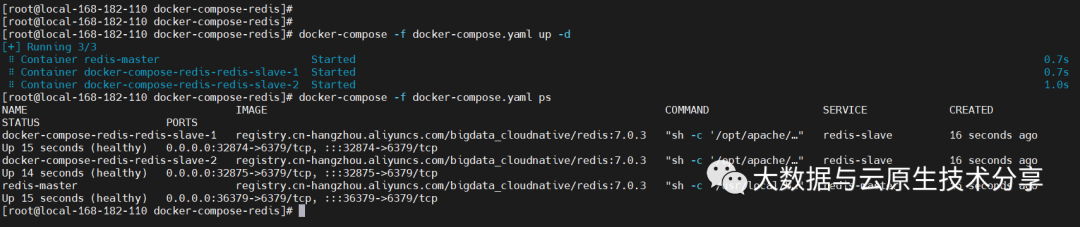
想了解更多redis知识点可以参考我这篇文章:Redis原理介绍与环境部署(主从模式、哨兵模式、集群模式) 二、前期准备 1)部署 docker # 安装yum-config-manager配置工具 yum -y install yum-utils # 建议使用阿里云yum源:(推荐) #yum-config-manager --add-repo https://download.docker.com/linux/centos/docker-ce.repo yum-config-manager --add-repo http://mirrors.aliyun.com/docker-ce/linux/centos/docker-ce.repo # 安装docker-ce版本 yum install -y docker-ce # 启动并开机启动 systemctl enable --now docker docker --version 2)部署 docker-compose curl -SL https://github.com/docker/compose/releases/download/v2.16.0/docker-compose-linux-x86_64 -o /usr/local/bin/docker-compose chmod +x /usr/local/bin/docker-compose docker-compose --version 三、创建网络 # 创建,注意不能使用hadoop_network,要不然启动hs2服务的时候会有问题!!! docker network create hadoop-network # 查看 docker network ls 四、Redis 编排部署 1)下载 Redis下载地址:http://download.redis.io/releases/ wget http://download.redis.io/releases/redis-7.0.3.tar.gz 2)配置config/master/redis.conf bind 0.0.0.0 daemonize yes logfile "/usr/local/redis/redis.log" dir /opt/apache/redis/data masterauth 123456 requirepass 123456 appendonly yes参数解释: bind # 监听ip,多个ip用空格分隔,监听所有的IP地址 daemonize yes # 允许后台启动 logfile # 日志路径 dir # 数据库备份文件存放目录 masterauth # slave连接master密码,master可省略 requirepass # 设置master连接密码,slave可省略 appendonly # 在/opt/apache/redis/data目录生成appendonly.aof文件,将每一次写操作请求都追加到appendonly.aof 文件中config/slave/redis.conf bind 0.0.0.0 daemonize yes logfile "/usr/local/redis/redis.log" dir /opt/apache/redis/data replicaof redis-master 6379 masterauth 123456 requirepass 123456 appendonly yes参数解释: bind # 监听ip,多个ip用空格分隔,监听所有的IP地址 daemonize yes # 允许后台启动 logfile # 日志路径 dir # 数据库备份文件存放目录 replicaof # replicaof用于追随某个节点的redis,被追随的节点为主节点,追随的为从节点。就是设置master节点 masterauth # slave连接master密码,master可省略 requirepass # 设置master连接密码,slave可省略 appendonly # 在/opt/apache/redis/data目录生成appendonly.aof文件,将每一次写操作请求都追加到appendonly.aof 文件中 3)启动脚本 bootstrap.sh #!/usr/bin/env sh wait_for() { echo Waiting for $1 to listen on $2... sleep 1 while ! nc -z $1 $2; do echo waiting...; sleep 1s; done } node_type=$1 if [ $node_type = "slave" ];then wait_for redis-master 6379 fi /usr/local/bin/redis-server /usr/local/redis/redis.conf tail -f /usr/local/redis/redis.log 4)构建镜像 Dockerfile FROM registry.cn-hangzhou.aliyuncs.com/bigdata_cloudnative/centos:7.7.1908 RUN rm -f /etc/localtime && ln -sv /usr/share/zoneinfo/Asia/Shanghai /etc/localtime && echo "Asia/Shanghai" > /etc/timezone RUN export LANG=zh_CN.UTF-8 RUN yum -y install install net-tools telnet wget nc less gcc gcc++ make RUN mkdir /opt/apache/ # 编译安装 redis ENV REDIS_VERSION 7.0.3 ADD redis-${REDIS_VERSION}.tar.gz /opt/apache/ ENV REDIS_HOME /opt/apache/redis RUN ln -s /opt/apache/redis-${REDIS_VERSION} $REDIS_HOME # 开始编译 RUN cd $REDIS_HOME && make && make install # 创建数据目录 RUN mkdir ${REDIS_HOME}/data # copy bootstrap.sh COPY bootstrap.sh /opt/apache/ RUN chmod +x /opt/apache/bootstrap.sh WORKDIR $KAFKA_HOME开始构建镜像 # 需要查看构建镜像详细过程则需要加上 --progress=plain 选项 docker build -t registry.cn-hangzhou.aliyuncs.com/bigdata_cloudnative/redis:7.0.3 . --no-cache --progress=plain # 为了方便小伙伴下载即可使用,我这里将镜像文件推送到阿里云的镜像仓库 docker push registry.cn-hangzhou.aliyuncs.com/bigdata_cloudnative/redis:7.0.3 ### 参数解释 # -t:指定镜像名称 # . :当前目录Dockerfile # -f:指定Dockerfile路径 # --no-cache:不缓存 5)编排 docker-compose.yaml version: '3' services: redis-master: image: registry.cn-hangzhou.aliyuncs.com/bigdata_cloudnative/redis:7.0.3 container_name: redis-master hostname: redis-master restart: always volumes: - ./config/master/redis.conf:/usr/local/redis/redis.conf ports: - "36379:6379" #command: ["sh","-c","/opt/apache/bootstrap.sh master"] command: ["sh","-c","/usr/local/bin/redis-server /usr/local/redis/redis.conf ; tail -f /usr/local/redis/redis.log"] networks: - hadoop-network healthcheck: test: ["CMD-SHELL", "netstat -tnlp|grep 6379 || exit 1"] interval: 10s timeout: 20s retries: 3 redis-slave: image: registry.cn-hangzhou.aliyuncs.com/bigdata_cloudnative/redis:7.0.3 restart: always deploy: replicas: 2 volumes: - ./config/slave/redis.conf:/usr/local/redis/redis.conf ports: - "6379" command: ["sh","-c","/opt/apache/bootstrap.sh slave"] networks: - hadoop-network healthcheck: test: ["CMD-SHELL", "netstat -tnlp|grep 6379 || exit 1"] interval: 10s timeout: 10s retries: 3 # 连接外部网络 networks: hadoop-network: external: true 6)开始部署 docker-compose -f docker-compose.yaml up -d # 查看 docker-compose -f docker-compose.yaml ps
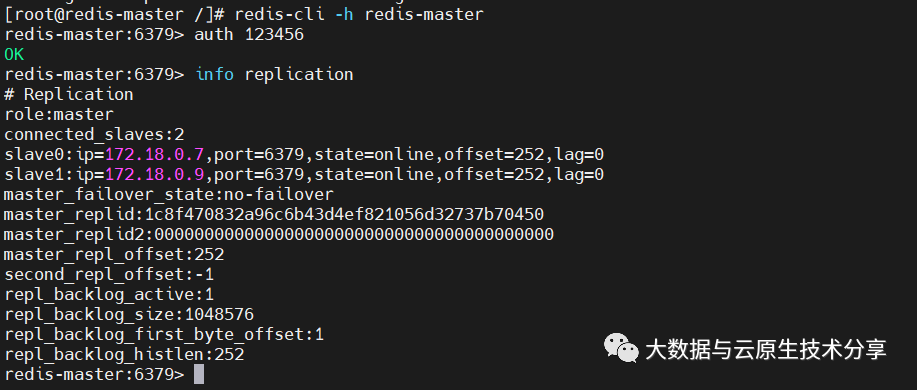
【温馨提示】master节点可读可写,slave是只读的。 六、常用的 redis 客户端命令下面是 Redis 常用的客户端命令: SET key value: 设置字符串类型的键值对。 GET key: 获取指定 key 的值。 DEL key: 删除指定的 key 。 INCR key: 将指定 key 的值加 1。 DECR key: 将指定 key 的值减 1。 EXISTS key: 判断 key 是否存在。 EXPIRE key seconds: 设置 key 的过期时间,以秒为单位。 TTL key: 获取 key 的剩余生存时间,以秒为单位。 KEYS pattern: 查找所有符合给定模式的 key。 FLUSHALL: 删除所有 key。 还有一些高级命令,可以用于处理 Redis 的复杂数据结构和实现事务等功能: LPUSH key value: 将一个元素添加到列表的头部。 RPUSH key value: 将一个元素添加到列表的尾部。 LPOP key: 弹出并返回列表的头部元素。 RPOP key: 弹出并返回列表的尾部元素。 SADD key members: 将一个或多个元素添加到集合中。 SMEMBERS key: 返回集合中的所有成员。 ZADD key score member: 将元素和分值添加到有序集合中。 ZREVRANGE key start stop: 反向获取有序集合中指定分值范围内的所有成员。 MULTI: 开始事务。 EXEC: 执行事务中所有命令。 WATCH key: 监视指定 key 。如果在执行事务期间该 key 发生了变化,事务将被取消。 以上是 Redis 中的常用客户端命令,掌握这些命令的使用可以更好地利用 Redis 进行数据存储和处理。 通过 docker-compose 快速部署 Redis 教程就先到这里了。 本文转载自:「大数据与云原生技术分享」,原文:https://url.hi-linux.com/ZNbV2,版权归原作者所有。欢迎投稿,投稿邮箱: [email protected]。
最近,我们建立了一个技术交流微信群。目前群里已加入了不少行业内的大神,有兴趣的同学可以加入和我们一起交流技术,在 「奇妙的 Linux 世界」 公众号直接回复 「加群」 邀请你入群。
你可能还喜欢 点击下方图片即可阅读
如何使用 zSwap 提高系统性能
更多有趣的互联网新鲜事,关注「奇妙的互联网」视频号全了解! |


 点击上方图片,『美团|饿了么』外卖红包天天免费领
【本文地址】