| 多文件 LaTeX 项目 | 您所在的位置:网站首页 › overleaf模板转换 › 多文件 LaTeX 项目 |
多文件 LaTeX 项目
|
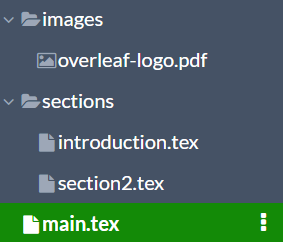
原 文:Multi-file LaTeX projects 译 者:Xovee 翻译时间:2021年7月24日 多文件 LaTeX 项目 文章目录 多文件 LaTeX 项目介绍注意:Overleaf `.tex`文件中的`\documentclass``subfiles`包主文件子文件 `standalone`包主文件子文件 介绍大型 LaTeX 项目一般拥有多个.tex文件,例如,每个文件可以代表书籍里的章节,这些文件最后组合到一起生成单个书籍。这种多文件项目可以帮助你更好地管理项目,对文档进行调试。当你的项目非常大的时候,编译可能会消耗很多时间。而你大多数时间只会专注于文档的某个部分。 对于这个问题最直观的解决方法是对每个文件进行单独的编译。LaTeX 有两个包可以支持在多文件项目中进行单文件编译: subfiles:你可以单独编译每个子文件,每个子文件都会用到主文档的 preamble。standalone:每一个子文件类似于一个单独的文件,它们可以在之后合并到主文档里,它们各自的 preamble 也会纳入到主文档中。当你需要在多个文档中重用一个文件的时候,这个包非常有用,例如,tikz 图片。 注意:Overleaf .tex文件中的\documentclass如下面的视频所展示的,在你设置了文档的主文件之后,你仍然可以编译其他的文件:只要它拥有\documentclass声明。但是,为了保证你项目中的所有内容都可以正确编译(例如术语表,访问.bib文件的路径等),我们强烈推荐你只编译位于根目录下的文件。 视频地址:https://videos.ctfassets.net/nrgyaltdicpt/U2nGfRx9NwNGX0vWXNebP/1ca4b9a4b2f36d5ca9c0dbaa87f44bfa/maincompile.mp4 subfiles包这个包可以解决大多数问题,它非常容易使用。 下面的例子所使用的文件结构如下图所示:
在主文件中有两个特殊的命令: \documentclass{article} \usepackage{graphicx} \graphicspath{images/} \usepackage{blindtext} \usepackage{subfiles} % Best loaded last in the preamble \title{Subfiles package example} \author{Overleaf} \date{ } \begin{document} \maketitle \section{Introduction} \subfile{sections/introduction} \section{Second section} \subfile{sections/section2} \end{document}
接下来每个外部的文件由命令\subfile{}引入。在这个例子中,我们从sections文件夹中引入了introduction.tex和section2.tex两个文件。文件名的后缀可以省略。 子文件每个子文件都必须有它自己的 preamble,并且引入所有让它正常运行的包。 \documentclass[class=article, crop=false]{standalone} \usepackage[subpreambles=true]{standalone} \usepackage{import} \usepackage{blindtext} \begin{document} A TikZ figure will be rendered below this line \begin{figure}[ht] \centering \subimport{../}{diagram.tex} \label{fig:tikzexample} \caption{A nice simple diagram} \end{figure} \blindtext \end{document} ``` 这个文件可以被当做独立的文件进行编译,文档类型和 preamble 与主文档中定义的一样。 第一个命令是: ```latex \documentclass[../main.tex]{subfiles}方括号中的参数是相对于主文件的相对路径。在这个例子中,文件introduction.tex在文件夹sections中,所以文件main.tex是当前文件夹的上一级目录(这也是../的含义)。 在introduction.tex文件中使用\graphicspath命令的时候,你还需要使用\subfix命令,该命令的参数为相对文件夹路径。 \graphicspath{{\subfix{../images/}}}然后将文件内容置于\begin{document}和\end{document}之间。在这个环境之外的内容将被忽略(或者被当做 preamble 中的一部分)。尽量避免在文件的开头和结尾留有空行。 standalone包这个包提供了与subfiles包相同的功能,并且更为灵活。但是它的语法也更复杂,容易出错。主要的区别在于,它允许每个子文件拥有自己的 preamble。 下面的例子使用的文件结构为:
这个命令应该放置在文档的靠前部分。方括号中的参数告诉 LaTeX 去引入每个子文件中的 preamble(包只会引入一次)。如果你没有指定这个参数,请确保你在主文档中引入了所有必须的包。你需要确保不同的 preamble 之间的兼容性。 在主文档的主体部分,每个子文件由命令\import{}{}引入。你也可以使用标准的\input{}命令。但是我们推荐你使用这个例子中的方法,因为它可以避免嵌套文件所可能引入的错误。 子文件每个子文件都必须拥有自己的 preamble,其中包含了所有让子文件正常运行的包。 \documentclass[class=article, crop=false]{standalone} \usepackage[subpreambles=true]{standalone} \usepackage{import} \usepackage{blindtext} \begin{document} A TikZ figure will be rendered below this line \begin{figure}[ht] \centering \subimport{../}{diagram.tex} \label{fig:tikzexample} \caption{A nice simple diagram} \end{figure} \blindtext \end{document}
这个命令声明了这个文件是使用了standalone包的文件,方括号中有两个参数: class=article。设置当前文档的类型,你也可以使用其他的文档类型,例如book、report等(除了beamer)。crop=false。如果这个命令被忽略了,那么文件的输出会被裁剪到一个最小的大小。之后的这个命令并不是强制的: \usepackage[subpreambles=true]{standalone}但是因为这个例子用到了嵌套的子文件,所以我们必须使用它。命令\subimport{../}{diagram.tex}插入了一个 tikz 图片,diagram.tex文件的内容如下: \documentclass{standalone} \usepackage{tikz} \usetikzlibrary{positioning} \begin{document} \begin{tikzpicture}[ roundnode/.style={circle, draw=green!60, fill=green!5, very thick, minimum size=7mm}, squarednode/.style={rectangle, draw=red!60, fill=red!5, very thick, minimum size=5mm}, ] %Nodes \node[squarednode] (maintopic) {2}; \node[roundnode] (uppercircle) [above=of maintopic] {1}; \node[squarednode] (rightsquare) [right=of maintopic] {3}; \node[roundnode] (lowercircle) [below=of maintopic] {4}; %Lines \draw[->] (uppercircle.south) -- (maintopic.north); \draw[->] (maintopic.east) -- (rightsquare.west); \draw[->] (rightsquare.south) .. controls +(down:7mm) and +(right:7mm) .. (lowercircle.east); \end{tikzpicture} \end{document}
|
 首先我们需要激活这个包,在 preamble 中导入它:
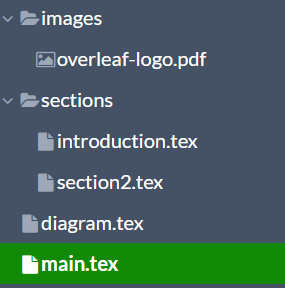
 首先引入这个包:
 子文件的第一行是
 这是standalone包的主要特性,你可以在文档的任何地方引入这个文件,并且循环利用里面的代码。例如,这个示意图可以随后在另外一个项目中使用,而不需要做任何改动。
【本文地址】