| TikZ学习笔记(三)图形的标记与交点 | 您所在的位置:网站首页 › origin标出某个点画出的交点 › TikZ学习笔记(三)图形的标记与交点 |
TikZ学习笔记(三)图形的标记与交点
|
图形标记
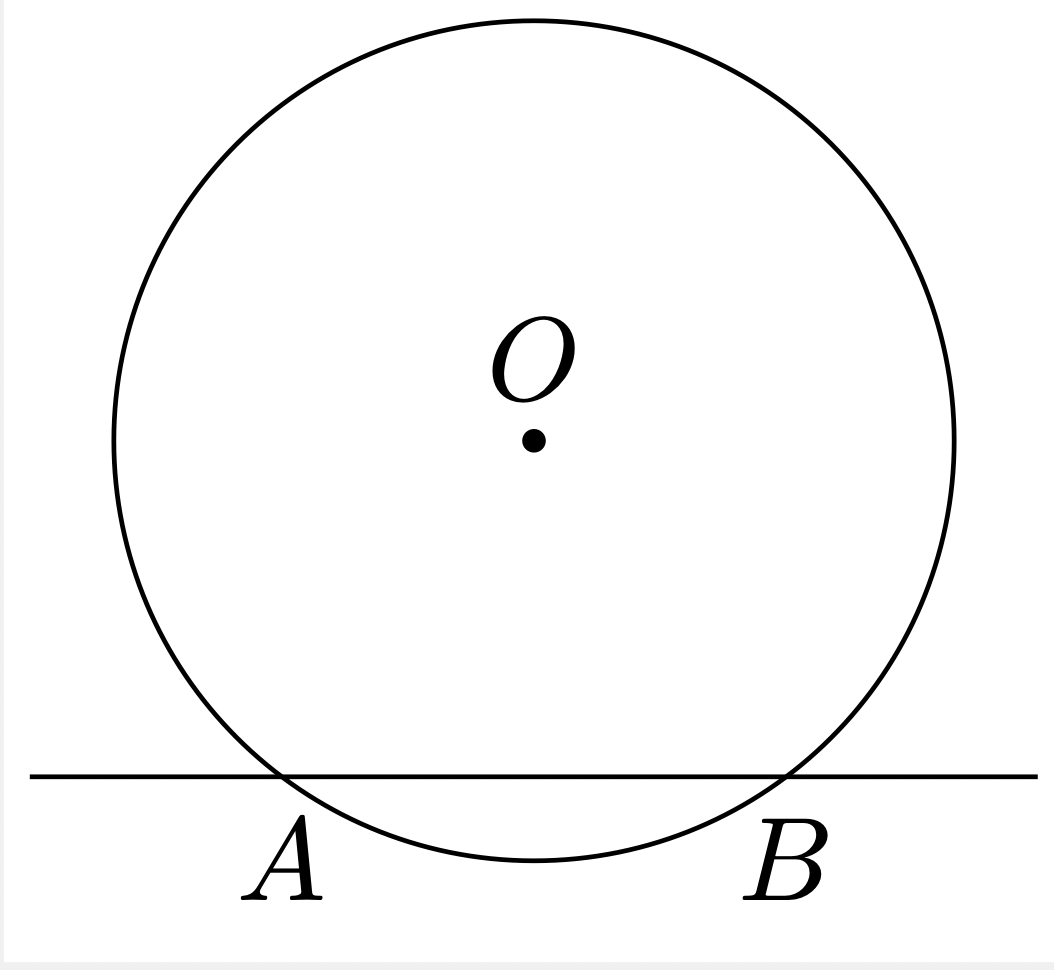
对每一个图形来说, 都是独立的存在, 为了方面本节之后的图形交点, 我们需要了解一下图形的标记. 具体方法就是在绘制时候加上参数name path=, 不过需要注意的是使用标记需要在导言区加上\usetikzlibrary{intersections}. 直线的标记 对于一条直线(线段)来说, 标记还是很简单的, 只需在绘制直线的时候在参数中加上name path=即可. 具体示例如下 %导言区 %\usetikzlibrary{intersections} \path [draw, name path=l] (A) -- (B);之后就可以通过l来代表直线AB了. 圆的标记 与直线类似, 但是这里因为圆需要找到一个圆周上的定点, 所以要多一个参数. %导言区 %\usetikzlibrary{intersections,through} \coordinate [name path=o, circle through=(A)] (o) at (O);这里用o表示圆心在O点, 且经过点A的圆. 交点这里的交点可以是两直线之间的交点, 直线与圆的交点或者圆与圆的交点等等, 有了交点就可以方面的根据交点绘制需要的图形. 首先是直线与圆的交点, 这里就分了几种情况, 如果只有一个交点还比较好处理, 如果是两个, 还要考虑圆绘制的方向(顺时针方向), 以此确定交点的先后顺序. 单个交点 \documentclass[tikz,border=3pt]{standalone} \usetikzlibrary{calc} \usetikzlibrary{intersections,through} \begin{document} \begin{tikzpicture} \coordinate [label=below:$M$] (M) at (0,0); \coordinate [label=below:$N$] (N) at (5,0); \draw [name path=l1] (M) -- (N); \coordinate [label=right:$A$] (A) at (2,2); \coordinate [label=below:$B$] (B) at (2,-2); \draw [name path=l2] (A) -- (B); \path [name intersections={of=l1 and l2}] coordinate [label=below right:$P$] (P) at (intersection-1); \end{tikzpicture} \end{document}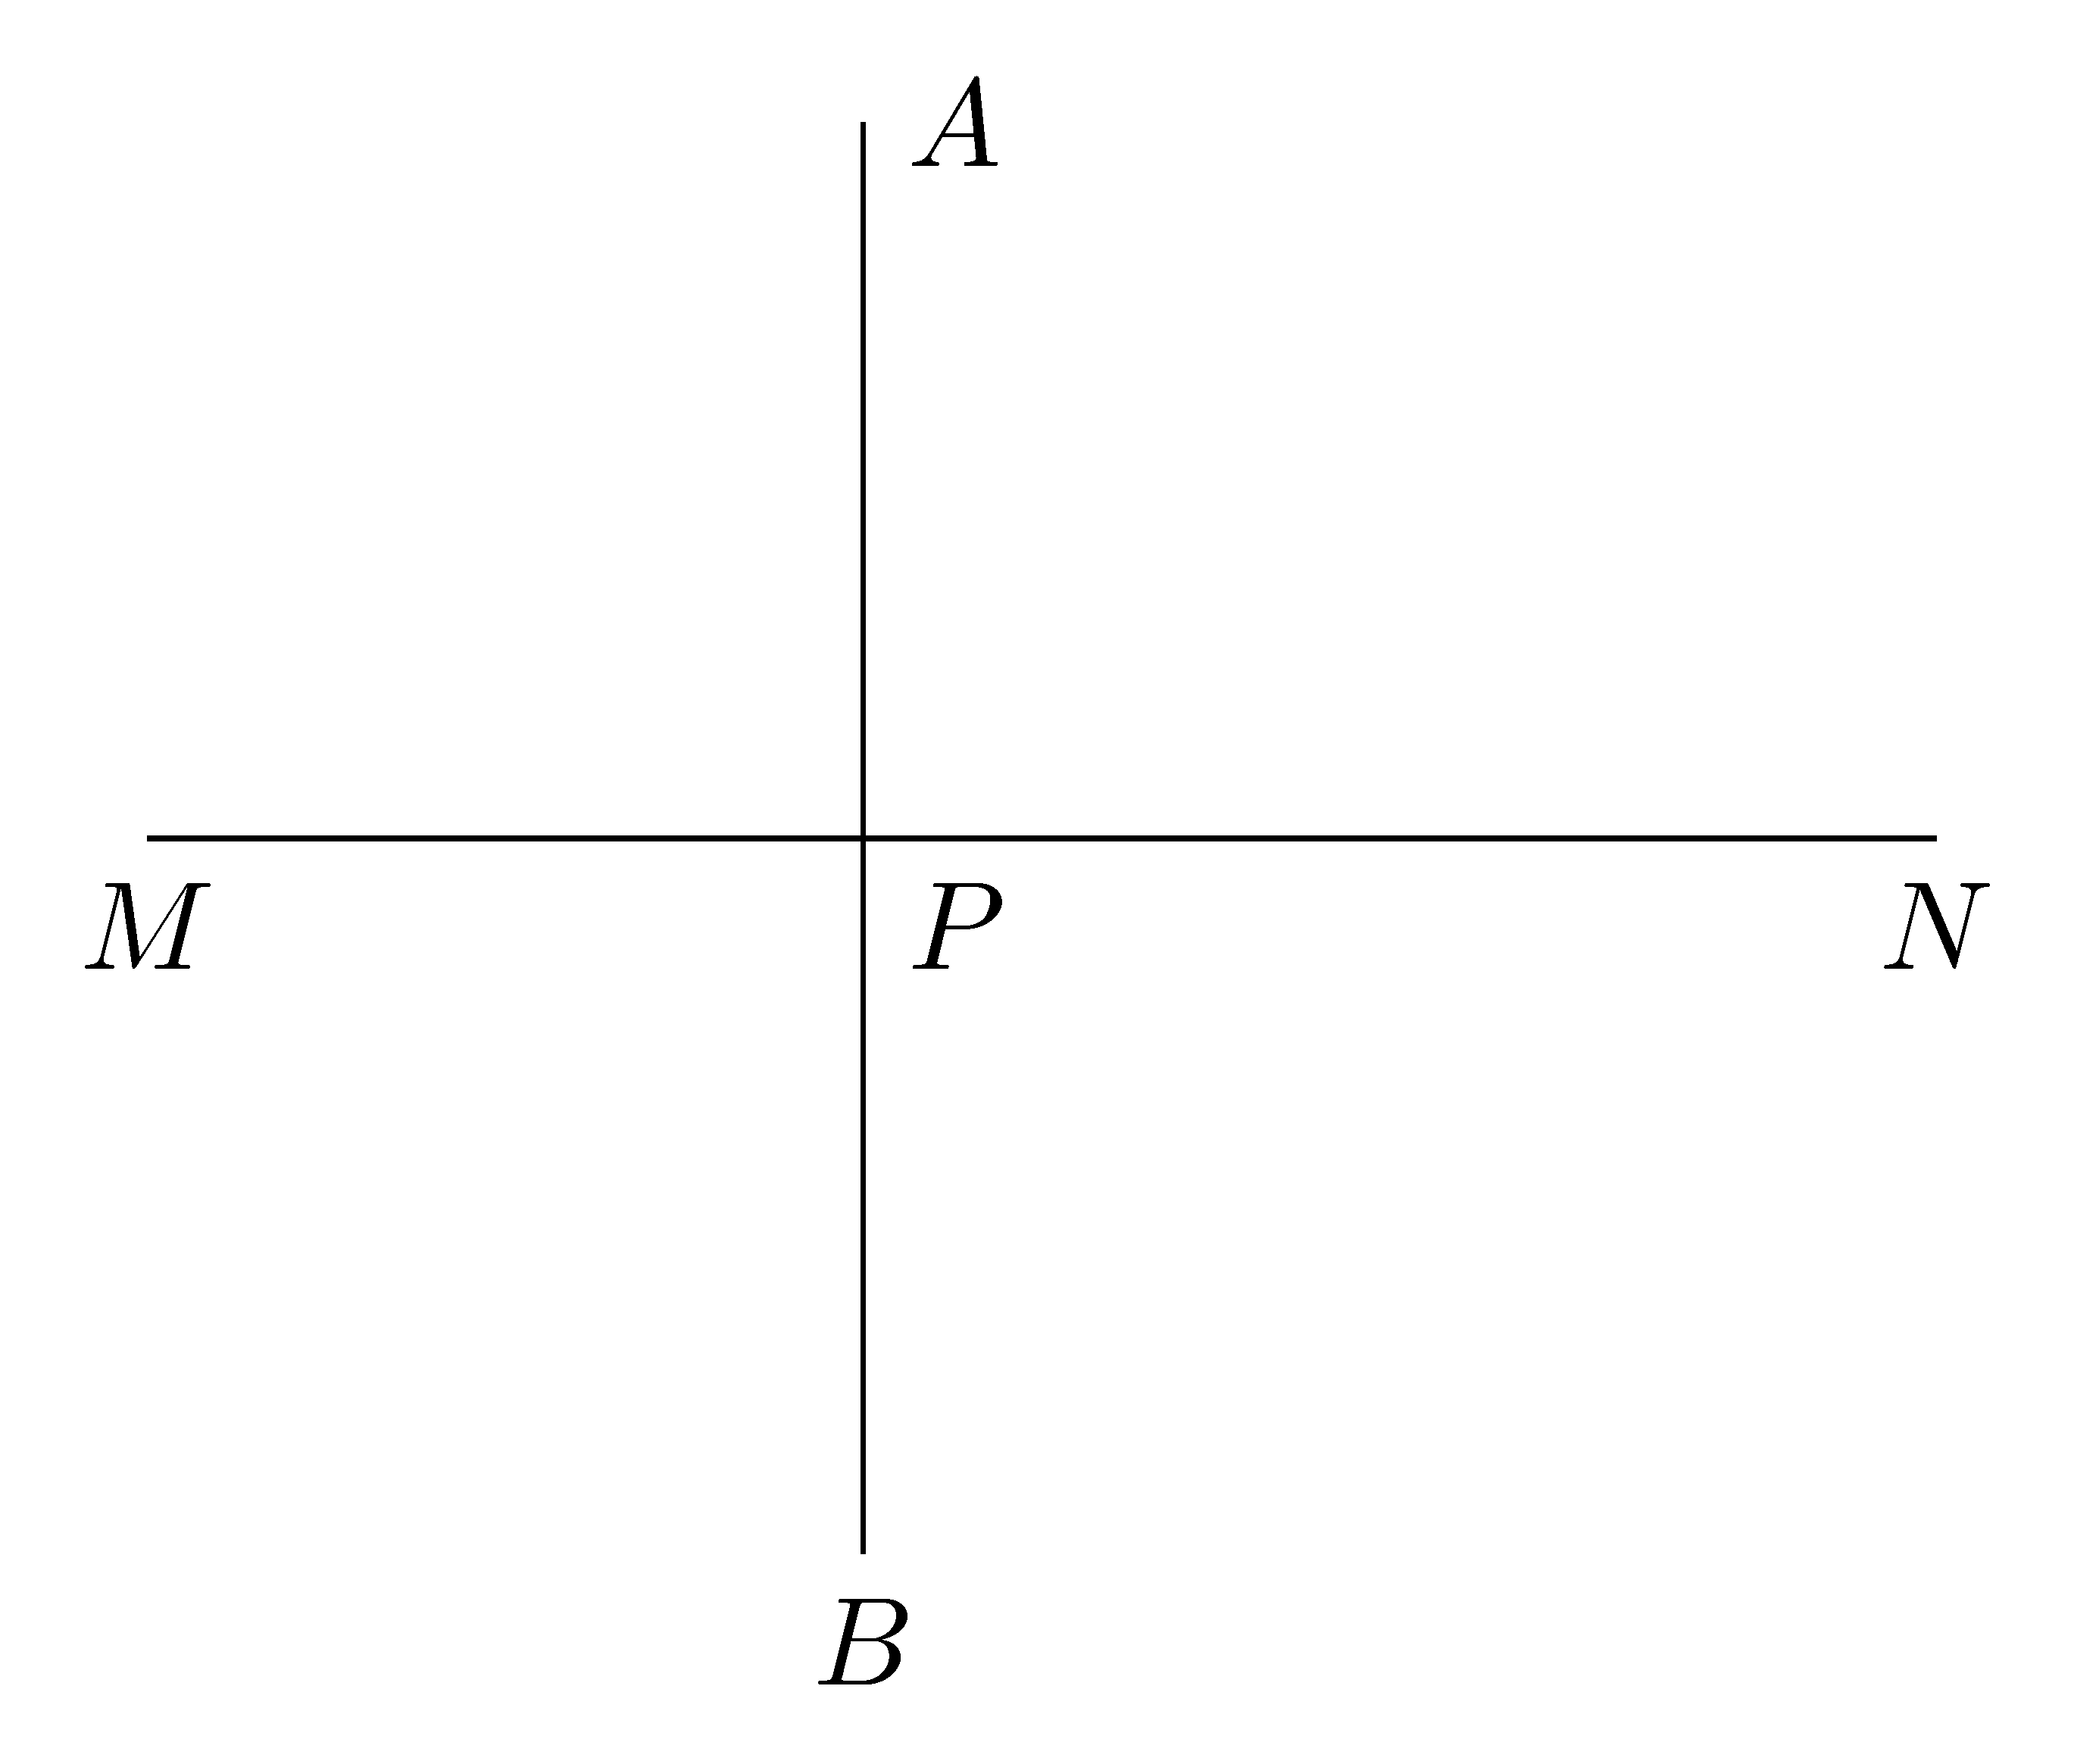 多个交点(两个为例)
\documentclass[tikz,border=3pt]{standalone}
\usetikzlibrary{calc}
\usetikzlibrary{intersections,through}
\begin{document}
\begin{tikzpicture}[]
% 标记两点, 做直线
\coordinate (M) at (-.5,0);
\coordinate (N) at (2.5,0);
\draw [name path=l] (M) -- (N);
% 标记圆心并画圆
\coordinate [label=$O$] (O) at (1,1);
\fill (O) circle(1pt);
\coordinate (P) at ($(O)+(1.25,0)$);
% 圆被标记为o
\draw (O) circle (1.25);
\coordinate [name path=o,circle through=(P)] (o) at (O);
% 找交点并标记A,B
\path [name intersections={of=l and o}]
coordinate [label=below:$A$] (A) at (intersection-1)
coordinate [label=below:$B$] (B) at (intersection-2);
\end{tikzpicture}
\end{document}
多个交点(两个为例)
\documentclass[tikz,border=3pt]{standalone}
\usetikzlibrary{calc}
\usetikzlibrary{intersections,through}
\begin{document}
\begin{tikzpicture}[]
% 标记两点, 做直线
\coordinate (M) at (-.5,0);
\coordinate (N) at (2.5,0);
\draw [name path=l] (M) -- (N);
% 标记圆心并画圆
\coordinate [label=$O$] (O) at (1,1);
\fill (O) circle(1pt);
\coordinate (P) at ($(O)+(1.25,0)$);
% 圆被标记为o
\draw (O) circle (1.25);
\coordinate [name path=o,circle through=(P)] (o) at (O);
% 找交点并标记A,B
\path [name intersections={of=l and o}]
coordinate [label=below:$A$] (A) at (intersection-1)
coordinate [label=below:$B$] (B) at (intersection-2);
\end{tikzpicture}
\end{document}
|
【本文地址】
公司简介
联系我们