| Mac M1芯片安装miniAnaconda、Jupyter、TensorFlow环境 | 您所在的位置:网站首页 › macos安装anaconda失败 › Mac M1芯片安装miniAnaconda、Jupyter、TensorFlow环境 |
Mac M1芯片安装miniAnaconda、Jupyter、TensorFlow环境
|
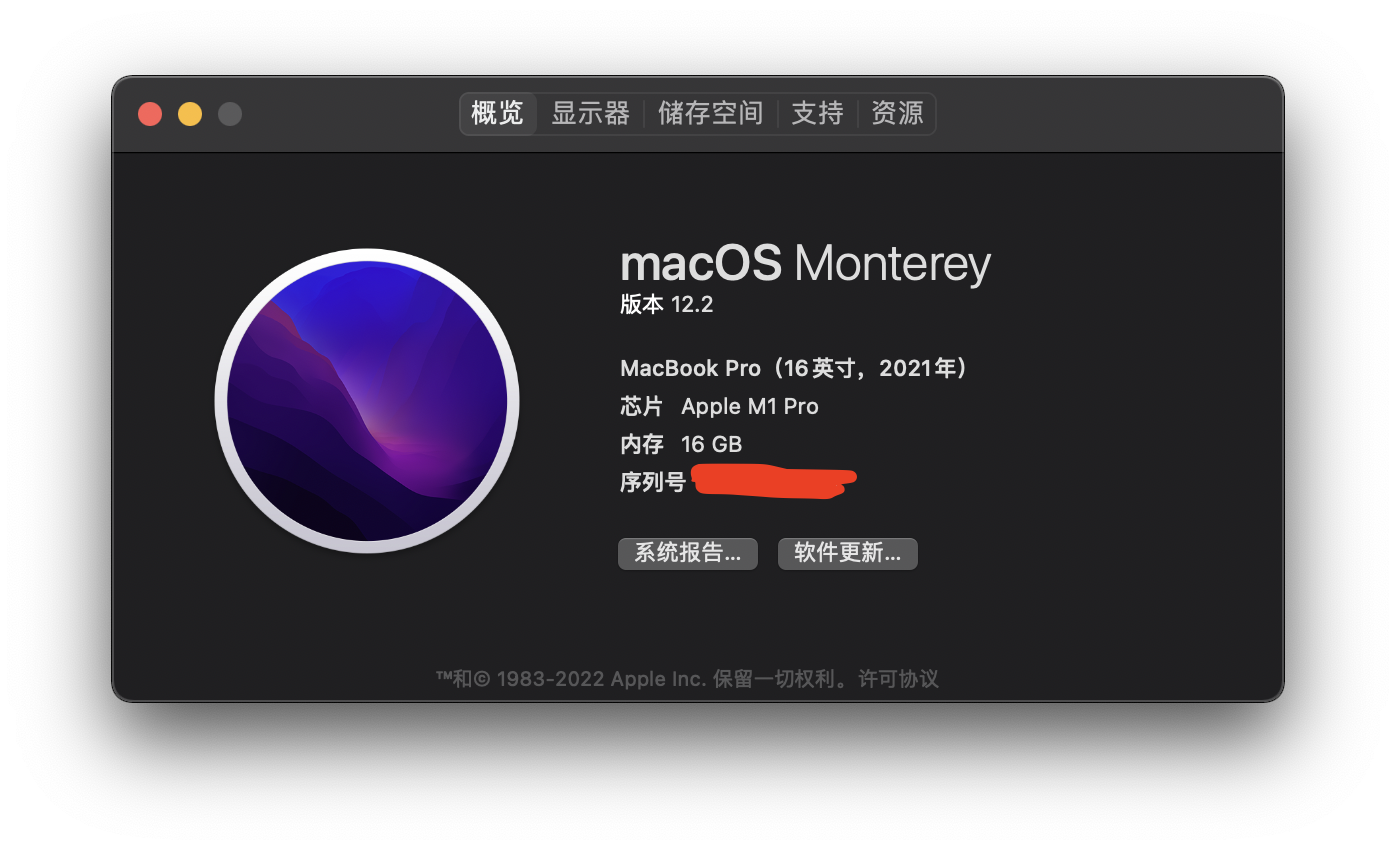
本文适用于macOS 12+,使用conda自带python3.9
电脑环境Miniforge先配置环境变量给anaconda添加国内镜像源
macOS中PyCharm配置conda环境的方法安装JupyterLab、JupyterNotebook命令配置JupyterLab的默认工作路径
安装TensorFlow2.8创建虚拟环境安装 Tensorflow dependencies(虚拟环境中执行)首次安装(这里装tf2.8版本)升级安装
安装 Tensorflow(虚拟环境中执行)安装tensorflow-metal(虚拟环境中执行)安装必须的包(虚拟环境中执行)jupyter虚拟环境的配置
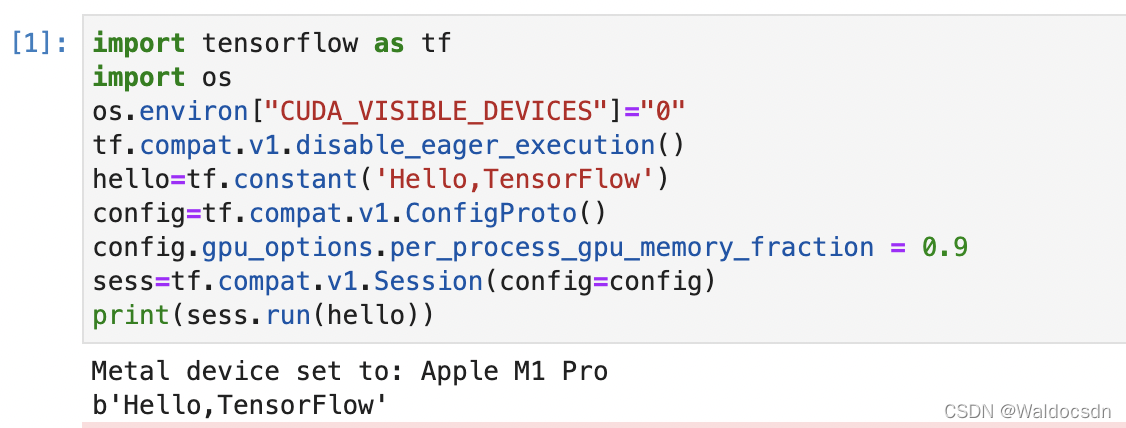
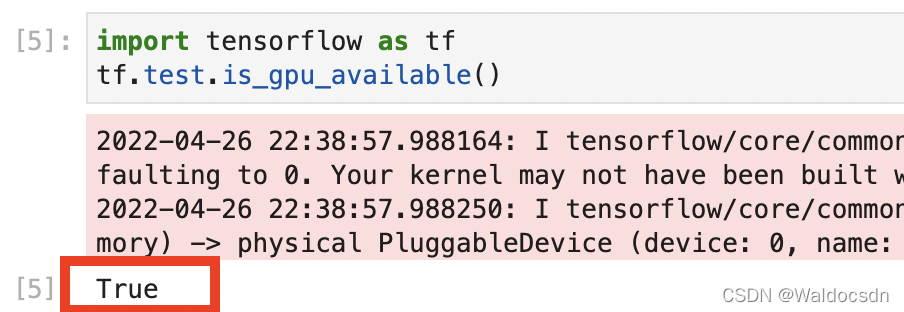
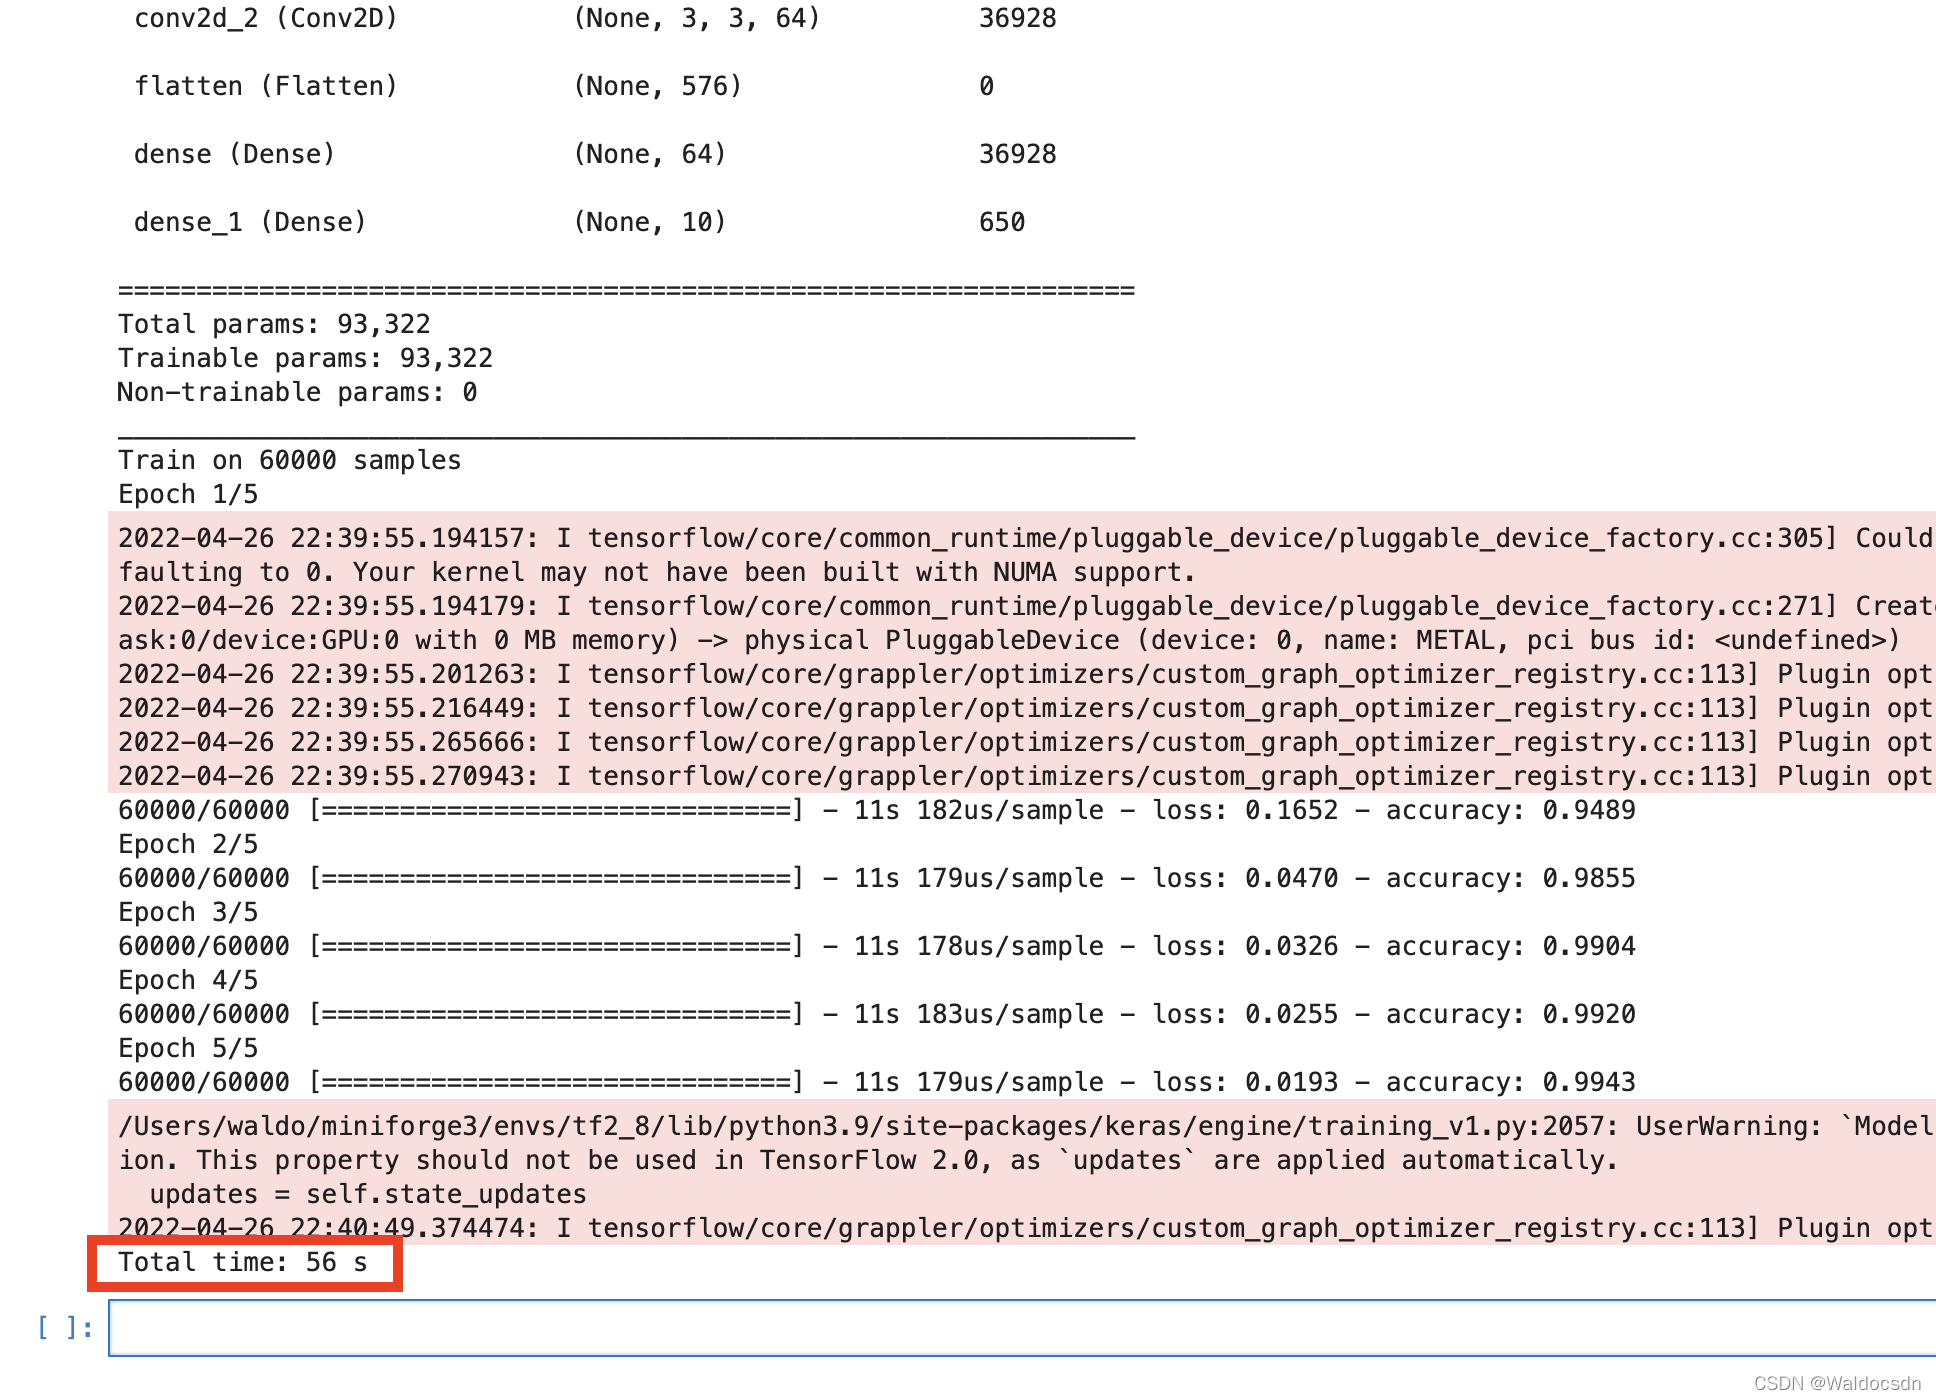
测试代码输出Hello,TensorFlow测试GPU加速功能是否正常测试GPU性能
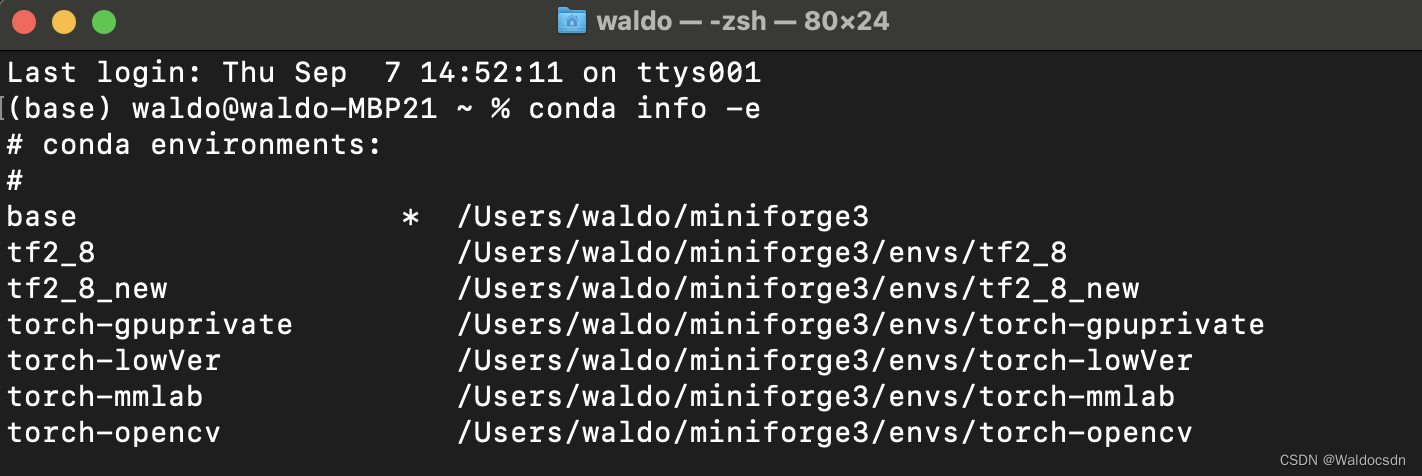
卸载某个虚拟环境查看已创建的conda所有虚拟环境:删除名为“torch-mmlab”的虚拟环境从 jupyter 中删除虚拟环境 kernel
Anaconda已发布原生支持M1的安装包,可去Anaconda官网下载安装、 电脑环境
Anaconda 无法在 M1 上运行, Miniforge 是用来替代它的。 从 https://github.com/conda-forge/miniforge下载 Miniforge3-MacOSX-arm64。如下图:
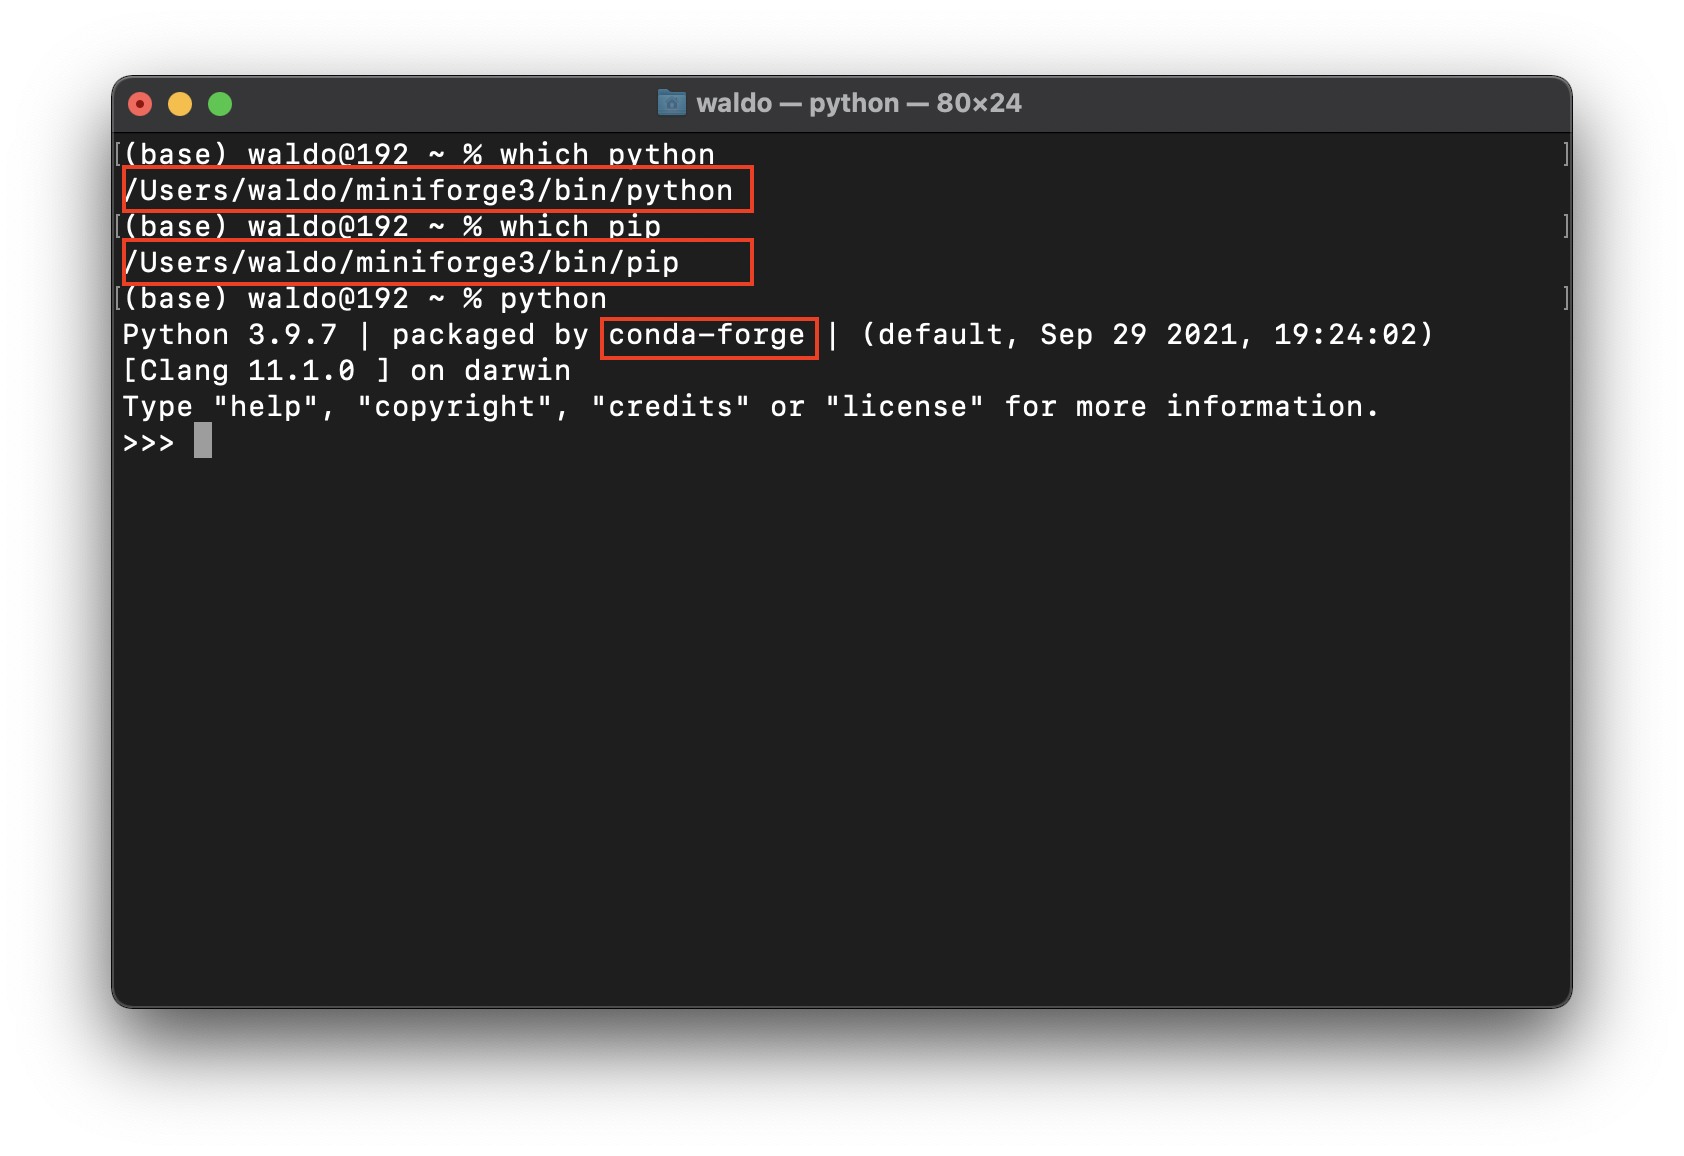
在终端执行以下命令,使用刚刚下载的 文件,安装Miniforge: bash Miniforge3-MacOSX-arm64.sh重启终端并检查 Python 安装情况: conda安装的Python、Jupyter都在这个目录下/Users/waldo/miniforge3/bin,将它添加进环境变量 步骤: 终端执行: touch ~/.bash_profile终端执行: open ~/.bash_profile添加环境变量,如下图: 终端执行: source ~/.bash_profile终端执行: open ~/.zshrc在首行添加: source ~/.bash_profile,如下图: 终端执行: source ~/.bash_profile终端执行: open ~/.zshrc在首行添加: source ~/.bash_profile,如下图: 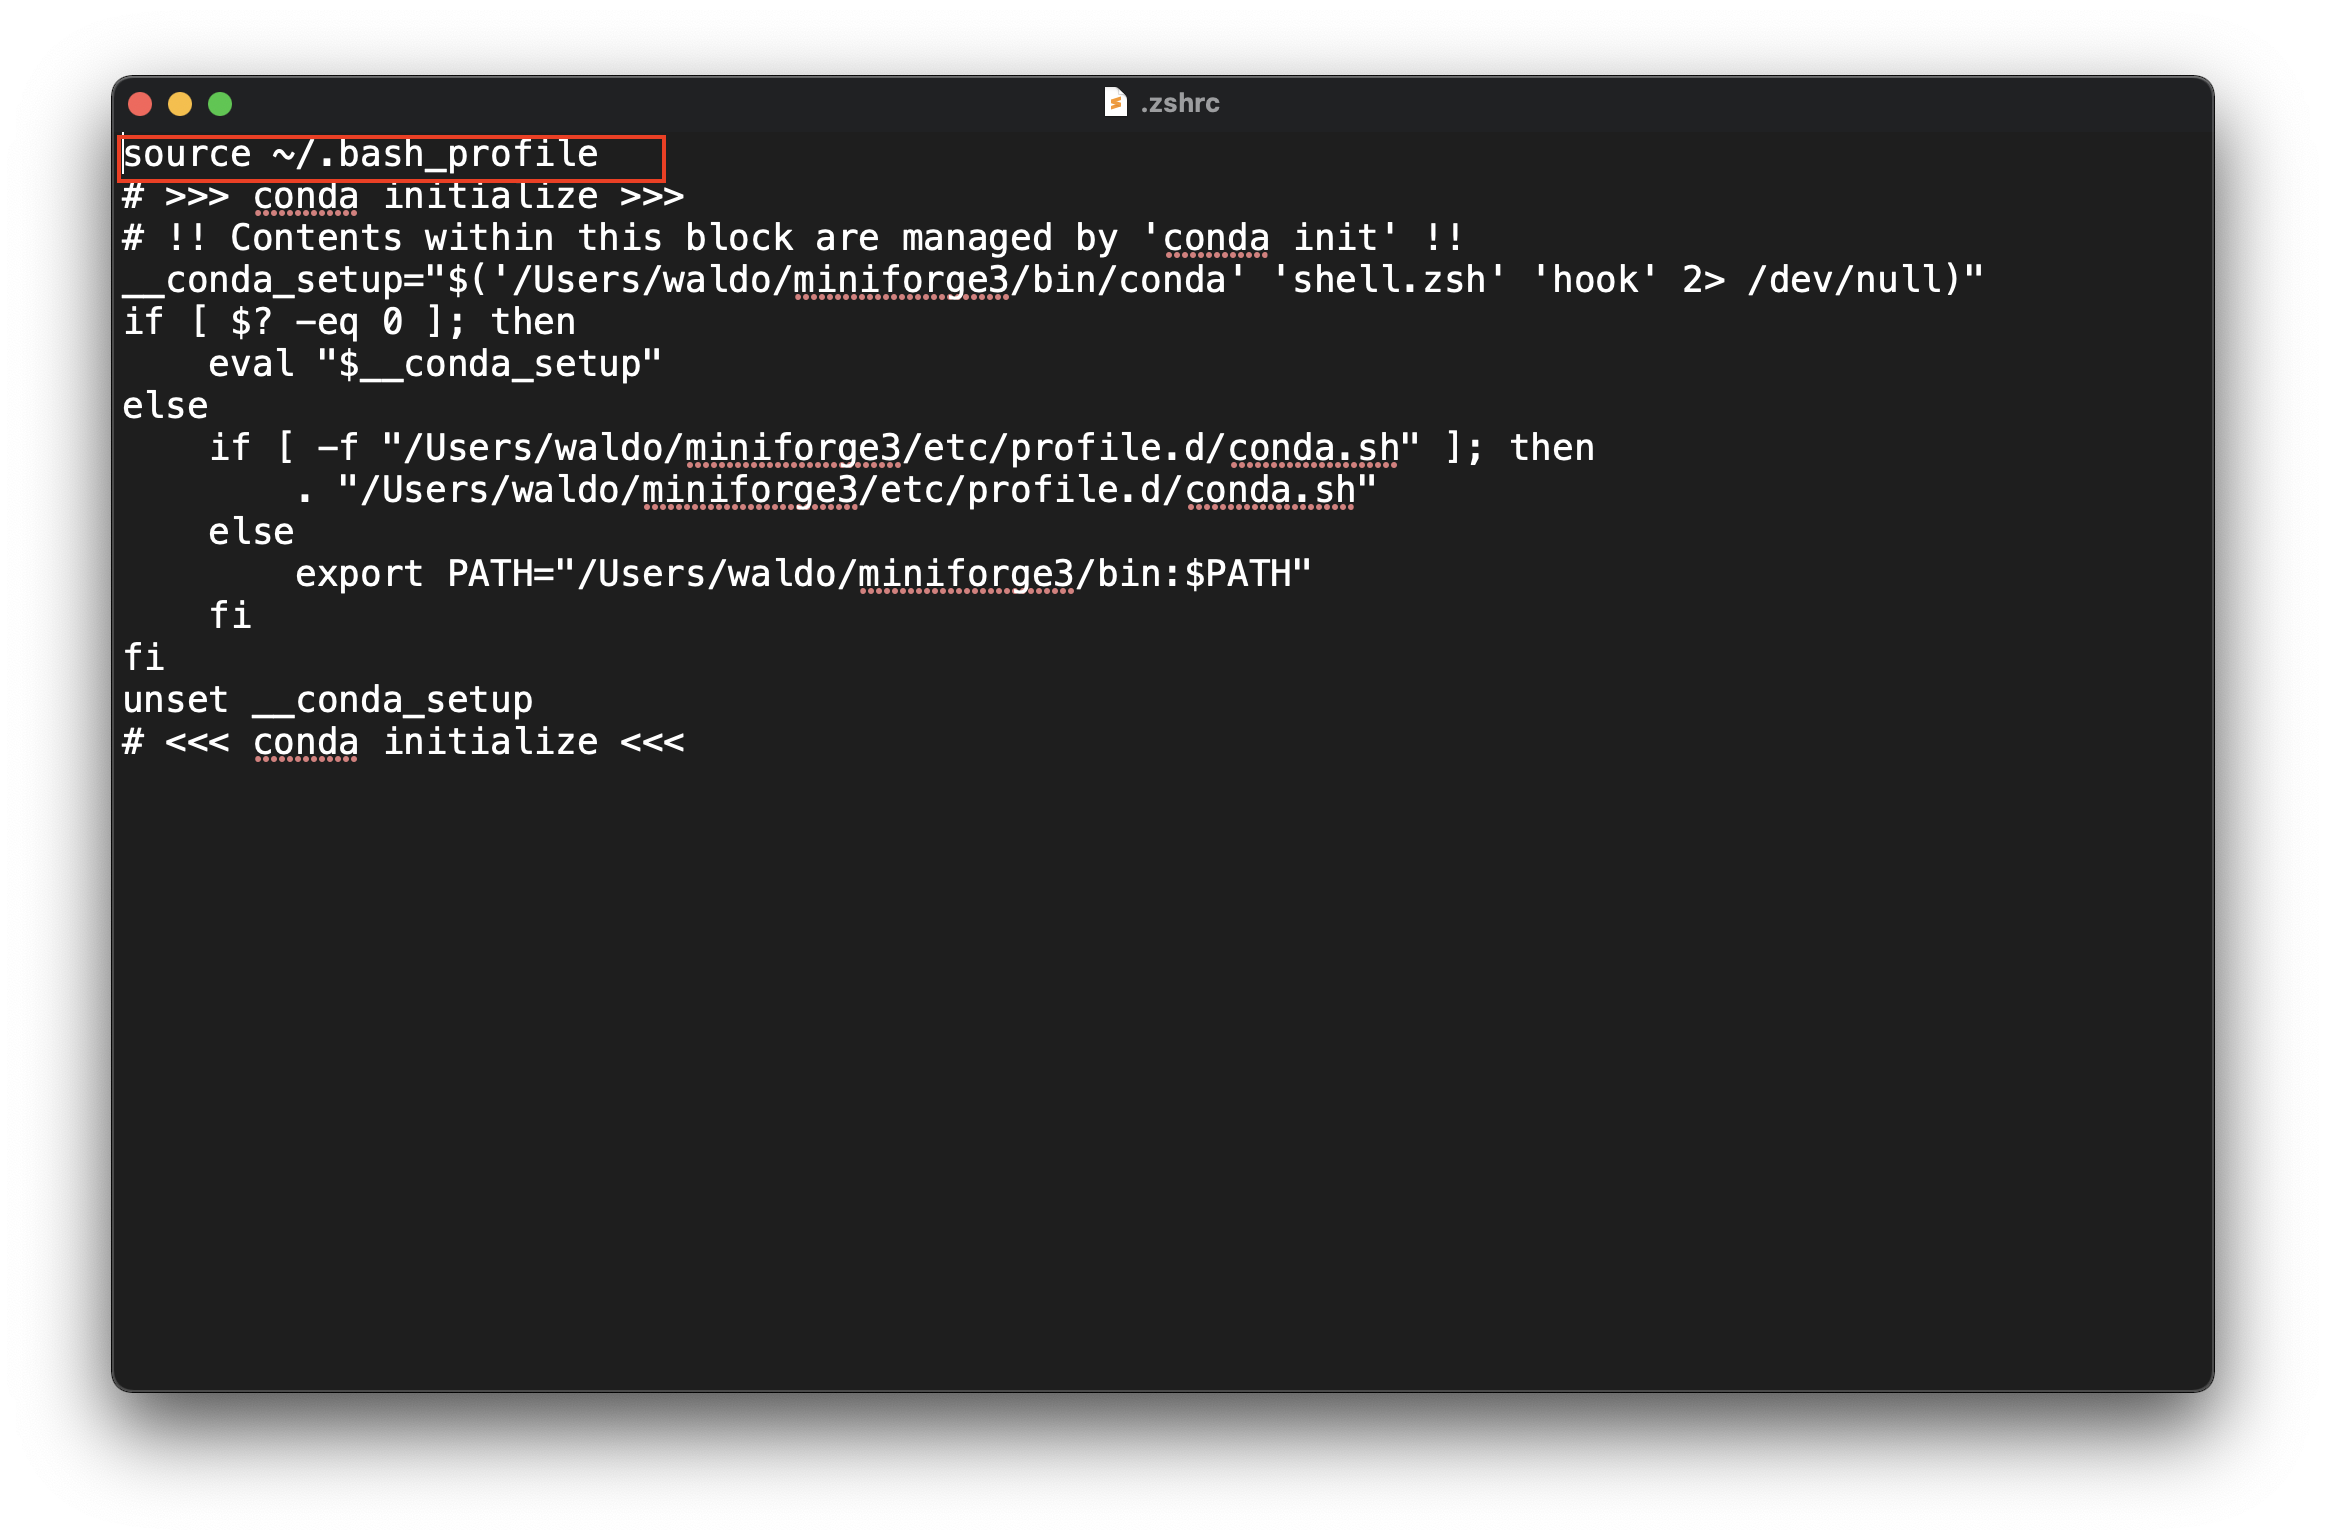 终端执行: source ~/.bash_profile终端执行: source ~/.zshrc
给anaconda添加国内镜像源 终端执行: source ~/.bash_profile终端执行: source ~/.zshrc
给anaconda添加国内镜像源
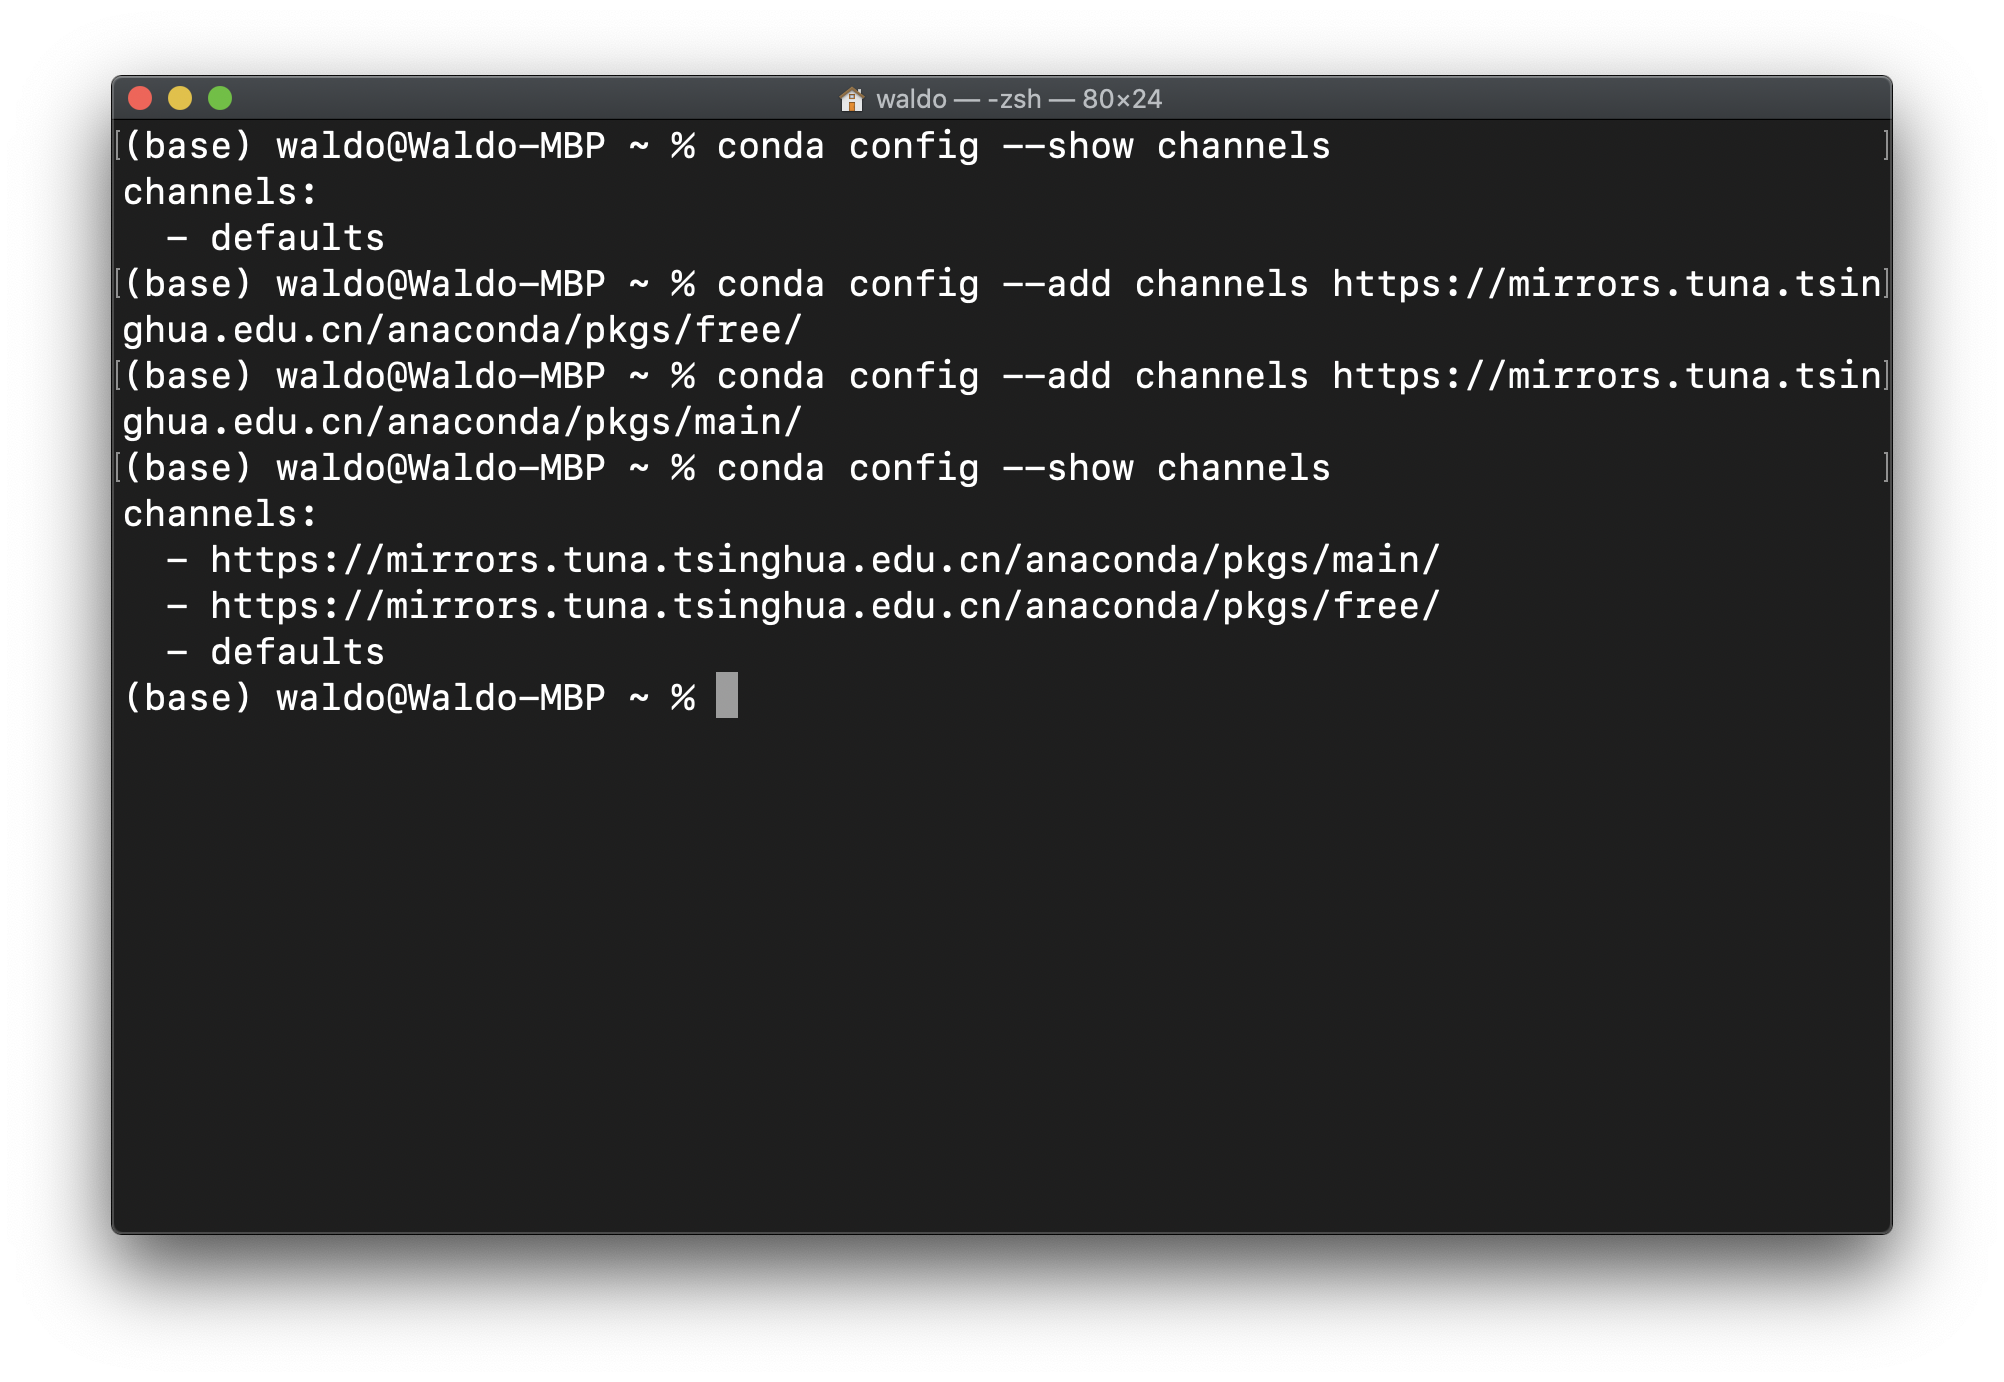
若在本文以后的配置中,有些地方网速还是慢,开启“全局模式”可解决 1. 查看镜像源: conda config --show channels 2. 添加(两条命令): conda config --add channels https://mirrors.tuna.tsinghua.edu.cn/anaconda/pkgs/free/ conda config --add channels https://mirrors.tuna.tsinghua.edu.cn/anaconda/pkgs/main/ 3. 再次查看镜像源: conda config --show channels
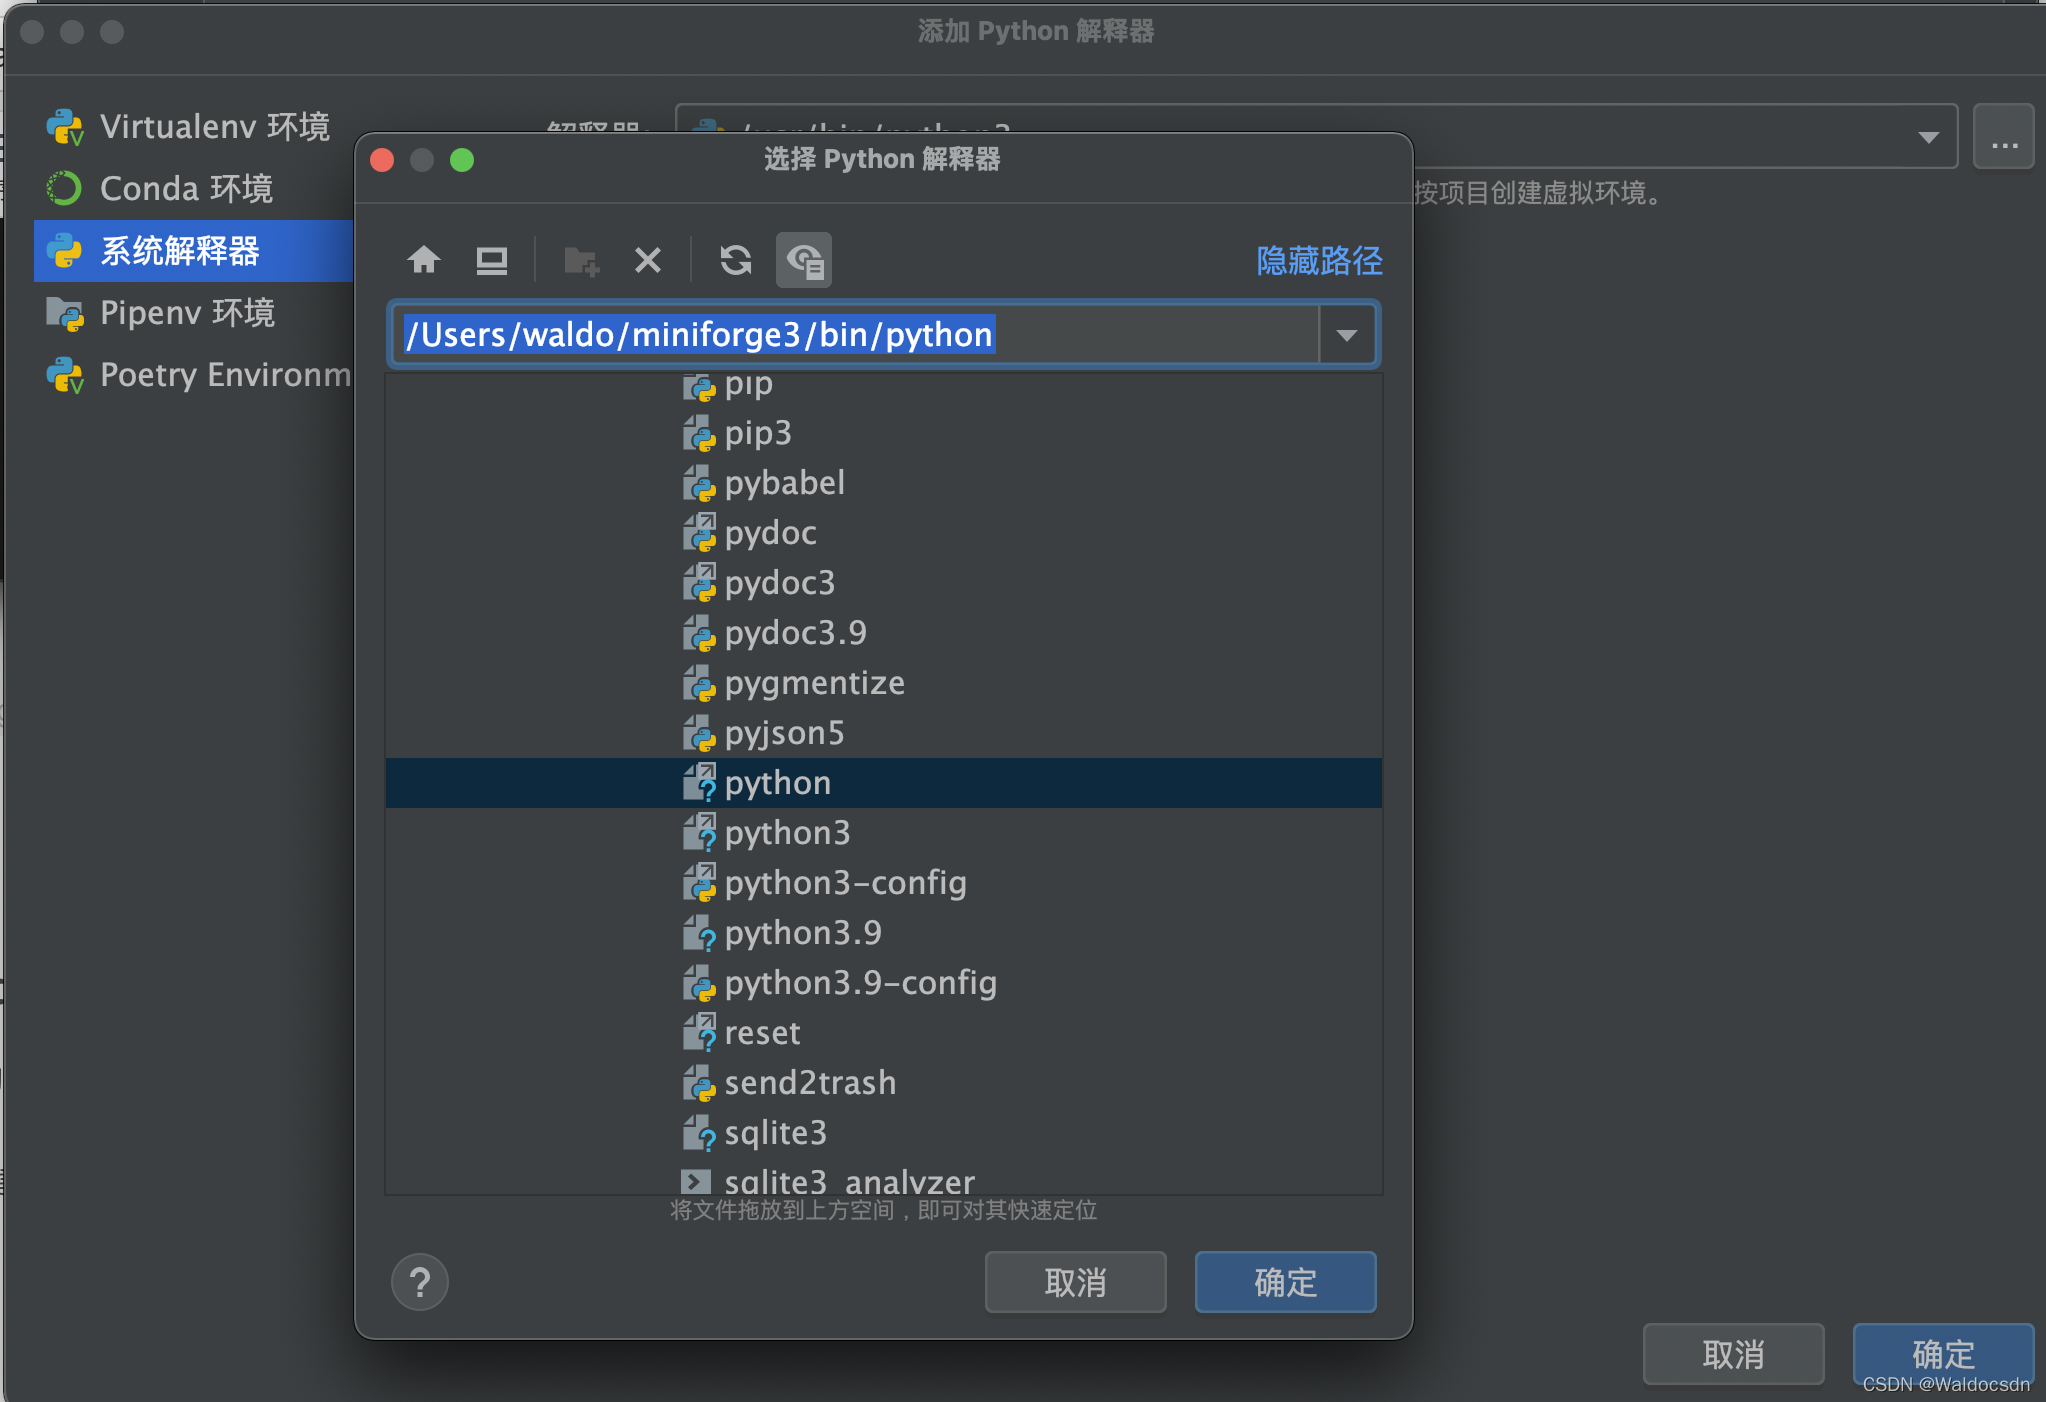
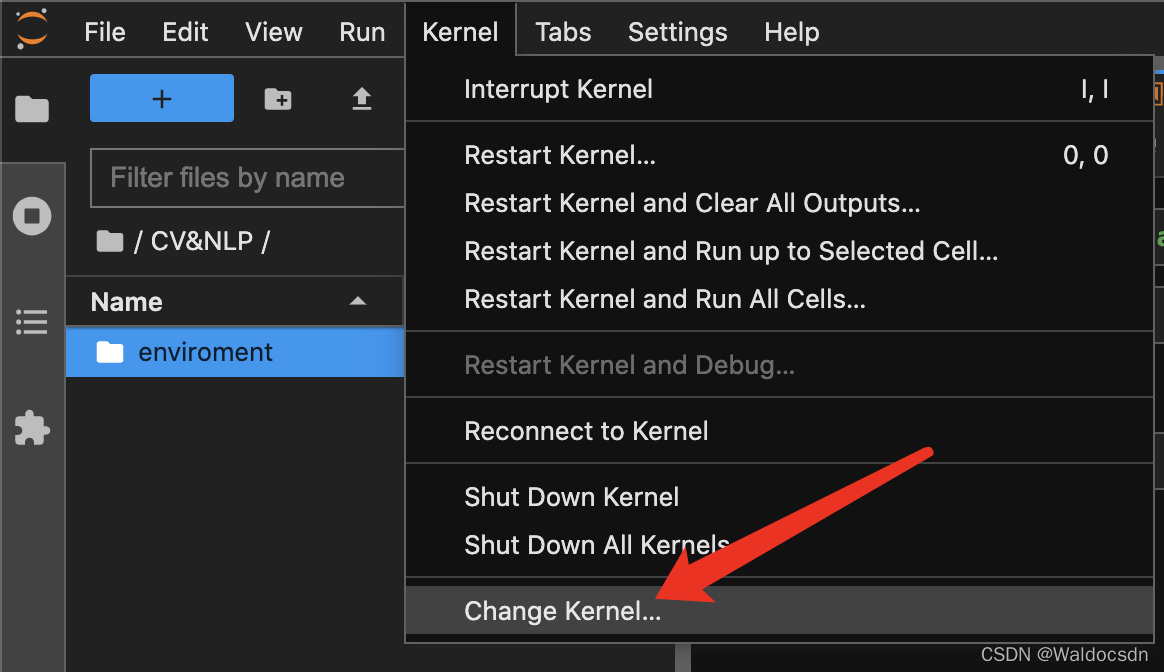
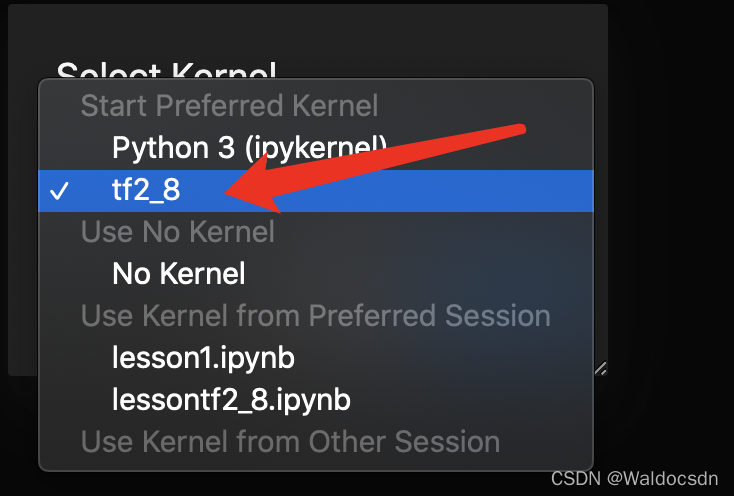
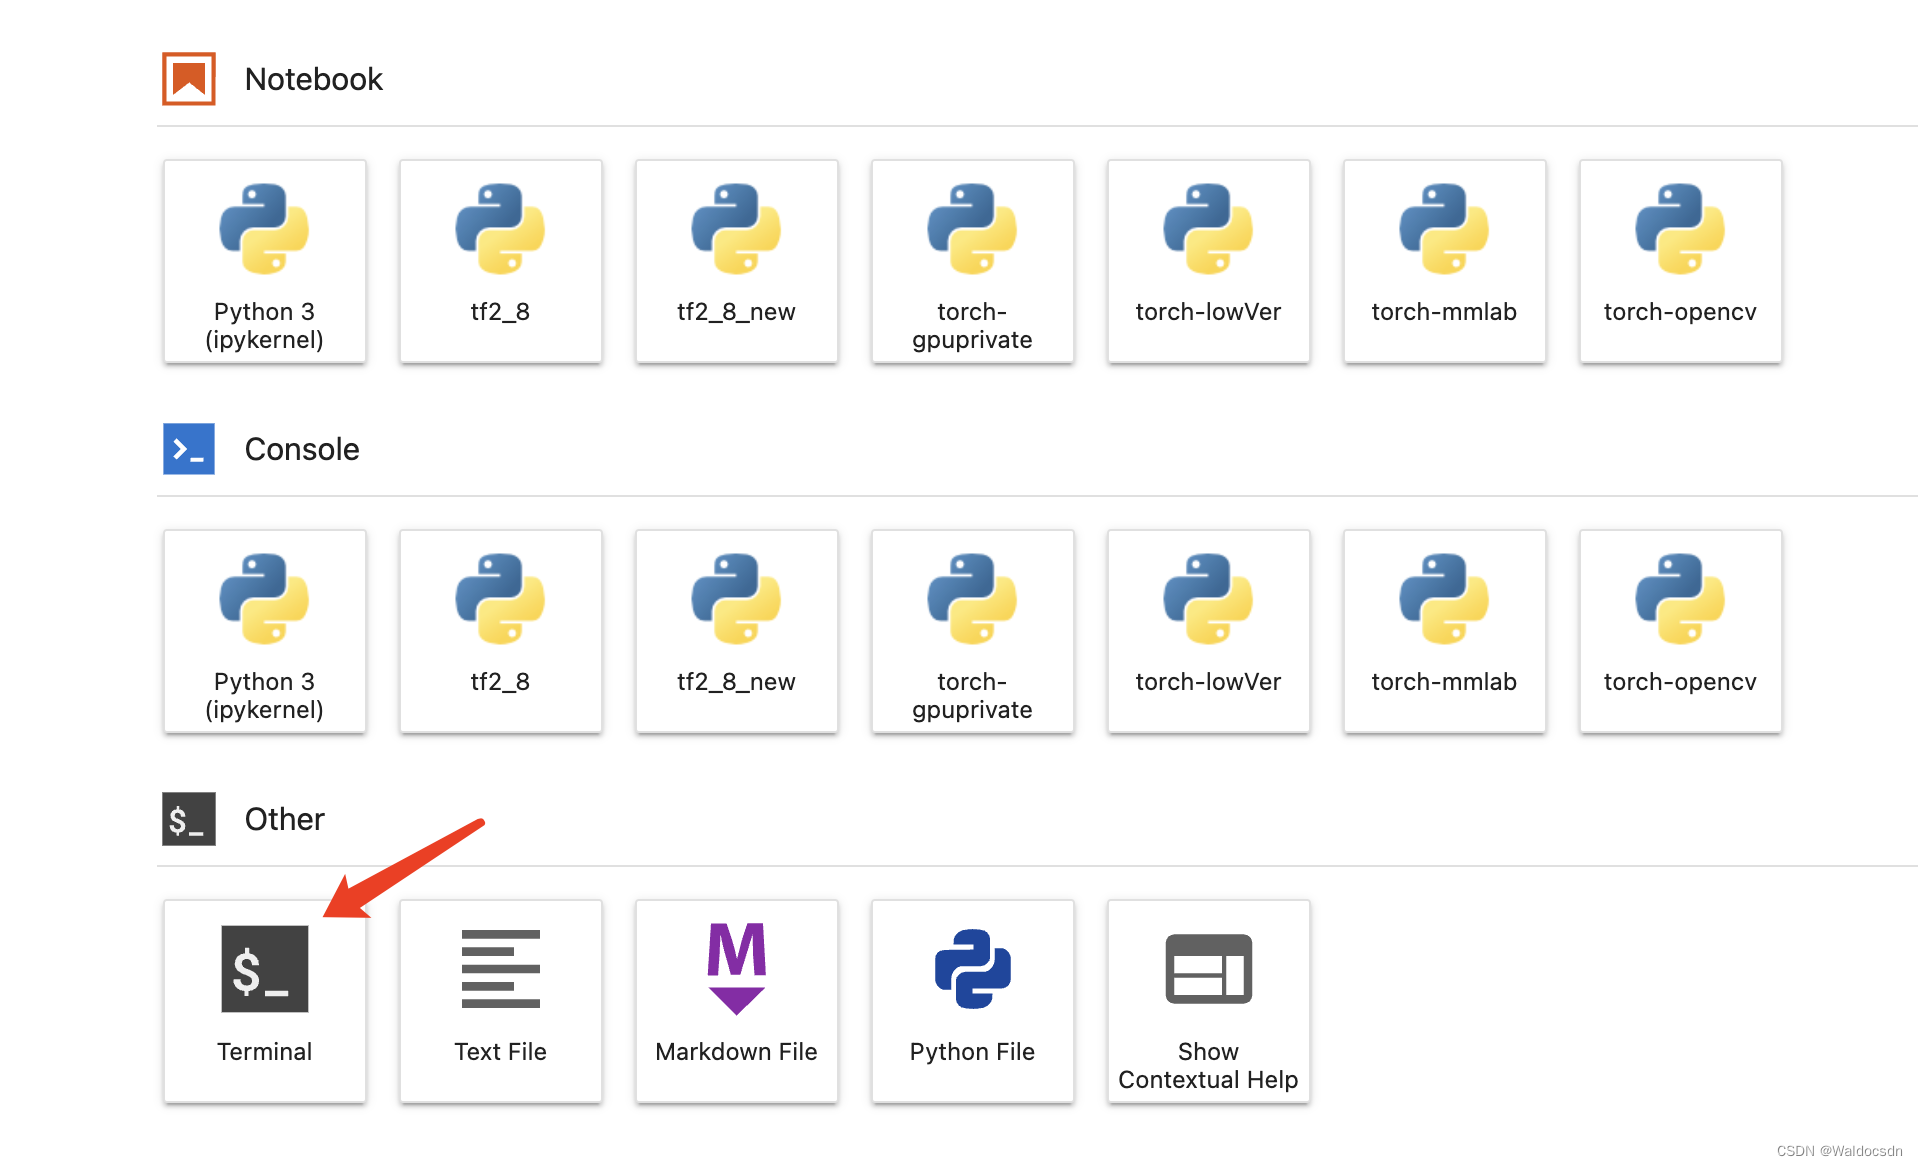
我们的目的是在PyCharm使用Anaconda自带的python以及它丰富的第三方库,所以这一步才是最重要的。 选择Python解释器,这一步最为关键,也是最容易出错的。当我们看到上图所示的内容之后,第一反应就是点击 Conda Environment,这是不正确的,也是很多人都会遇到的困惑。正确的选择应该是 System Interpreter。 再按照下图中路径选择python解释器,则可以在pycharm中使用conda的包: 安装jupyter notebook命令: pip3 install jupyter或者conda install jupyter,按enter等待安装完成 终端输入jupyter notebook,按enter键就会用默认浏览器打开 安装jupyter lab命令: pip3 install jupyterlab或者conda install jupyterlab 终端输入jupyter lab,按enter键就会用默认浏览器打开 配置JupyterLab的默认工作路径目的: 自己创建一个文件夹专门放JupyterLab中的文件 创建一个py文件,命令: jupyter notebook --generate-config 重新打开后,是空的(处于默认的wpforJupyter文件夹里面): Apple Silicon Mac M1 原生支持 TensorFlow 2.8 GPU 加速(tensorflow-metal PluggableDevice) 创建虚拟环境虚拟环境相当于沙盒,避免不能框架的互相影响,这样甚至可以安装多个不同版本的tensorflow。也方便卸载,直接把虚拟环境删除就行 创建一个 conda 创建虚拟环境,这里使用 python 3.9.7 (TensorFlow 需要)。 创建名为“tf2_8”的虚拟环境: conda create -n tf2_8 python=3.9.7 激活虚拟环境: conda activate tf2_8 补充一个知识点,删除上述虚拟环境的命令为: conda remove -n tf2_8 --all 安装 Tensorflow dependencies(虚拟环境中执行) 首次安装(这里装tf2.8版本) conda install -c apple tensorflow-deps==2.8.0 注:tensorflow-deps 的版本是基于 TensorFlow 的,因此可以根据自己的需求指定版本安装。如下: 安装指定2.6版本: conda install -c apple tensorflow-deps==2.6.0 安装指定2.8版本: conda install -c apple tensorflow-deps==2.8.0 升级安装如果之前已经安装了 v2.6,想要更新 v2.8 的,可以执行以下命令安装。 # 卸载已安装的 tensorflow-macos 和 tensorflow-metal python -m pip uninstall tensorflow-macos python -m pip uninstall tensorflow-metal # 升级 tensorflow-deps conda install -c apple tensorflow-deps --force-reinstall # 后者指向特定的 conda 环境 conda install -c apple tensorflow-deps --force-reinstall -n tf2_8 安装 Tensorflow(虚拟环境中执行) python -m pip install tensorflow-macos注: 若这一步出现报错,执行pip3 install torch,再重新执行上面的命令 安装tensorflow-metal(虚拟环境中执行) python -m pip install tensorflow-metal 安装必须的包(虚拟环境中执行) conda install libjpeg 或者 pip3 install libjpeg conda install -y matplotlib jupyterlab 注意: libjpeg 是 matplotlib 需要依赖的库。执行以下命令: pip install -U --force-reinstall charset-normalizer jupyter虚拟环境的配置此时打开jupyter notebook,执行import tensorflow as tf是不成功的,需要如下配置 打开系统终端,执行以下命令: 1. conda activate tf2_8 //注意替换成自己的虚拟环境名 2. conda install ipykernel //安装ipykernel 3. sudo python -m ipykernel install --name tf2_8 //在ipykernel中安装当前环境 4. conda deactivate打开jupyter,切换kernel:
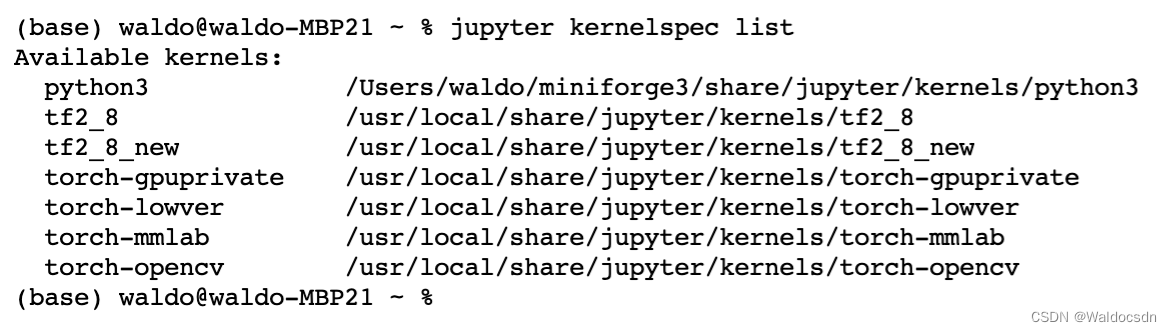
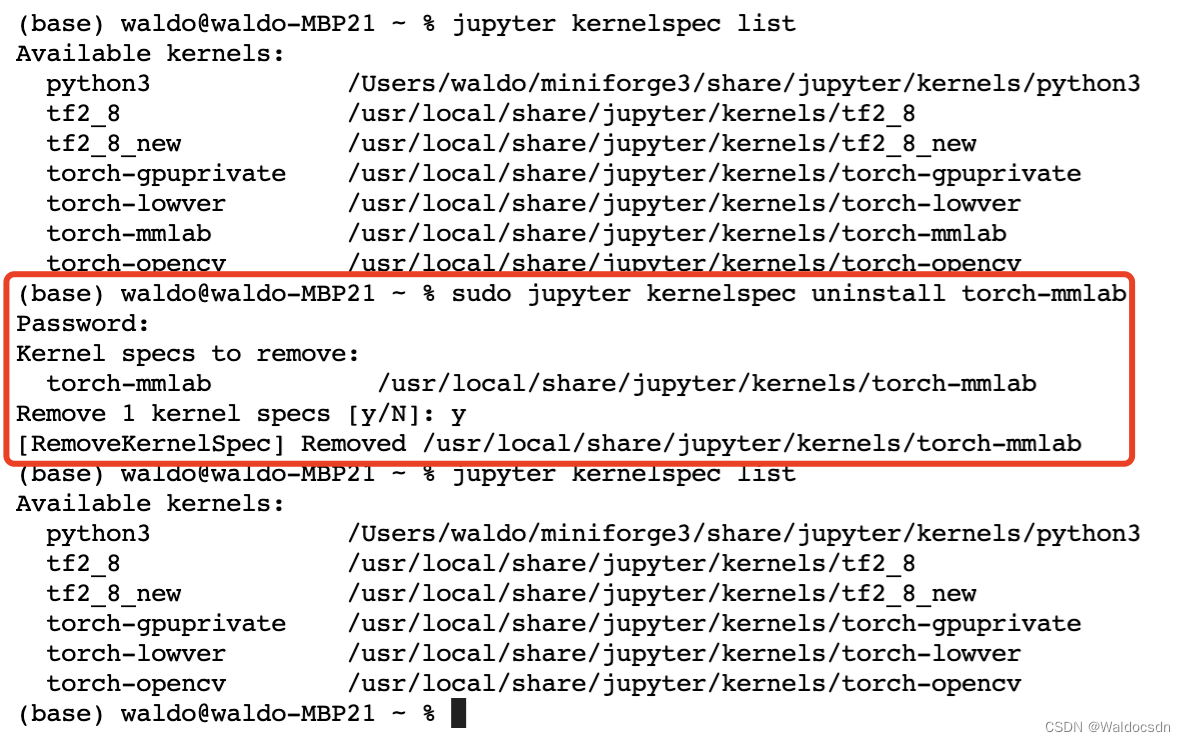
打开jupyter 终端: jupyter 终端 Terminal 中输入如下,显示当前存在的kernel的名字及其路径,其实上一张图里也能看出来 kernel 名叫啥。 jupyter kernelspec list
运行下面的语句删除 kernel: sudo jupyter kernelspec uninstall 名字如: sudo jupyter kernelspec uninstall torch-mmlab
|
 回到终端,用ls -a命令检查是否已有.zshrc文件,如果没有,使用命令touch ~/.zshrc建立文件:
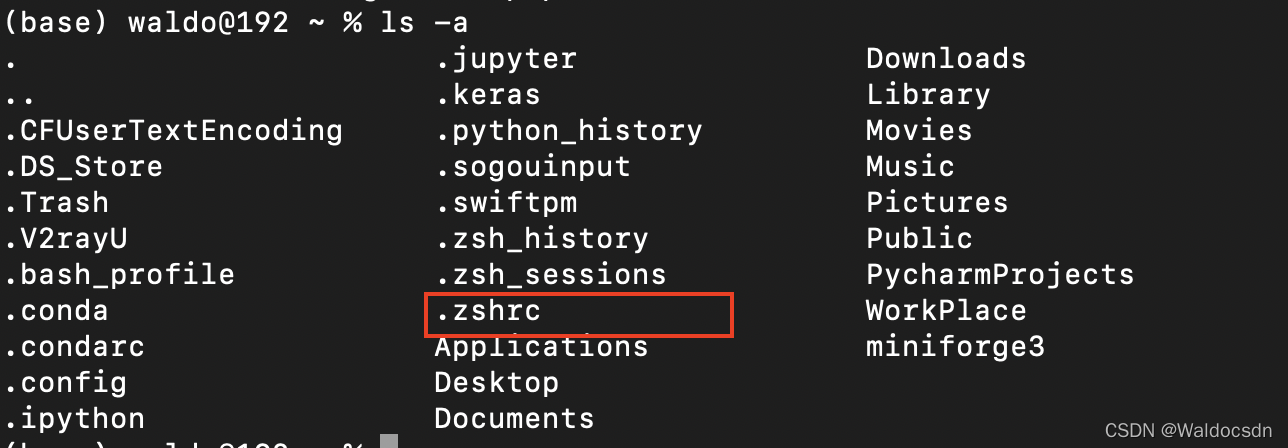
 打开这个py文件: open /Users/waldo/.jupyter/jupyter_notebook_config.py 找到下图对应位置修改notebook默认工作目录(去掉注释符),保存:
 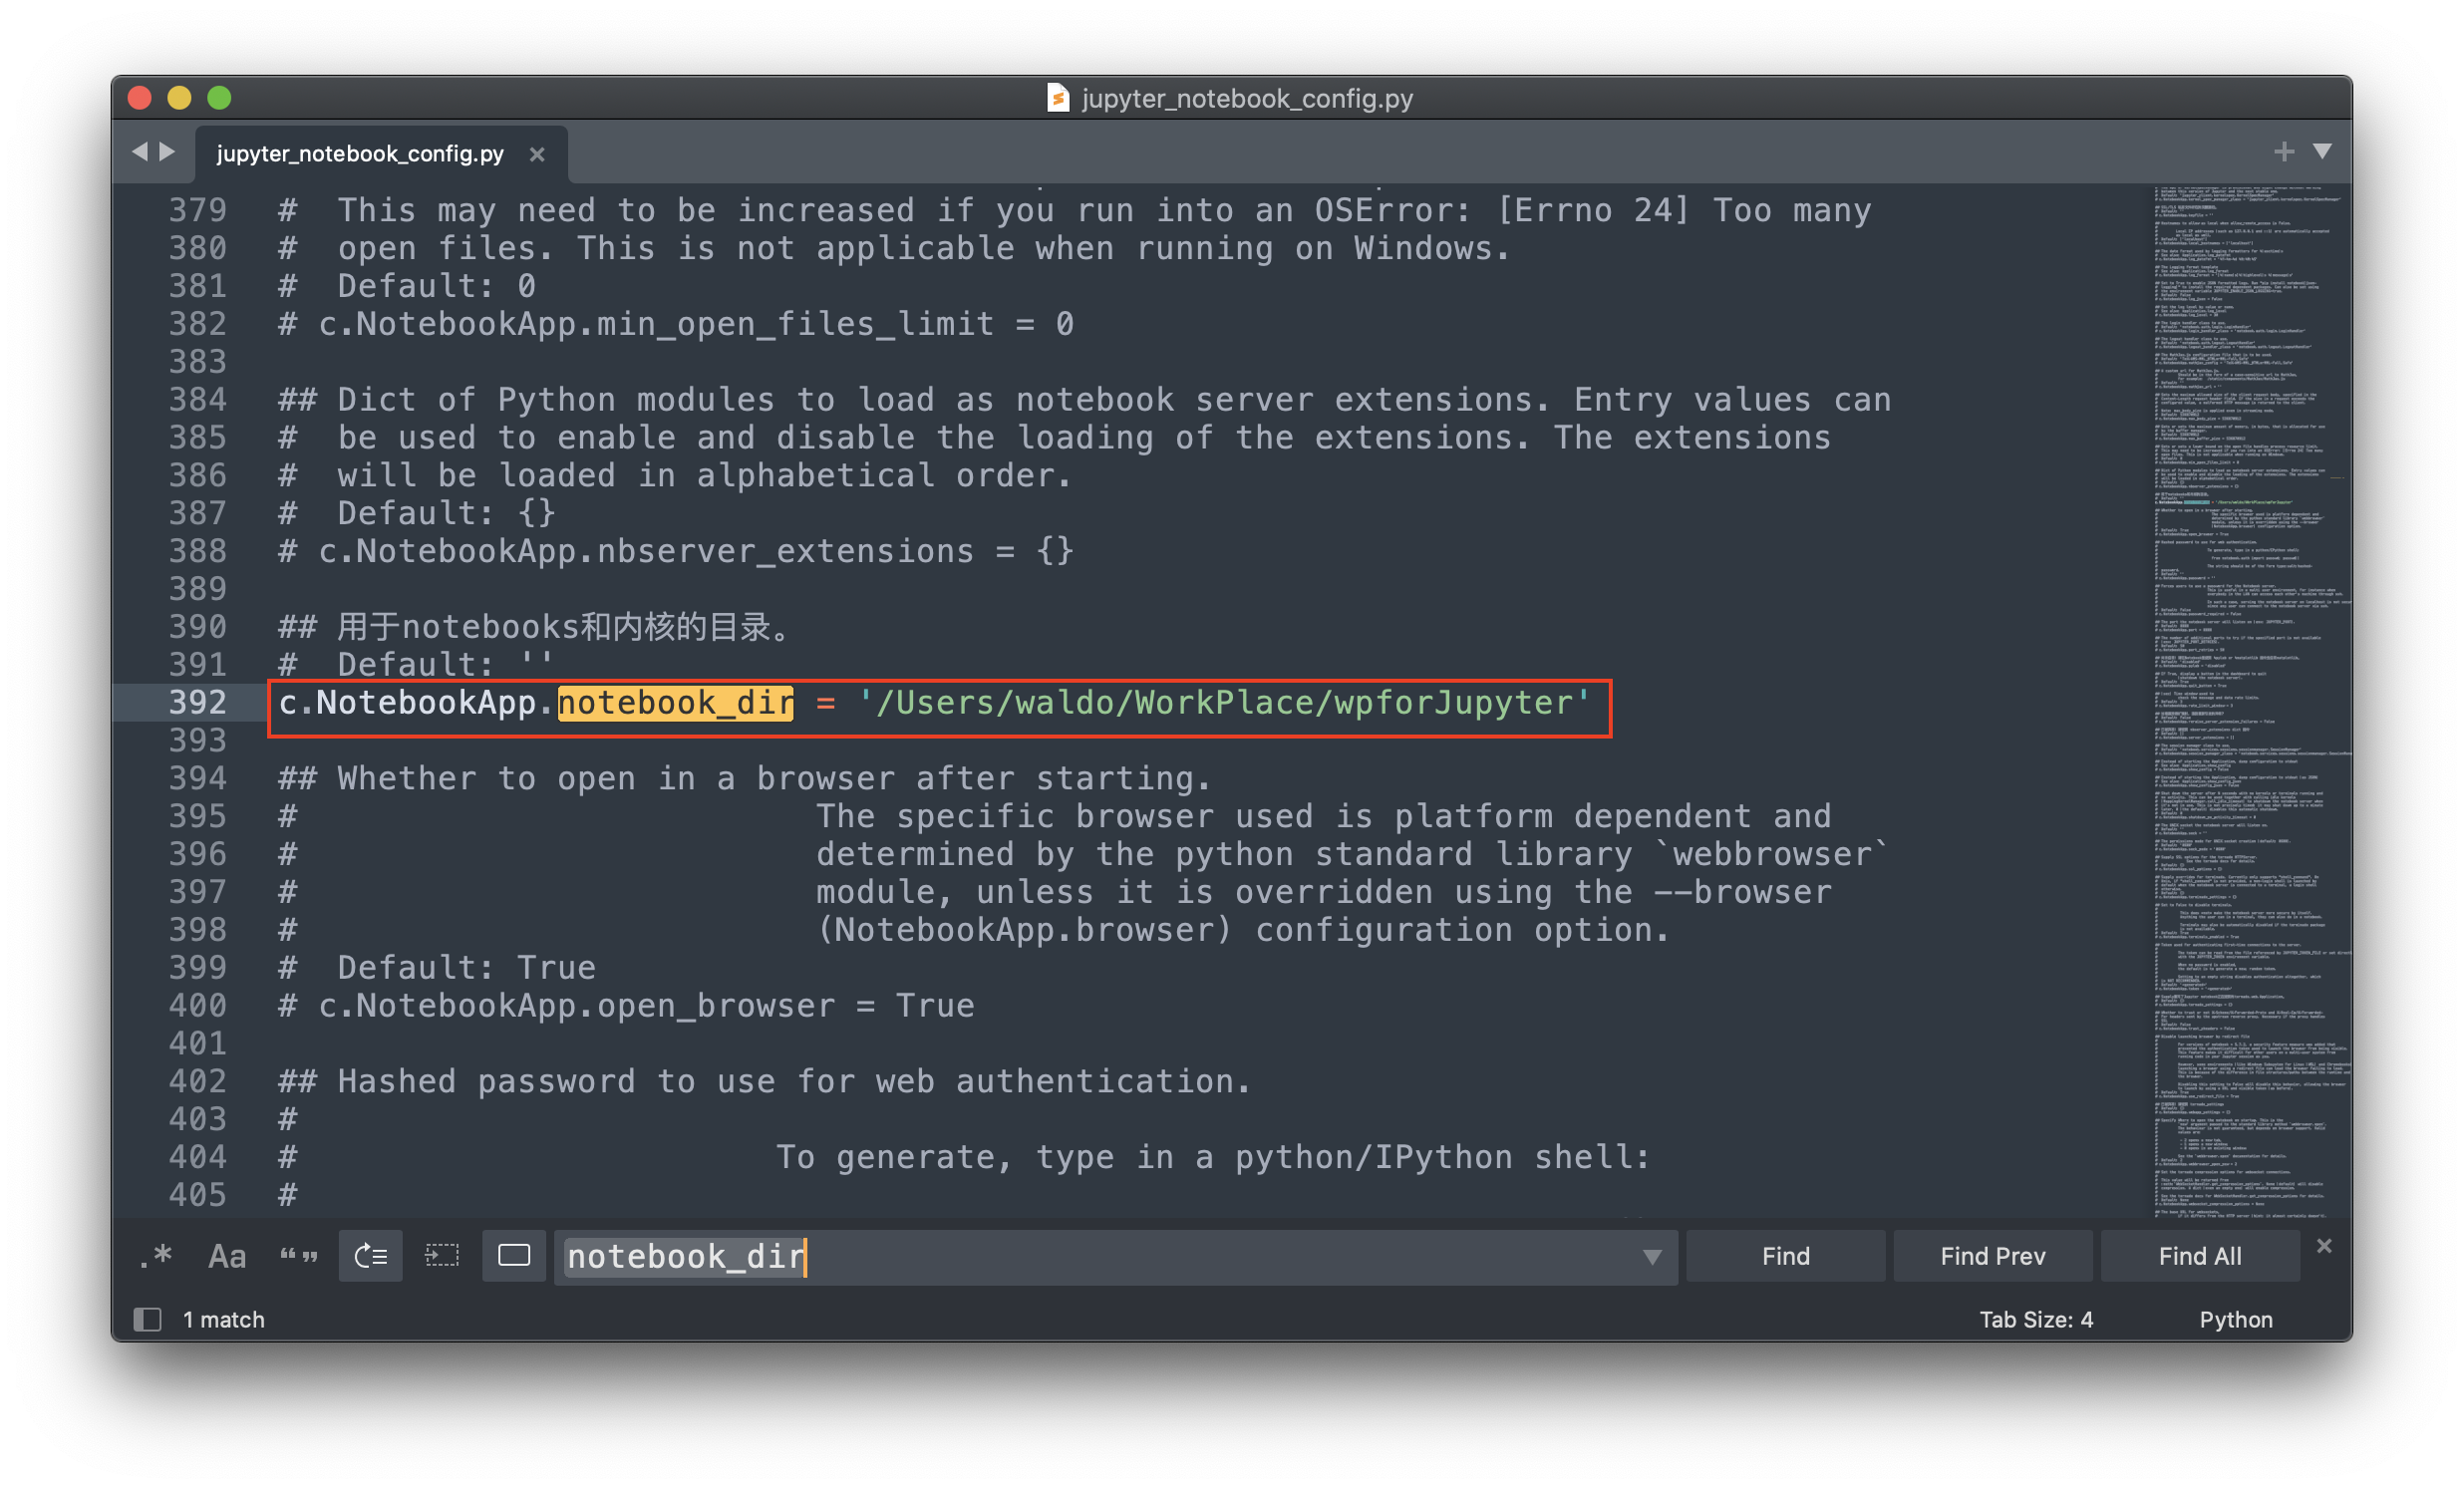 注意一下,工作目录文件夹要自己先新建好
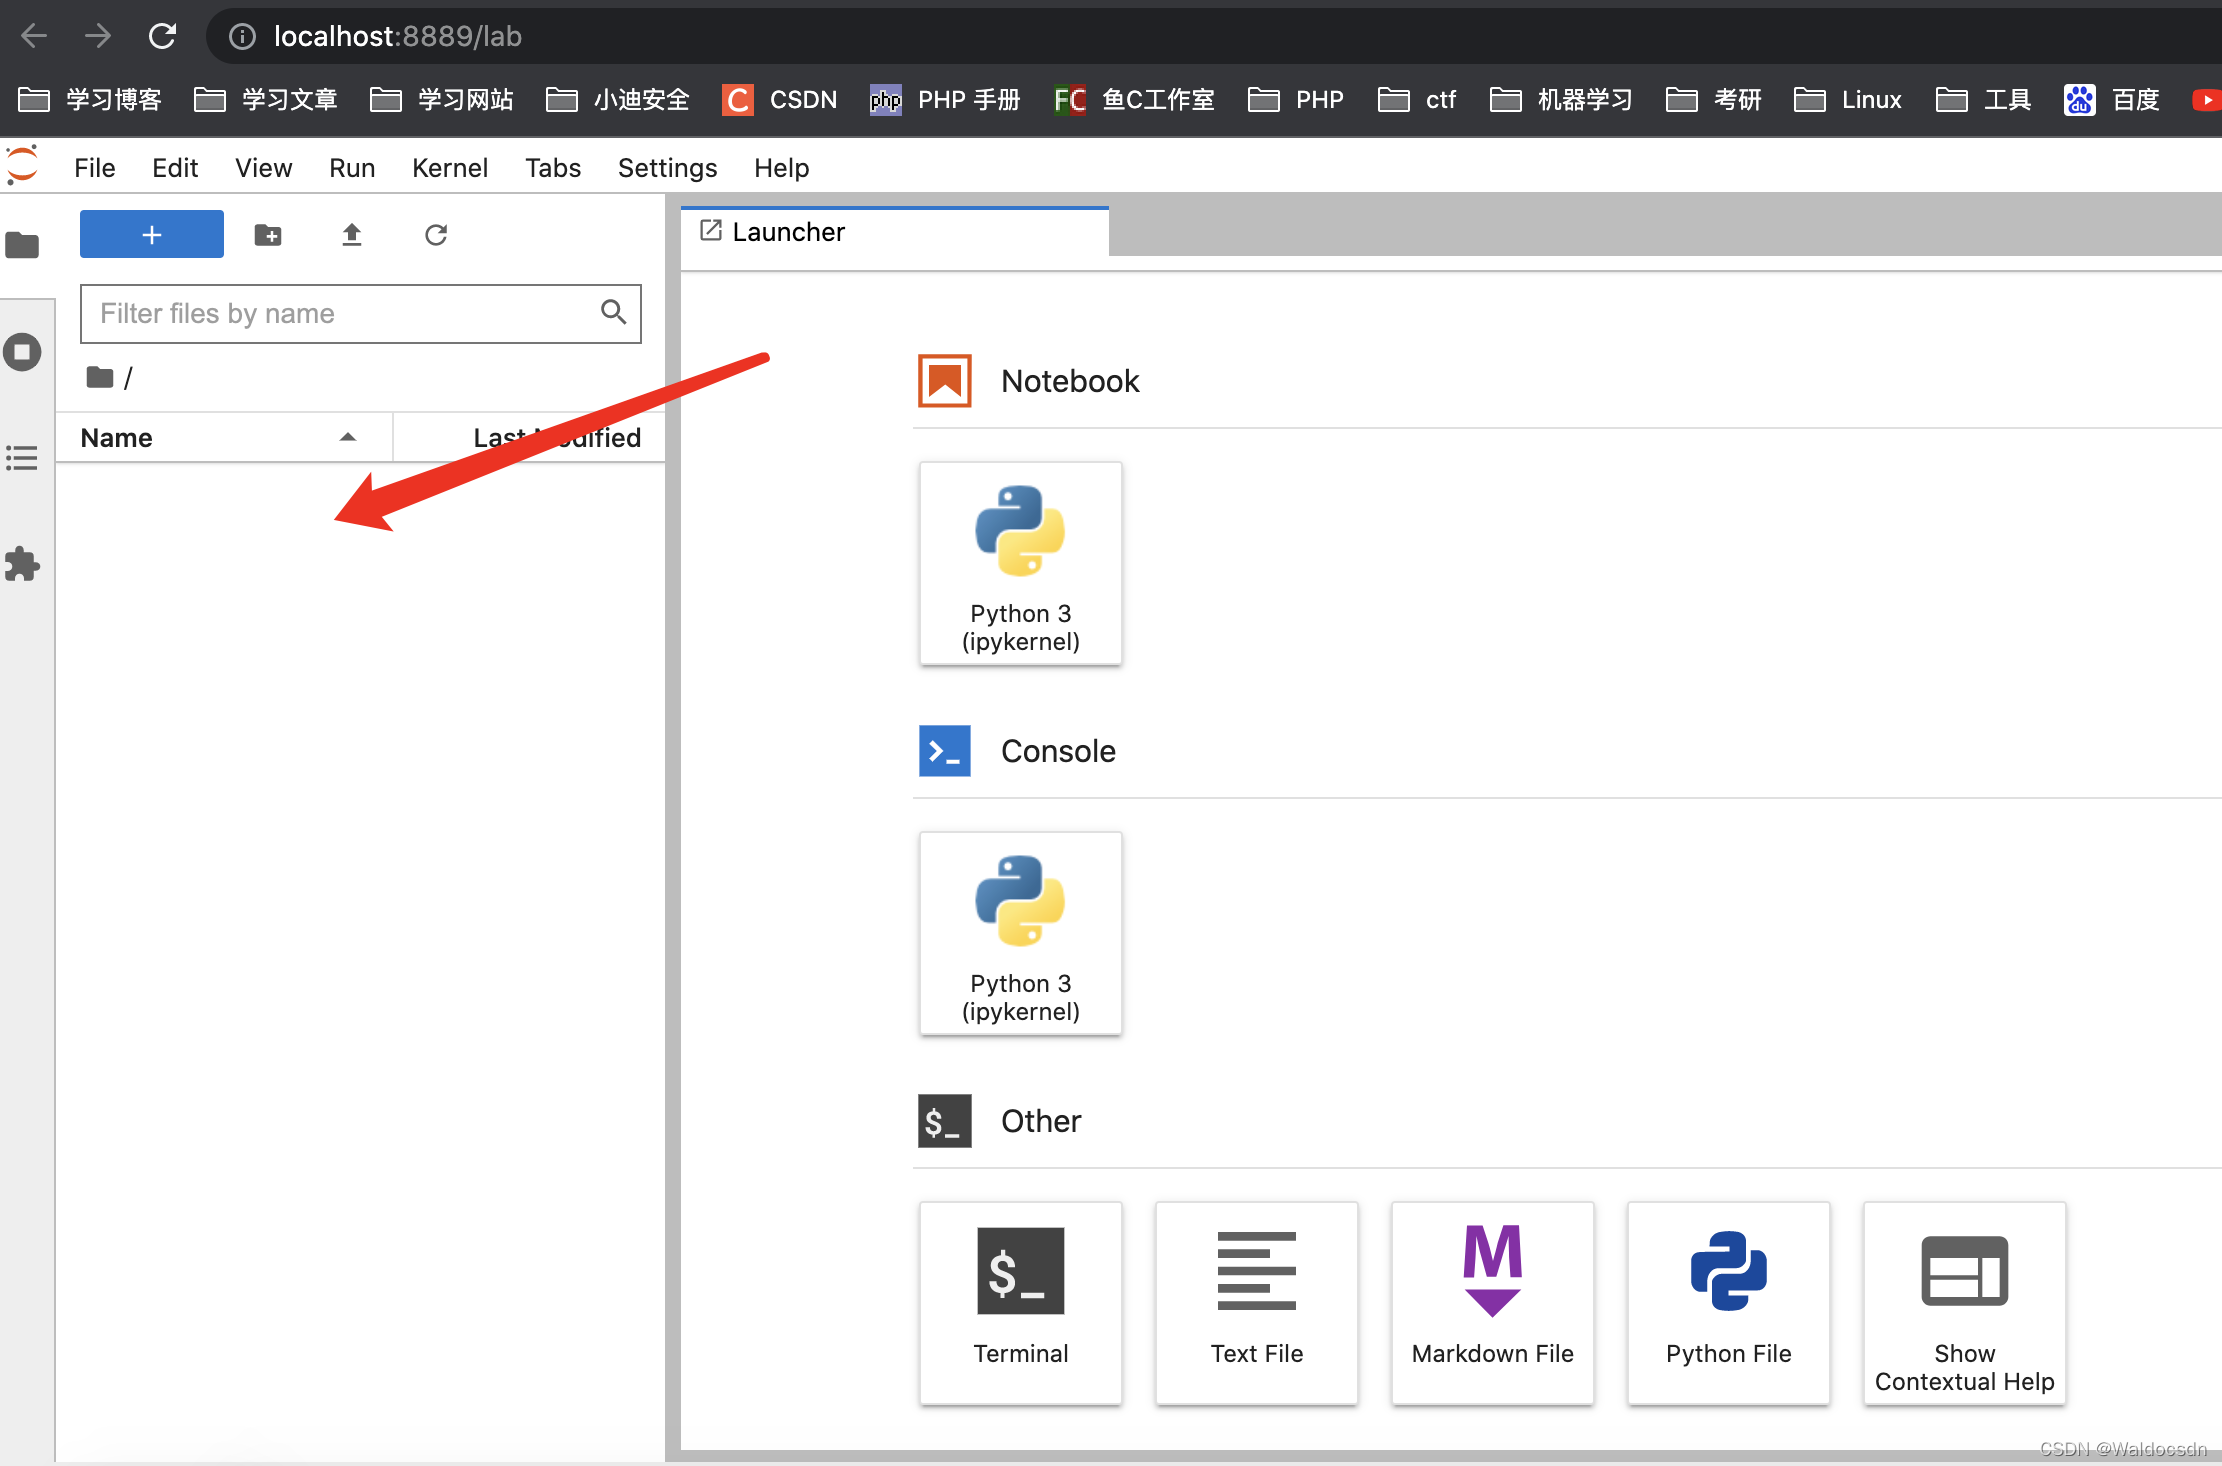
【本文地址】