| JavaFX UI控件教程(二十七)之File Chooser | 您所在的位置:网站首页 › java中sethgap › JavaFX UI控件教程(二十七)之File Chooser |
JavaFX UI控件教程(二十七)之File Chooser
|
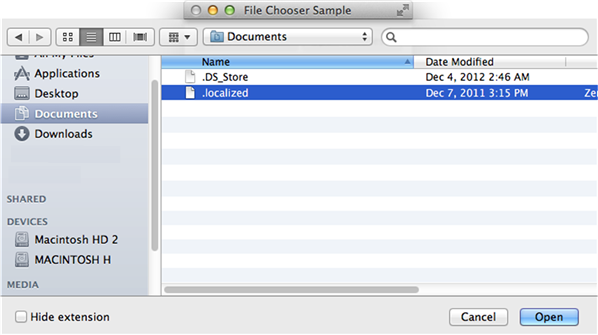
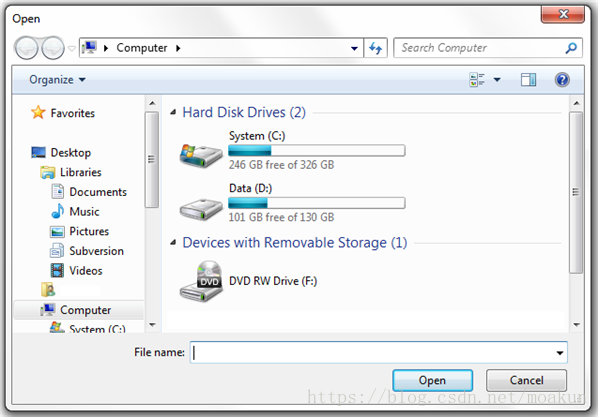
翻译自 File Chooser 本章介绍如何使用FileChooser该类使用户能够导航文件系统。本章提供的示例说明了如何打开一个或多个文件,配置文件选择器对话框窗口以及保存应用程序内容。 与其他用户界面组件类不同,FileChooser该类不属于该javafx.scene.controls包。但是,这个类值得在JavaFX UI Controls教程中提及,因为它支持典型的GUI应用程序功能之一:文件系统导航。 的FileChooser类位于javafx.stage包与其他的基本根图形元素,例如沿着Stage,Window,和Popup。图26-1中的“查看图片”窗口是Windows中文件选择器对话框的示例。 图26-1文件选择器窗口示例 打开文件 文件选择器可用于调用打开的对话框窗口,用于选择单个文件或多个文件,以及启用文件保存对话框窗口。要显示文件选择器,通常使用FileChooser该类。例26-1提供了在应用程序中启用文件选择器的最简单方法。 示例26-1显示文件选择器 FileChooser fileChooser = new FileChooser(); fileChooser.setTitle("Open Resource File"); fileChooser.showOpenDialog(stage);将示例26-1中的代码添加到JavaFX应用程序后,应用程序启动时会立即显示文件选择器对话框窗口,如图26-2所示。 图26-2简单文件选择器 注意: 图26-2显示了Windows中的文件选择器。在其他支持此功能的操作系统中打开文件选择器时,您将收到备用窗口。图26-3和图26-4显示了Linux和Mac OS中文件选择器窗口的示例。 图26-3 Linux中的文件选择器窗口 图26-4 Mac OS中的“文件选择器”窗口
虽然在前面的示例中,文件选择器在应用程序启动时自动出现,但更典型的方法是通过选择相应的菜单项或单击专用按钮来调用文件选择器。在本教程中,您将创建一个应用程序,使用户可以单击按钮并打开位于文件系统中的一个或多个图片。例26-2显示了实现此任务的FileChooserSample应用程序的代码。 示例26-2打开单个和多个选择的文件选择器 import java.awt.Desktop; import java.io.File; import java.io.IOException; import java.util.List; import java.util.logging.Level; import java.util.logging.Logger; import javafx.application.Application; import javafx.event.ActionEvent; import javafx.event.EventHandler; import javafx.geometry.Insets; import javafx.scene.Scene; import javafx.scene.control.Button; import javafx.scene.layout.GridPane; import javafx.scene.layout.Pane; import javafx.scene.layout.VBox; import javafx.stage.FileChooser; import javafx.stage.Stage; public final class FileChooserSample extends Application { private Desktop desktop = Desktop.getDesktop(); @Override public void start(final Stage stage) { stage.setTitle("File Chooser Sample"); final FileChooser fileChooser = new FileChooser(); final Button openButton = new Button("Open a Picture..."); final Button openMultipleButton = new Button("Open Pictures..."); openButton.setOnAction( new EventHandler() { @Override public void handle(final ActionEvent e) { File file = fileChooser.showOpenDialog(stage); if (file != null) { openFile(file); } } }); openMultipleButton.setOnAction( new EventHandler() { @Override public void handle(final ActionEvent e) { List list = fileChooser.showOpenMultipleDialog(stage); if (list != null) { for (File file : list) { openFile(file); } } } }); final GridPane inputGridPane = new GridPane(); GridPane.setConstraints(openButton, 0, 0); GridPane.setConstraints(openMultipleButton, 1, 0); inputGridPane.setHgap(6); inputGridPane.setVgap(6); inputGridPane.getChildren().addAll(openButton, openMultipleButton); final Pane rootGroup = new VBox(12); rootGroup.getChildren().addAll(inputGridPane); rootGroup.setPadding(new Insets(12, 12, 12, 12)); stage.setScene(new Scene(rootGroup)); stage.show(); } public static void main(String[] args) { Application.launch(args); } private void openFile(File file) { try { desktop.open(file); } catch (IOException ex) { Logger.getLogger( FileChooserSample.class.getName()).log( Level.SEVERE, null, ex ); } } }在示例26-2中,“打开图片”按钮使用户可以打开文件选择器进行单个选择,“打开图片”按钮使用户可以打开文件选择器进行多项选择。setOnAction这些按钮的方法几乎相同。唯一的区别在于用于调用a的方法FileChooser。 该showOpenDialog方法显示一个新的文件打开对话框,其中可以选择一个文件。该方法返回指定用户选择的文件的值,或者null是否未进行选择。 该showOpenMultipleDialog方法显示了一个新的文件打开对话框,其中可以选择多个文件。该方法返回指定用户选择的文件列表的值,或者null是否未进行选择。无法修改返回的列表,并UnsupportedOperationException在每次修改尝试时抛出。 两种方法都不会返回结果,直到显示的打开对话框窗口被取消(换句话说,直到用户提交或取消选择)。 编译并运行FileChooserSample应用程序时,它会生成如图26-5所示的窗口。 图26-5带有两个按钮的FileChooserSample 单击其中一个按钮时,将出现如图26-6所示的对话框窗口。打开的文件选择器对话框窗口显示操作系统的默认位置。 图26-6默认文件选择器窗口 FileChooserSample应用程序的用户可以导航到包含图片的目录并选择图片。选择文件后,将使用关联的应用程序打开该文件。示例代码通过使用实现此open的方法java.awt.Desktop类:desktop.open(file);。 注意: Desktop该类的可用性取决于平台。有关该类的更多信息,请参阅API文档Desktop。您还可以使用该isDesktopSupported()方法检查系统是否支持它。 通过将文件选择器目录设置为包含图片的特定目录,可以改善此应用程序的用户体验。 配置文件选择器 您可以通过设置对象的属性initialDirectory和title属性来配置文件选择器对话框窗口FileChooser。例26-3显示了如何指定初始目录以及预览和打开图片的合适标题。 示例26-3设置初始目录和窗口标题 import java.awt.Desktop; import java.io.File; import java.io.IOException; import java.util.List; import java.util.logging.Level; import java.util.logging.Logger; import javafx.application.Application; import javafx.event.ActionEvent; import javafx.event.EventHandler; import javafx.geometry.Insets; import javafx.scene.Scene; import javafx.scene.control.Button; import javafx.scene.layout.GridPane; import javafx.scene.layout.Pane; import javafx.scene.layout.VBox; import javafx.stage.FileChooser; import javafx.stage.Stage; public final class FileChooserSample extends Application { private Desktop desktop = Desktop.getDesktop(); @Override public void start(final Stage stage) { stage.setTitle("File Chooser Sample"); final FileChooser fileChooser = new FileChooser(); final Button openButton = new Button("Open a Picture..."); final Button openMultipleButton = new Button("Open Pictures..."); openButton.setOnAction( new EventHandler() { @Override public void handle(final ActionEvent e) { configureFileChooser(fileChooser); File file = fileChooser.showOpenDialog(stage); if (file != null) { openFile(file); } } }); openMultipleButton.setOnAction( new EventHandler() { @Override public void handle(final ActionEvent e) { configureFileChooser(fileChooser); List list = fileChooser.showOpenMultipleDialog(stage); if (list != null) { for (File file : list) { openFile(file); } } } }); final GridPane inputGridPane = new GridPane(); GridPane.setConstraints(openButton, 0, 0); GridPane.setConstraints(openMultipleButton, 1, 0); inputGridPane.setHgap(6); inputGridPane.setVgap(6); inputGridPane.getChildren().addAll(openButton, openMultipleButton); final Pane rootGroup = new VBox(12); rootGroup.getChildren().addAll(inputGridPane); rootGroup.setPadding(new Insets(12, 12, 12, 12)); stage.setScene(new Scene(rootGroup)); stage.show(); } public static void main(String[] args) { Application.launch(args); } private static void configureFileChooser(final FileChooser fileChooser){ fileChooser.setTitle("View Pictures"); fileChooser.setInitialDirectory( new File(System.getProperty("user.home")) ); } private void openFile(File file) { try { desktop.open(file); } catch (IOException ex) { Logger.getLogger( FileChooserSample.class.getName()).log( Level.SEVERE, null, ex ); } } }该configureFileChooser方法使用“我的图片”子目录设置“查看图片”标题和用户主目录的路径。编译并运行FileChooserSample并单击其中一个按钮时,将出现如图26-7所示的文件选择器。 图26-7打开图片库 您还可以让用户使用DirectoryChooser该类指定目标目录。在例26-4中显示的代码片段中,单击它会browseButton调用该directoryChooser.showDialog方法。 示例26-4使用DirectoryChooser类 final Button browseButton = new Button("..."); browseButton.setOnAction( new EventHandler() { @Override public void handle(final ActionEvent e) { final DirectoryChooser directoryChooser = new DirectoryChooser(); final File selectedDirectory = directoryChooser.showDialog(stage); if (selectedDirectory != null) { selectedDirectory.getAbsolutePath(); } } } );执行选择后,您可以按如下方式将相应的值分配给文件选择器:fileChooser.setInitialDirectory(selectedDirectory);。 设置扩展过滤器 作为下一个配置选项,您可以设置扩展过滤器以确定在文件选择器中打开哪些文件,如例26-5所示。 示例26-5设置图像类型过滤器 import java.awt.Desktop; import java.io.File; import java.io.IOException; import java.util.List; import java.util.logging.Level; import java.util.logging.Logger; import javafx.application.Application; import javafx.event.ActionEvent; import javafx.event.EventHandler; import javafx.geometry.Insets; import javafx.scene.Scene; import javafx.scene.control.Button; import javafx.scene.layout.GridPane; import javafx.scene.layout.Pane; import javafx.scene.layout.VBox; import javafx.stage.FileChooser; import javafx.stage.Stage; public final class FileChooserSample extends Application { private Desktop desktop = Desktop.getDesktop(); @Override public void start(final Stage stage) { stage.setTitle("File Chooser Sample"); final FileChooser fileChooser = new FileChooser(); final Button openButton = new Button("Open a Picture..."); final Button openMultipleButton = new Button("Open Pictures..."); openButton.setOnAction( new EventHandler() { @Override public void handle(final ActionEvent e) { configureFileChooser(fileChooser); File file = fileChooser.showOpenDialog(stage); if (file != null) { openFile(file); } } }); openMultipleButton.setOnAction( new EventHandler() { @Override public void handle(final ActionEvent e) { configureFileChooser(fileChooser); List list = fileChooser.showOpenMultipleDialog(stage); if (list != null) { for (File file : list) { openFile(file); } } } }); final GridPane inputGridPane = new GridPane(); GridPane.setConstraints(openButton, 0, 1); GridPane.setConstraints(openMultipleButton, 1, 1); inputGridPane.setHgap(6); inputGridPane.setVgap(6); inputGridPane.getChildren().addAll(openButton, openMultipleButton); final Pane rootGroup = new VBox(12); rootGroup.getChildren().addAll(inputGridPane); rootGroup.setPadding(new Insets(12, 12, 12, 12)); stage.setScene(new Scene(rootGroup)); stage.show(); } public static void main(String[] args) { Application.launch(args); } private static void configureFileChooser( final FileChooser fileChooser) { fileChooser.setTitle("View Pictures"); fileChooser.setInitialDirectory( new File(System.getProperty("user.home")) ); fileChooser.getExtensionFilters().addAll( new FileChooser.ExtensionFilter("All Images", "*.*"), new FileChooser.ExtensionFilter("JPG", "*.jpg"), new FileChooser.ExtensionFilter("PNG", "*.png") ); } private void openFile(File file) { try { desktop.open(file); } catch (IOException ex) { Logger.getLogger(FileChooserSample.class.getName()).log( Level.SEVERE, null, ex ); } } }在示例26-5中,您可以使用FileChooser.ExtensionFilter以定义文件选择的以下选项来设置扩展过滤器:所有图像,JPG和PNG。 编译时,运行例26-5中的FileChooserSample代码,然后单击其中一个按钮,扩展名筛选器将出现在文件选择器窗口中。如果用户选择JPG,则文件选择器仅显示JPG类型的图片。图26-8捕获了My Pictures目录中选择JPG图像的时刻。 图26-8在文件选择器中过滤JPG文件 保存文件 除了打开和过滤文件之外,FileChooserAPI还提供了一种功能,允许用户为应用程序保存的文件指定文件名(及其在文件系统中的位置)。该类的showSaveDialog方法FileChooser打开一个保存对话框窗口。与其他show dialog方法一样,该showSaveDialog方法返回用户选择的文件,或者null如果没有执行选择。 例26-6中显示的代码片段是Menu示例的补充。它还实现了上下文菜单中的另一项,用于将显示的图像保存在文件系统中。 示例26-6使用FileChooser类保存图像 MenuItem cmItem2 = new MenuItem("Save Image"); cmItem2.setOnAction(new EventHandler() { public void handle(ActionEvent e) { FileChooser fileChooser = new FileChooser(); fileChooser.setTitle("Save Image"); System.out.println(pic.getId()); File file = fileChooser.showSaveDialog(stage); if (file != null) { try { ImageIO.write(SwingFXUtils.fromFXImage(pic.getImage(), null), "png", file); } catch (IOException ex) { System.out.println(ex.getMessage()); } } } } );将Example 26-6添加到MenuSample应用程序(在Application Files中查找源代码),编译并运行它时,启用Save Image菜单项,如图26-9所示。 图26-9保存图像 用户选择“保存图像”项后,将出现如图26-10所示的“保存图像”窗口。 图26-10“保存图像”窗口 “保存图像”窗口对应于保存对话框窗口的典型用户体验:用户需要选择目标目录,键入保存文件的名称,然后单击“保存”。
相关的API文档 FileChooser DirectoryChooser |


【本文地址】