| Hexo | 您所在的位置:网站首页 › hexo炫酷主题 › Hexo |
Hexo
|
网页预览:
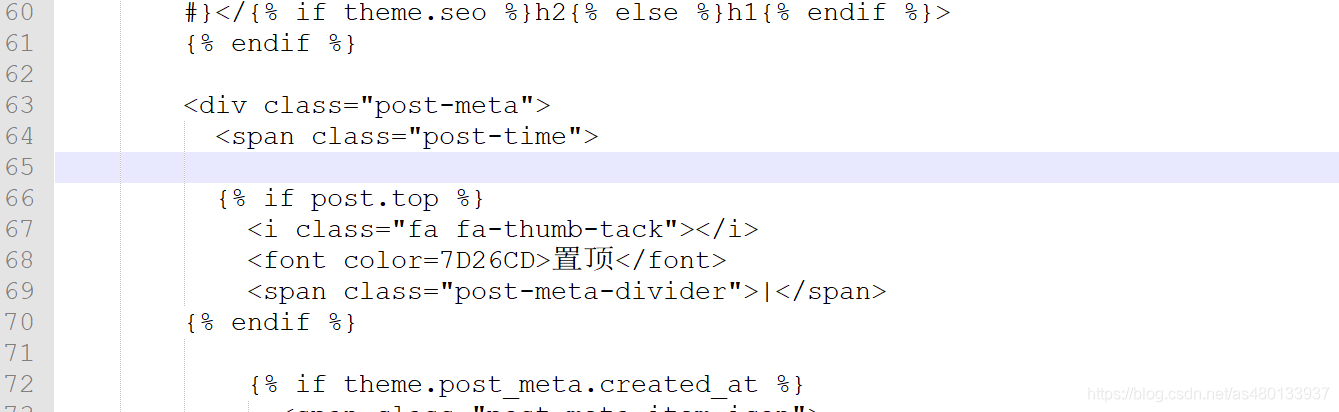
zxiaoxuan.cn 使用工具: Git Github Nodepad++ QQ浏览器F12开发者选项 Hexo简易安装 前置条件npm install -g hexo-cli 安装hexonpm install -g hexo-cli 主题下载安装进入命令行,下载 NexT 主题,输入: git clone https://github.com/theme-next/hexo-theme-next themes/next修改站点配置文件_config.yml,找到如下代码: ## Themes: https://hexo.io/themes/ theme: landscape将 landscape 修改为 next 即可。 配置文件在 Hexo 中有两份主要的配置文件,其名称都是 _config.yml。 其中,一份位于站点根目录下,主要包含 Hexo 本身的站点配置;另一份位于主题目录下,这份配置由主题作者提供,主要用于配置主题相关的选项。 为了描述方便,在以下说明中,将前者称为 站点配置文件, 后者称为 主题配置文件。 /hexo/_config.yml /hexo/themes/next/_config.yml 修改语言打开站点配置文件,搜索 language,找到如下代码: author: language: timezone:在 language 后面输入 zh-CN。 新建标签及分类界面打开 主题配置文件,搜索 menu,找到如下代码: menu: home: / || home #about: /about/ || user #tags: /tags/ || tags #categories: /categories/ || th archives: /archives/ || archive #schedule: /schedule/ || calendar #sitemap: /sitemap.xml || sitemap #commonweal: /404/ || heartbeat把 tags 和 categories 前面的 # 删除, 切换主题next 主题自带四种样式。 在主题配置文件/next/_config.yml中查找:scheme,找到如下代码: # Schemes scheme: Muse #scheme: Mist #scheme: Pisces #scheme: Gemini 选择你喜欢的一种样式,去掉前面的 #,其他主题前加上 # 即可。 隐藏网页底部 powered By Hexo / 强力驱动打开 themes/next/layout/_partials/footer.swig 找到: {% if theme.footer.powered.enable %} {# #}{{ __('footer.powered', 'Hexo') }}{% if theme.footer.powered.version %} v{{ hexo_env('version') }}{% endif %}{# #} {% endif %} {% if theme.footer.powered.enable and theme.footer.theme.enable %} | {% endif %} {% if theme.footer.theme.enable %} {# #}{{ __('footer.theme') }} – {# #} nofollow }} href="https://theme-next.org">{# #}NexT.{{ theme.scheme }}{# #}{% if theme.footer.theme.version %} v{{ version }}{% endif %}{# #} {% endif %}把这段代码首尾分别加上:,或者直接删除。 文章添加阴影打开 /themes/next/source/css/_custom/custom.styl,添加: .post { margin-top: 60px; margin-bottom: 60px; padding: 25px; -webkit-box-shadow: 0 0 5px rgba(202, 203, 203, .5); -moz-box-shadow: 0 0 5px rgba(202, 203, 204, .5); } 浏览页面显示当前浏览进度打开 themes/next/_config.yml,搜索关键字 scrollpercent,把 false 改为 true。 效果图: 安装插件hexo-generator-searchdb,执行以下命令: npm install hexo-generator-searchdb --save修改hexo/_config.yml站点配置文件,新增以下内容到任意位置: search: path: search.xml field: post format: html limit: 10000编辑 主题配置文件,启用本地搜索功能: # Local search local_search: enable: true效果图: 在 EasyIcon 中找一张(32 * 32)的 ico 图标,或者去别的网站下载或者制作,并将图标名称改为 favicon.ico,然后把图标放在 /themes/next/source/images 里,并且修改主题配置文件: Put your favicon.ico into `hexo-site/source/` directory. favicon: /favicon.ico效果图: 修改模板/themes/next/layout/_macro/post.swig 搜索 rel=“tag”>#,将 # 换成 效果图: 打开themes/next/_config.yml 搜索关键字needmoreshare2 修改为下面设置 needmoreshare2: enable: true postbottom: enable: true options: iconStyle: default boxForm: horizontal #位置 position: bottomCenter #可分享网站 networks: Weibo,Wechat,Douban,QQZone,Twitter,Facebook float: enable: true options: iconStyle: default boxForm: vertical #位置 position: topRight #可分享网站 networks: Weibo,Wechat,Douban,QQZone,Twitter,Facebook效果图: postbottom为文章末尾分享 float则是在页面侧端分享 打开themes->next->layout->_partials->head.swig文件,插入这样一段代码: (function(){ if('{{ page.password }}'){ if (prompt('请输入文章密码') !== '{{ page.password }}'){ alert('密码错误!'); history.back(); } } })();然后在文章上写成类似这样: --- title: Hello World date: 2016/7/13 20:46:25 categories: - Diary tags: - Testing - Another Tag password: 123456 --- 增加文章字数统计及阅读时常功能安装插件hexo-wordcount,执行以下命令: npm install hexo-wordcount --save修改themes/next/_config.yml主题配置文件,搜索关键字post_wordcount,修改如下: post_wordcount: item_text: true wordcount: true #单篇文章字数 min2read: true #单篇阅读时长 totalcount: true #站点总字数 separated_meta: true 文章置顶功能移除默认安装的插件: npm uninstall hexo-generator-index --save 1 安装新插件: npm install hexo-generator-index-pin-top --save 1 最后编辑有这需求的相关文章时,在Front-matter(文件最上方以—分隔的区域)加上一行: top: true1 如果你置顶了多篇,怎么控制顺序呢?设置top的值(大的在前面),比如: # Post a.md title: a top: 1 # Post b.md title: b top: 10文章 b 便会显示在文章 a 的前面 设置置顶图标 打开/themes/next/layout/_macro/post.swig文件,在下方,插入如下代码: {% if post.top %} 置顶 | {% endif %}
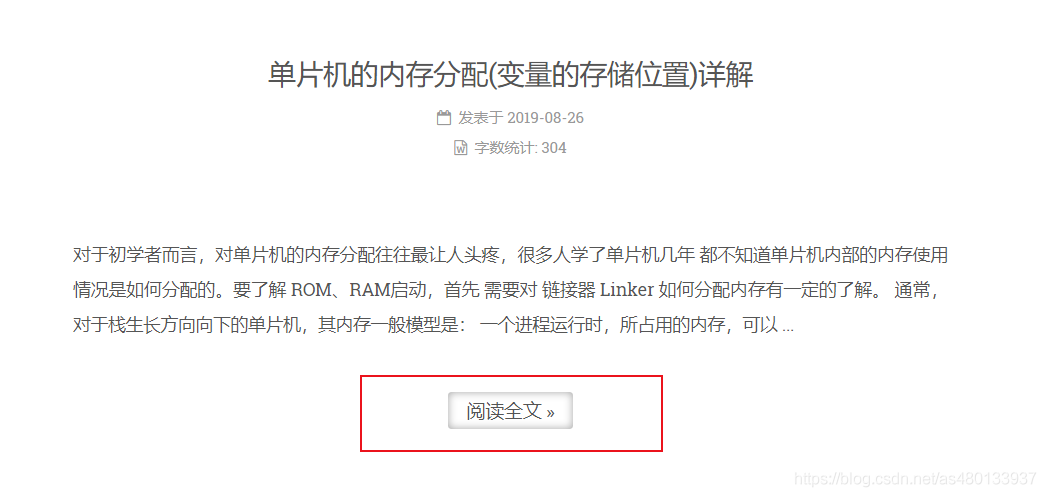
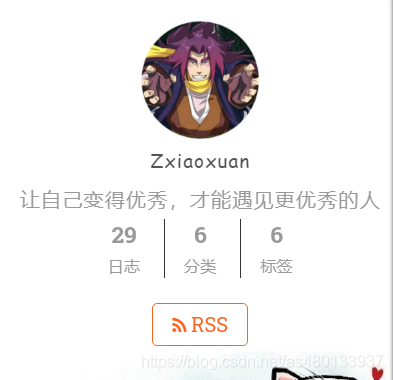
修改themes\next\source\css\_custom\custom.styl文件,加入自定义样式 // [Read More]按钮样式 .post-button .btn { color: #555 !important; background-color: rgb(255, 255, 255); border-radius: 3px; font-size: 15px; box-shadow: inset 0px 0px 10px 0px rgba(0, 0, 0, 0.35); border: none !important; transition-property: unset; padding: 0px 15px; } .post-button .btn:hover { color: rgb(255, 255, 255) !important; border-radius: 3px; font-size: 15px; box-shadow: inset 0px 0px 10px 0px rgba(0, 0, 0, 0.35); background-image: linear-gradient(90deg, #a166ab 0%, #ef4e7b 25%, #f37055 50%, #ef4e7b 75%, #a166ab 100%); }效果图: 打开 themes/next/_config.yml,搜索关键字 auto_excerpt, 修改length即可修改阅读全文前显示文字数量 auto_excerpt: enable: true length: 150或者在文章中任意位置添加 建议在文章中加入 自定义 [Read More] 按钮之前要显示的内容! 修改链接文字样式打开themes\next\source\css\_common\components\post\post.styl添加以下代码: .post-body p a{ color: #0593d3; border-bottom: none; &:hover { color: #ff106c; text-decoration: underline; } }效果图: 修改themes\next\source\css\_common\components\sidebar\sidebar-author.styl,新增以下代码: .site-author-image { display: block; margin: 0 auto; padding: $site-author-image-padding; max-width: $site-author-image-width; height: $site-author-image-height; border: $site-author-image-border-width solid $site-author-image-border-color; //设置圆形 + border-radius: 50%; + transition: 2s all; } //旋转 + .site-author-image:hover{ + transform: rotate(360deg); + }效果图: 打开themes/next/source/css/_custom/custom.styl文件添加: .post { margin-top: 60px; margin-bottom: 60px; padding: 25px; -webkit-box-shadow: 0 0 5px rgba(202, 203, 203, .5); -moz-box-shadow: 0 0 5px rgba(202, 203, 204, .5); } 近期文章修改themes/next/layout/_macro/sidebar.swig 。找到theme.social板块代码,在该板块最后的endif后隔一行添加如下代码。 {# recent posts #} {% if theme.recent_posts %} |
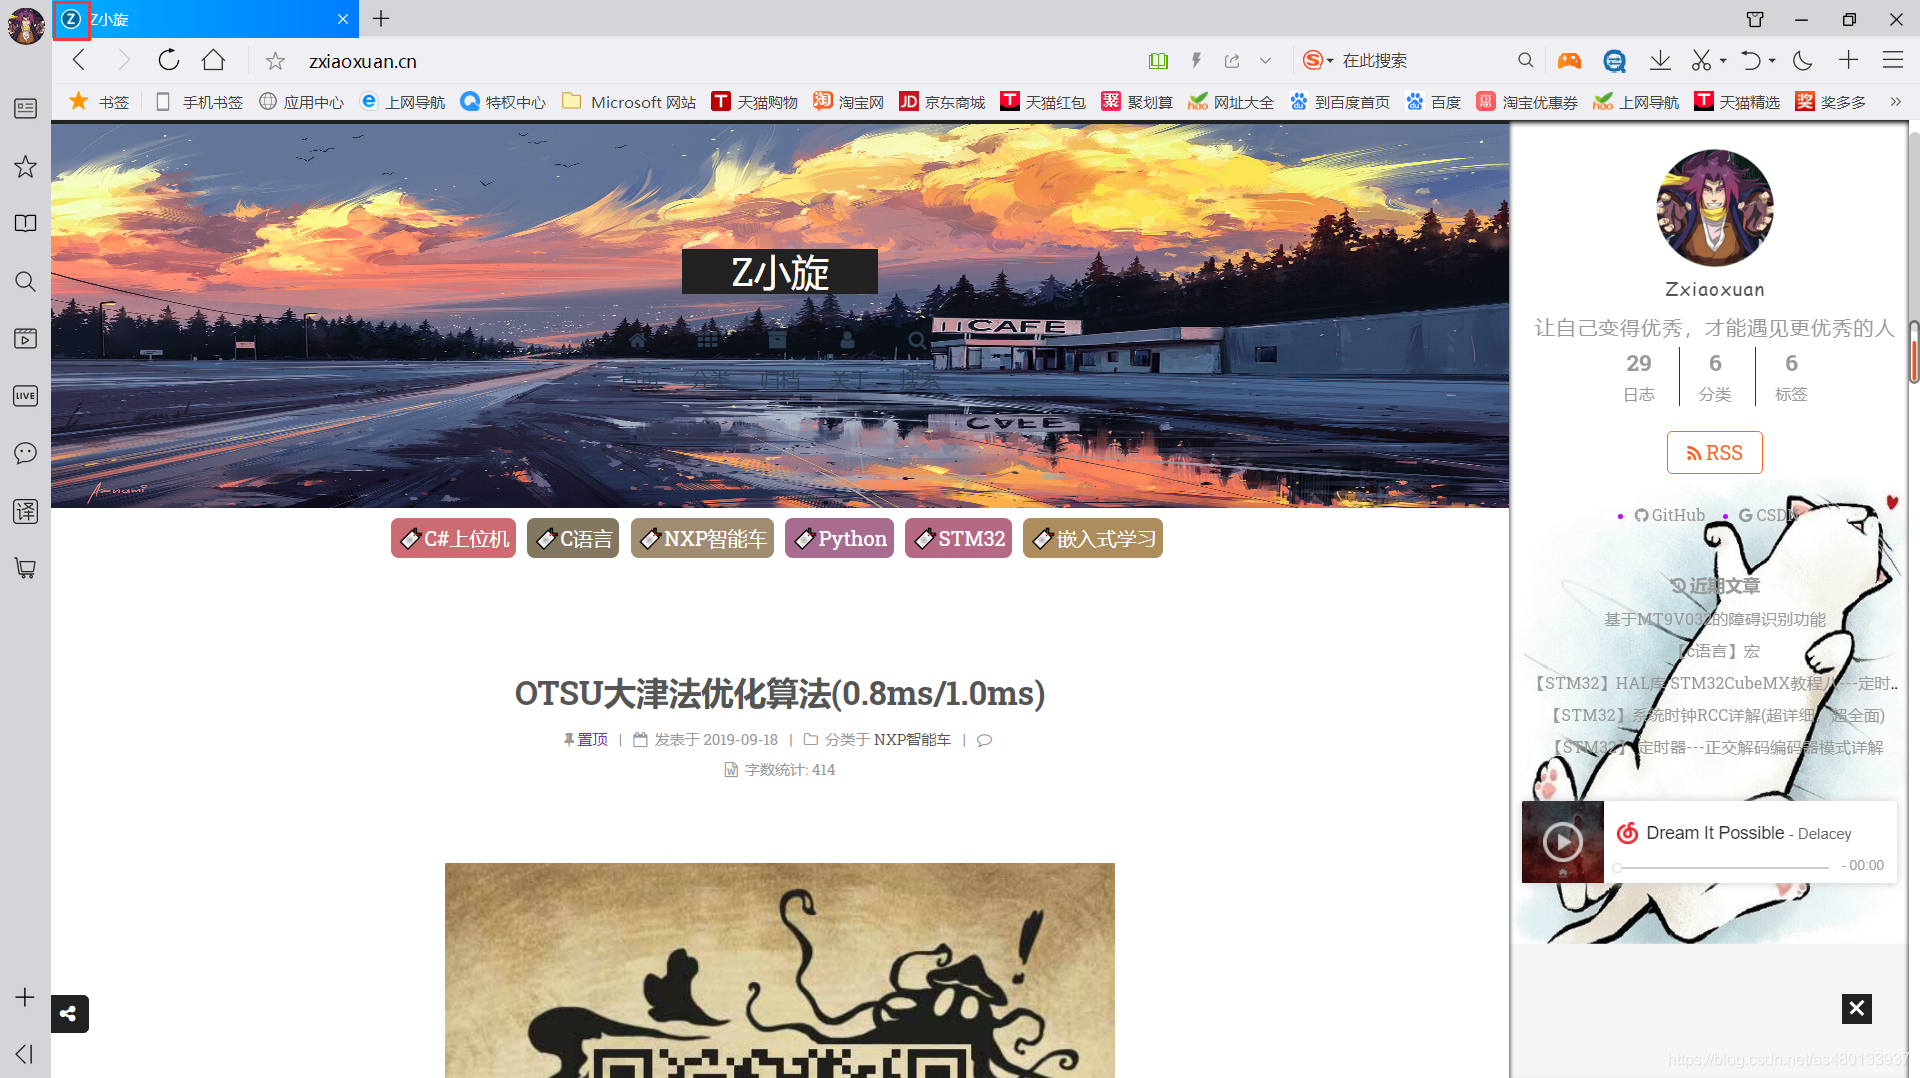 因为本人比较喜欢简介风格的,所以整个界面都是简约风格的,一个好的博客,应该让人一眼就能看清楚技术分类,文章也应该就是文章,让人能够最好的阅读你的博客 这才是我们应该做的,所以没有太多花里胡哨的东西。


【本文地址】