| 手把手教你移植openharmony3.0到stm32(liteos | 您所在的位置:网站首页 › freertos和liteos › 手把手教你移植openharmony3.0到stm32(liteos |
手把手教你移植openharmony3.0到stm32(liteos
|
stm32系列芯片移植openhrmony3.0 liteos_m
之前找了很多文章,但是由于本身这方面文章较少加上官网文档太过简洁,移植过程比较繁琐,特此纪录。
附上最终模板地址:https://gitee.com/emb-y/hm3-to-stm32 一、创建stm32cubemx模板工程为了方便移植先使用stm32cubemx生成模板工程, 以stm32f411为例 该处参考连志安老师的帖子和鸿蒙官方文档 添加target_config.h到项目根目录 #ifndef _TARGET_CONFIG_H #define _TARGET_CONFIG_H #include "stm32f4xx.h" #ifdef __cplusplus #if __cplusplus extern "C" { #endif /* __cplusplus */ #endif /* __cplusplus */ /*============================================================================= System clock module configuration =============================================================================*/ #define OS_SYS_CLOCK SystemCoreClock #define LOSCFG_BASE_CORE_TICK_PER_SECOND (1000UL) #define LOSCFG_BASE_CORE_TICK_HW_TIME 0 #define LOSCFG_BASE_CORE_TICK_WTIMER 0 #define LOSCFG_BASE_CORE_TICK_RESPONSE_MAX SysTick_LOAD_RELOAD_Msk /*============================================================================= Hardware interrupt module configuration =============================================================================*/ #define LOSCFG_PLATFORM_HWI 1 #define LOSCFG_USE_SYSTEM_DEFINED_INTERRUPT 1 #define LOSCFG_PLATFORM_HWI_LIMIT 128 /*============================================================================= Task module configuration =============================================================================*/ #define LOSCFG_BASE_CORE_TSK_LIMIT 24 #define LOSCFG_BASE_CORE_TSK_IDLE_STACK_SIZE (0x500U) #define LOSCFG_BASE_CORE_TSK_DEFAULT_STACK_SIZE (0x2D0U) #define LOSCFG_BASE_CORE_TSK_MIN_STACK_SIZE (0x130U) #define LOSCFG_BASE_CORE_TIMESLICE 1 #define LOSCFG_BASE_CORE_TIMESLICE_TIMEOUT 20000 /*============================================================================= Semaphore module configuration =============================================================================*/ #define LOSCFG_BASE_IPC_SEM 1 #define LOSCFG_BASE_IPC_SEM_LIMIT 48 /*============================================================================= Mutex module configuration =============================================================================*/ #define LOSCFG_BASE_IPC_MUX 1 #define LOSCFG_BASE_IPC_MUX_LIMIT 24 /*============================================================================= Queue module configuration =============================================================================*/ #define LOSCFG_BASE_IPC_QUEUE 1 #define LOSCFG_BASE_IPC_QUEUE_LIMIT 24 /*============================================================================= Software timer module configuration =============================================================================*/ #define LOSCFG_BASE_CORE_SWTMR 1 #define LOSCFG_BASE_CORE_SWTMR_ALIGN 0 #define LOSCFG_BASE_CORE_SWTMR_LIMIT 48 /*============================================================================= Memory module configuration =============================================================================*/ #define LOSCFG_MEM_MUL_POOL 1 #define OS_SYS_MEM_NUM 20 /*============================================================================= Exception module configuration =============================================================================*/ #define LOSCFG_PLATFORM_EXC 1 /* ============================================================================= printf module configuration ============================================================================= */ #define LOSCFG_KERNEL_PRINTF 1 #define LOSCFG_BASE_CORE_SCHED_SLEEP 1 #define LOSCFG_SYS_HEAP_SIZE 0x4000UL #ifdef __cplusplus #if __cplusplus } #endif /* __cplusplus */ #endif /* __cplusplus */ #endif /* _TARGET_CONFIG_H */该文件为liteos_m的配置文件 添加build.sh文件到根目录 #!/bin/bash set -e OUT_DIR="$1" TOOLCHAIN_DIR="$2" function main(){ ROOT_DIR=$(cd $(dirname "$0");pwd) if [ -z "${TOOLCHAIN_DIR}" ]; then make clean && make -j16 OUT_DIR_PATH=${OUT_DIR} else make clean && make -j16 OUT_DIR_PATH=${OUT_DIR} TOOLCHAIN_DIR_PATH=${TOOLCHAIN_DIR} fi } main "$@"该文件为编译脚本 在根目录下新建liteos_m文件夹并添加config.gni文件 # Kernel type, e.g. "linux", "liteos_a", "liteos_m". kernel_type = "liteos_m" # Kernel version. kernel_version = "3.0.0" # Board CPU type, e.g. "cortex-a7", "riscv32". board_cpu = "cortex-m4" # Board arch, e.g. "armv7-a", "rv32imac". board_arch = "" # Toolchain name used for system compiling. # E.g. gcc-arm-none-eabi, arm-linux-harmonyeabi-gcc, ohos-clang, riscv32-unknown-elf. # Note: The default toolchain is "ohos-clang". It's not mandatory if you use the default toochain. board_toolchain = "arm-none-eabi-gcc" # The toolchain path instatlled, it's not mandatory if you have added toolchian path to your ~/.bashrc. board_toolchain_path = "" # Compiler prefix. board_toolchain_prefix = "arm-none-eabi-" # Compiler type, "gcc" or "clang". board_toolchain_type = "gcc" # Board related common compile flags. board_cflags = [ "-mcpu=cortex-m4", "-mfpu=fpv4-sp-d16", "-mfloat-abi=hard", "-mthumb", "-Og", "-fdata-sections", "-ffunction-sections", "-DUSE_HAL_DRIVER", # 视情况修改!!!!!!!!!!! "-DSTM32F411xE", # 视情况修改!!!!!!!!!!! ] board_cxx_flags = board_cflags board_ld_flags = [] # Board related headfiles search path. # 视情况修改!!!!!!!!!!! board_include_dirs = [ "//kernel/liteos_m/kernel/arch/arm/cortex-m4/gcc", "//device/st/stm32f411core", "//device/st/stm32f411core/Core/Inc", "//device/st/stm32f411core/Drivers/CMSIS/Include", "//device/st/stm32f411core/Drivers/CMSIS/Device/ST/STM32F4xx/Include", "//device/st/stm32f411core/Drivers/STM32F4xx_HAL_Driver/Inc", "//device/st/stm32f411core/third_party/LWIP", "//drivers/framework/support/platform/include/common", "//kernel/liteos_m/kal/cmsis", ] # Board adapter dir for OHOS components. board_adapter_dir = "" # Sysroot path. board_configed_sysroot = "" # Board storage type, it used for file system generation. storage_type = ""其中board_cflags 的最后两项需要按照芯片修改makefile中可以找到对应选项 board_include_dirs 为依赖的头文件目录,需要自行修改 修改Makefile文件 # File automatically-generated by tool: [projectgenerator] version: [3.13.0-B3] date: [Fri Apr 30 08:31:16 CST 2021] ########################################################################################################################## # ------------------------------------------------ # Generic Makefile (based on gcc) # # ChangeLog : # 2017-02-10 - Several enhancements + project update mode # 2015-07-22 - first version # ------------------------------------------------ ###################################### # target ###################################### TARGET = stm32f411core_ninjia ####################################### # paths ####################################### # Build path BUILD_DIR = $(OUT_DIR_PATH) ####################################### # toolchain paths ####################################### # Toolchain path ifneq ($(TOOLCHAIN_DIR_PATH), ) GCC_PATH = $(TOOLCHAIN_DIR_PATH) endif ####################################### # binaries ####################################### PREFIX = arm-none-eabi- # The gcc compiler bin path can be either defined in make command via GCC_PATH variable (> make GCC_PATH=xxx) # either it can be added to the PATH environment variable. ifneq ($(GCC_PATH), ) CC = $(GCC_PATH)/$(PREFIX)gcc AS = $(GCC_PATH)/$(PREFIX)gcc -x assembler-with-cpp CP = $(GCC_PATH)/$(PREFIX)objcopy SZ = $(GCC_PATH)/$(PREFIX)size else CC = $(PREFIX)gcc AS = $(PREFIX)gcc -x assembler-with-cpp CP = $(PREFIX)objcopy SZ = $(PREFIX)size endif HEX = $(CP) -O ihex BIN = $(CP) -O binary -S ####################################### # CFLAGS ####################################### # cpu CPU = -mcpu=cortex-m4 # fpu FPU = -mfpu=fpv4-sp-d16 # float-abi FLOAT-ABI = -mfloat-abi=hard # mcu MCU = $(CPU) -mthumb $(FPU) $(FLOAT-ABI) ####################################### # LDFLAGS ####################################### # link script LDSCRIPT = STM32F411CEUx_FLASH.ld # 视情况修改!!!!!!!!!!! # libraries # 视情况修改!!!!!!!!!!! STATIC_LIB = -larch -lbacktrace -lcmsis -lcore -lcpup -lexchook -lkernel \ -lsec_static -lpm -lstartup_stm32f411xe -lSTM32F4xx_HAL_Driver -lutils \ -lhdf_core -lhdf_osal_lite STATIC_LIB_DIR = -L$(BUILD_DIR)/libs LIBS = -lc -lm -lnosys LIBDIR = LDFLAGS = $(MCU) -specs=nano.specs -T$(LDSCRIPT) $(LIBDIR) $(LIBS) -Wl,-Map=$(BUILD_DIR)/$(TARGET).map,--cref -Wl,--gc-sections # default action: build all all: $(BUILD_DIR)/$(TARGET).elf $(BUILD_DIR)/$(TARGET).hex $(BUILD_DIR)/$(TARGET).bin ####################################### # build the application ####################################### $(BUILD_DIR)/$(TARGET).elf: Makefile $(CC) $(STATIC_LIB_DIR) -Wl,--whole-archive -Wl,--start-group $(STATIC_LIB) -Wl,--end-group -Wl,--no-whole-archive $(LDFLAGS) -o $@ $(SZ) $@ $(BUILD_DIR)/%.hex: $(BUILD_DIR)/%.elf | $(BUILD_DIR) $(HEX) $< $@ $(BUILD_DIR)/%.bin: $(BUILD_DIR)/%.elf | $(BUILD_DIR) $(BIN) $< $@ $(BUILD_DIR): mkdir -p $@ ####################################### # clean up ####################################### clean: -rm -fR $(BUILD_DIR) # *** EOF ***其中LDSCRIPT 为生成的ld文件需要修改 STATIC_LIB 为链接.a文件的选项需要修改(如果不知道怎么写可以先编译,在鸿蒙源码的out目录下找到需要链接的lib文件) 配置各级目录下的BUILD.gn脚本根目录下: import("//build/lite/config/component/lite_component.gni") group("stm32f411core") { } build_ext_component("stm32f411core_ninjia") { exec_path = rebase_path(".", root_build_dir) outdir = rebase_path("$root_out_dir") print("$board_toolchain") if (board_toolchain_path != "") { toolchain_path = rebase_path("$board_toolchain_path") command = "./build.sh ${outdir} ${toolchain_path}" } else { command = "./build.sh ${outdir}" } deps = [ "//build/lite:ohos" ] } static_library("startup_stm32f411xe") { sources = [ "startup_stm32f411xe.s" ] include_dirs = [ "." ] deps = [ "//drivers/adapter/khdf/liteos_m:hdf_lite", "//device/st/stm32f411core/Core:core", "//device/st/stm32f411core/Drivers/STM32F4xx_HAL_Driver:STM32F4xx_HAL_Driver", ] }其中sources 为cubemx生成的.s文件的名称 group及build_ext_component视情况修改 deps 为下级gn文件列表 Drivers\STM32F4xx_HAL_Driver下的BUILD.gn: static_library("STM32F4xx_HAL_Driver") { sources = [ "Src/stm32f4xx_hal_tim.c", "Src/stm32f4xx_hal_tim_ex.c", "Src/stm32f4xx_hal_rcc.c", "Src/stm32f4xx_hal_rcc_ex.c", "Src/stm32f4xx_hal_flash.c", "Src/stm32f4xx_hal_flash_ex.c", "Src/stm32f4xx_hal_flash_ramfunc.c", "Src/stm32f4xx_hal_gpio.c", "Src/stm32f4xx_hal_dma_ex.c", "Src/stm32f4xx_hal_dma.c", "Src/stm32f4xx_hal_pwr.c", "Src/stm32f4xx_hal_pwr_ex.c", "Src/stm32f4xx_hal_cortex.c", "Src/stm32f4xx_hal.c", "Src/stm32f4xx_hal_exti.c", ] include_dirs = [ "Inc", "Inc/Legacy", "../CMSIS/Include", "../CMSIS/Device/ST/STM32F4xx/Include", "//kernel/liteos_m/kal/cmsis", "../../Core/Inc", ] }source及include_dirs是c文件和头文件目录,视情况修改 Core下的BUILD.gn: static_library("core") { sources = [ "Src/main.c", "Src/stm32f4xx_hal_msp.c", "Src/stm32f4xx_it.c", "Src/system_stm32f4xx.c", ] include_dirs = [ "Inc", "../", "../Drivers/STM32F4xx_HAL_Driver/Inc", "../Drivers/CMSIS/Include", "../Drivers/CMSIS/Device/ST/STM32F4xx/Include", "//kernel/liteos_m/kernel/include", "//kernel/liteos_m/utils", "//kernel/liteos_m/kernel/arch/include", "//kernel/liteos_m/kal/cmsis" ] }source及include_dirs是c文件和头文件目录,视情况修改 修改main.c文件 /* Includes ------------------------------------------------------------------*/ #include "main.h" #include "cmsis_os2.h" /* Private includes ----------------------------------------------------------*/ /* USER CODE BEGIN Includes */ /* USER CODE END Includes */ /* Private typedef -----------------------------------------------------------*/ /* USER CODE BEGIN PTD */ /* USER CODE END PTD */ /* Private define ------------------------------------------------------------*/ /* USER CODE BEGIN PD */ /* USER CODE END PD */ /* Private macro -------------------------------------------------------------*/ /* USER CODE BEGIN PM */ /* USER CODE END PM */ /* Private variables ---------------------------------------------------------*/ /* USER CODE BEGIN PV */ /* USER CODE END PV */ /* Private function prototypes -----------------------------------------------*/ void SystemClock_Config(void); static void MX_GPIO_Init(void); static void *LedTask(const char *arg); static void LedExampleEntry(void); /* USER CODE BEGIN PFP */ /* USER CODE END PFP */ /* Private user code ---------------------------------------------------------*/ /* USER CODE BEGIN 0 */ /* USER CODE END 0 */ /** * @brief The application entry point. * @retval int */ int main(void) { /* USER CODE BEGIN 1 */ /* USER CODE END 1 */ /* MCU Configuration--------------------------------------------------------*/ /* Reset of all peripherals, Initializes the Flash interface and the Systick. */ HAL_Init(); /* USER CODE BEGIN Init */ /* USER CODE END Init */ /* Configure the system clock */ SystemClock_Config(); /* USER CODE BEGIN SysInit */ osKernelInitialize(); /* USER CODE END SysInit */ /* Initialize all configured peripherals */ /* USER CODE BEGIN 2 */ LedExampleEntry(); /* USER CODE END 2 */ osKernelStart(); /* Infinite loop */ /* USER CODE BEGIN WHILE */ while (1) { /* USER CODE END WHILE */ osDelay(500); /* USER CODE BEGIN 3 */ } /* USER CODE END 3 */ } /** * @brief System Clock Configuration * @retval None */ void SystemClock_Config(void) { RCC_OscInitTypeDef RCC_OscInitStruct = {0}; RCC_ClkInitTypeDef RCC_ClkInitStruct = {0}; /** Configure the main internal regulator output voltage */ __HAL_RCC_PWR_CLK_ENABLE(); __HAL_PWR_VOLTAGESCALING_CONFIG(PWR_REGULATOR_VOLTAGE_SCALE1); /** Initializes the RCC Oscillators according to the specified parameters * in the RCC_OscInitTypeDef structure. */ RCC_OscInitStruct.OscillatorType = RCC_OSCILLATORTYPE_HSI; RCC_OscInitStruct.HSIState = RCC_HSI_ON; RCC_OscInitStruct.HSICalibrationValue = RCC_HSICALIBRATION_DEFAULT; RCC_OscInitStruct.PLL.PLLState = RCC_PLL_NONE; if (HAL_RCC_OscConfig(&RCC_OscInitStruct) != HAL_OK) { Error_Handler(); } /** Initializes the CPU, AHB and APB buses clocks */ RCC_ClkInitStruct.ClockType = RCC_CLOCKTYPE_HCLK|RCC_CLOCKTYPE_SYSCLK |RCC_CLOCKTYPE_PCLK1|RCC_CLOCKTYPE_PCLK2; RCC_ClkInitStruct.SYSCLKSource = RCC_SYSCLKSOURCE_HSI; RCC_ClkInitStruct.AHBCLKDivider = RCC_SYSCLK_DIV1; RCC_ClkInitStruct.APB1CLKDivider = RCC_HCLK_DIV1; RCC_ClkInitStruct.APB2CLKDivider = RCC_HCLK_DIV1; if (HAL_RCC_ClockConfig(&RCC_ClkInitStruct, FLASH_LATENCY_0) != HAL_OK) { Error_Handler(); } } /** * @brief GPIO Initialization Function * @param None * @retval None */ static void MX_GPIO_Init(void) { GPIO_InitTypeDef GPIO_InitStruct = {0}; /* GPIO Ports Clock Enable */ __HAL_RCC_GPIOC_CLK_ENABLE(); /*Configure GPIO pin Output Level */ HAL_GPIO_WritePin(GPIOC, GPIO_PIN_13, GPIO_PIN_RESET); /*Configure GPIO pin : PC13 */ GPIO_InitStruct.Pin = GPIO_PIN_13; GPIO_InitStruct.Mode = GPIO_MODE_OUTPUT_PP; GPIO_InitStruct.Pull = GPIO_NOPULL; GPIO_InitStruct.Speed = GPIO_SPEED_FREQ_LOW; HAL_GPIO_Init(GPIOC, &GPIO_InitStruct); } /* USER CODE BEGIN 4 */ static void *LedTask(const char *arg) { (void)arg; while(1) { osDelay(500); HAL_GPIO_WritePin(GPIOC, GPIO_PIN_13, 0); osDelay(500); HAL_GPIO_WritePin(GPIOC, GPIO_PIN_13, 1); } return NULL; } static void LedExampleEntry(void) { osThreadAttr_t attr; MX_GPIO_Init(); attr.name = "LedTask"; attr.attr_bits = 0U; attr.cb_mem = NULL; attr.cb_size = 0U; attr.stack_mem = NULL; attr.stack_size = 1024; attr.priority = 13; if (osThreadNew((osThreadFunc_t)LedTask, NULL, &attr) == NULL) { printf("[LedExample] Falied to create LedTask!\n"); } } /* USER CODE END 4 */ /** * @brief This function is executed in case of error occurrence. * @retval None */ void Error_Handler(void) { /* USER CODE BEGIN Error_Handler_Debug */ /* User can add his own implementation to report the HAL error return state */ __disable_irq(); while (1) { } /* USER CODE END Error_Handler_Debug */ } #ifdef USE_FULL_ASSERT /** * @brief Reports the name of the source file and the source line number * where the assert_param error has occurred. * @param file: pointer to the source file name * @param line: assert_param error line source number * @retval None */ void assert_failed(uint8_t *file, uint32_t line) { /* USER CODE BEGIN 6 */ /* User can add his own implementation to report the file name and line number, ex: printf("Wrong parameters value: file %s on line %d\r\n", file, line) */ /* USER CODE END 6 */ } #endif /* USE_FULL_ASSERT */该例程采用cmsis,就是最简单的创建了一个任务,在任务中让灯闪烁。 新建ventor文件夹 创建如下目录结构: 该文件为鸿蒙的编译选项配置,可参考鸿蒙官方文档 在BUILD.gn中写入: group("gd32f303_qidian") { }在hdf.hcs中写入: //#include "../../../../device/hisilicon/hispark_taurus/sdk_liteos/config/uart/uart_config.hcs" #include "device_info/device_info.hcs" root { module = "st,stm32_chip"; }在device_info.hcs中写入: root { device_info { match_attr = "hdf_manager"; template host { hostName = ""; priority = 100; template device { template deviceNode { policy = 0; priority = 100; preload = 0; permission = 0664; moduleName = ""; serviceName = ""; deviceMatchAttr = ""; } } } platform :: host { hostName = "platform_host"; priority = 50; device_uart :: device { device0 :: deviceNode { policy = 1; priority = 40; permission = 0644; moduleName = "HDF_PLATFORM_UART"; serviceName = "HDF_PLATFORM_UART_0"; deviceMatchAttr = "hisilicon_hi35xx_uart_0"; } } } } } 三、将自己写的工程文件移入鸿蒙源码该处采用全量代码 此处略过鸿蒙hpm等配置(通过鸿蒙官网设备开发3.0的工具可以自动化配置) 下载arm-none-eabi-gcc、gn、ninja工具链并配置环境变量 并复制目录到鸿蒙源码对应目录 在源码更目录终端下输入hb set可以看到自己设置的开发板编译选项 即可开始编译 四、修改报错问题如果不出会遇到报错 有两处错误可能是因为工作人员粗心 另一处我猜测是我编译配置有问题,但是这个地方为了省事我直接把一个编译选项屏蔽掉了 打开STM32 ST-Link Utility烧录到开发板 |
 当然要用嵌软人的helloworld–点灯来证明是否移植成功 这块核心板的led在pc13,直接用cubemx生成一个模板程序
  这里只初始化pc13为Output
  只需要设置一个名字以及把工具链设置为MakeFile,然后点击生成即可。 工程目录如下:
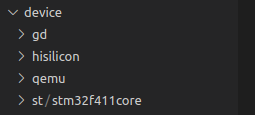
 按照鸿蒙官方的要求规范目录结构 修改stm32cubemx项目名为stm32f411core 规则为: device/厂商名称/板卡名称
 在config.json文件中写入:
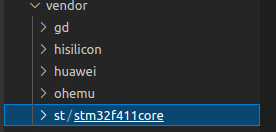
 这时候激活鸿蒙官方的python虚拟环境(如果使用官方工具配置环境需要这一步)
 回车选择后输入
 这里的PRINT_ERR少了一个参数,我直接补了个字符串。(这个问题现在开源社区已经修复了) 还有一处是也是输出报错,uint32_t类型打印时传的是%u,这个也可能是编译器问题
 最后再此编译,令人激动的时刻到来了
  在out目录下可以看到.bin文件
 按下开发板rst键
  可以看到led闪烁,移植成功!
【本文地址】