| How to Create a Basic Single Page Application Using Angular Router? | 您所在的位置:网站首页 › fe的晶体结构图 › How to Create a Basic Single Page Application Using Angular Router? |
How to Create a Basic Single Page Application Using Angular Router?
|
This tutorial is adapted from Web Age course聽Introduction to Angular 8 Programming. In this tutorial, we will develop a very simple single page application (SPA) using the Angular Component Router module. The main goal will be to understand how routing works. We will keep the business logic very simple. Part 1 – Get Started1. Open a command prompt window. 2. Create聽聽C:\LabWork folder. 3. Run this command to create a new project called route-test. ng new route-test --routing --style css Part 2 – The Business Logic
We will develop an SPA that has three pages (views): The home page. Shown by default. The news page. Mapped to the “/news” URL. The about page. Mapped to the “/about” URL. After we develop this application we will be able to navigate between the pages without reloading the browser. Part 3 – Create the ComponentsEach view in SPA is implemented by a separate component. These components can employ child components if needed. We will now create the components for our applications. 1. Change to the root project. cd C:\LabWork\route-test2. Run these commands to create the components. ng g c home ng g c about ng g c newsThe shortcut g stands for generate and c for component. 3. Open src/app/home/home.component.html. 4. Change the template like this: HomeThis is the Home page 5. Save the file. 6. Open src/app/about/about.component.html. 7. Change the template like this: AboutThis is the About page 8. Save the file. 9. Open src/app/news/news.component.html. 10. Change the template like this: NewsThis is the News page 11. Save the file. The selectors for these components do not really play any role. We never manually add these components to any template. The router system inserts these components for us based on the URL. Part 4 – Define the Route Table1. Open route-test/src/app/app-routing.module.ts 2. Add these import statements for the component classes. import { HomeComponent } from './home/home.component'; import { NewsComponent } from './news/news.component'; import { AboutComponent } from './about/about.component';3. Set up the route table as shown in bold face below. const routes: Routes = [ { path: '', component: HomeComponent }, { path: 'news', component: NewsComponent }, { path: 'about', component: AboutComponent } ];4. Save changes. Part 5 – Setup the Component Host1. Edit \src\app\app.component.html and replace all of its contents with the code below: Simple SPA! Home; News; AboutThe App component will act as the root of the application. It will render HTML content that is shared by all pages in the app. Note these key aspects of the code: We use the routerLink attribute directive to define navigational links. Here we are using links like “/news” and “/about”. We will later map these to the corresponding components in a route table. Use tag to define where the component for the pages should be inserted. 2. Save changes. 3. Edit \src\styles.css 4. Add the following content and save the file: h2 { margin:0px; } #main{ border: 1px solid grey; width: 250px; background-color: lightgray; margin-top: 5px; padding: 5px; }5. Save changes. Part 6 – Test1. Open a command prompt and go to the root folder of the project: C:\LabWork\route-test2. Run the following command to compile TypeScript and start the server: npm start3. Open a browser to http://localhost:4200 4. Verify that the home page is shown by default.
6. Verify that the back button navigation works as expected. 7. Navigate to the About page. 8. Now refresh the browser. You should still see the About page. Note: This behavior is primarily because the project uses the embedded server and all requests get routed to Angular. If you were using a web server that might first look for a local HTML file, refreshing the URL from the Router may not work and you may get a 404 error. 9. In the command prompt, hit ‘-C‘ to terminate the embedded server. 10. Close all open files. Part 7 – ReviewIn this tutorial, we created a single page application with routing. |

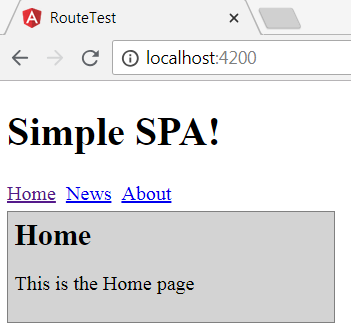 5. Click the News and About links. Make sure that the corresponding pages are shown. Verify that the URL in the browser’s address bar changes as you navigate.
【本文地址】