| Python 提取图像信息保存为TXT、xml格式 | 您所在的位置:网站首页 › eclipse的xml文件怎么转换格式 › Python 提取图像信息保存为TXT、xml格式 |
Python 提取图像信息保存为TXT、xml格式
|
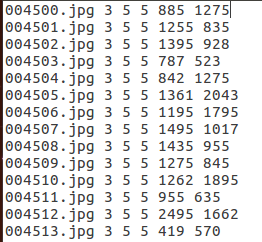
1.首先提取图像为TXT格式,格式如下: xxxx.jpg 通道数 xmin,ymin,xmax,ymax
2.代码如下 # -*- coding:utf-8 -*- ''' 作者:tanbin 时间:2019年10月31日 代码工作内容:1.对文件下sex_image/*.jpg进行重命名 2.对对文件下sex_image/*.jpg ''' import os import cv2 import xml.etree.ElementTree as ET from PIL import Image import numpy as np #图像处理类 内置各种函数 class image_processing(): def __init__(self): self.img_path="./sex_image/" self.annotations_txt_path="./" self.annotations_xml_path="./sex_xml/" if not os.path.exists(self.annotations_xml_path): os.makedirs(self.annotations_xml_path) #图像批量重命名 def rename(self): imagelist = os.listdir(self.img_path) total_num = len(imagelist) #得到图像数量大小 i=4500 for item in imagelist: # print item if item.endswith('.jpg'): src = os.path.join(os.path.abspath(self.img_path), item) dst = os.path.join(os.path.abspath(self.img_path), '00' + format(str(i), '0>4s') + '.jpg') os.rename(src, dst) print ('converting %s to %s ...' % (src, dst)) i = i + 1 print('total %d to rename & converted %d jpgs' % (total_num, i)) #提取图像的shape到txt文件里 def get_image_information(self): image_list=os.listdir(self.img_path) print image_list total_num=len(image_list) file_txt=open('./sex_image_txt.txt',"w") for i in range(10): img=cv2.imread(os.path.join(self.img_path+image_list[i])) image_shape=img.shape print image_shape file_txt.write(image_list[i]+' '+'3 '+'5 '+'5 '+str(image_shape[0]-5)+str(image_shape[1]-5)) file_txt.close() if __name__ == '__main__': newname = image_processing() #newname.rename() newname.get_image_information()得到一个txt文件,里面内容如图
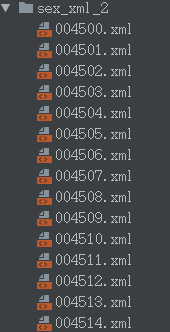
3.Python提取图像信息为xml # -*- coding:utf-8 -*- from xml.dom.minidom import Document import os from PIL import Image ann_path = "./sex_image_txt.txt" img_path = "./sex_image/" xml_path = "./sex_xml_2/" #标签的类别 label_list = ["salacity"] if not os.path.exists(xml_path): os.mkdir(xml_path) def writeXml(imgname,imgpath, w, h, label_list, wxml): doc = Document() #owner annotation = doc.createElement('annotation') doc.appendChild(annotation) #owner folder = doc.createElement('folder') annotation.appendChild(folder) folder_txt = doc.createTextNode("R_dataset") folder.appendChild(folder_txt) filename = doc.createElement('filename') annotation.appendChild(filename) filename_txt = doc.createTextNode(imgname) filename.appendChild(filename_txt) path = doc.createElement('path') annotation.appendChild(path) path_txt = doc.createTextNode(imgpath) path.appendChild(path_txt) #ones# source = doc.createElement('source') annotation.appendChild(source) database = doc.createElement('database') source.appendChild(database) database_txt = doc.createTextNode("The R Database") database.appendChild(database_txt) #onee# #twos# size = doc.createElement('size') annotation.appendChild(size) width = doc.createElement('width') size.appendChild(width) width_txt = doc.createTextNode(str(w)) width.appendChild(width_txt) height = doc.createElement('height') size.appendChild(height) height_txt = doc.createTextNode(str(h)) height.appendChild(height_txt) depth = doc.createElement('depth') size.appendChild(depth) depth_txt = doc.createTextNode("3") depth.appendChild(depth_txt) #twoe# segmented = doc.createElement('segmented') annotation.appendChild(segmented) segmented_txt = doc.createTextNode("0") segmented.appendChild(segmented_txt) # object object = doc.createElement('object') annotation.appendChild(object) name = doc.createElement('name') object.appendChild(name) name_content = doc.createTextNode(label_list[0]) name.appendChild(name_content) pose=doc.createElement('pose') object.appendChild(pose) pose_content=doc.createTextNode("0") pose.appendChild(pose_content) truncated=doc.createElement('truncated') object.appendChild(truncated) truncated_content=doc.createTextNode("0") truncated.appendChild(truncated_content) difficult=doc.createElement('difficult') object.appendChild(difficult) difficult_content=doc.createTextNode("0") difficult.appendChild(difficult_content) bndbox=doc.createElement('bndbox') object.appendChild(bndbox) xmin=doc.createElement('xmin') bndbox.appendChild(xmin) xmin_content=doc.createTextNode(str(5)) xmin.appendChild(xmin_content) ymin=doc.createElement('ymin') bndbox.appendChild(ymin) ymin_content=doc.createTextNode(str(5)) ymin.appendChild(ymin_content) xmax=doc.createElement('xmax') bndbox.appendChild(xmax) xmax_content=doc.createTextNode(str(w-5)) xmax.appendChild(xmax_content) ymax=doc.createElement('ymax') bndbox.appendChild(ymax) ymax_content=doc.createTextNode(str(h-5)) ymax.appendChild(ymax_content) #threee# with open(wxml, "w") as f: f.write(doc.toprettyxml(indent = '\t', encoding='utf-8')) #f.write(doc.toprettyxml()) f.close() return f = open(ann_path, 'r') txt_list = f.readlines() f.close() im_name_list = [] for line in txt_list: line = line.strip() line_split = line.split(' ') # print line img_name = line_split[0] im_name_list.append(img_name) fileimgpath = os.path.join(img_path, img_name) im=Image.open(fileimgpath) width= int(im.size[0]) height= int(im.size[1]) # print width,height # print label_list savename = os.path.join(xml_path , img_name.split('.')[0] + '.xml') writeXml(img_name,fileimgpath, width, height, label_list, savename)结果如图如下所示:
ps: 这里采用OpenCv 、PIL.image提取图像的宽高有细微的差别: PIL的提取图像大小用的是image.size,而OpenCV对应的是image.shape。 另外image.size默认输出的结果是宽和高,而OPenCV默认输出的结果是高和宽。【具体的参考博客Python实现图像处理:PIL和OpenCV提取图像大小的方法和区别】
|


【本文地址】
公司简介
联系我们