| 如何在Microsoft PowerPoint中创建时间轴 | 您所在的位置:网站首页 › PPT快速生成时间线 › 如何在Microsoft PowerPoint中创建时间轴 |
如何在Microsoft PowerPoint中创建时间轴

One of PowerPoint’s charms is the ability to visually represent information by using its large library of available graphics, such as charts and graphs. If you want to create a timeline, well, Microsoft has just the thing. Here’s how it’s done. PowerPoint的魅力之一是能够通过使用其大量的可用图形库(例如图表和图形)以视觉方式表示信息。 如果您想创建一个时间表,那么,Microsoft就是这样。 这是完成的过程。 Open your PowerPoint presentation and navigate to the slide in which you would like to add a timeline. Once there, navigate to the “Insert” tab and select “SmartArt” from the “Illustrations” group. 打开PowerPoint演示文稿,然后导航到要在其中添加时间轴的幻灯片。 到达后,导航到“插入”选项卡,然后从“插图”组中选择“ SmartArt”。 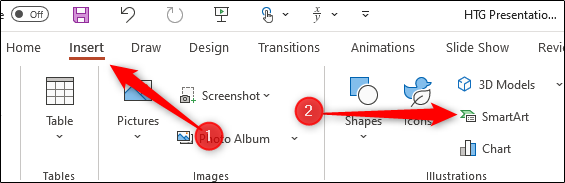
The “Choose a SmartArt Graphic” window will appear. Here, select “Process” from the left-hand pane. 出现“选择SmartArt图形”窗口。 在这里,从左侧窗格中选择“处理”。 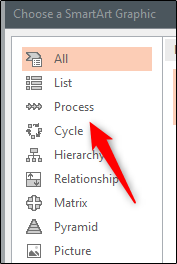
A library of several different process-focused SmartArt graphics will appear. You can choose the style you like best for your timeline. In this example, we’ll use the “Basic Timeline” option. 将出现一个包含几个以过程为中心的不同SmartArt图形的库。 您可以为时间轴选择最喜欢的样式。 在此示例中,我们将使用“基本时间轴”选项。 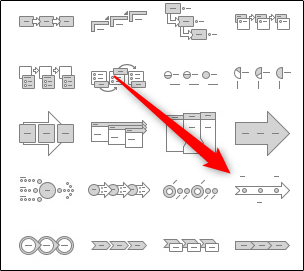
Once selected, information about the SmartArt option will be displayed in the right-hand pane. When you’re ready to insert the SmartArt, select the “OK” button. 选择后,有关SmartArt选项的信息将显示在右侧窗格中。 准备插入SmartArt时,选择“确定”按钮。 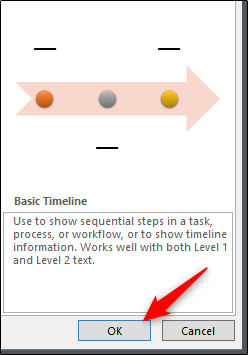
The timeline will now appear on the slide, along with a window where you will type the respective text for the timeline. 现在,时间线将显示在幻灯片上,同时您还将在窗口中键入时间线的相应文本。 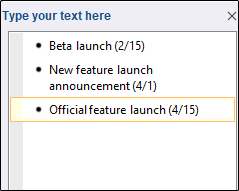
The text entered in the box will automatically reflect on the actual timeline. 在框中输入的文本将自动反映在实际时间轴上。 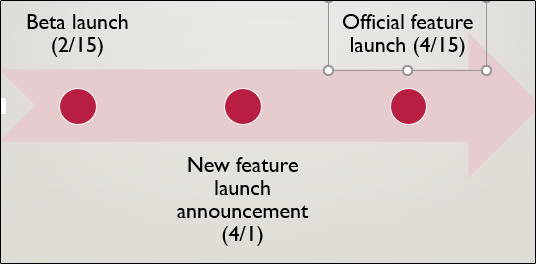
By default, this timeline will have three bullets for you to fill out. To add more, place your cursor at the end of the last item on the list in the text window, press “Enter,” and then type the desired text. Repeat this step as many times as necessary. 默认情况下,此时间轴将包含三个项目符号供您填写。 要添加更多内容,请将光标置于文本窗口列表中最后一项的末尾,按“ Enter”,然后键入所需的文本。 根据需要重复此步骤多次。 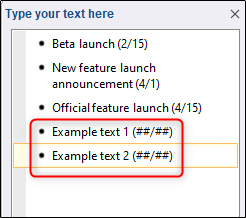
The size of the text and the placement of the bullets on the timeline will adjust automatically. 文本大小和项目符号在时间轴上的位置将自动调整。 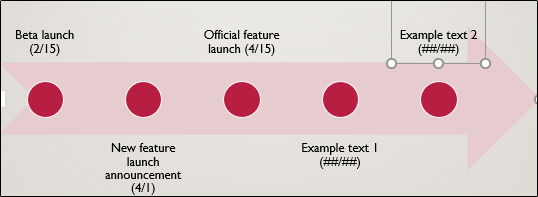
When you’re finished adding text, select the “X” button at the top right of the text window. 添加完文本后,选择文本窗口右上方的“ X”按钮。 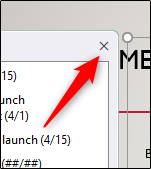
If you need to adjust the colors of the timeline to better align with the presentation, select the timeline and then click “Change Colors” in the “SmartArt Styles” group of the “SmartArt Design” tab. 如果需要调整时间线的颜色以更好地与演示文稿保持一致,请选择时间线,然后在“ SmartArt设计”选项卡的“ SmartArt样式”组中单击“更改颜色”。 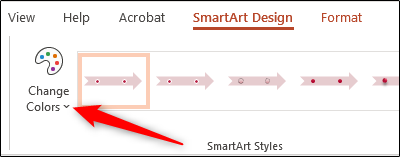
A menu will appear, displaying a large library of different color schemes for the timeline. In this example, we’ll use “Gradient Loop” from the “Accent 6” group. 将出现一个菜单,其中显示了一个大的时间线库,其中包含不同的配色方案。 在此示例中,我们将使用“重音6”组中的“渐变循环”。 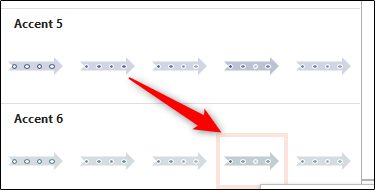
Once selected, the change will take place on your timeline. 选择后,更改将在您的时间轴上进行。 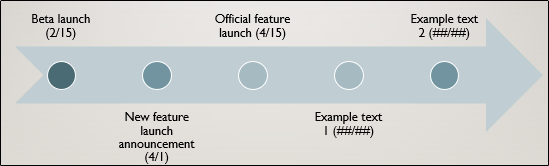
And, of course, you can adjust the bullets and the text in the timeline by clicking and dragging each item. 而且,当然,您可以通过单击并拖动每个项目来调整时间轴中的项目符号和文本。 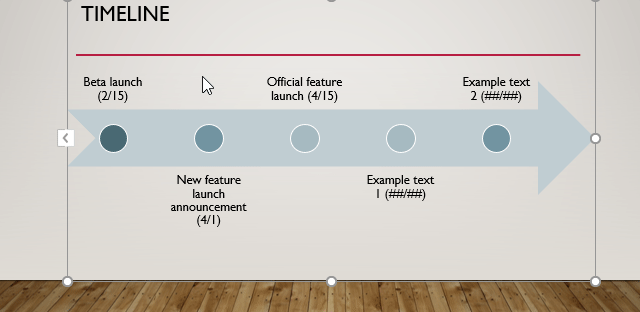
Finally, if you ever need to add or remove a bullet from (or edit text in) the timeline, you can bring back the text edit window by selecting the timeline and then clicking the “Left Arrow” icon found on the left side of the graphic box. 最后,如果您需要从时间线中添加或删除项目符号(或在其中编辑文本),则可以通过选择时间线,然后单击位于左侧的“左箭头”图标来返回文本编辑窗口。图形框。 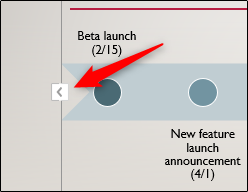
翻译自: https://www.howtogeek.com/677677/how-to-create-a-timeline-in-microsoft-powerpoint/ |
【本文地址】