| moviepy处理视频帧和遍历的方式处理视频帧速度对比 | 您所在的位置:网站首页 › 30帧和25帧视频的大小对比 › moviepy处理视频帧和遍历的方式处理视频帧速度对比 |
moviepy处理视频帧和遍历的方式处理视频帧速度对比
|
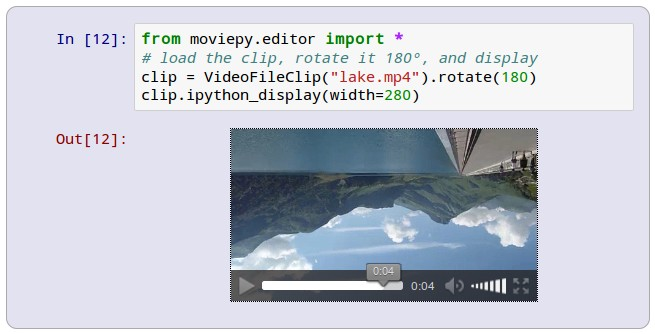
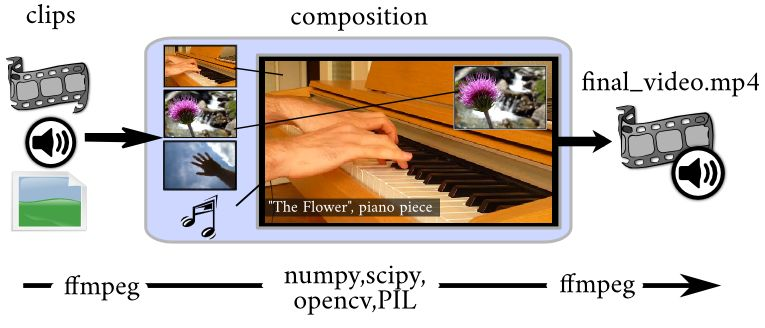
@[toc] 摘要MoviePy是一个用于视频编辑的Python模块,它可被用于一些基本操作(如剪切、拼接、插入标题)、视频合成(即非线性编辑)、视频处理和创建高级特效。它可对大多数常见视频格式进行读写,包括GIF。 手册:http://doc.moviepy.com.cn/index.html#document-index 示例如下(IPython Notebook环境) MoviePy使用ffmpeg软件来读取和导出视频和音频文件。也使用(可选)ImageMagick来生成文字和制作GIF文件。不同媒体的处理依靠Python的快速的数学库Numpy。高级效果和增强功能使用一些Python的图片处理库(PIL,Scikit-image,scipy等)。
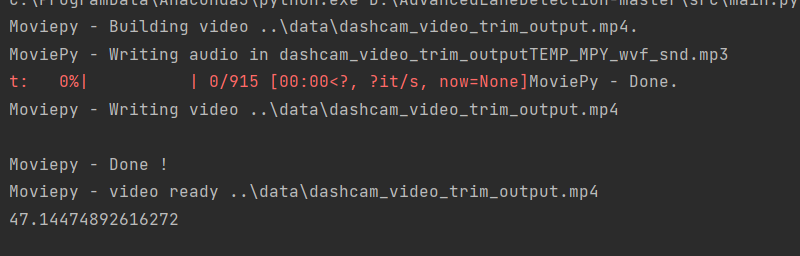
在MoviePy中,核心对象是剪辑,可以使用AudioClips或VideoClips来处理。剪辑可被修改(剪切、降低速度、变暗等)或与其他剪辑混合组成新剪辑。剪辑可被预览(使用PyGame或IPython Notebook),也可生成文件(如MP4文件、GIF文件、MP3文件等)。以VideoClips为例,它可以由一个视频文件、一张图片、一段文字或者一段卡通动画而来。它可以包含音频轨道(即AudioClip)和一个遮罩(一种特殊的VideoClip),用于表明当两个剪辑混合时,哪一部分的画面被隐藏)。详见生成与导出视频剪辑和混合剪辑。 你可使用MoviePy的很多效果对一个剪辑进行修改(如clip.resize(width=“360”)、clip.subclip(t1,t2)、clip.fx(vfx.black_white)或使用用户自行实现的效果。MoviePy提供许多函数(如clip.fl、clip.fx等),可以用简单的几行代码实现你自己的效果。详见视频转换与效果。 你还可以在moviepy.video.tools找到一些高级的效果来对视频中的对象进行追踪、画简单的形状和颜色渐变(对于遮罩来说很有用)、生成字幕和结束时的演职人员表等。参见高级工具中的详细描述。 最后,尽管MoviePy没有生动的用户界面,它也有许多方法来预览剪辑,使你能够调试脚本,从而确保你的视频在高质量的同时一切正常。详见如果更有效率地使用MoviePy。 速度对比 测试遍历的方式新建脚本Opencv_demo.py,插入代码: import laneDetection import time import cv2 import preprocess t1=time.time() vs = cv2.VideoCapture('..\\data\\dashcam_video_trim.mp4') fps = 30 #保存视频的FPS,可以适当调整 size=(1280,720)#宽高,根据frame的宽和高确定。 fourcc = cv2.VideoWriter_fourcc(*"mp4v") videoWriter = cv2.VideoWriter('3.mp4',fourcc,fps,size)#最后一个是保存图片的尺寸 # 循环播放图像流中的帧 while True: # 从视频流中读取下一帧并调整其大小 (grabbed, frame) = vs.read() if not grabbed: break image = frame frame, invM = preprocess.warp(frame) frame = preprocess.grayscale(frame) frame = preprocess.threshold(frame) frame, left_curverad, right_curverad = laneDetection.search_around_poly(frame) frame = cv2.warpPerspective(frame, invM, (frame.shape[1], frame.shape[0]), flags=cv2.INTER_LINEAR) frame = cv2.addWeighted(frame, 0.3, image, 0.7, 0) # Add curvature and distance from the center curvature = (left_curverad + right_curverad) / 2 car_pos = image.shape[1] / 2 center = (abs(car_pos - curvature) * (3.7 / 650)) / 10 curvature = 'Radius of Curvature: ' + str(round(curvature, 2)) + 'm' center = str(round(center, 3)) + 'm away from center' frame = cv2.putText(frame, curvature, (50, 50), cv2.FONT_HERSHEY_COMPLEX, 1, (255, 255, 255), 2, cv2.LINE_AA) frame = cv2.putText(frame, center, (50, 100), cv2.FONT_HERSHEY_COMPLEX, 1, (255, 255, 255), 2, cv2.LINE_AA) videoWriter.write(frame) key = cv2.waitKey(1) & 0xFF # 如果按下“ q”键,则退出循环 if key == ord("q"): break videoWriter.release() cv2.destroyAllWindows() vs.release() t2=time.time() print(t2-t1)结果如下: 新建main.py,插入代码: import time import cv2 import preprocess import calibrateCamera import laneDetection from moviepy.editor import VideoFileClip def pipeline(frame): image = frame #Disabled, techinically each frame needs to be undistored before being processed. #objpoints, imgpoints = [] #Add them manually #frame = calibrateCamera.calibrate(objpoints, imgpoints, frame) frame, invM = preprocess.warp(frame) frame = preprocess.grayscale(frame) frame = preprocess.threshold(frame) frame, left_curverad, right_curverad = laneDetection.search_around_poly(frame) frame = cv2.warpPerspective(frame, invM, (frame.shape[1], frame.shape[0]), flags=cv2.INTER_LINEAR) frame = cv2.addWeighted(frame, 0.3, image, 0.7, 0) #Add curvature and distance from the center curvature = (left_curverad + right_curverad) / 2 car_pos = image.shape[1] / 2 center = (abs(car_pos - curvature)*(3.7/650))/10 curvature = 'Radius of Curvature: ' + str(round(curvature, 2)) + 'm' center = str(round(center, 3)) + 'm away from center' frame = cv2.putText(frame, curvature, (50, 50), cv2.FONT_HERSHEY_COMPLEX, 1, (255, 255, 255), 2, cv2.LINE_AA) frame = cv2.putText(frame, center, (50, 100), cv2.FONT_HERSHEY_COMPLEX, 1, (255, 255, 255), 2, cv2.LINE_AA) return frame def debugFrames(file): cap = cv2.VideoCapture(file) if(cap.isOpened()==False): print('Error opening the file, check its format') cap.set(1, 100) res, frame = cap.read() #frame = pipeline(objpoints, imgpoints, frame) uncomment if using for frame = pipeline(frame) cv2.imshow('Frame', frame) cv2.waitKey(10000) def processFrames(infile, outfile): output = outfile clip = VideoFileClip(infile) processingClip = clip.fl_image(pipeline) processingClip.write_videofile(output,fps=30, audio=True) def main(infile, outfile): #objpoints, imgpoints = calibrate() uncomment, provided you have calibration pictures processFrames(infile, outfile) if __name__ == "__main__": infile = "..\\data\\dashcam_video_trim.mp4" outfile = "..\\data\\dashcam_video_trim_output.mp4" t1=time.time() main(infile, outfile) t2=time.time() print(t2-t1)结果如下: moviepy处理图片的帧比直接遍历快了7秒。速度提升了不少。 本例用到代码和资料详见: https://download.csdn.net/download/hhhhhhhhhhwwwwwwwwww/86757342 |

【本文地址】